How to Make Small Paper Dahlia Flowers: Easy Tutorial
This post may contain affiliate links that won’t change your price but will share some commission.
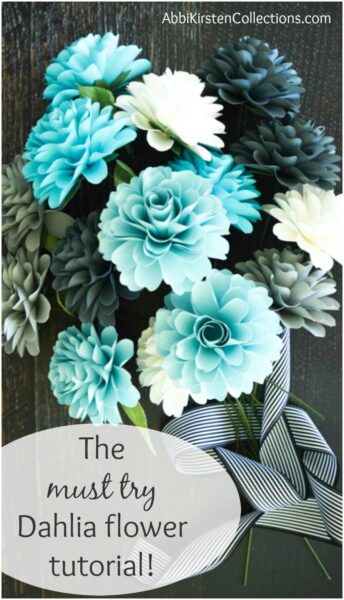
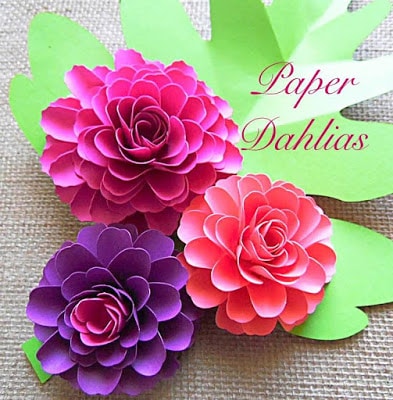
An Easy-to-follow Tutorial to make small paper Dahlias
When I started out, capturing the beauty of the dahlia flower did not seem like an easy feat. But with the right tools and patience, I found the perfect way to channel the intense color and festive attitude of this beautiful flower into an easy but delightful paper craft. Now you can learn how to make paper dahlia flowers to decorate favor boxes, centerpiece arrangements, bouquets, and more! These step-by-step written and picture instructions are divided into two parts: how to make the small paper dahlia flowers and how to add stems to the flowers.
While I will be showing you how to make small paper dahlias in this tutorial, there is no shortage of paper dahlia flowers you can make! If you’re looking for different styles of paper dahlia flowers, check out my other tutorials here:
- DIY Paper Dahlia Flower Tutorial – Easy Pearl Center Dahlia
- Paper Dahlia Tutorial: How to Make Giant Paper Dahlias
- Autumn Sunburst Dahlia Paper Flower Template and Tutorial
- DIY Giant Paper Dahlia Flowers- Free Paper Dahlia Flower Templates
Supplies Needed for Small Paper Dahlia Flowers
Before beginning any craft project, be sure to gather all the supplies you will need, and prepare your workspace. To create small paper dahlia flowers, you will need:
- 65-pound cardstock paper
- Scissors
- Cutting machine – optional, but recommended
- Hot glue gun
- Paper Blooms Shaping Mat and Tool Set
- Thin wood dowel
- 18-gauge wire
- Dahlia flower templates
Pro-Tip: I have created a comprehensive guide and ultimate supply list for making any paper flower you want, from basic to advanced materials. I’ve also included links to the resources I use!

How to Make Small Paper Dahlia Flowers
Now that you have all of your supplies and a clean surface to work on, it’s time to create these fanciful paper dahlia flowers. You can use these step-by-step instructions to create any color of small dahlia flowers you want.
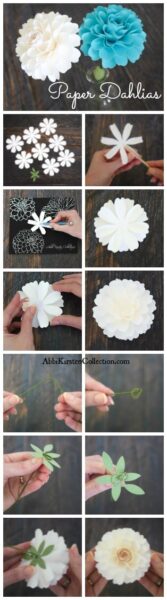
Step 1: Cut Out Your Dahlia Petals and Leaf Base
- You will need 8 petal layers consisting of 7 petals per layer, as indicated in the template. Cut these out first.
- Cut out your leaf base.
Pro-Tip: A cutting machine, like a Cricut Explore Air 2, is recommended but PDFs are included with the template download for those who wish to hand cut. Learn more about which Cricut may be right for you with my Cricut Buying Guide.
Step 2: Curl Your Petals
- Roll each petal tip using your thin wood dowel to curl the petal to the shape of the dowel.
Step 3: Shape Your Petal Layer
- Gently press and roll the centers of each small paper dahlia layer into cups so the petals stand up using your Paper Blooms Shaping Mat and Tool Set.
If you do not wish to purchase the shaping mat and rolling tools, you can gently fold the flower petals upwards with your fingers.
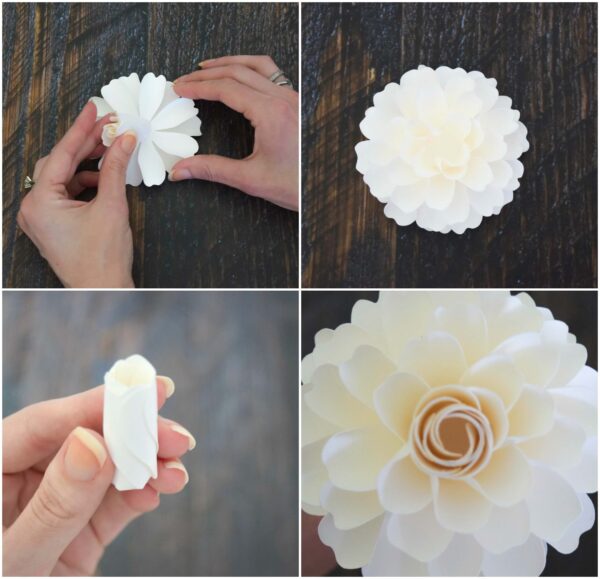
Step 4: Stack the Small Paper Dahlia Petal Layers
- Begin stacking and gluing 6 of the petal layers.
- Save the last two layers for step 5.
- Add a small dot of glue to the center of one petal layer and place another dahlia layer on top. Like shown in the picture, be sure to alternate the petal placement. Don’t place single petals directly on top of the bottom petals. Petals should be put between the bottom petals.
- Glue one petal layer at a time. Try to preserve the curls you added to the petals in the last step.
Pro-Tip: If you haven’t yet, be sure to join the subscriber community to gain access to all my freebies or visit my signature design shop here!
Step 5: Create the Small Paper Dahlia Center Bud
The last two petal layers are going to be the center of the DIY dahlia flower.
- Curl the individual petals of these last two layers tightly upwards and twist slightly so they remain tight and upright together. It is important to keep this center bud tight. Your finished two layers should look like a cylinder, as shown in the picture above.
Step 6: Add the Center Bud
- Glue the tightly curled center bud (your last two layers) to the middle of your paper dahlia flower. Now the center of the flower is complete.
Your completed dahlia should resemble the last image on the picture. Remember, learning how to make a dahlia paper flower takes time and patience. Nobody gets it perfect the first time, including me.
Now that your petals are in place, it’s time to add the leaf base and stem.
Related Posts: More Paper Flower Tutorials for Your Collection!
- Spring Tulip Paper Flower Tutorial
- DIY Paper Flower Pomander Balls
- Step by Step Paper Peony Tutorial
- Springtime Calla Lilies
- Hanging Paper Wisteria
How to Stem Your Small Paper Dahlia Flower
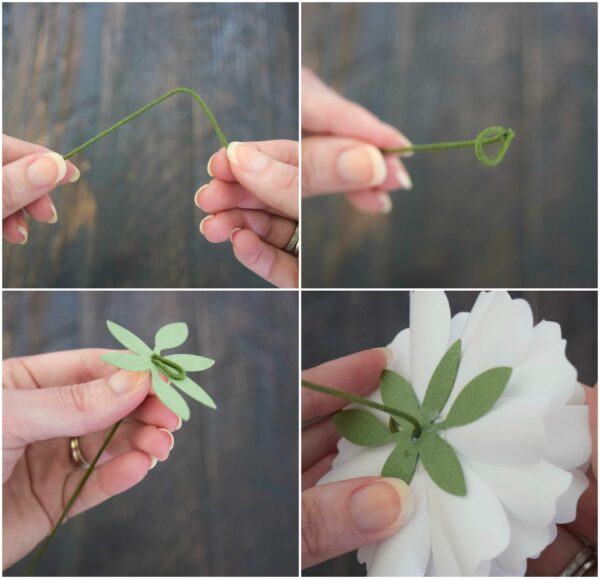
Step 1: Prepare Your Wire
- Bend the tip of your 18 gauge wire at a 90-degree angle and form a small circle.
Step 2: Prepare Your Leaf Base
- Punch a hole through the leaf base using your wire stem or a hole punch.
- Thread the wire stem through the hole in the top of the leaf base.
The circle you made in the wire stem should be on the top of the leaf base, with the rest of the wire under the leaf base.
Step 3: Glue the Stem and Leaf Base
- Add a generous amount of glue on the top of the stem (wire circle) and the top of the leaf base.
- Press firmly onto the bottom of the dahlia until fully dry.
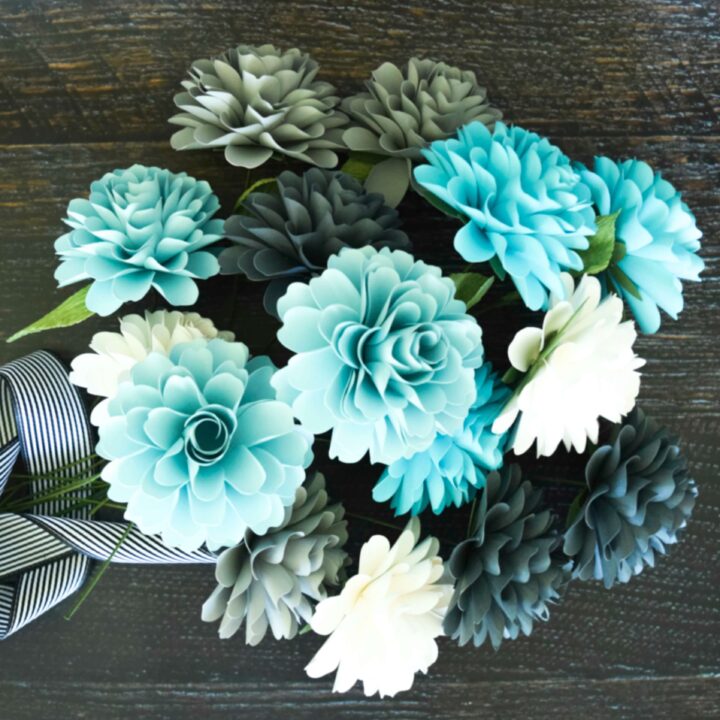
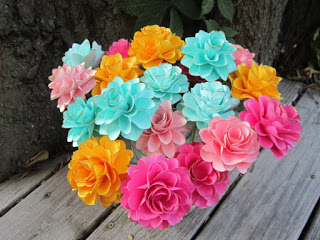
Your stunning small paper dahlia flower is finished! Display these DIY paper flowers on their own, with a bunch of dahlias in a bouquet, or any way you like!
I don’t know about you, but when I first started making these dahlias, I fell in love. This DIY dahlia flower quickly became one of my top go-to small flower crafts. They especially look stunning when assembled together in a large bunch (they would look gorgeous in a bridal bouquet!).
Tell me below in the comments how you would use these beauties in your own special way! Share what you’ve been up to by using #DIYwithAbbi and follow me on social media. I would love to see your creativity in the works, so flaunt your flower power magic! You are a huge source of my inspiration!
My mission is to inspire you to nurture the creative magic inside your soul – bringing you fun, easy-to-learn DIY paper flower tutorials and quality template designs. I share a variety of projects but specifically love paper crafting and paper flowers. Interested in more flower tutorials?! I’ve created dozens of signature designs for you to enjoy – The Art of Giant Paper Flowers (a bestseller), the Giant Flower Library, and my shop of endless paper designs and paper flower templates.
Thanks for letting me pop into your day!
How to Make Small Paper Dahlia Flowers
Learn how to make gorgeous small paper dahlia flowers with this beginner tutorial! These paper flowers are perfect for home decor, bouquets, special events, and more.
Materials
Instructions
Step 1: Cut Out Your Dahlia Petals and Leaf Base
You will need 8 petal layers consisting of 7 petals per layer, as indicated in the template. Cut these out first.
Step 2: Curl Your Petals
Roll each petal tip using your thin wood dowel to curl the petal to the shape of the dowel.
Step 3: Shape Your Petal Layer
Gently press and roll the centers of each small paper dahlia layer into cups so the petals stand up using your Paper Blooms Shaping Mat and Tool Set.
Step 4: Stack the Small Paper Dahlia Petal Layers
Begin stacking and gluing 6 of the petal layers. Add a small dot of glue to the center of one petal layer and place another dahlia layer on top. Glue one petal layer at a time.
Step 5: Create the Small Paper Dahlia Center Bud
Curl the individual petals of these last two layers tightly upwards and twist slightly so they remain tight and upright together.
Step 6: Add the Center Bud
Glue the tightly curled center bud (your last two layers) to the middle of your paper dahlia flower.
How to Stem Your Small Paper Dahlia Flower
Step 1: Prepare Your Wire
Bend the tip of your 18 gauge wire at a 90-degree angle and form a small circle.
Step 2: Prepare Your Leaf Base
Punch a hole through the leaf base using your wire stem or a hole punch. Thread the wire stem through the hole in the top of the leaf base.
Step 3: Glue the Stem and Leaf Base
Add a generous amount of glue on the top of the stem (wire circle) and the top of the leaf base. Press firmly onto the bottom of the dahlia until fully dry.
Your stunning small paper dahlia flower is finished!

More Crafts To Love
- Free Angel Wings SVG File For Cricut: 3D Angel Wings Mandala Paper Craft
- Sublimation for Beginners – What Supplies, Printer, and Blanks You Need to Get Started
- 19 Easy and Fun Summer Craft Ideas for Kids to Make (Arts and Craft Activities)
- 9 Paper Flowers For Summer: Easy Paper Flowers for Kids and Adults
Hey, Crafty Bestie! I’m Abbi!

I’m thrilled you are here! I have spent the last 10+ years making messes and making magic in my home studio with the goal of making the world a more colorful place, one craft at a time! I’m on a mission to nurture the creative magic inside your soul and bring that bursting imagination inside you to life with easy-to-learn tutorials. If you haven’t yet, be sure to join the subscriber community to gain access to all my freebies or visit my signature design shop here!