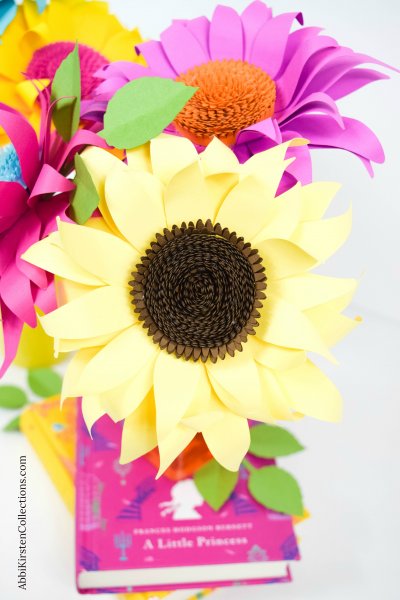
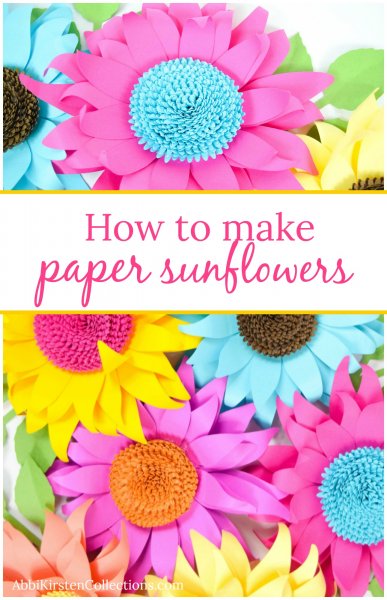
Paper Sunflower Tutorial: How to Make Classic Paper Sunflowers
This post may contain affiliate links that won’t change your price but will share some commission.
A Bright and Cheery Paper Sunflower how-to guide
There is no other flower quite like a sunflower. Since I have already conquered a large paper sunflower, I decided it was time to add a small paper sunflower tutorial to my paper flower collection. In time, I feel I may come up with another giant sunflower variation, though!
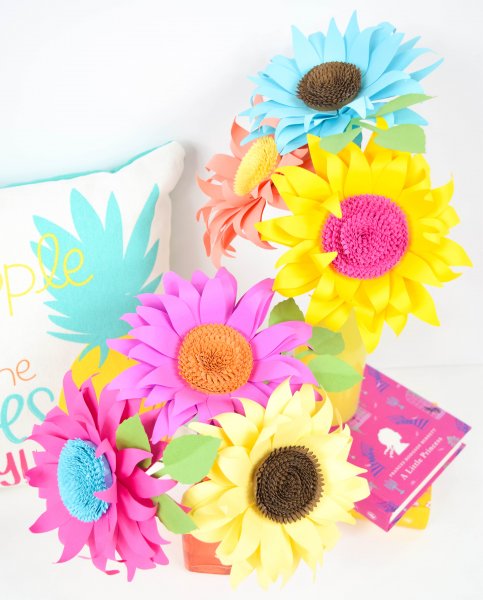
This paper sunflower tutorial will make you feel bright and cheery in no time. And because I love color so much, I decided to mix in non-traditional colors for an extra unique pop!
As always, let’s visit our supply list real quick and then get started!
Paper Sunflower Supplies:
- Glue Gun
- 65-pound cardstock
- Scissors and/or cutting machine (Cricut Explore Air 2 Machine)
- Thin wooden dowel for rolling
- Templates
- Paper Blooms shaping mat and toolset (optional)
- You can always view my full tried and true supply list!
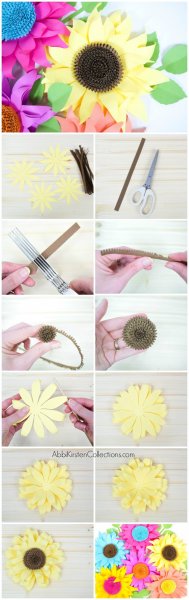
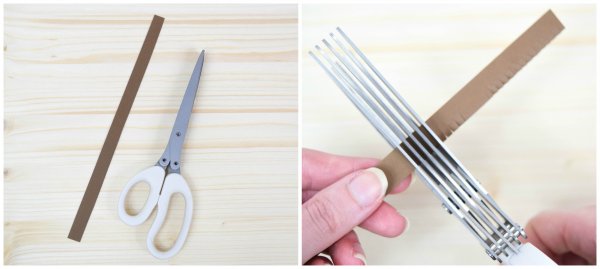
Step 1: Cut Out Your Petals
You will have 2 petal sizes for the sunflower petals plus the sunflower center pieces. To get started on your paper sunflower tutorial, cut the following number of petals/fringe pieces out:
- Larger sunflower petals – 2
- Smaller sunflower petals – 2
- Fringe center pieces- 16-20
If needed, cutting machine measurements are in the description of the tutorial video on Youtube, linked below.
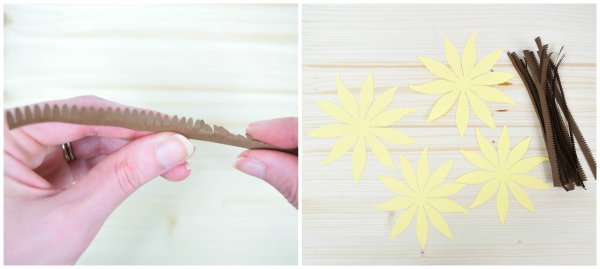
Step 2: Create the Sunflower Center Piece
To create the center of the sunflower, we will slightly fold the fringe down by bending it with your fingers.
If you do not have a cutting machine, then you can just cut out 7 inch by 1/2-inch strips and cut small slits all the way down using regular or fringe scissors as shown in the first photo set above.
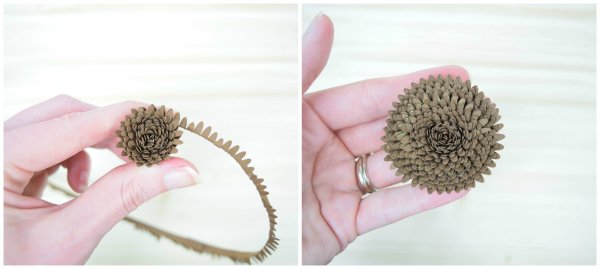
When making the sunflower center, it can be helpful to glue and overlap 2-3 strips at a time and then roll them together.
Beginning at one end, start rolling the fringe center piece inwards. Add glue as you go every few rolls to keep it tightly together.
Continue rolling till you have used 16-20 fringe pieces. The whole center will probably take you 5-7 minutes to roll. Your center will measure between 2-3 inches once made.
Step 3: Shape Your Paper Sunflower Petals
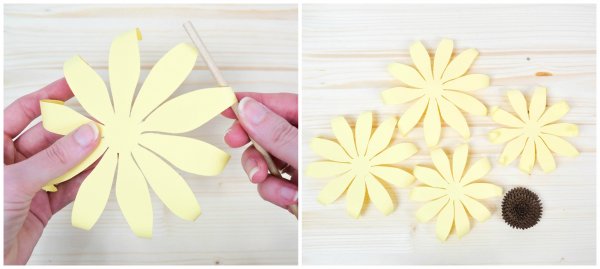
Moving on to the sunflower petals. We will curl each petal using a thin wood dowel. A pencil can work as well. I’m curling all the petals of the larger sunflower cuts backward. For the smaller sunflower layers, I am curling 1 backward and then alternating for the 2nd cut. You can mix it up here. Sunflowers are very forgiving. 🙂
In the video, you will see me using my shaping mat and rolling tool. If you do not have one then you can use your fingers to bend the petals up.
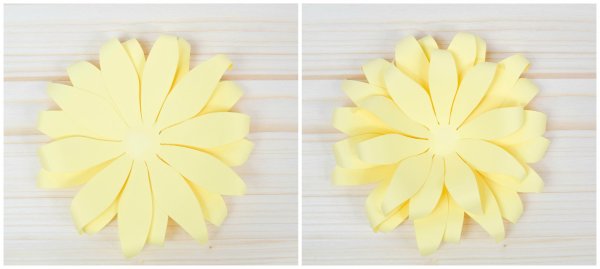
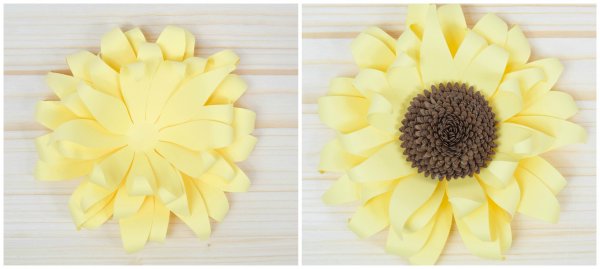
Step 4: Begin Layering the Sunflower Petals
Starting with your 2 largest petal layers, glue them together – one on top of the other. Try to alternate the petal layers, so they are not directly stacked.
Continue the same way by gluing on the 2 smaller petal layers. For my last petal layer, I curled 2 petal points inwards and 2 backward. Again, there is no exact right way to do this.
Step 5: Add the Sunflower Center
To complete the sunflower, glue in your center! You can watch the full video below and if you want to learn how to stem this sunflower take a look at that video below as well!
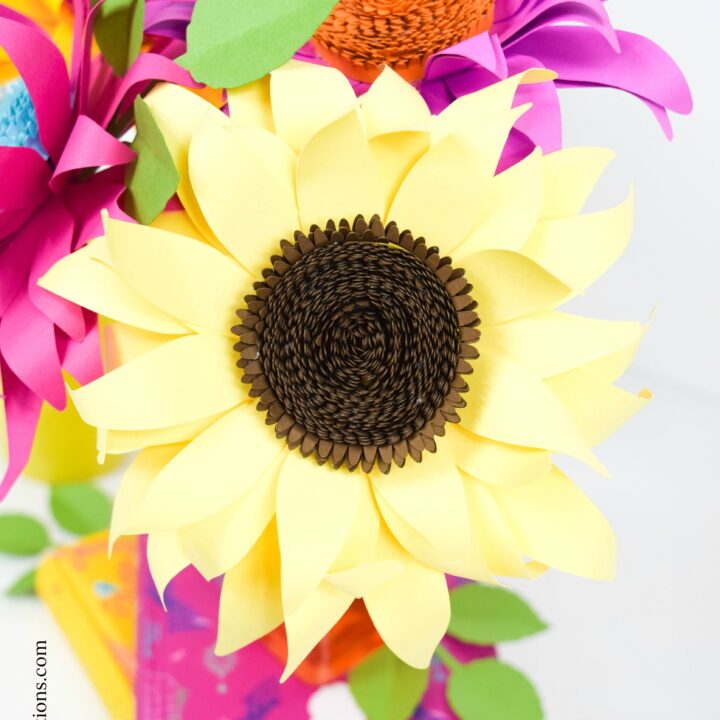
Paper Sunflower Tutorial
Learn how to make these classic, colorful paper sunflowers! This beginner-friendly tutorial shows how to make gorgeous paper sunflowers in just about any color you can imagine!
Materials
Tools
Instructions
Step 1: Cut Out Your Petals
Cut the following number of petals/fringe pieces out:
- Larger sunflower petals - 2
- Smaller sunflower petals - 2
- Fringe center pieces - 16-20
Step 2: Create the Sunflower Center Piece
To create the center of the sunflower, we will slightly fold the fringe down by bending it with your fingers. If you do not have a cutting machine, then you can just cut out 7-inch by 1/2-inch strips and cut small slits all the way down using regular or fringe scissors
Step 3: Shape Your Paper Sunflower Petals
We will curl each petal using a thin wood dowel. A pencil can work as well. I'm curling all the petals of the larger sunflower cuts backward.
Step 4: Begin Layering the Sunflower Petals
Starting with your 2 largest petal layers, glue them together - one on top of the other. Try to alternate the petal layers, so they are not directly stacked. Continue the same way by gluing on the 2 smaller petal layers.
Step 5: Add the Sunflower Center
To complete the sunflower, glue in your center!

I loved creating these especially since I really played with color here. Whatcha think? How would you use this paper sunflower tutorial? Tell me below! And if you enjoyed this please be a pal and share!
Discover More
Share what you’ve been up to by using #DIYwithAbbi. I would love to see your creativity in the works so flaunt your flower power magic! You are a huge source of my inspiration!
My mission is to inspire you to nurture the creative magic inside your soul – bringing you fun, easy to learn DIY projects, and quality template designs. I share a variety of projects but specifically love paper crafting and paper flowers. Interested in more flower tutorials?! I’ve created dozens of signature designs for you to enjoy – starting with my best seller, The Art of Giant Paper Flowers, the Giant Flower Library and my shop of endless paper designs and flower templates.
Feeling overwhelmed? Start with my tried and true Resource List!
Thanks for letting me pop into your day!