Easy Beginners Steps to Learning Cricut Design Space
This post may contain affiliate links that won’t change your price but will share some commission.
You just bought a Cricut machine! Congrats! If you have spent any time on my blog you know that I love my Cricut Explore Air 2. But before you can get to creating; you will need to know the basics of how to use this machine. Today I am going to share with you the Best Cricut Tutorials for Beginners to get you started! There is a lot these machines can do, but my goal is just to get you familiar with the Design Space interface.
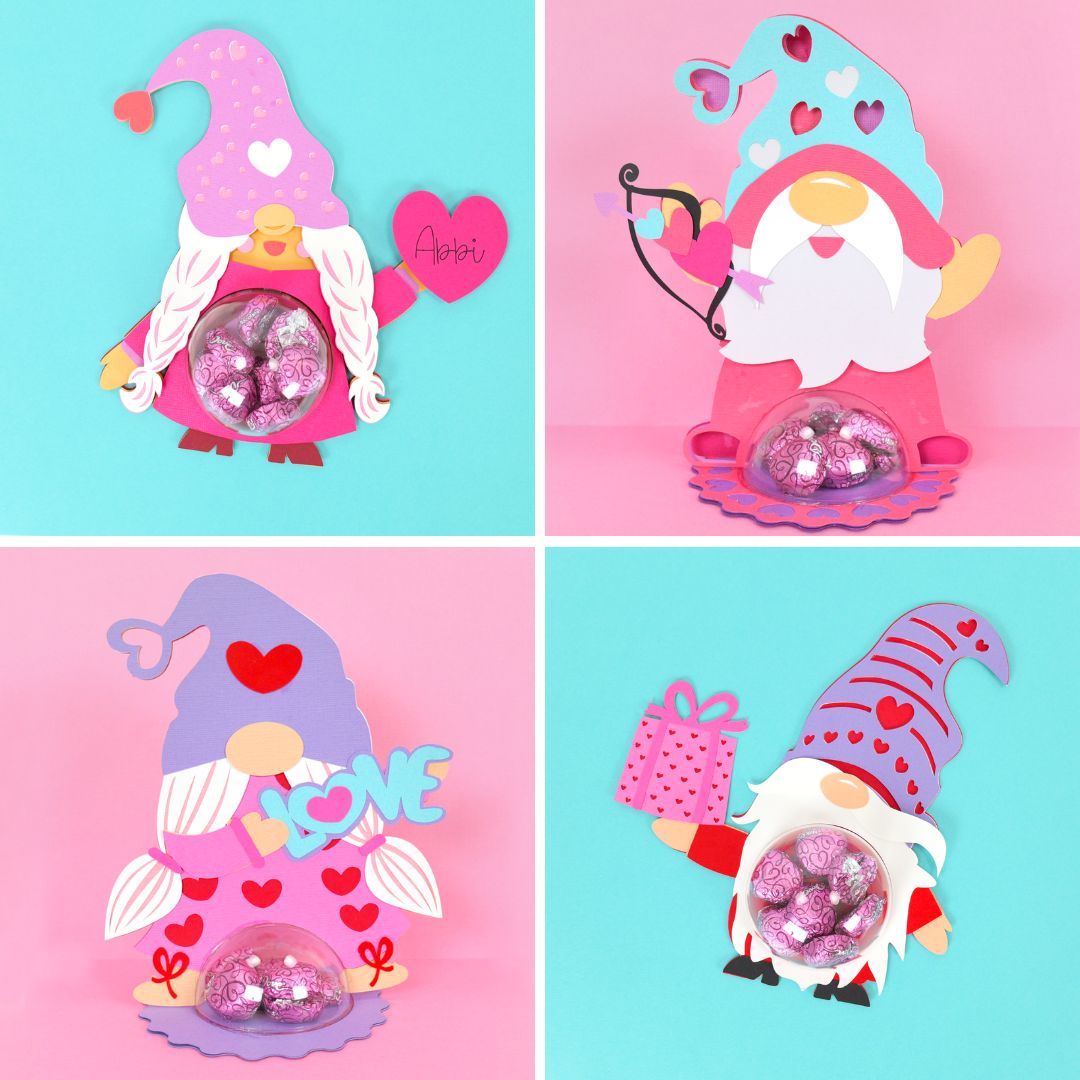
Your creativity can really run wild when you own one of these crafty powerhouses. As you may know, one of my favorite ways to use my Cricut is with all my papercraft and flower template designs. You will see me use some in the examples below. In addition to the beginner’s Cricut tutorials, I will also point you to some other favorite resources of mine that can help you learn your machine inside and out!
Cricut Tutorials for Beginners
The 3 most common beginners questions usually:
- How do I upload an SVG cut file?
- How do I use the print and cut method?
- How do I use the layers panel – move things around, ungroup, attach weld etc?
I’m going to cover each one, so let’s get a-going! To ensure you are familiar with the Design Space terminology, I have created a separate guide here!
How to Upload an SVG Cut File in Cricut Design Space
I’m going to bravely skip to the point and assume you have set up your machine and downloaded Cricut Design Space to your computer or iPad. If you are looking for how to set up your Cricut machine, view this Cricut setup guide for Explore or Maker.
So let’s say you want to explore the world of SVG cut files outside of what the Cricut design library offers. There are a TON of files out there on my Etsy shop, Catching Colorflies, and Design Space SVGs for free on blogs.
Sometimes people get scared off because they don’t know how to upload an SVG. I’m going to give you a video clip and a couple of essential screenshots.
Let me break it down: how to upload an SVG cut file
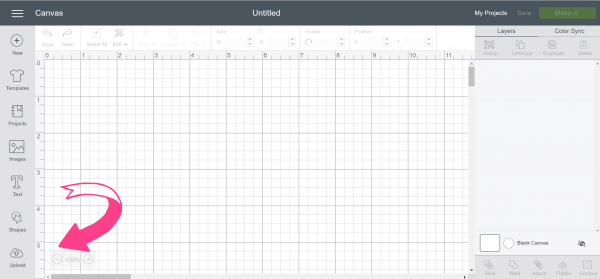
- Open a new project and click on the upload button on the bottom left of your screen
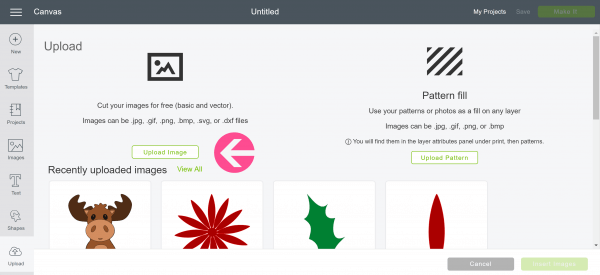
- Click the upload images button
- Click browse to find the file on your computer
- Double-click to open the file in Design Space
- Select the image under ‘recent uploads’ so that it is highlighted green, and click Insert Images
- A vector image will appear in Design Space!
Watch the overview video of uploading an SVG into Design Space
So now you know how easy it is to upload an SVG file! Yay, you! In the next section, I am going to show you how to play with the files even more.
But you might be asking; What if I do not have an SVG cut file? Can I use a PNG or JPEG image and convert it? The answer is YES! Read this short and sweet post on how to convert an image to an SVG cut file!
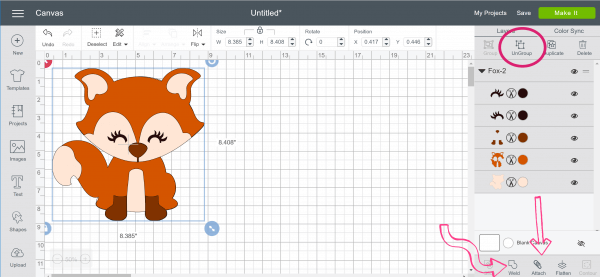
There are some basic things you want to know when dealing with SVG cut files. Some of these things are:
- How to ungroup a file
- The difference between attach and weld
- Changing colors so you can visualize your project or consolidating colors
- Resizing and unlocking proportions
- Hiding layers
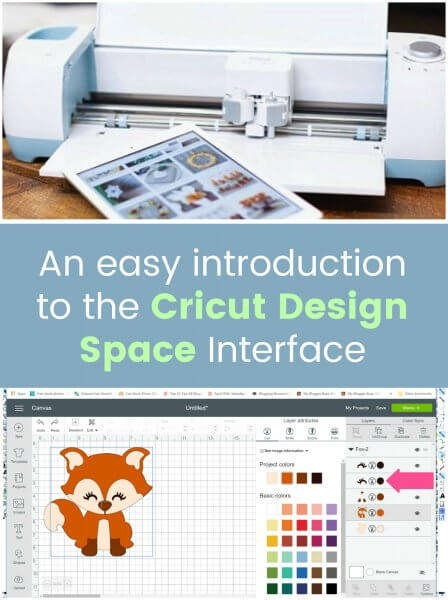
Take a look at this screenshot. I have highlighted those focus areas and will walk you through them in these Cricut Tutorials for Beginners clips!
How to Use the Contour and Flatten Button in Cricut Design Space
Contour Button
- You will need to ungroup an image first if it has multiple layers.
- Select which of the layers you wish to hide the image cut lines
- Click on the image cut line you wish to hide you will see that once you close the contour panel that they have disappeared, and the image has been simplified.
Flatten Button
Using the Flatten tool means you will be turning a multi-layered vector into a single-layer image to print. To flatten any SVG so that it can be printed and cut out like a JPEG or PNG image just select all and click the flatten button at the bottom right-hand corner.
Watch how I use both the contour, flatten button, and change colors in my short clip
Once you have flattened an image, Cricut will give you prompts to walk you through printing the image and cutting it out. I decided to add an additional clip on that to elaborate. Watch my video clip of how to use the print and cut method:
How to use the attach tool in Cricut Design Space
The Attach tool helps you to hold your cuts in the same position relative to one other on the mat so that when you go to your cut screen they do not shift. See an example of how to use the Attach tool on the bottom right of your layer’s panel in my clip below.
- Select 2 or more image cuts on your canvas after placing them as desired on the screen
- Click the Attach button at the bottom of the layers panel to your right.
How to use the Weld tool in Design Space
The Weld tool allows you to join shapes to create a single custom-cut image by eliminating cut lines. The Weld tool is very useful if you wish to simplify a design or join to existing shapes together, but I think my favorite use for the Weld tool is using it with text.
Watch how I use the Weld tool here:
How to use the Slice tool in Design Space
When using the Slice tool you will work with 2 layers at a time but make sure they are ungrouped first. Remember, your Ungroup tool is at the top of the layers panel.
The Slice tool allows you to cut out one shape from another existing shape. Or you can overlap the two shapes to cut a new one out.
Watch me use the Slice tool here:
I also find the Slice tool helpful if you wish to cut text out from a shape. See my screenshot example of the text below. I just placed my text over the seashell base image, selected them both, then pressed my Slice tool. The result was the text cut out from my seashell shape! So cool!

Wow! Do you realize you now know how to use everything in the layers panel interface?! Hopefully, these very simple Cricut tutorials for beginners help you to feel more confident as you turn on your new machine. My best advice is don’t be afraid to play around! What could happen? You could create something fantastic!
Grow Your Skills
If you need some free SVG files to get started you can find my freebies below!
Ready to take your Cricut skills up a notch?
Are you ready to Master your Cricut, discover new hobbies and skills, and design for yourself?! Be sure to join my FREE masterclass on the 3 biggest beginner Cricut crafter misconceptions and how to fix them!
This masterclass is for you if you…
…own a Cricut machine but feel like you have no clue what you are doing!
…wish you could design your own project files.
…are tired of searching Pinterest and Google for answers
…craft several times a week, and want to personalize your crafts, home or event decor or maybe even want to sell your crafts!
Join me in my Master Class right now!

Shop Cricut on Amazon!