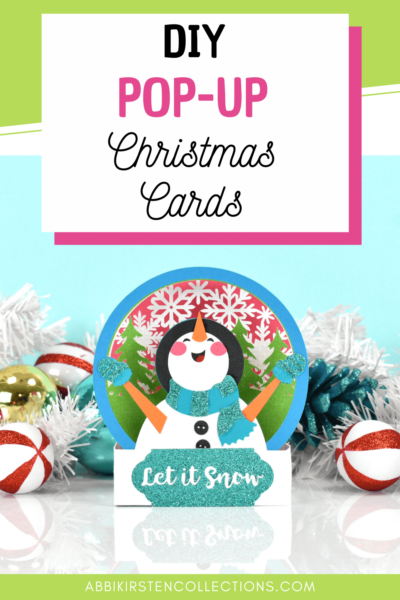
DIY Pop-Up Christmas Greeting Cards For The Holidays
This post may contain affiliate links that won’t change your price but will share some commission.
How To Make Pop-Up Christmas Cards With Cricut
Pop-up cards have become a trendy craft project for paper crafters and Cricut users to take on. I started making pop-up cards like this a couple of years ago with my free pop-up flower bouquets.
The holidays are a great season for handmade greeting cards, so it was time to add some Christmas pop-up cards to the collection! Our DIY pop-up Christmas card craft is easy enough for a beginner to make, too.
If you are ready to get crafty this Christmas season, grab the supplies below and get started with these holiday pop-up cards!
Supplies to Make Pop-Up Christmas Cards
- Cardstock (65-80 pound weight is best). You can also use glitter cardstock for added texture.
- Bearly Art glue
- Scrapbooking tape (optional)
- Cricut machine – I use my Cricut Maker 3, but you can use any model that can score, including the Explore models.
- Scoring tool. You can use the scoring wheel for the Maker or scoring stylus the Explore and Maker models.
- Cricut pen if you plan to write a message
- Kraft board or chipboard (only for the shaker card option)
- Acetate or cellophane (only for the shaker card option)
- Glitter shapes and confetti (only for the shaker card option)
- Standard Cricut mat and 12 x 24 Cricut mat for the envelope

Download The Christmas Pop-Up Card Templates
Firstly, you will need to download the templates. Find these DIY pop-up card templates with envelopes inside Abbi’s membership! Additionally, there are hundreds of other crafts you will earn instant access to!
Find the complete collection of Christmas pop-up cards here, or each is linked individually below. If you already have an account, just log in and start downloading. Likewise, you can upgrade to the membership here and then click any link below to access once logged in!
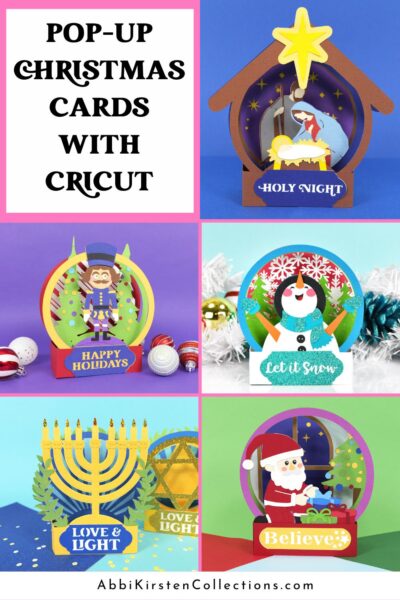
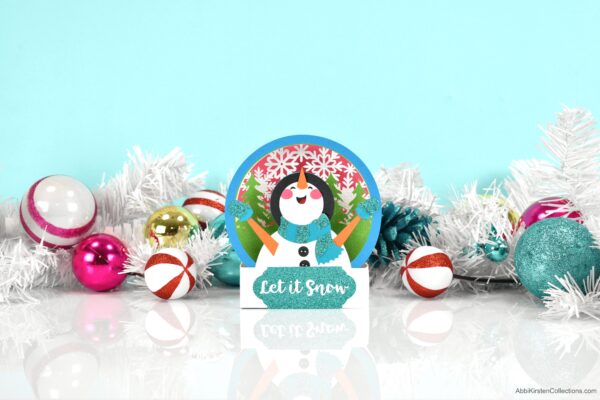
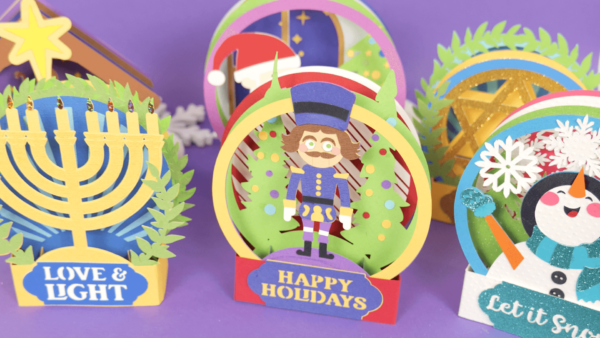
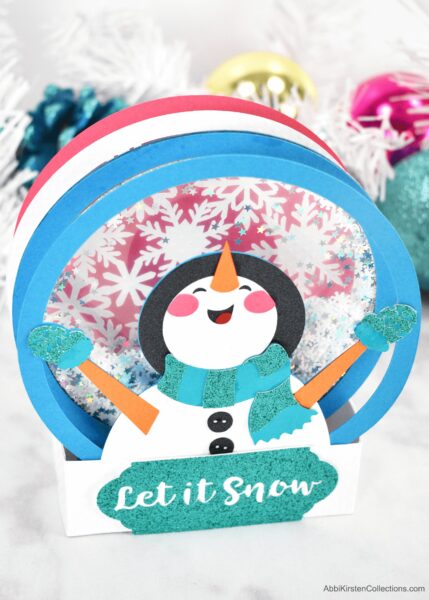
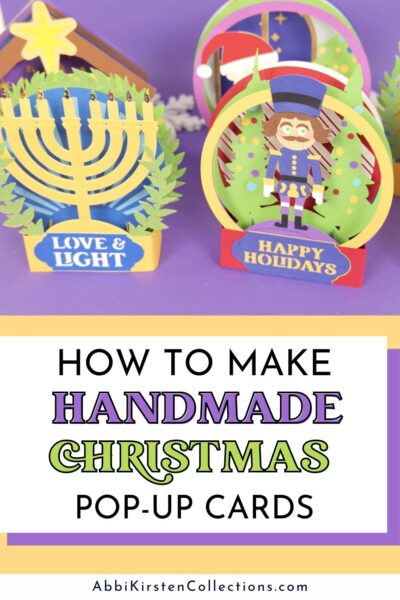
- Snowman pop-up card design
- Hanukkah menorah pop-up card design
- Nutcracker pop-up card design
- Nativity pop-up card design
- Santa Claus and tree pop-up card design
- Hanukkah Star of David pop-up card design

Snowman Pop-Up Card Video Tutorial
Watch the full video to learn how to make these Christmas pop-up cards. I will also show you how to set everything up in Cricut Design Space. The shaker card option can replace the Christmas tree layer or make both and swap out the scenes!
nativity Pop-Up Card Video Tutorial
I decided to expand this collection a while after creating the snowman pop-up card, so there are now six designs in total.
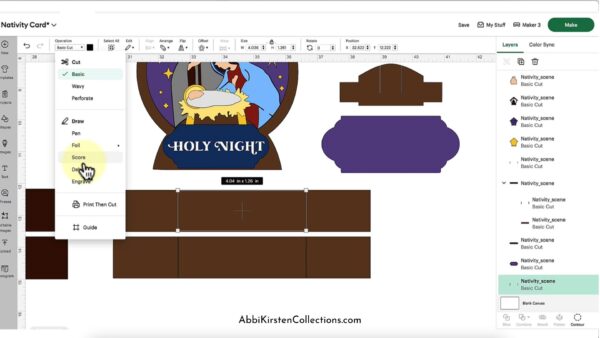
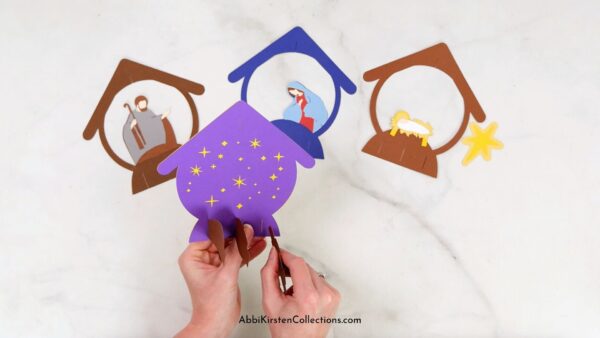
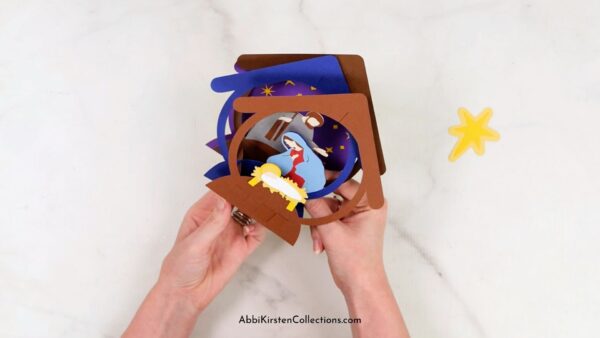
These pop-up cards are all assembled the same way as far as the pop-up mechanics of the card goes. The only difference is the layers you will add for the details. Follow the order of the SVG layers on your screen for each design. Here is another look at the nativity design because it has one tiny variation from the others.
Design Space Set Up
- If you are new to Cricut, be sure to watch the video tutorial because I will show you how to do all of the setups.
You can also view this post for how to upload an SVG to Cricut if you have never uploaded your own SVG cut file to Design Space before. - Once the file has been brought in, you want to set your scale. You can cut this pop-up card out at the size it imports or scale it up a bit, which is what I recommend. Just be sure to scale as a group to retain the image proportions. Select the group, click hold, and drag larger at any one of the four corners.
- Next, ungroup the file and select the black lines. Go to Operation at the top left and select Score from the dropdown menu.
- With the score lines and the base they sit on selected, use the Attach tool at the bottom of the Layer’s Panel to hold the placement of your score lines.
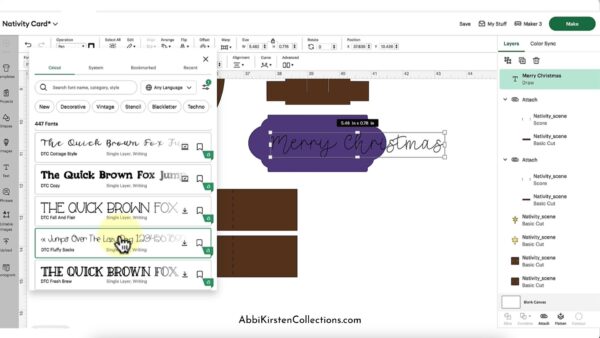
- In the Christmas pop-up card SVGs, you will also see an option to add a message to the back of your card. I used my Cricut to write the message in pretty cursive.
Be sure to filter by Writing fonts so you don’t end up with bubble letters. Visit this tutorial to learn more about using fonts in Design Space.
Cut and Score The Card
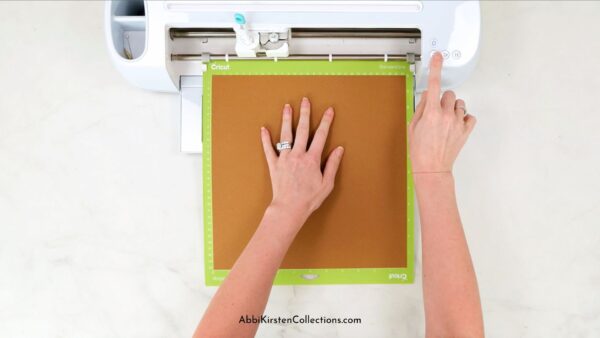
- Load your cardstock onto your Cricut mat. Place your scoring stylus in Clamp A when Cricut prompts you. The same will be true for your pen if you opt to have Cricut write for you.
- Get all your cardstock layers cut out, keeping track of all the small pieces as you go.
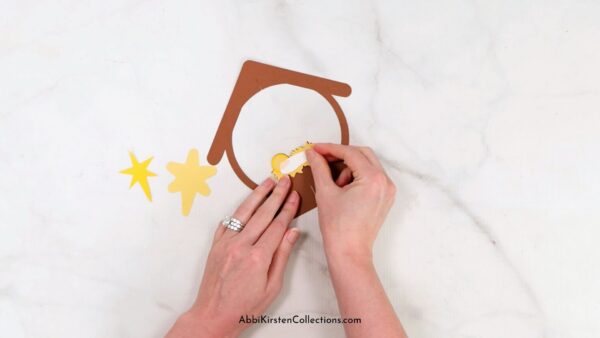
- Once all the pieces have been cut out, use glue to layer the details of the design together first. Refer to each SVG design to see the order of the layers easily.
- With the back piece, you will glue the purple star and yellow base layer together.

- Use the 3 long connecting pieces with grooves to thread through the slots of the back piece and glue to secure from the backside.
- Repeat step 5 with the front piece of the card as well, in my case, the baby Jesus layer.
15+ Christmas Holiday Cards You Can Make With Your Cricut Machine
Looking for more great ideas to make one-of-a-kind Christmas cards? I’m sharing the best Cricut Christmas cards to make this holiday season, including the cutest shaker cards, photo cards, pop-up Christmas cards, lantern pop-up cards, and more in this DIY Christmas Card post!
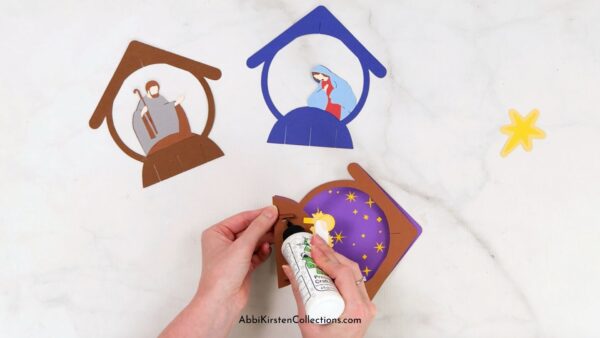
- Slide the two additional layers into the center remaining grooves and wiggle them down into place. This takes a little patience.
- Use the small H-shaped pieces to fold in half length-wise and glue them around the grooves where the two center pieces slide in. This ensures they cannot slide out. See the video here for more clarity.
- Grab the long, thin rectangle pieces and fold them along the scorelines.
- Glue the one piece to the front and the other to the backside.
- Then glue the sides closed on the left and right of the card.
- Open and close the card in each direction to make sure it is collapsing properly.

- Add your star on the front of the card and the message to the back with glue! And that’s it!

Envelopes For The Pop-Up Cards
To send your loved ones these Christmas greetings, there is an SVG file included for envelopes for these Christmas cards. It is important to note that you will need to have a 12 x 24-inch Cricut mat to cut these envelopes out.
The envelope SVG can be loaded right into Design Space. Just make sure to change the black lines to score lines and use the Attach tool to hold their placement before cutting the envelope out.
If that is not an option for you, then just grab a premade set online like these envelopes here!

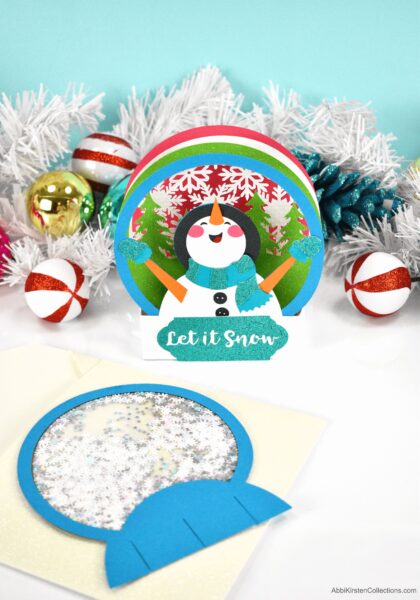
With the snowman card, I also include a shaker layer that can be swapped out for the tree layer making these cards double-special, – pop-up and shaker!
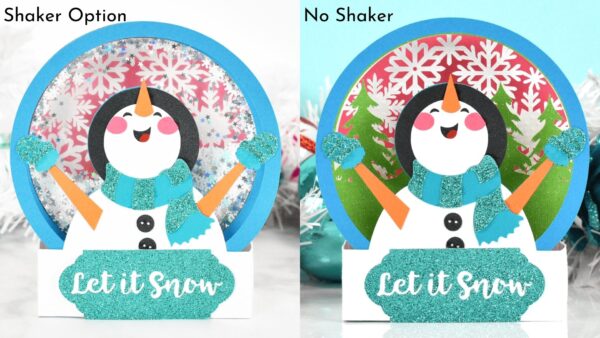
Here is a side-by-side look at how the card with and without the shaker card insert – both are cute in their own way!
Don’t forget to download this entire collection of Christmas pop-up cards to use with your Cricut machine inside the Abbi Kirsten Membership!
Did you like this DIY pop-up Christmas card tutorial? And do you enjoy making your own Christmas cards? Which of these six unique designs is your favorite?
Share with me below in the comments, and Merry Christmas!
You may also love my Joy Christmas cards and my advent calendar gift boxes!
About Abbi Kirsten
Welcome to my colorful corner of the internet, where we play with vibrant crafts and unlock your creative magic! Hang out with me and get lost in a fun array of projects, tutorials, and products, from stunning papercraft ideas to flower templates, Cricut help for beginners, and endless crafter’s hacks.
Join the Member Vault and participate in my monthly Craft-Alongs in my Facebook group to access all the magic!