Cricut Mug Press Tutorial – How to Layer Infusible Ink with Your Mug Press
This post may contain affiliate links that won’t change your price but will share some commission.

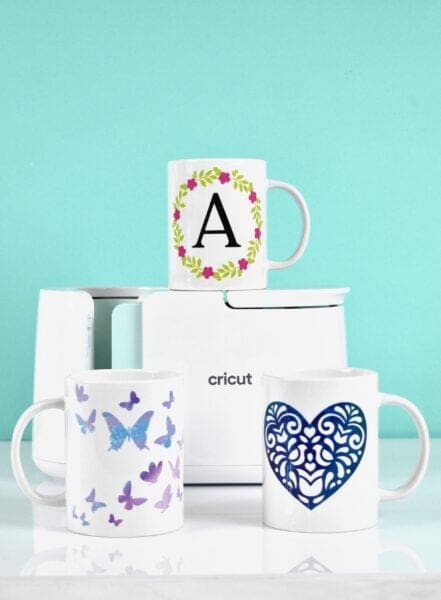
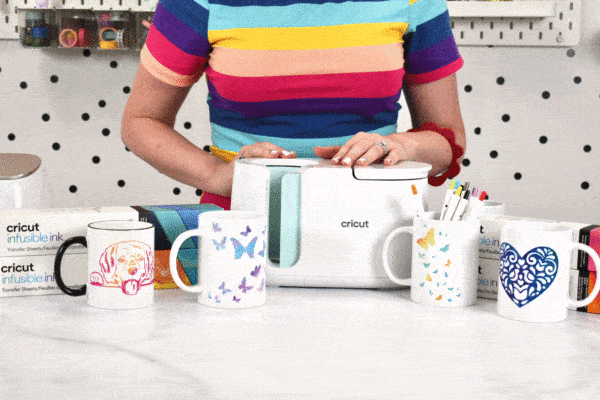
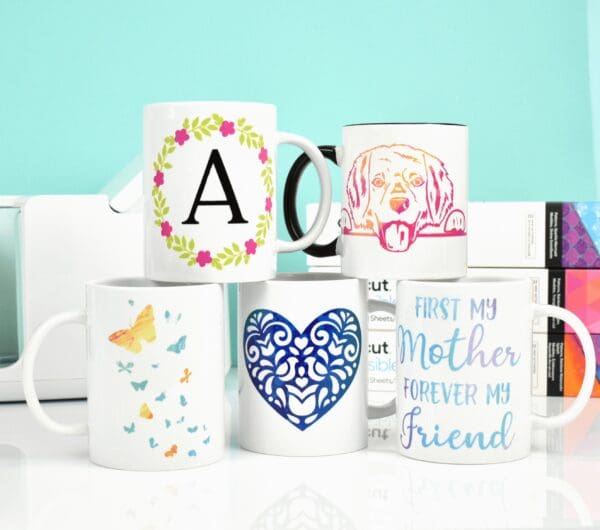
Today we are talking all about the new Cricut Mug Press. I absolutely love the Cricut Mug Press because it’s so compact, but I also love how simple it is to produce a beautiful gift in really just a few moments. I have been busy making mugs, and I have been busy testing different ways to use the mug press with Infusible Ink.
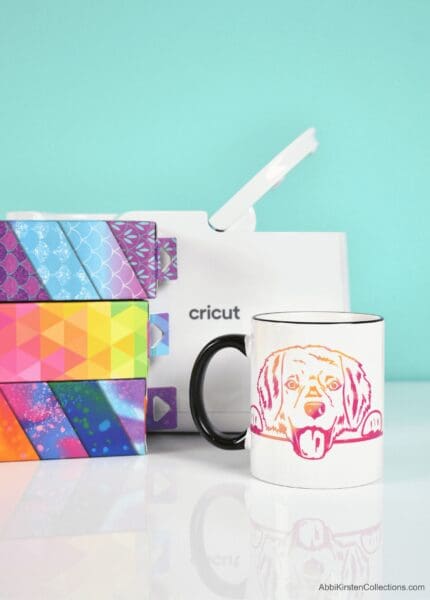
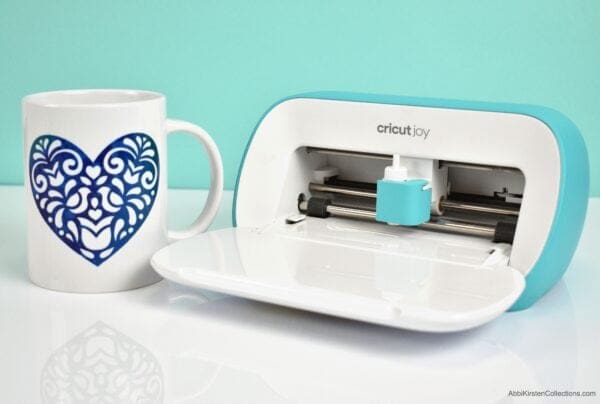
When making DIY mugs, Infusible Ink is what you’re going to need to cut out on your Cricut machine, your Maker, your Explore, or your Joy machine. I am featuring the Joy machine in this mug tutorial.
I’m also going to show you how you can add more than one color of infusible ink to your mug so that you can add different colors and layers to your design! If you want to see how I had layers of infusible ink on a t-shirt check out this tutorial.
Supply List – How to Make Mugs With Cricut
The supplies you’re going to need for this are, of course, the
- Cricut Mug Press
- Cricut machine (the Maker, Explore, or Joy will work)
- Ceramic mug: You can either buy a generic sublimation mug or buy Cricut brand mugs, which I recommend because they are specifically designed to work with the Cricut Mug Press, which means they’re going to work the best. The black and white mug in my video is not a Cricut brand, but it still worked out just fine, as you can see. As long as it is a sublimation mug, you shouldn’t have any problems.
- Heat safe tape
- Infusible Ink
- Lint roller
- Heat-safe surface (towel or Easypress mat works)
- SVG design (grab my free monogram wreath below!)
Download the Free monogram mug wreath SVG Design
If you love any of the designs you see in this tutorial, you can find several SVG designs in my Freebie Vault, including the circle monogram wreath SVG design, which is free! Just search “mugs” inside the Freebie vault!
If you love the “First, My Mother. Forever My Friend SVG”, you can get that as a Premium Member in the Vault too!

If you have ever wondered how you can make your own SVG files so others’ designs do not limit you, I would love to invite you to my FREE Magic of SVGs workshop to see how it’s done!
How to Layer Infusible Ink with the Cricut Mug Press
Below is my full step-by-step video tutorial for the Cricut mug press. Keep reading for written instructions to make mugs with Cricut and understand the Slice Method!
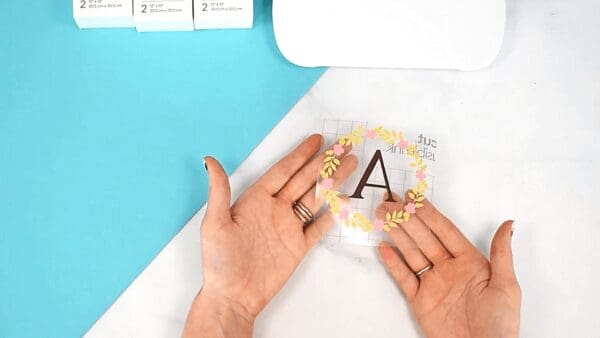
Slice method for Infusible Ink in Cricut Design Space
To layer any Infusible Ink, we need to perform the Slice Method.
The Slice Method is slicing out two designs from each other so there is no overlap between the two colors because infusible ink can’t be layered directly without the colors becoming blended.
First, start by selecting the design and click that duplicate button at the top right. Now, I’m going to select the flower and the greenery. It is essential when you’re using the slice tool, you’re items are ungrouped, and only two layers are selected.
Then click the slice tool at the bottom of the layers panel with those two selected.
Once the slice is complete, you can pull the layers apart. When you look at the design, you’ll also notice that anywhere the flowers and the greenery were overlapping has been sliced, and you can see cut lines.
Here’s the reason I had us duplicate the wreath. You still need to pull over the original flowers to add to the sliced greenery. For the extra messy flower pieces remaining, you can delete those.
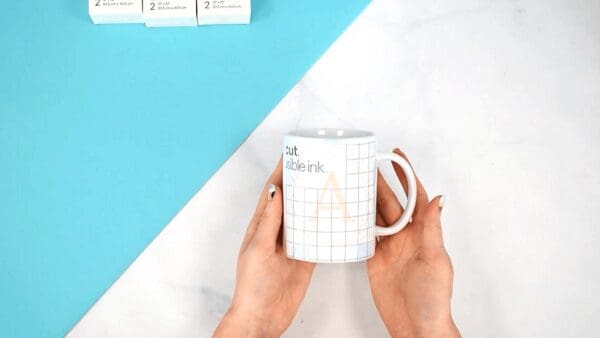
Cut your mug SVG design
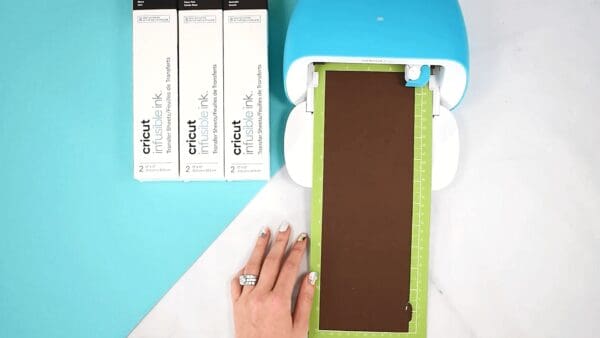
I’m using my Cricut Joy machine for this DIY mug project. In Design Space, I have my Joy machine selected, and Material Settings set to Infusible Ink transfer sheets. I’ve cut down my larger infusible ink sheets to size, or you can use Cricut Joy infusible ink rolls that they sell in the pre-made Joy size, but either will work.
Place your infusible ink on the green Cricut Joy mat and load your machine pressing the mat against the rollers. Press Go when Design Space prompts you.
Weed your Infusible Ink
Next, we need to weed the infusible ink. The best thing to do is just sort of roll the transfer sheet a little bit – this is technically known as cracking, and this helps the infusible ink material release any areas that you’re trying to weed so that the design doesn’t come up.
If you have any pieces that need to be weeded inside the design, you would typically use a weeding tool. However, in most cases, I find with infusible ink, gently rolling the design and using your fingers to pick up the pieces works better.
How to Layer Infusible Ink for the Cricut mug press
Because the Cricut mug press should only press each design one time, you will need to move the different infusible ink layers onto one transfer sheet. With my simple SVG file, I picked up each pink flower and placed them onto the liner with the wreath where the space is that we sliced out in Design Space. Now all my colors and layers are on one-liner sheet.
Prep the mug
To prep your mug to receive the transfer, you’ll want to use a little rubbing alcohol or alcohol wipe. At the very least, wash your mug and dry it with a paper towel. And then, before you do anything else, you’ll also want to roll a lint roller on it, just to make sure that there are no tiny bits of lint or anything from the paper towel or your dish towel. If you don’t have a lint roller, you can grab just a piece of masking tape, wrap it around your hand and then sort of grab at it, and it’ll do the same effect.
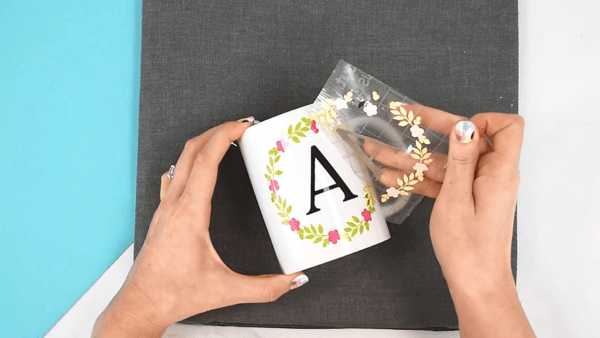
Apply the design
There isn’t a real trick to the alignment. Make sure you’re looking straight down at it to make sure you’re getting a good view, and be sure to push the infusible ink liner down and rub out any bubbles. You can always lift the liner if you need to reposition it to get a bubble out.
Load your Cricut Mug Press
Power on your Cricut mug press and give it some time to heat up. It’s best to have the mug press sitting on an Easypress mat or towel.
I will add a couple of pieces of this heat-safe tape right along the bottom and top of my mug where the liner of my design sits. The heat-safe tape helps the design not to lift as I put it into my mug press. It’s not a big deal if you put a little bit of the tape over the design, although it is good practice to try and avoid that if you can.
Insert your mug into the press carefully, sort of at an angle, and slide it right down in. Make sure your design is inside, and it’s not coming towards the end of the heated area. Then press down the lever to start the transfer. It will take about 6-7 minutes to transfer the design, and the mug press will beep when finished.
Reveal your project!
Once the mug press beeps that it is finished, pull up the lever. Carefully remove the mug, only touch the handle and nothing else. Set your mug on a heat-safe surface. Let the mug cool for 10-15 minutes.
Once cooled, remove your liner and tape to reveal your finished mug! Because the ink is actually in the mug and not on top like heat transfer vinyl, these mugs are dishwasher safe too!
Did you love this Cricut mug press tutorial? Share and save for later!
Don’t forget to download the FREE wreath monogram SVG cut file for this Cricut mug tutorial!
More Free Monogram SVG Files

Crafting Ebooks

More crafts to love
- 9 Best Paper Flowers Crafts: Easy Papercrafts to Brighten Your Day
- The Best Free Summer SVG Files For Cricut And Silhouette Crafts
- Paper Flowers for Baby Showers: A Special Guest Post
- Small Ruffle Dahlia Paper Flower: Template and Tutorial
- DIY Fairy House Craft: Indoor Paper Luminaries
Hey, Crafty bestie! I’m Abbi!

I’m thrilled you are here! I have spent the last 10+ years making messes and magic in my home studio to make the world a more colorful place, one craft at a time! I’m on a mission to nurture the creative magic inside your soul and bring that bursting imagination inside you to life with easy-to-learn tutorials. If you haven’t yet, be sure to join the subscriber community to gain access to all my freebies or visit my signature design shop, Catching Colorflies!