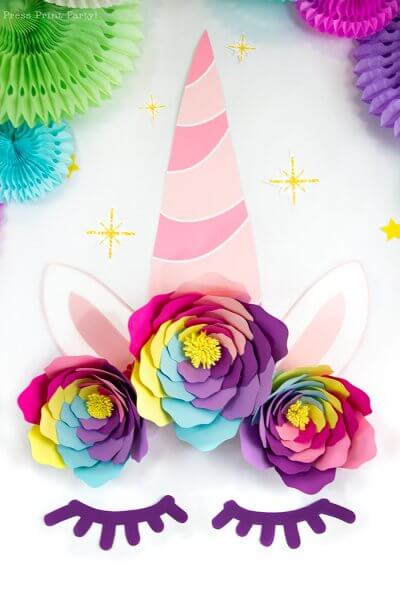
DIY Iris Unicorn Rainbow Flowers- Large Rainbow Paper Flowers
This post may contain affiliate links that won’t change your price but will share some commission.
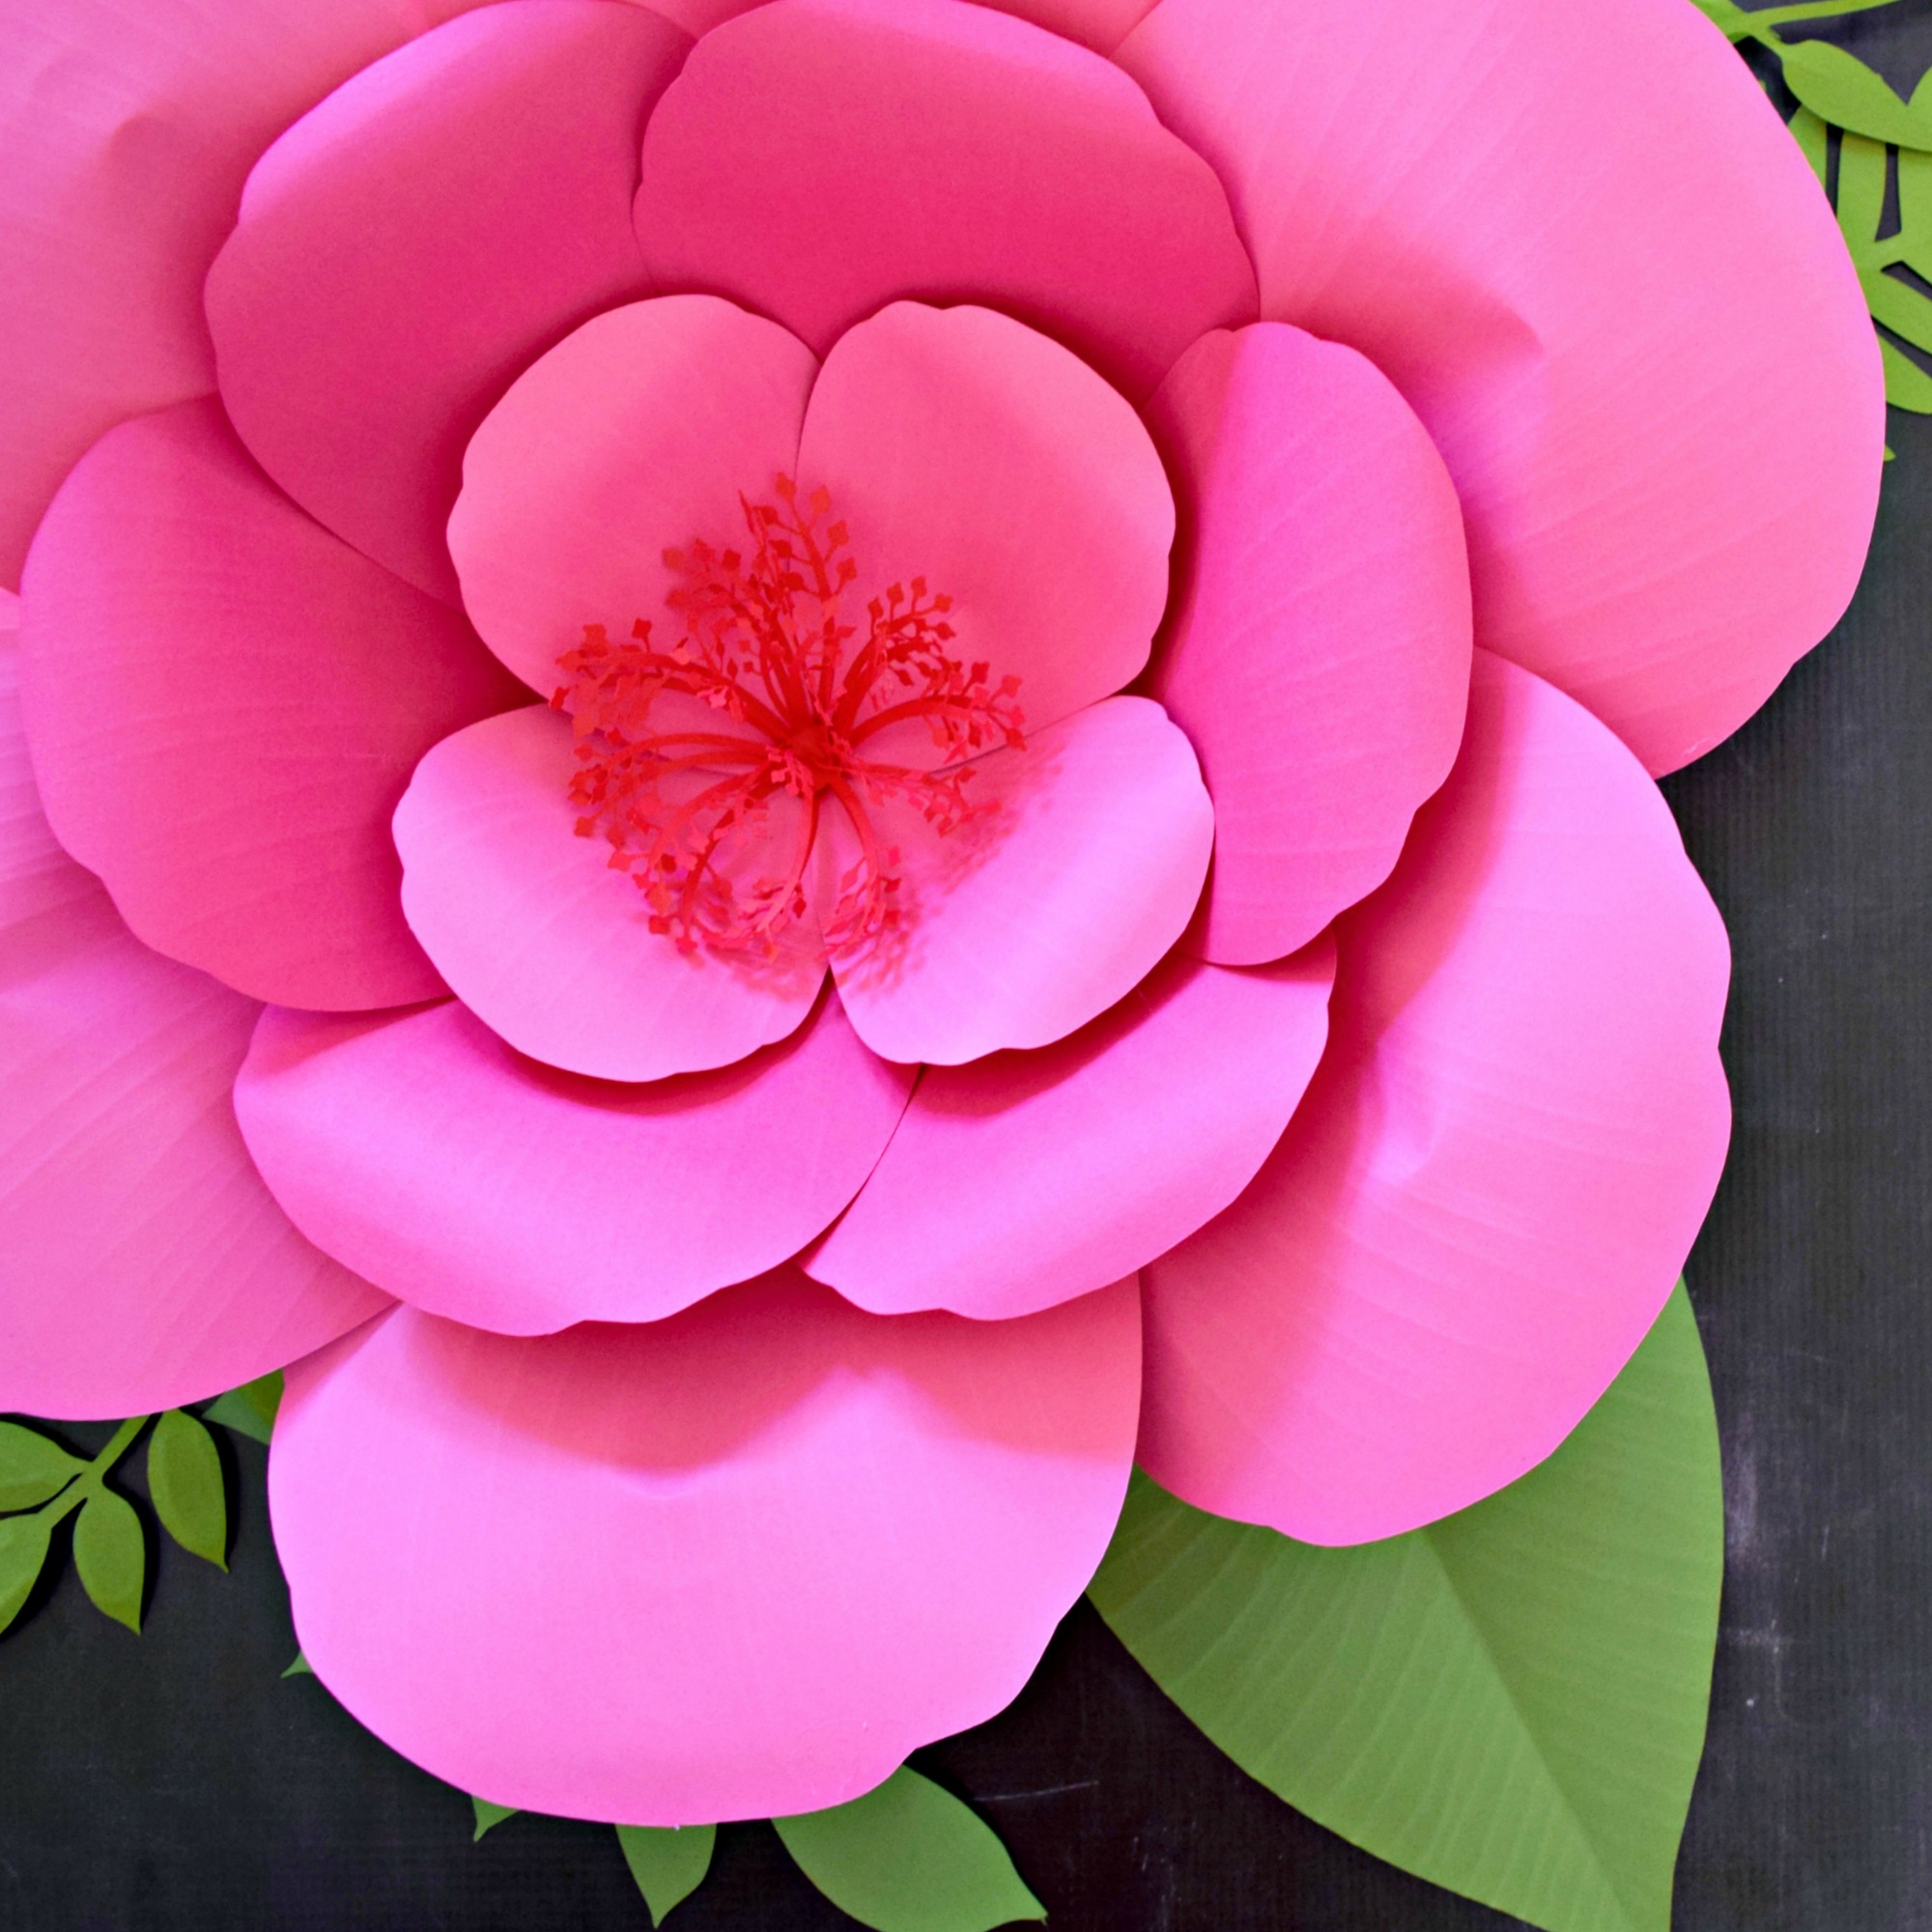
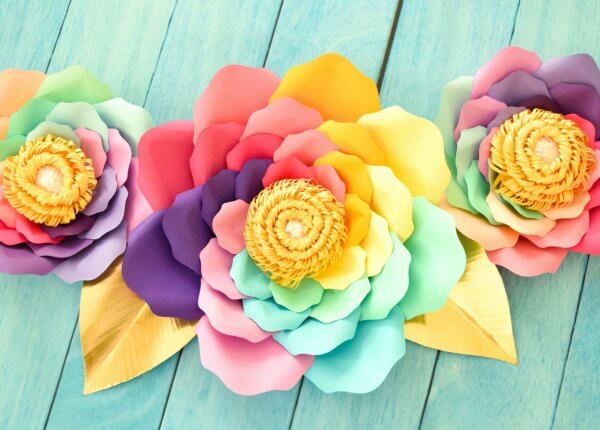
The magic & fun of unicorns is taking over my crafting heart this week, and creating something spectacular – Large Rainbow Paper Flowers! Everything about these brightly colored beauties is just what any unicorn admirer could dream up! I teamed up with a fellow creator and friend over at Press Print Party to bring you all this rainbow unicorn goodness!
Follow my step-by-step instructions and get ready for a bright & exciting color explosion!
DIY Iris Unicorn Rainbow Flowers Supplies
- Unicorn flower templates
- Glue Gun
- 65-pound cardstock
- Scissors and/or cutting machine (Cricut Explore Air 2 Machine)
- Thin wooden dowel for rolling
- Fringe scissors (optional)
- Paper Blooms Shaping Mat & Rolling Tool Kit (optional)
Step-By-Step Large Rainbow Flower Instructions
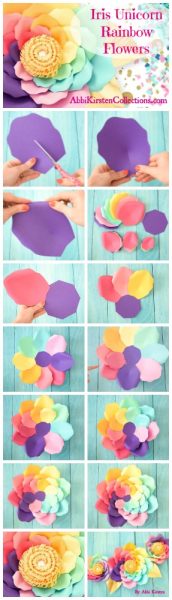
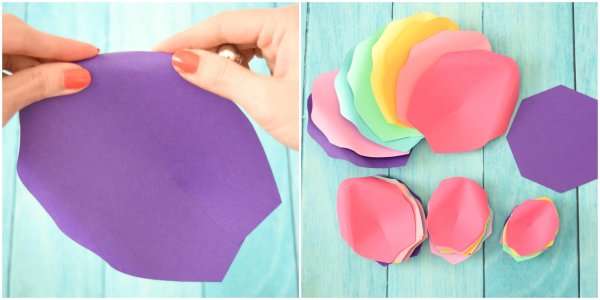
You will have 8 petals in each layer. Each of the 8 petals will be a different color.
Petal Prep
Cut the following number of petals:
Extra Large: 8 Petals
Large: 8 Petals
Small: 8 Petals
Extra Small: 8 Petals
5 layers for an XL flower or downsize to a large by subtracting the XL Petal. Downsize to a medium by subtracting the XL & Large Petal.
Let’s get started on our DIY Iris Unicorn Rainbow Flowers- Large Rainbow Paper Flowers
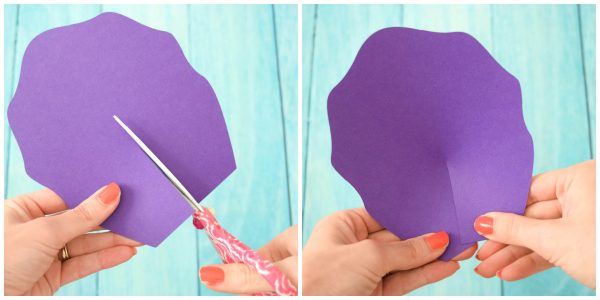
Step 1: Cut out all of your petals. Then cut 2-inch slits at the bottom of each petal and overlap slightly with glue.
Step 2: Use a marker, pencil, or dowel to curl back the top edges of the flower petal. I’m using my Paper Blooms Shaping Mat rolling tool.
Related Posts
Step 3: Repeat with all of your petals. You should have 8 Petals for each layer. For this tutorial, there will be five layers since we are making an XL flower. I have eight colors present for each layer. One for each petal.
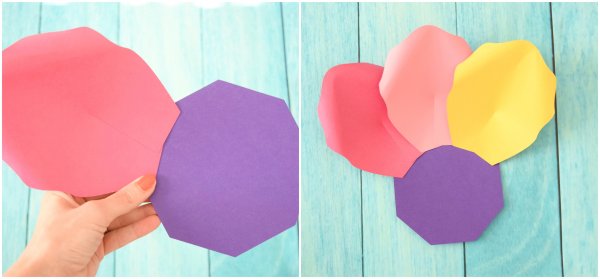
Note: With my other flower tutorials, I use circle bases. Today, I’m introducing the ‘Petal Perfect Bases.’ This base comes with the DIY Iris Unicorn Rainbow Flower & can also be purchased separately. The Petal Perfect Base helps you keep petals in a neat circle.
Step 4: You will be gluing each petal over each segment of the petal perfect base. There are eight sides. One for each petal. Add glue to the bottom of the back and glue onto the base as shown. Your petals will not fit perfectly on each side since we want the petals to overlap to achieve the correct look.
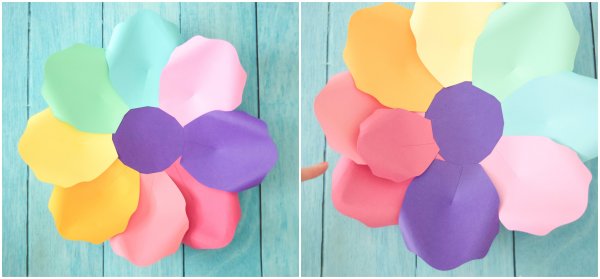
Step 5: Glue the next petal onto the next segment. Here you can see my two petals roughly line up with each side of the octagon base. Keep going with the next 6 petals the same way.
All of my petals align with each side of the petal base.
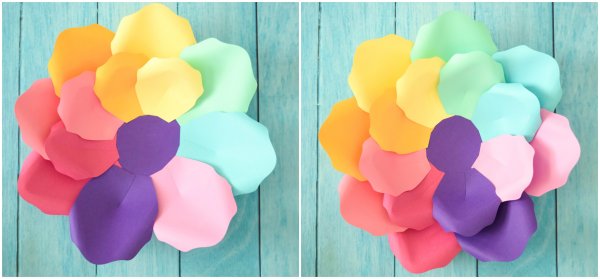
We will now move on to the second layer of large petals.
Step 6: I started the 2nd layer with my dark purple petal. To create a spiral look, you will want to glue the large dark purple petal to the right of the XL purple petal. Your large dark purple petal should be between the XL dark purple and the lighter purple petal.
Step 7: Follow the color pattern and glue the lighter purple flower petal in between the lighter purple XL petal and the lavender XL petal.
Step 8: Keep going until your 2nd layer is complete with eight large petals.
We will now move on to the third layer of large petals.
Step 9: I’m starting with the dark pink petal. Glue it in between the dark pink large petal and the dark purple large petal from the previous layer.
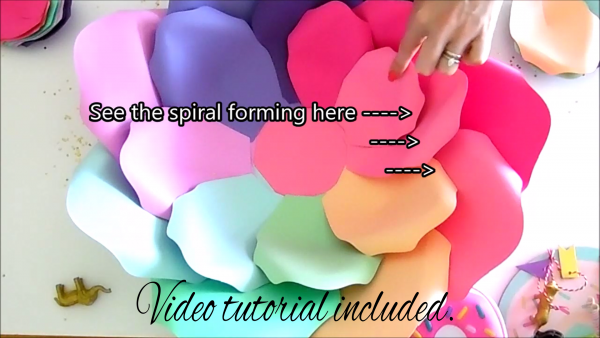
Step 10: Add in the next petal (mine is light pink). Keep going until your 3rd layer is complete. You should be picking up on the repetitive pattern we are doing here and start to notice a spiral forming.
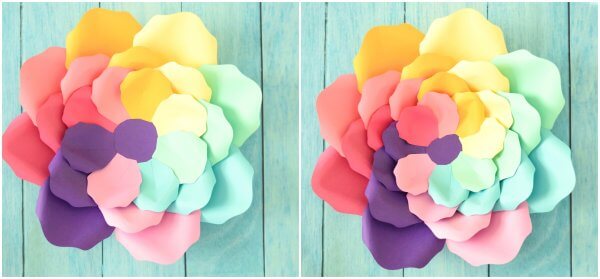
Step 11: It’s now time to move onto the 4th layer. I will keep repeating the exact same pattern with the colors.
Step 12: Finally, add in the 5th layer of extra small petals the same way we did the last four layers.
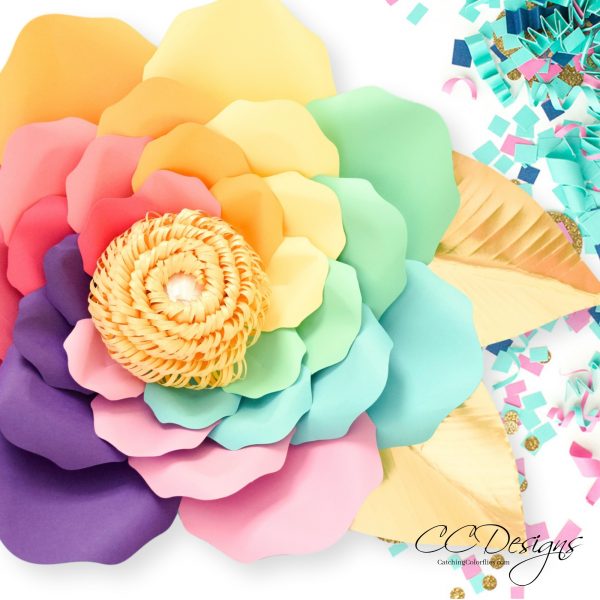
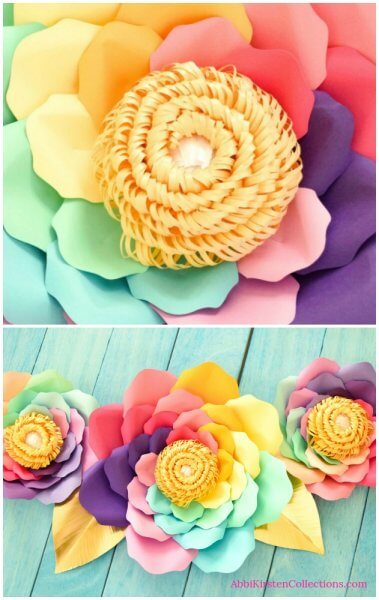
Step 13: To finish, add in a pompom center. Basic pompom PDF instructions are included with the templates or opt for a fun swirl pompom center with video instructions.
There you have it. A beautiful, fun, unicorn magic-filled tutorial to brighten your party, nursery, and/or home decor! How would you use this flower? Tell me below!
Follow along step-by-step with this video tutorial

Magical Unicorn Large Rainbow Paper Flowers
Bring whimsy and beauty to any party or home decor with these large rainbow paper flowers. The magical, colorful swirled flowers can be extra large and are perfect crowns for your children or their unicorns. This easy rainbow flower papercraft can be made using our written or video instructions.
Materials
Instructions
Step 1: Cut Out Your Petals And Base
There are 8 different-colored petals in each layer. Cut the following number of petals:
- Extra Large: 8 Petals
- Large: 8 Petals
- Small: 8 Petals
- Extra Small: 8 Petals
- Cut out the new Petal Perfect Base
Step 2: Petal Slit And Overlap
- Cut 2-inch slits at the bottom of each petal. Slightly overlap the cut edges to create a curve, then glue them together.
- Do this for all the petals.
Step 3: Curl The Petals
- Curl the top edges of the petals downward slightly to shape the petal. Use a marker, pencil, wood dowel, or the tools in my Paper Blooms Shaping Mat & Rolling Tool Kit.
- Repeat with all the petals.
Step 4: Add Bottom Petal Layer
- Glue each of the eight XL bottom petals over each side of the Petal Perfect Base. The petals will overlap.
- Begin with the dark purple petal.
Step 5: Add The Remaining Flower Layers
- Use the eight large petals to create the second layer of the rainbow flower.
- Start with the large dark purple petal on top of, and to the right, of the first layer XL dark purple petal.
- Layer the rest of the second row in the same color order so that each color is slightly offset from the same color beneath it.
- Your large dark purple petal should be between the XL dark purple and the lighter purple petal.
- Follow the color pattern and overlap technique for the remaining rows to create a color spiral.
Step 6: The Flower Center
- Create the flower center from the included PFD instructions or the video tutorial.
- Glue in the pompom center.
Now you have a fun, unicorn magic-filled rainbow paper flower to brighten your party, nursery, and home!
Discover More
My mission is to inspire you to nurture the creative magic inside your soul – bringing you fun, easy-to-learn DIY projects, and quality template designs. I share various projects but specifically love paper crafting and flowers. Interested in more flower tutorials?! I’ve created dozens of signature designs for you to enjoy – starting with my best seller, The Art of Giant Paper Flowers, and my Member Vault full of hundreds of paper crafts and Cricut crafts.
Feeling overwhelmed? Start here with my tried and true Resource List!
Thanks for letting me pop into your day!