DIY Paper Butterfly Wreath for Spring
This post may contain affiliate links that won’t change your price but will share some commission.
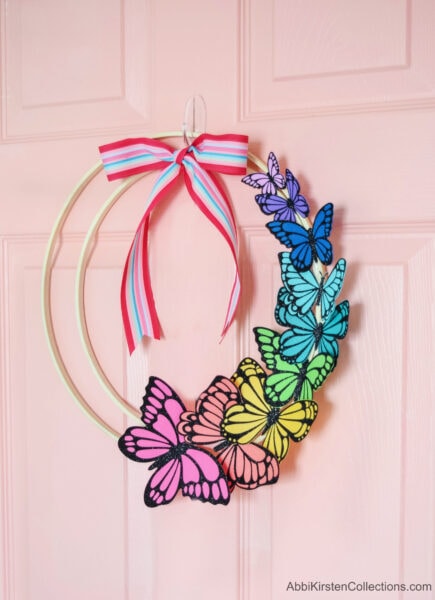
I absolutely love hanging wreaths in my home – they are such a great way to freshen up your home decor throughout the seasons. Wreaths can also be kept year after year and reused! If you visited Abbi Kirsten Collections blog before, you know I am an immense lover of papercraft. When I played with paper and experimented by combining iron-on vinyl with cardstock, I created a new way to make easy DIY paper butterflies, I decided to use the paper butterfly craft to make a colorful DIY wreath for spring- what’s more cheerful than a flock of rainbow butterflies?!
Because of the butterfly wings’ intricate nature, this papercraft will require a Cricut machine or a similar machine.
If you’re looking for more paper crafts that you can make with your Cricut machine, make sure to check out my favorite 21 Easiest Paper Flowers For Beginners!

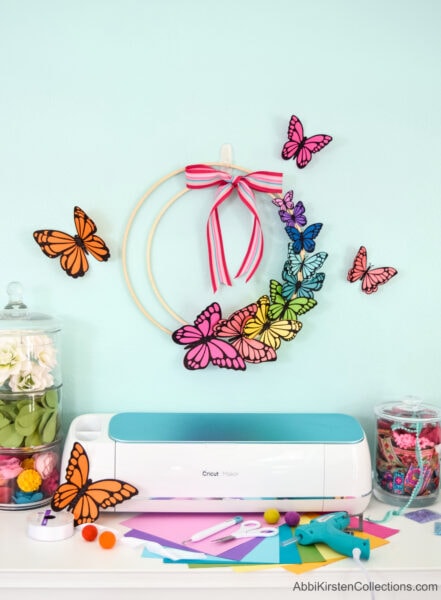
I will be using an embroidery hoop to create this DIY wreath project, but you could use a traditional wreath base as well. or you can build the reef. You will need to make either your paper butterflies or paper flowers. I am using my easy DIY paper butterfly tutorial, and I have created the butterflies in a variety of rainbow colors and sizes.
More Craft-Tastic Projects
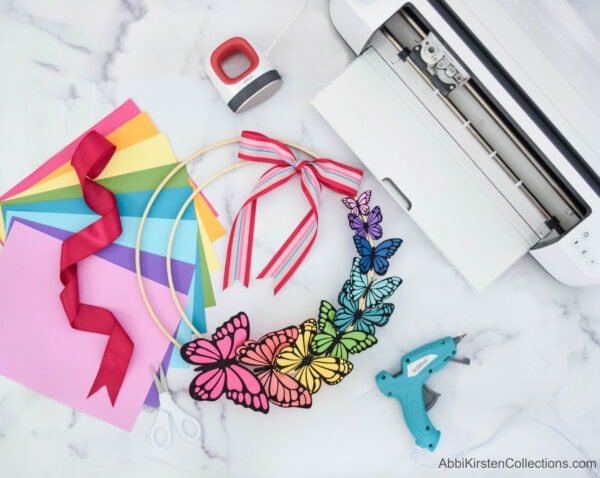
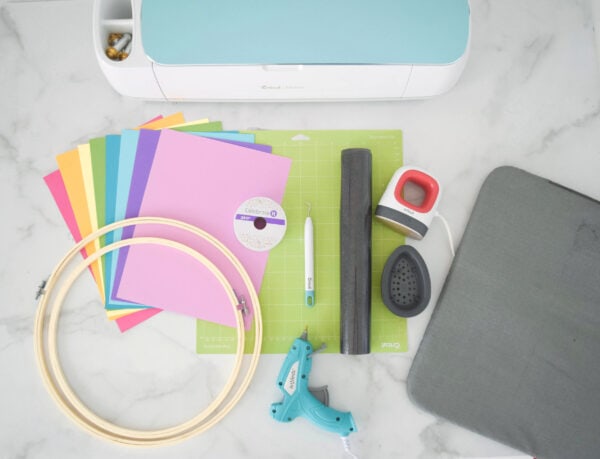
DIY Wreath for Spring – Supplies to Make the Paper Butterfly Embroidery Hoop Wreath
- Embroidery hoops or any wreath base
- Glue gun
- Premade paper butterflies or paper flowers. Check out my freebie orchid templates here!
- Ribbon for wreath
- Command hooks to hang your wreath
How to Make Paper Butterflies
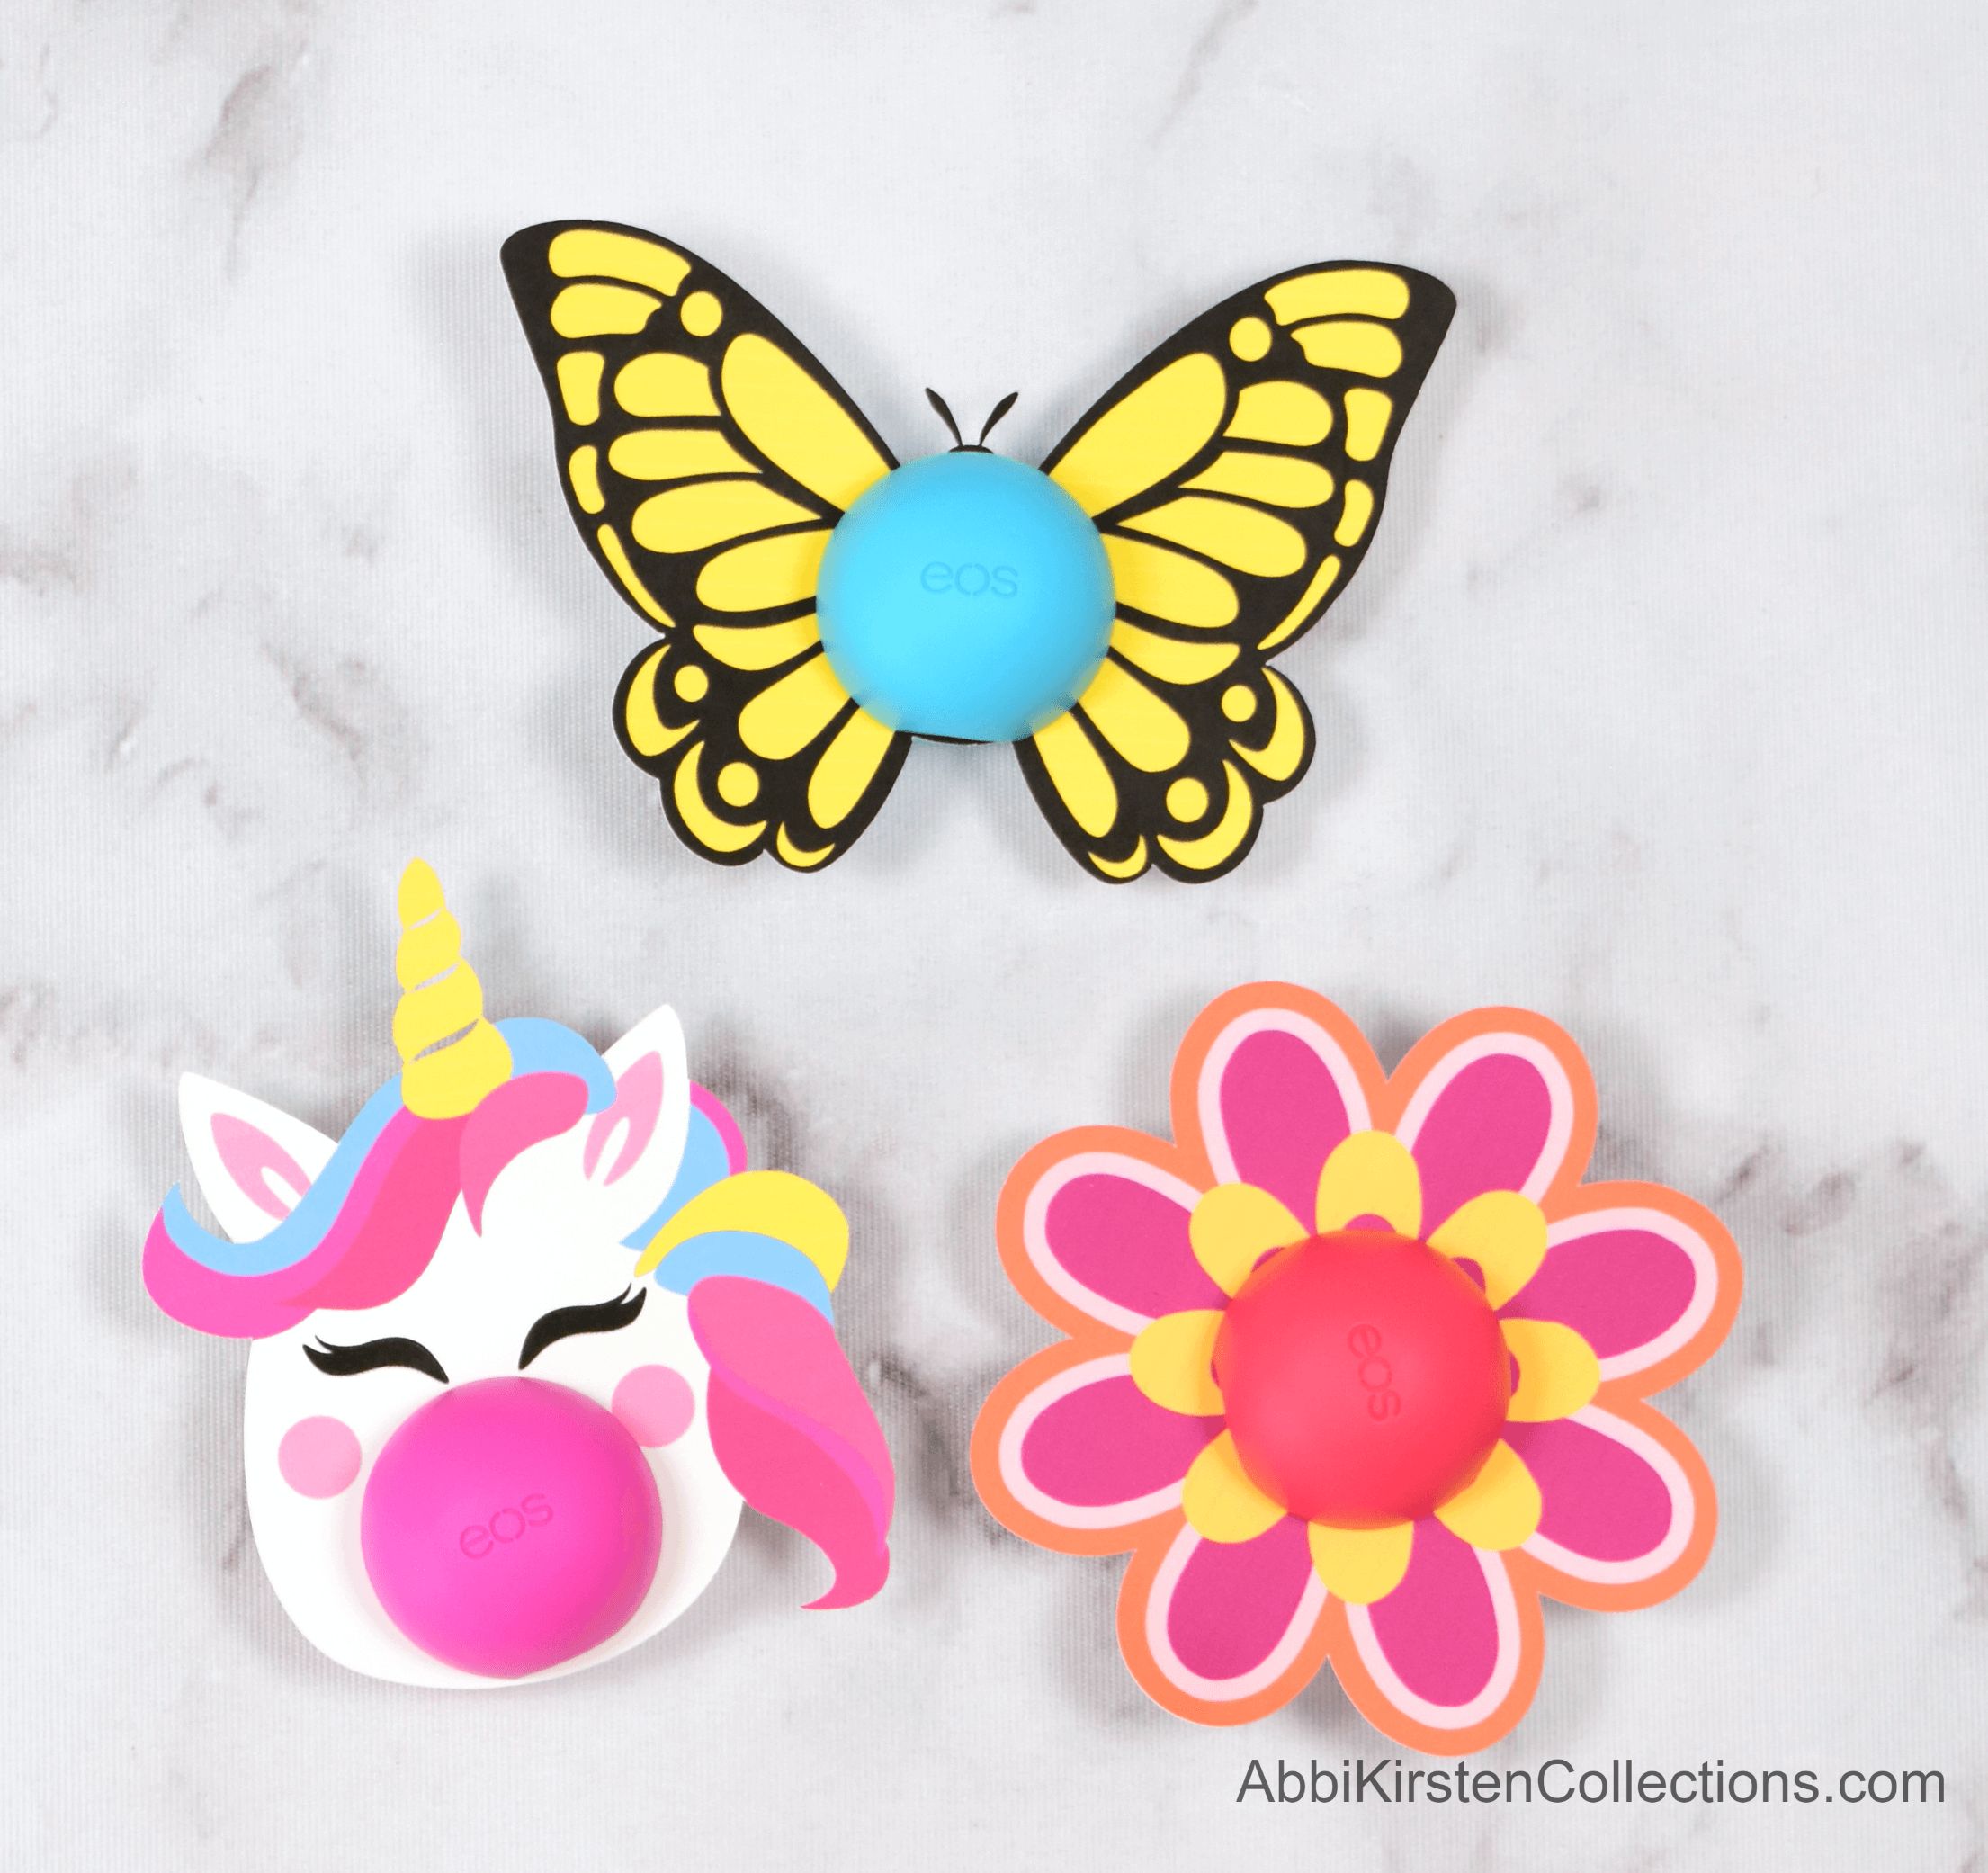
To make the paper butterflies pick out some cardstock and iron-on vinyl – yes, I said, iron-on vinyl! You can find out why I used iron-on HTV and view my video tutorial here!
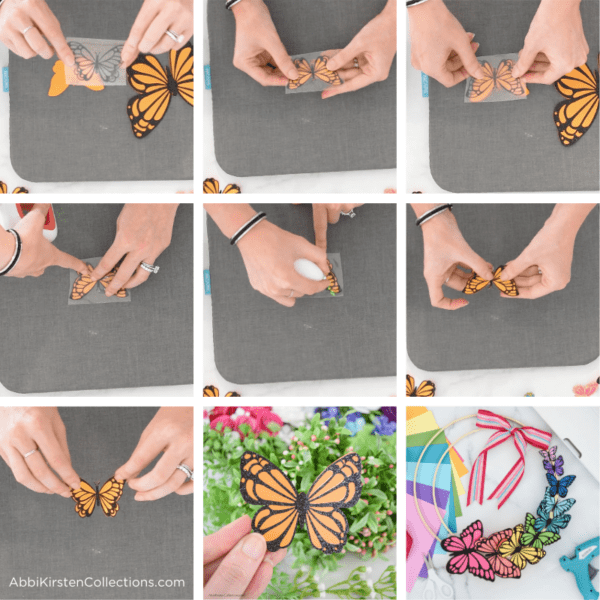
- Start by loading the butterfly templates into Design Space. Learn how to upload an SVG cut file to Cricut Design Space here. I also have some free butterflies here as well!
- Scale the butterflies to your preferred size. I made nine butterflies scaled progressively smaller. And, of course, they were rainbow colors!
- I cut the solid butterfly piece in cardstock and the intricate piece in glitter black iron-on vinyl.
- After weeding my iron-on vinyl, I used my Easypress mini to transfer the HTV to the cardstock. I used the medium setting for about 30 seconds.
- Repeat the process for all your butterfly pieces.
DIY Butterfly Wreath Video Tutorial
Now that we have our paper butterflies, we can start building our DIY wreath for Spring! The video tutorial above will show you step-by-step how to make this spring wreath, or you can take a glance at the steps in the pictures below.
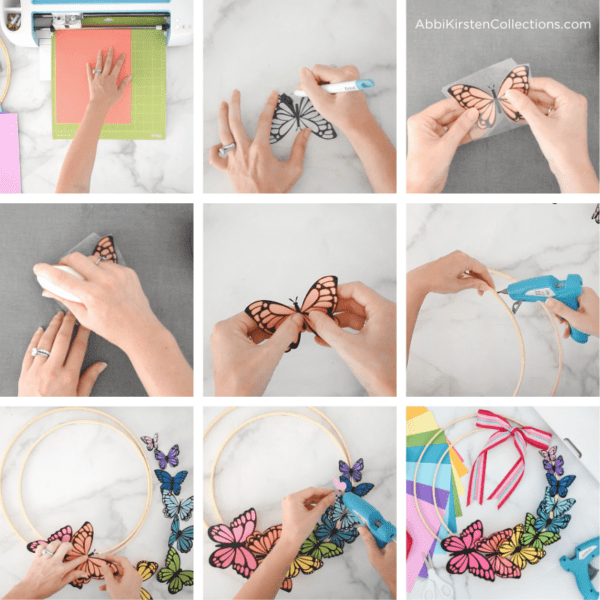
- Using a large embroidery hoop, open the two pieces and separate them. You want to use the piece that does not have the metal screw-on top I used to and watery poops in an extra-large size and a large size because I wanted to have an offset look to my wreath.
- Glue the smaller embroidery hoop inside the larger one using your hot glue gun. The spot where the two wreaths are glued together and meet is where you want to start your first butterfly or paper flower that you may add to the wreath.
- I’m just covering one side of the embroidery hoop in paper butterflies for my paper butterfly wreath. I start at the bottom with the largest butterfly and then work progressively up to the tiniest butterfly.
- Once my butterflies are added to the wreath, I finish it off at the top by tying a bow as a decorative ribbon. The ribbon part is, of course, entirely optional but can add a nice additional touch.
Just like any homemade wreath, you can personalize the final look in so many different ways. DIY home decor visit my DIY Paper Orchid Flower Tutorial and my Custom Soundwave Art craft project.
What was your take on this butterfly DIY wreath project? Please share it with me over in my Facebook group here!

DIY Paper Butterfly Wreath
Learn how to make a colorful rainbow paper butterfly wreath, perfect for Spring decor! This easy tutorial includes paper butterfly templates and a helpful video with step-by-step directions.
Instructions
How to Make Paper Butterflies:
- Start by loading the butterfly templates into Design Space. Learn how to upload an SVG cut file to Cricut Design Space here. I also have some free butterflies here as well!
- Scale the butterflies to your preferred size. I made nine butterflies scaled progressively smaller. And, of course, they were rainbow colors!
- I cut the solid butterfly piece in cardstock and the intricate piece in glitter black iron-on vinyl.
- After weeding my iron-on vinyl, I used my Easypress mini to transfer the HTV to the cardstock. I used the medium setting for about 30 seconds.
- Repeat the process for all your butterfly pieces.
How to Make the Paper Butterfly Wreath:
- Using a large embroidery hoop, open the two pieces and separate them. You want to use the piece that does not have the metal screw-on top I used to and watery poops in an extra-large size and a large size because I wanted to have an offset look to my wreath.
- Glue the smaller embroidery hoop inside the larger one using your hot glue gun. The spot where the two wreaths are glued together and meet is where you want to start your first butterfly or paper flower that you may add to the wreath.
- I’m just covering one side of the embroidery hoop in paper butterflies for my paper butterfly wreath. I start at the bottom with the largest butterfly and then work progressively up to the tiniest butterfly.
- Once my butterflies are added to the wreath, I finish it off at the top by tying a bow as a decorative ribbon. The ribbon part is, of course, entirely optional but can add a nice additional touch.
JOIN THOUSANDS OF CRAFTY BESTIES INSIDE THE FREEBIE VAULT!
Join the Abbi Kirsten Collections community, and as a thank you I will give you the keys to the prettiest Freebie Vault you have ever seen! With hundreds of freebies and new ones added every month, you will have endless craft projects at your fingertips. Printables for kids, home decor, Cricut craft projects, paper flowers, free SVG cut files, and more are waiting for you!
Hey, Crafty bestie! I’m Abbi!
I’m thrilled you are here! I have spent the last 10+ years making messes and magic in my home studio to make the world a more colorful place, one craft at a time! I’m on a mission to nurture the creative magic inside your soul and bring that bursting imagination inside you to life with easy-to-learn tutorials. If you haven’t yet, be sure to join the subscriber community to gain access to all my freebies or visit my signature design shop, Catching Colorflies!