DIY Paper Poinsettia and Holly Leaf Christmas Garland
This post may contain affiliate links that won’t change your price but will share some commission.

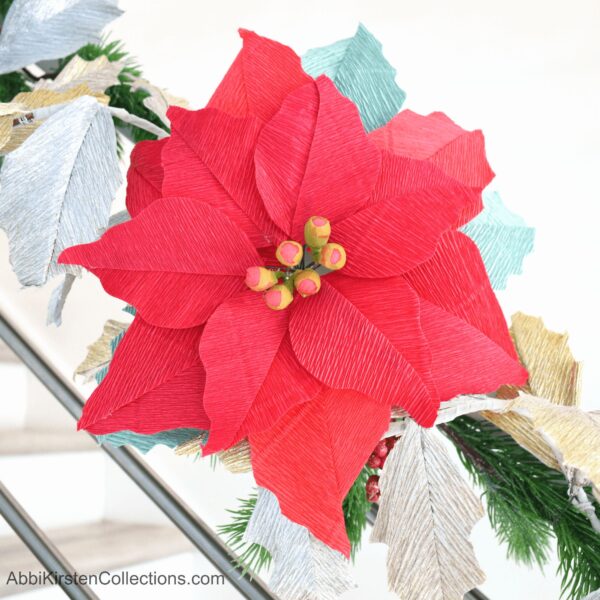
DIY paper flowers work for any season and any holiday. This craft tutorial will teach you how to make a DIY Christmas garland, which I am teaching you today with crepe paper poinsettias and holly leaves! This Christmas paper garland craft is perfect for displing in your home, such as hanging it on a Christmas tree or styling it onto a mantle for your holiday decor. But the best part is you can reuse this Christmas garland year after year!
I have a long history with paper poinsettias, such as these small cardstock poinsettia designs and even an 18-inch poinsettia wallflower!
If you need more Christmas crafts this holiday check out all the projects I have here!
First, let’s review the supplies, tools, and materials needed to craft this poinsettia and holly Christmas paper garland.
Supplies for DIY Christmas Garland Craft
- Cricut machine (don’t have a Cricut? I’ve gotcha covered! Scroll down for details!)
- Crepe paper
- Detail Scissors
- Thick floral wire
- Thin 22 gauge wire
- Floral tape
- Pearl stamen clusters
- Wire clippers
- Rotary blade
- Strong grip mat or fabric grip mat
- Crepe poinsettia and holly templates (download for free below)
Download The Free Poinsettia and Holly Templates
These paper poinsettia and holly templates are what I use to create the Christmas paper garland featured in this tutorial.
The poinsettia templates are FREE inside the Abbi Kirsten Craft Vault!
Create your free account via the form below, or log in and download this design to start crafting right now! Use the keyword “poinsettia” or design #936
What if I do not have a Cricut machine or the Maker that works with the rotary blade?
No Cutting Machine: There are printable PDF files included in my templates that can be hand-cut with scissors, so you can still make this craft! I recommend having a good pair of craft scissors AND detail scissors on hand.
No Cricut Maker Machine: If you are an Explore user, you can follow this tutorial with regular cardstock instead of crepe paper if you do not have the Maker with the Rotary blade option – OR cut by hand, as mentioned above!
Cricut Design Space Set up for Paper Poinsettias and Holly Leaves
If you are new to Cricut, learn how to upload an SVG cut file here.
Likewise, if you need to learn how to completely master your Cricut machine watch my FREE Cricut workshop here.
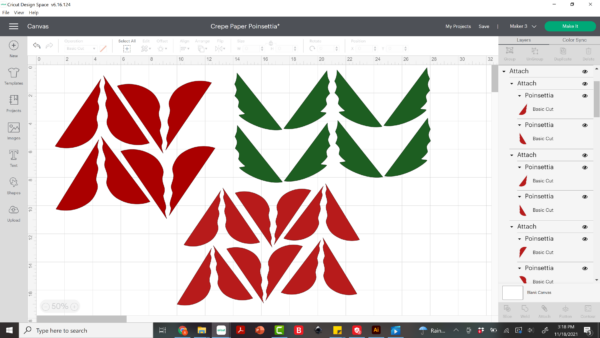
Firstly, you need to know how to cut your poinsettia petals and holly leaves with the grain running diagonally.
Turn each leaf and petal at the diagonal on the canvas. Use your Attach tool at the bottom of the Layers Panel to ensure it will cut out exactly as shown on the canvas.
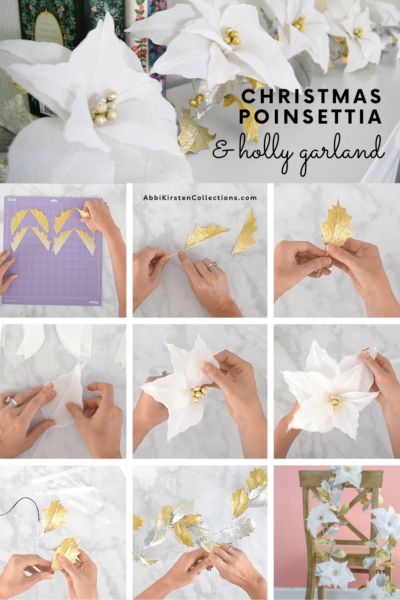
How to Make the DIY Christmas Poinsettia and Holly Garland
Click play to watch the full step-by-step tutorial for the DIY Christmas poinsettia holly garland. In addition, you can keep reading for a picture overview of the project as well.
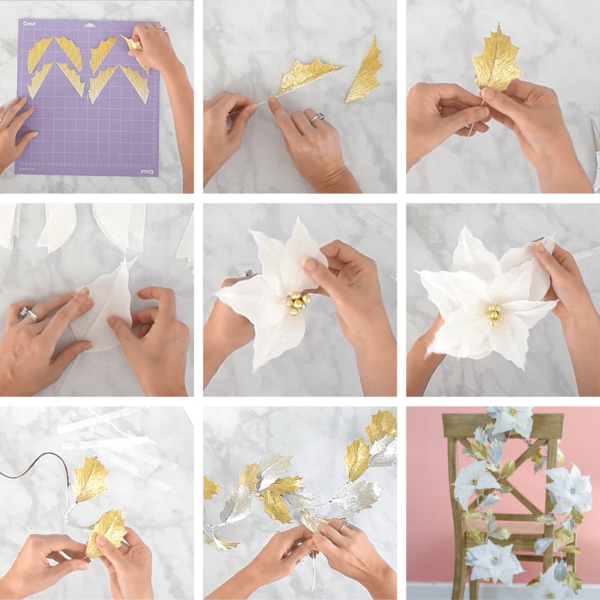
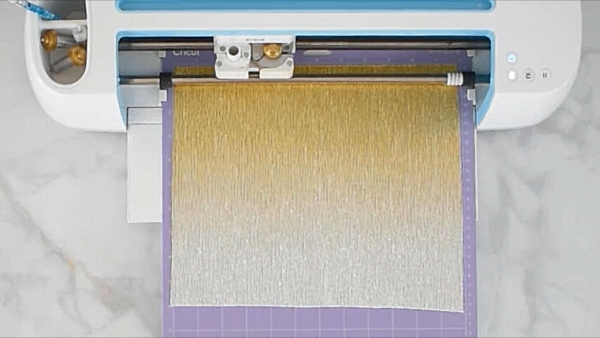
- Start by cutting out your templates. I use 5-6 poinsettia petals (10-12 halves) and about 50 leaves (100 holly leaf halves) for my 5-foot garland. Make sure you cut so the grain is running diagonally as should above in the Design Space setup. If you are cutting by hand, turn the template so that the grain runs across at an angle as you cut out the petals.
- For the poinsettia petals and leaves, you will add a line of hot glue down the right edge of the leaf. Then, overlap the petals and leaves slightly, sandwiching the thin wire in between to create the stemmed leaves and flower petals.
- Repeat this for all the poinsettia petals and holly leaves.
- For the pearl spray stamen, wrap each pearl with some crepe paper and secure it with floral tape. Your pearl sprays will be the center of your poinsettias.
- To make the poinsettia, start with the smaller petals and style them around the pearl stamen. Wrap in floral tape to secure. Place the larger poinsettia petals next and style them in between the smaller petals.
- Likewise, to build the garland, add each holly leaf to your long wire base with floral tape and work your way down the garland branch.
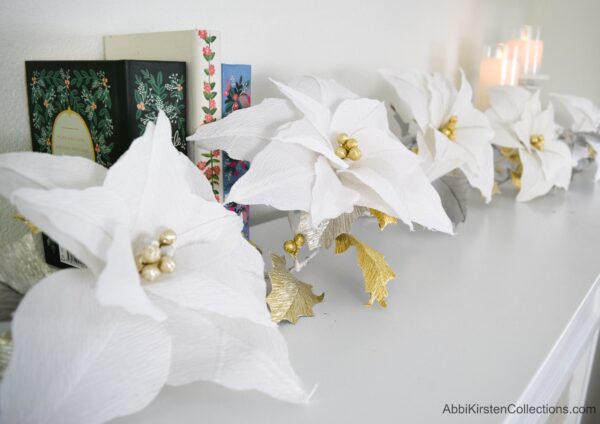
- Finally, style your DIY Christmas garland on a mantle or tree and hook your poinsettia flowers around the garland!
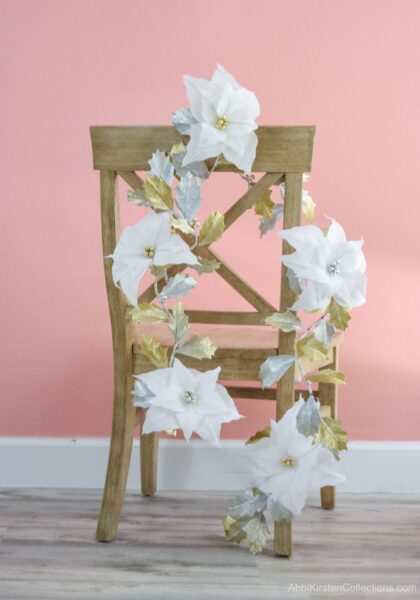
How would you use this DIY Christmas garland in your home? My favorite ways to display the paper garland are on a mantle, table, Christmas tree, or stair banister.

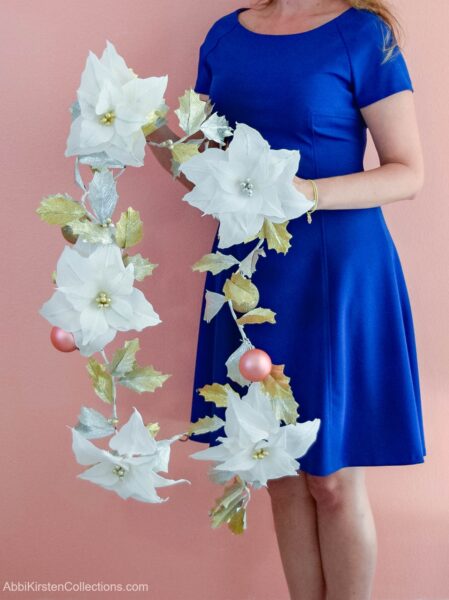
DIY Paper Poinsettia Flower and Holly Leaf Christmas Garland
Use this tutorial to make a beautiful large crepe paper poinsettia and holly leaf five-foot garland. Use traditional colors or make the decor more elegant with shades of silver and gold. You can hand cut this craft or use a Cricut cutting machine.
Materials
Instructions
Step 1: Cut The Petals and Leaves
Cut your templates by hand or with your Cricut machine. For a five-foot garland, you will need:
- 5 to 6 poinsettia petals (10-12 halves)
- ~50 leaves (100 holly leaf halves)
Be sure you cut with the grain running diagonally. If you are cutting by hand, turn the template so that the grain runs across at an angle as you cut out the petals.
Step 2: Assemble The Petals and Leaves
- Add a line of hot glue down the right edge of one leaf. Then overlap the petals and leaves slightly, sandwiching the thin wire in between to create the stemmed leaves and flower petals.
- Repeat this for all the poinsettia petals and holly leaves.
Step 3: Prepare The Pearl Sprays
- Wrap each pearl stamen with some crepe paper and secure it with floral tape. Your pearl sprays will be the center of your poinsettias.
Step 4: Make The Poinsettias
- Begin with the smaller petals and shape them around the pearl stamen with floral tape.
- Attach the larger petals next in the same fashion. Place each large petal between the gap of the smaller petals.
Step 5: Build The Garland
- Add each holly leaf to the long wire base with floral tape. Work your way down the garland branch.
Now you are ready to use your garland for decoration on a staircase banister, mantle, or around your Christmas tree!