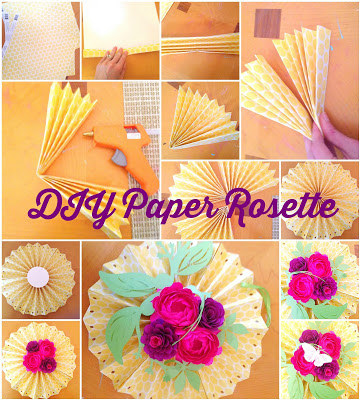
Hanging Paper Rosette Tutorial
This post may contain affiliate links that won’t change your price but will share some commission.
How to make paper rosettes step by step.
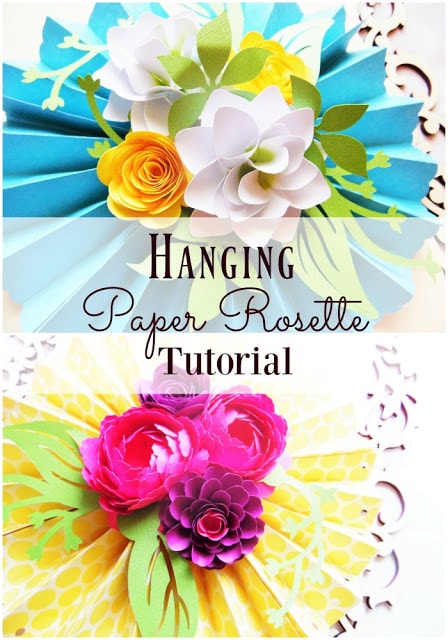
Here’s an easy craft anyone can pull off! DIY paper
rosette hanging fans with flowers. These are perfect for
hanging in a wedding arch or as a backdrop for any event.

Supplies:
Glue gun and sticks
scrapbooking paper
paper flowers – I use the Peony flower, Dahila and Rolled rosette templates.
ribbon for hanging
any other embellishments (butterflies, pearls, rhinestones etc..)
craft scissors or hole punch (optional)
circle punch or small cut out square
Instructions
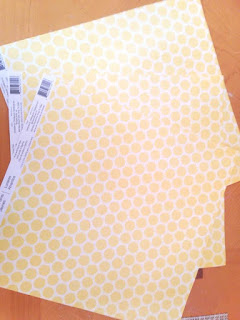
1. Pick out a pretty scrapbooking paper. Make sure it’s not card stock or it will be too thick to fold. I use 3 12×12 sheets for a hanging rosette, but if you wanted to make these as fans for your guests I would use 3 8.5×11 sheets for more appropriate size.
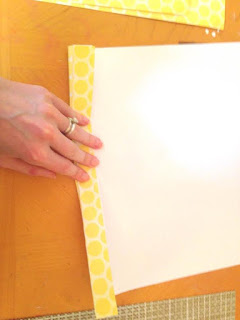
2. Begin folding like you would a paper fan,
back and forth. (you remember from elementary school 😉
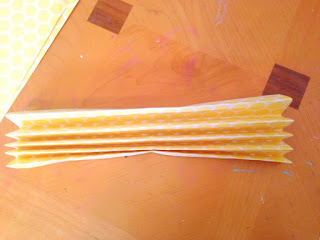
You should have something like this so far.

3. Take this piece and fold it in half.
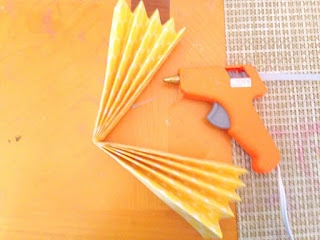
4. Now glue the inside of the fold together.
Should look like this now.

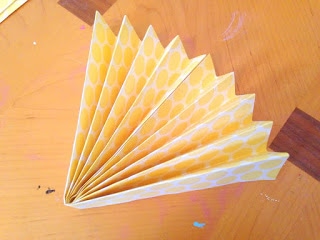
5. Repeat the above steps 2 more times with your
other 2 sheets of paper.

6. Glue the 3 pieces together. You can see I punched holes after I assembled the pieces for some extra detail.
You can also use craft scissors to
add a scalloped edge too.
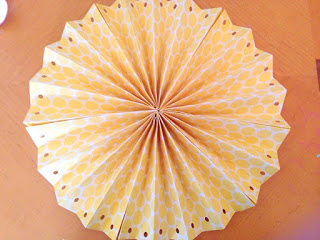
7. Now connect to form the circle.
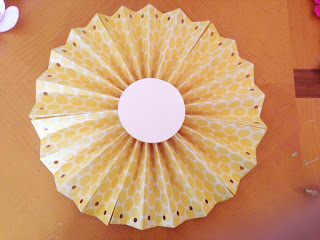
8. I use a circle punch to add a circle to
the center or cut a small square if you
don’t have a circle punch.
You can stop here if you want or go on to
add more details with the flowers.

9. The flowers I used are paper from my shop since I am a paper crafting fanatic!
The pinks are peonies, and one purple is a dahlia and the other a rolled rosette flower.
You can find all these templates available in the ‘download templates’ tab on the
home page. If you aren’t
up for crafting paper flowers
then just go buy some silk from a craft store!

10. Cut a piece of ribbon, as long a you
want and glue the ends together.
Find a good spot between creases
to slip it in and glue it.
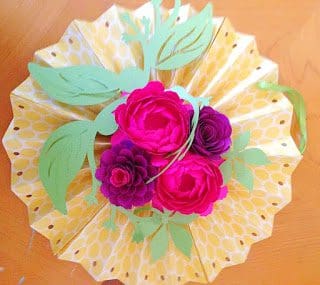
11. Add in any greenery you desire.

12. Be creative and don’t be afraid to
add other elements like butterflies and such.

If you like this please share!