How To Layer and Apply Vinyl To Wood Signs: DIY Signs With Cricut
This post may contain affiliate links that won’t change your price but will share some commission.
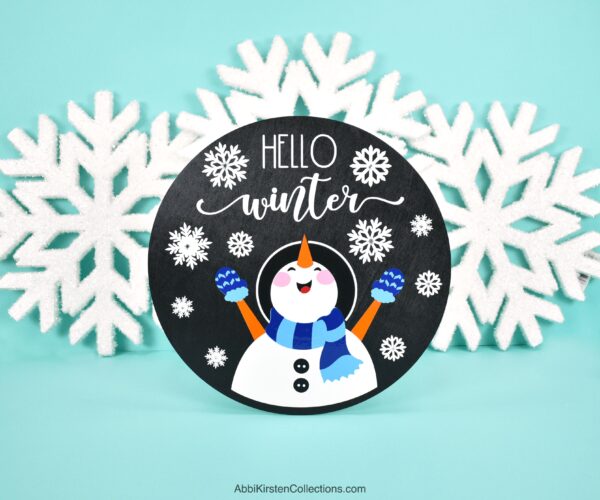
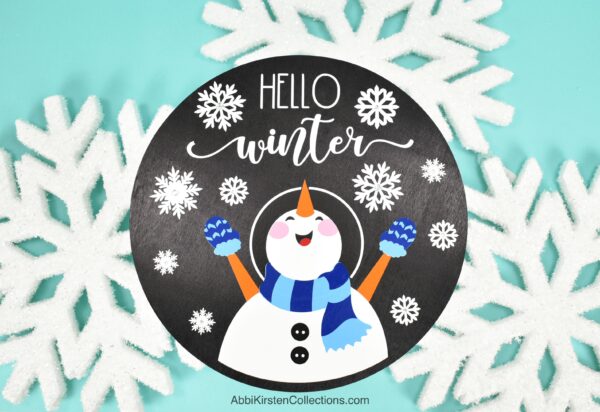
What better way to celebrate the winter season than making a fun craft that can be used as a cute sign in your home? This snowman winter sign will show you exactly how to apply and layer permanent Cricut vinyl on wood signs. You’ll learn how to layer vinyl together onto one surface—with an adorable DIY winter sign that everyone will love!
I think this method of using permanent adhesive vinyl and transfer tape with a Cricut machine is one of the best ways to make DIY decorative signs for your home or as a gift. Both permanent adhesive vinyl and iron-on vinyl can work on wood. If you are interested in learning how to apply iron-on vinyl onto wood, check out this full tutorial here.
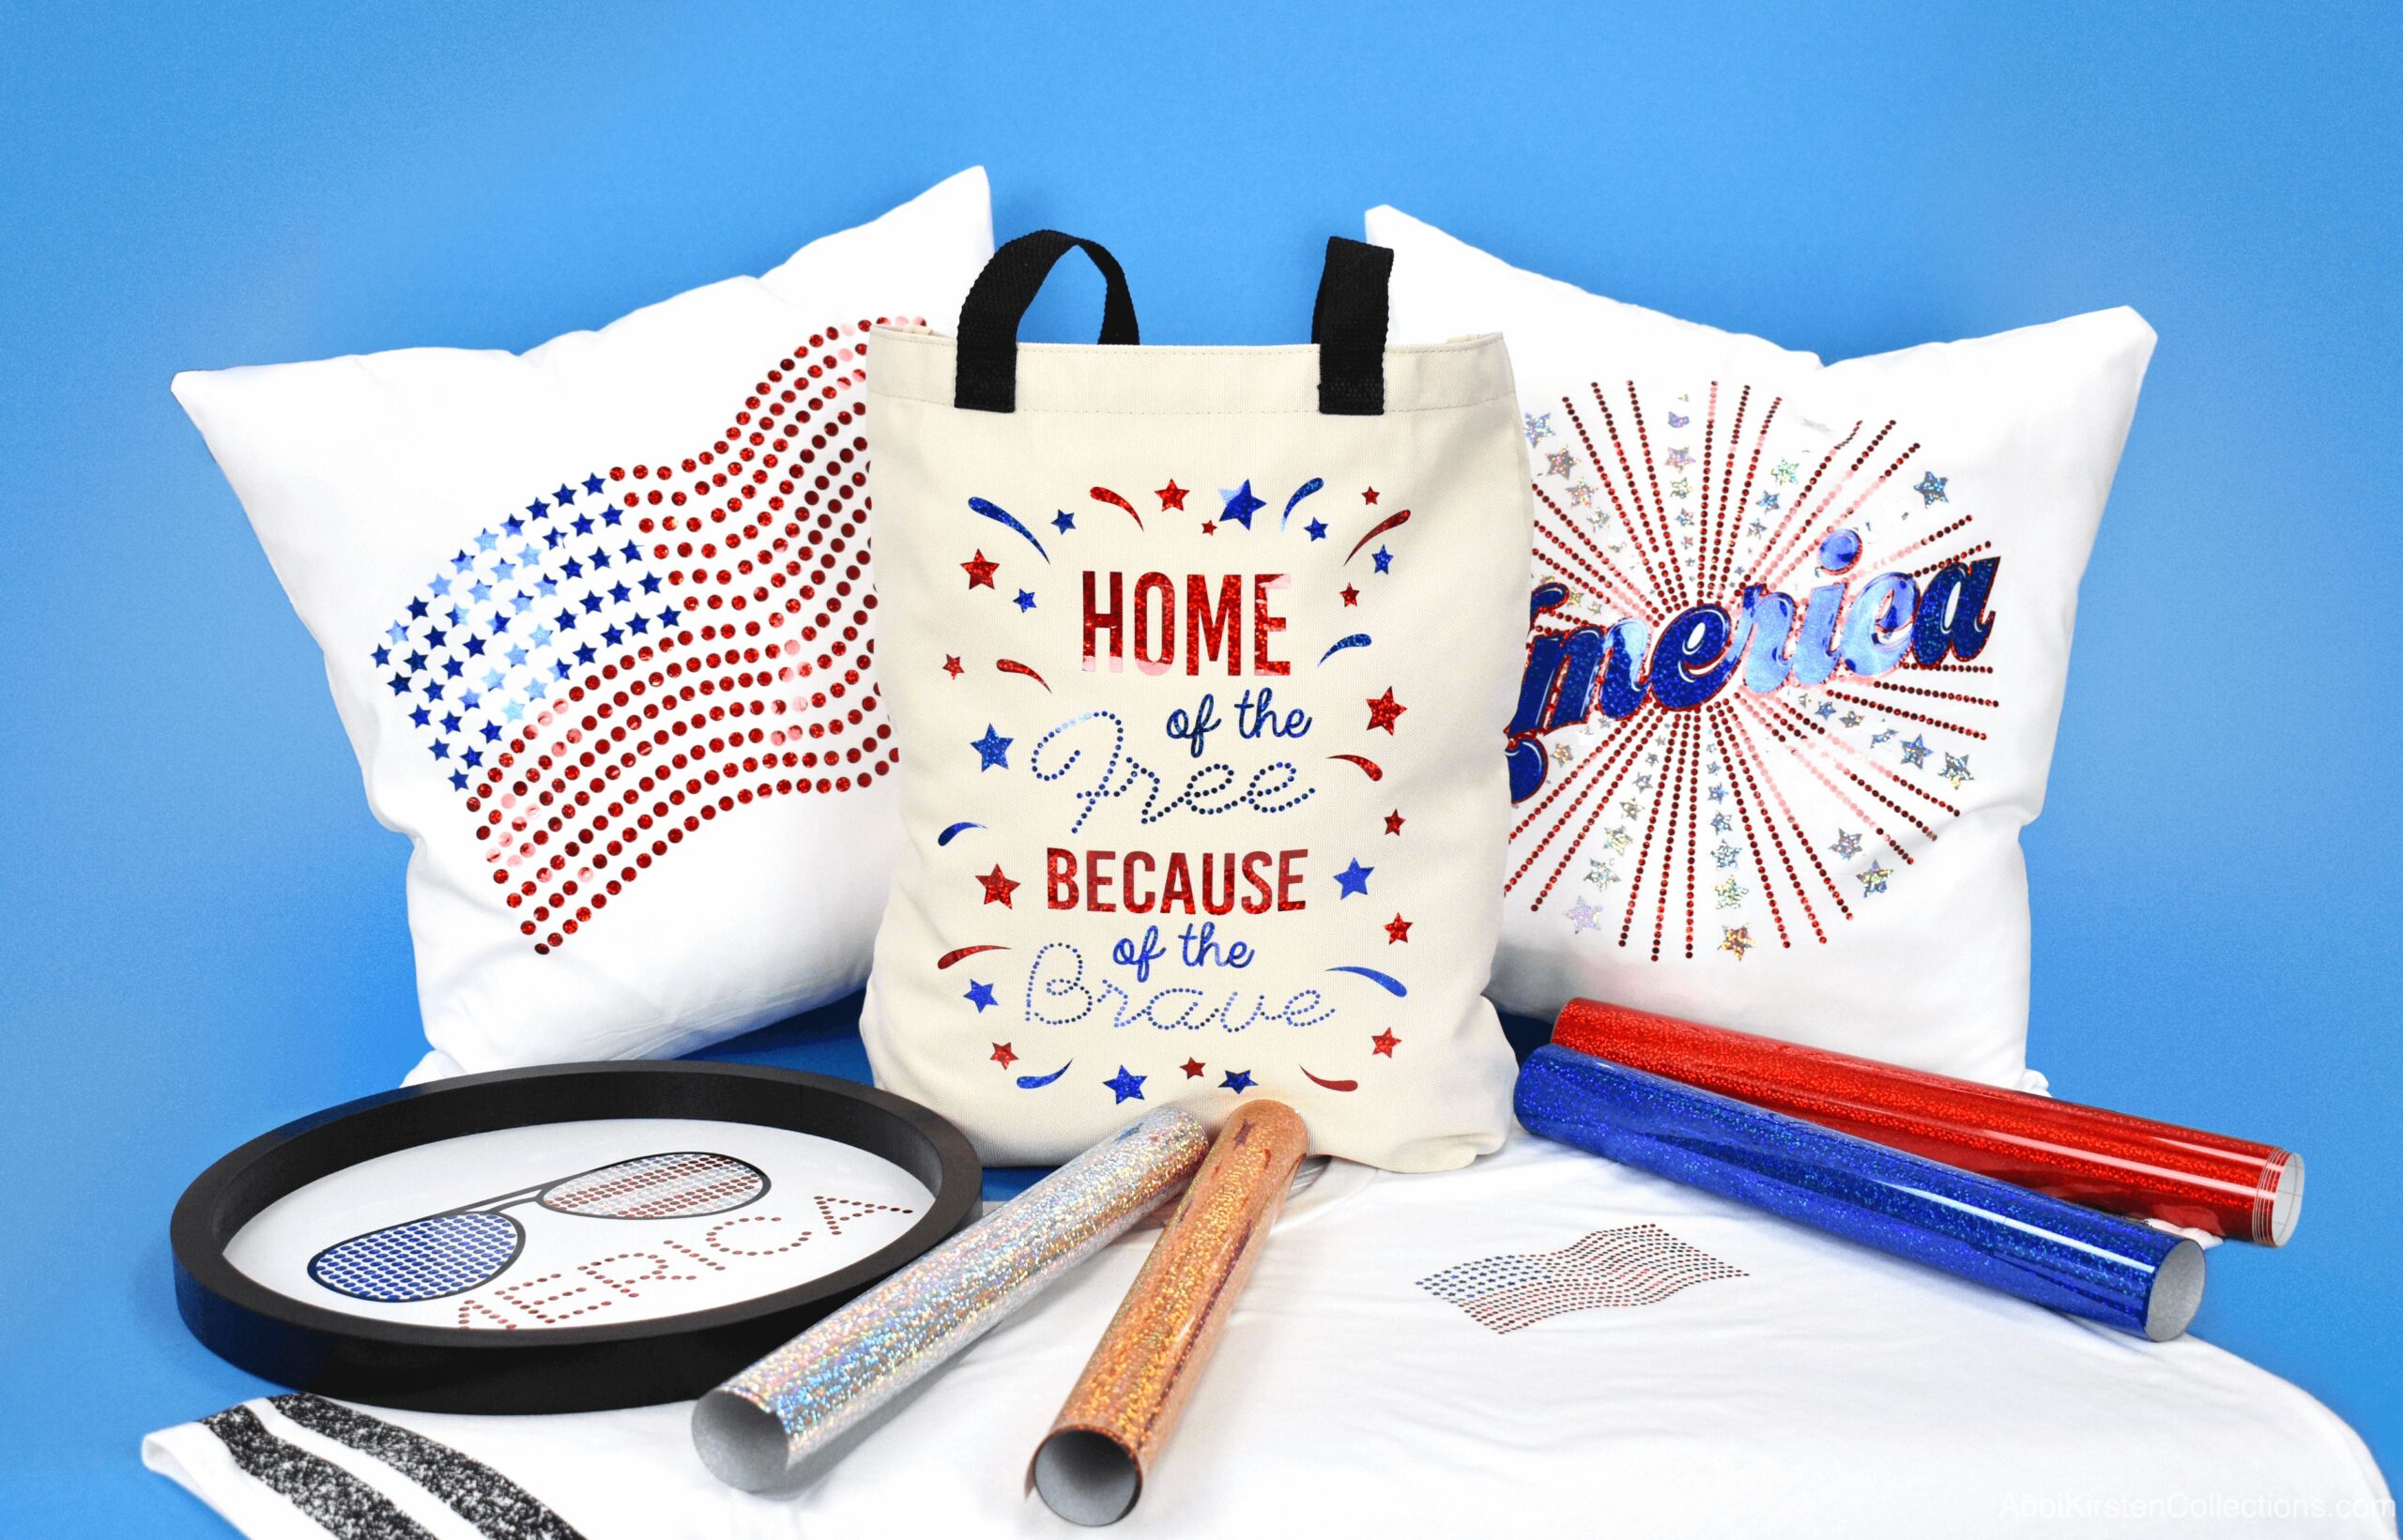
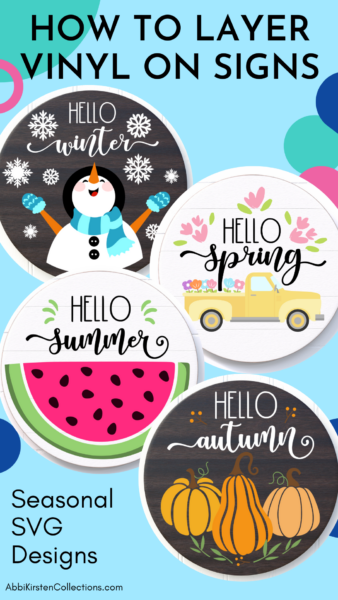
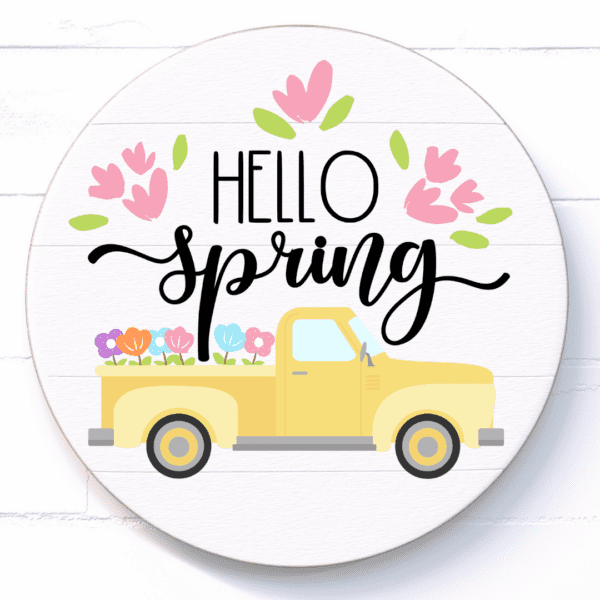
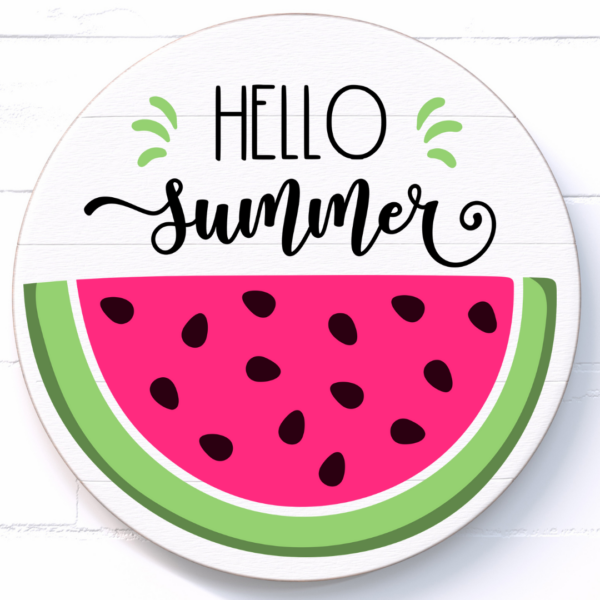
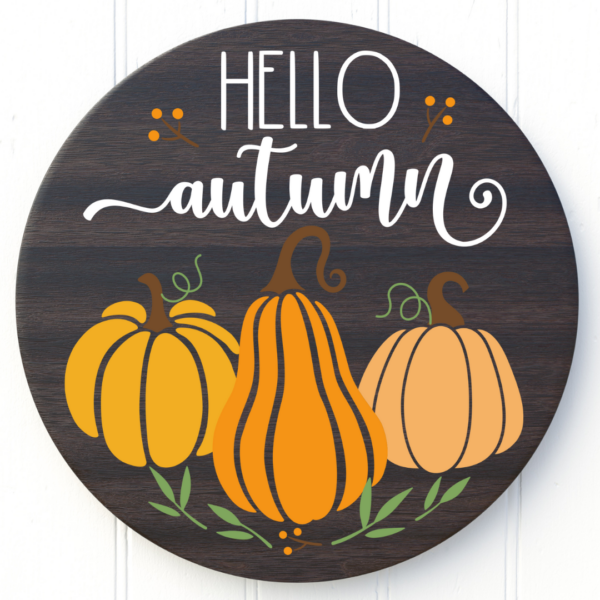
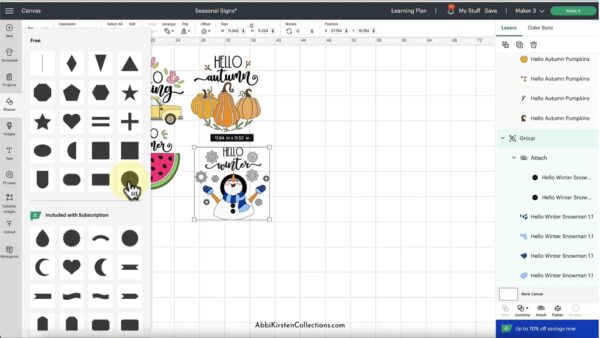
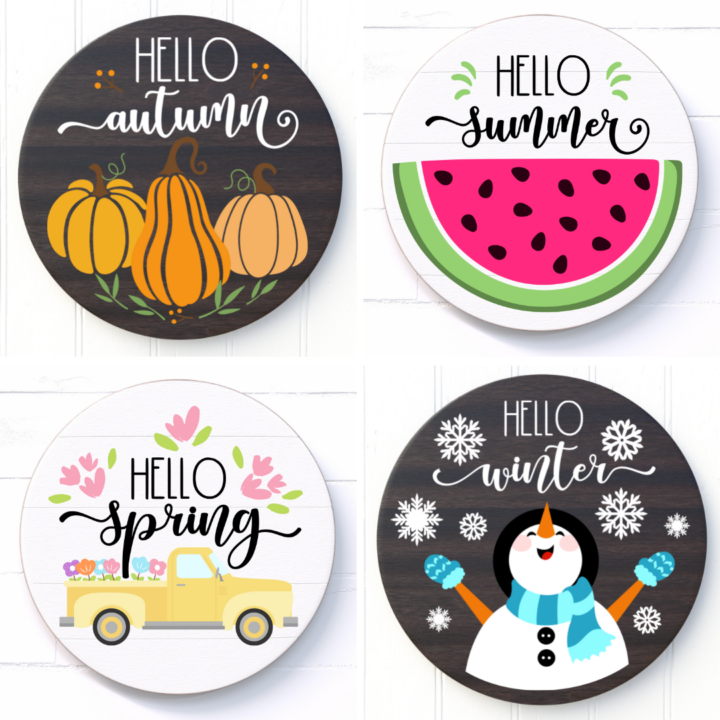
You can get the templates used in this project in the Abbi Kristen Member Vault, along with a pumpkin fall design, spring flower truck design, and watermelon summer design.
And if you love snowmen like me, you may also enjoy this pop-up snowman card.
Supplies For Seasonal Vinyl Wood Signs
- Wood sign blank
- Permanent vinyl
- Cricut machine
- Cricut Weeding tool
- Cricut mat
- Cricut Scraper tool
- Transfer tape
- Parchment paper (optional)
- Sewing pin (optional)
Download the Seasonal Sign SVG Files
Find all these spring, summer, fall and winter SVG sign designs inside the Abbi Kirsten Craft Vault! These SVG files are included in the Premium Member Craft Vault. Login here or sign up below! Once logged in, search the keywords “seasonal signs” to find all these designs. Here are the direct links as well!
- Snowman hello winter SVG
- Flower truck hello spring SVG
- Watermelon hello summer SVG
- Pumpkin patch hello autumn SVG

DIY Snowman Winter Sign Video Tutorial
If you haven’t layered vinyl on wood before, I wanted to add a couple of tips and tricks for getting your design set up properly in Cricut Design Space, which will make cutting and transferring your vinyl a smooth process. Below is a full video tutorial for how to put vinyl on wood and layer permanent vinyl.
Seasonal Vinyl Wood Signs Tutorial
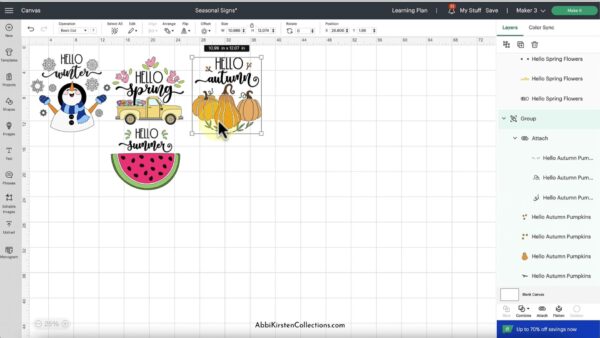
Setting Up Your SVG Files In Design Space
Once you upload the SVG file in Cricut Design Space, you’ll want to note the size of your sign. These seasonal design templates were created for round signs, but you could also work the design onto others. After uploading, you’ll likely need to scale your sign larger or smaller depending on the size of your sign. Make sure you measure the blank you are using.
I recommend giving yourself some wiggle room around the sign because you don’t want things to run right to the edge. I usually give myself roughly .5 inches around the circle’s circumference.
Use The Guide Tool For Size Reference
You can use the “Guide” feature in Cricut Design Space for size reference! If you have a round sign, click on the circle under “Shapes.” Scale your shape to the exact size of your sign. Select the circle, go over to “Operation,” and select “Guide.”
The purpose of guides in Design Space is to give you a size reference to help with notes. I really like this feature because it never cuts out when you go to the “Cut” screen. It automatically goes away; you don’t need to hide it or shift through other mats!
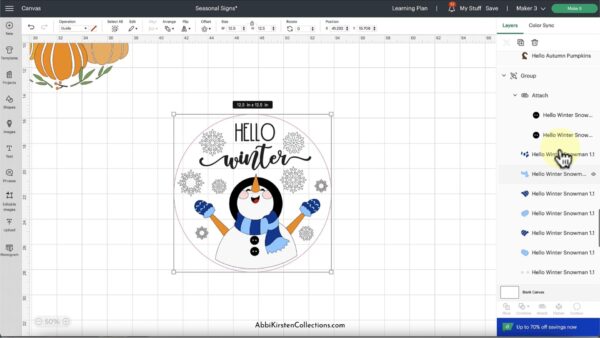
When you insert the snowman into the circle you created, you should see some space around the snowman. The “Guide” tool is super helpful to see what it’s going to look like when it’s printed on a sign (this trick is great for any sign project). You can adjust the snowman’s size however you’d like!
How To Use The Attach Tool For Layering Vinyl
The “Attach” tool is helpful and should be used whenever possible. If you attach things in smaller sections, your job will be a lot easier when layering the different parts. For more help with Design Space tools check out how to use Combine Tools here!
When you upload a design, it will be grouped. Right-click a design element and click “Ungroup.” Now, you should be able to select the pieces individually.

It would be really helpful if the spacing between the words “Hello” and “winter” stayed exactly as it were on the canvas. If you click on your “Make It” button, you’ll notice the words “Hello” and “winter” will not be in the same position as they were on the canvas.
To fix this, click on an object, hold the shift key on your keyboard, and then cherry-pick any other element of the design you’d like to keep together.
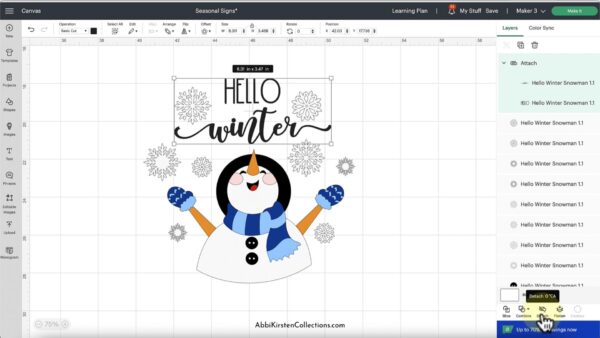
For this specific design, select the word “Hello” and hold down the shift key to select “Winter.” You can see this step reflected in your Layers panel on the right-hand side. With the layers selected, click the “Attach” tool at the bottom of the Layers panel. When you click on the “Make It” button now, you’ll see the words are now in the same position they are on the canvas. You can also select all of the snowflakes to attach together!
DIY Wood Sign With Cricut: How To Layer Vinyl
Before we go any further, make sure you’re always saving your project as you go with the save button at the top of the header menu.! Now, let’s get started with layering the vinyl on your wood sign.

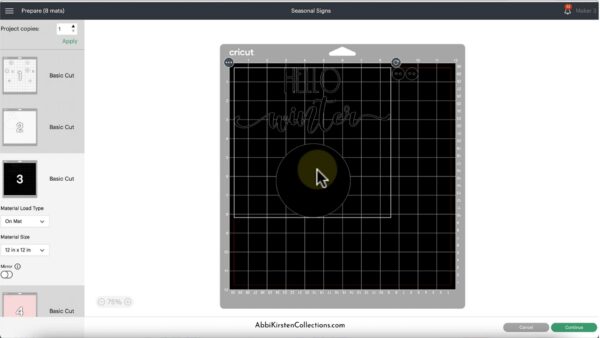
Click “Make It” and select the material. Usually, for projects like this, you’ll select a vinyl. Browse all materials and select the vinyl you’re using. Click done—now it’s time to get everything cut out!
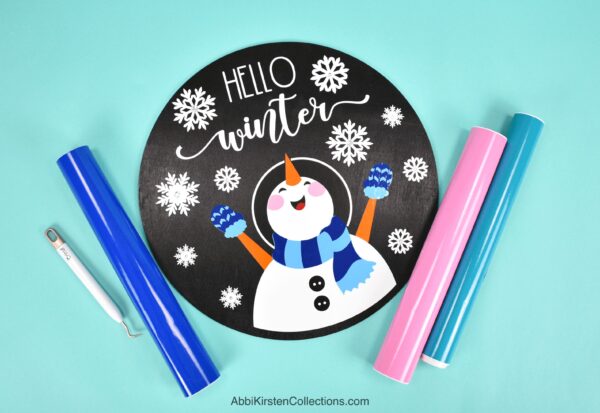
Load each color of your permanent vinyl onto your Cricut mat and let Cricut cut them out. I selected the “Permanent Vinyl” option in Cricut Design Space. If you’re using a different type of vinyl, go ahead and select the correct setting in Design Space.
This is a layered design, so we’ll get several layers prepped and put together before placing them on the sign.

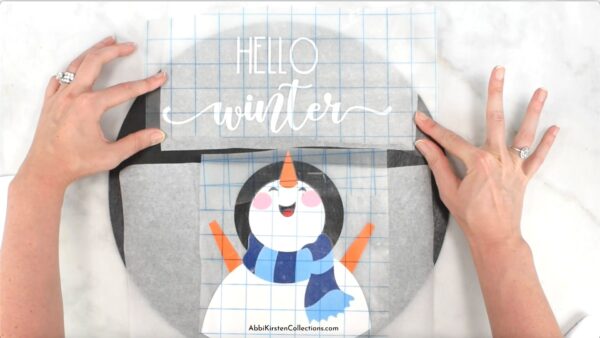
Trim some transfer tape and get ready to assemble the project! It’s helpful to look back in Design Space when putting together your sign to make sure you’re positioning things correctly.
How To Layer Vinyl: Cricut Tutorial
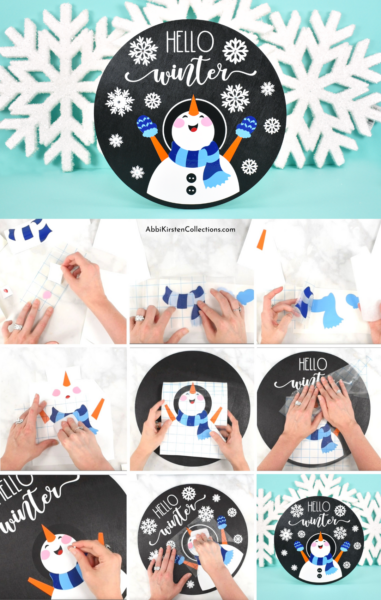
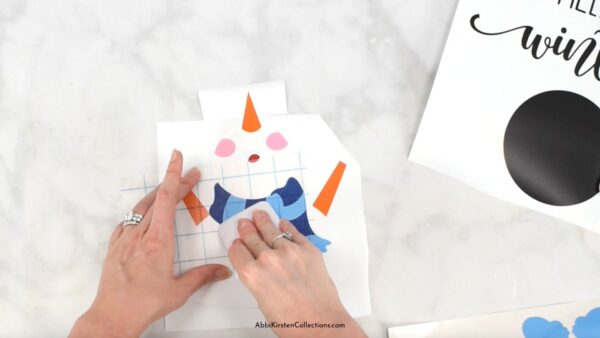
Place the snowman’s cheeks on the transfer tape, burnish the front and back sides with your scraper tool, and lift the liner away from the transfer tape.
Once you’ve got the cheeks in the right spot, place the snowman’s cheeks on the white snowman body. Do the same process with the snowman’s mouth. This process allows us to layer our design and get everything on a singular line, so we can place everything more evenly at the end. It really helps with alignment—you’ll see what I mean as we go along.
Repeat the process with the nose. Feel free to continue using the same transfer tape. Most transfer tape is sticky enough to be used 2-3 times before being discarded.
How To Layer Vinyl Using Parchment Paper
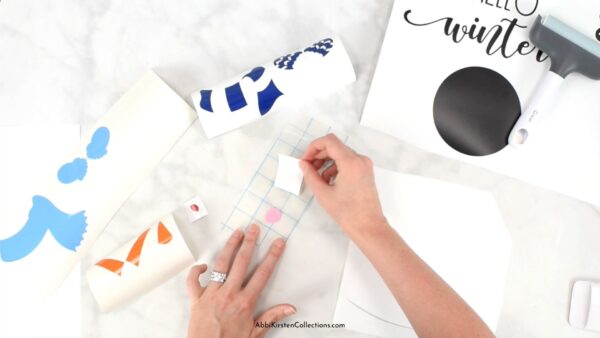
Next, repeat the process with the snowman’s scarf. If you struggle with alignment, try using some parchment paper. Place the parchment paper where it’ll cover a majority of your image. Place the top layer of the design on top of the parchment paper, and you’ll be able to see through it enough to shift things until you get that proper alignment exactly where you want.
Once you settle on it, press it down on the open side, slide out the parchment paper, and let it fall back into place. Now you have an easy alignment you’re able to create without shifting things around.
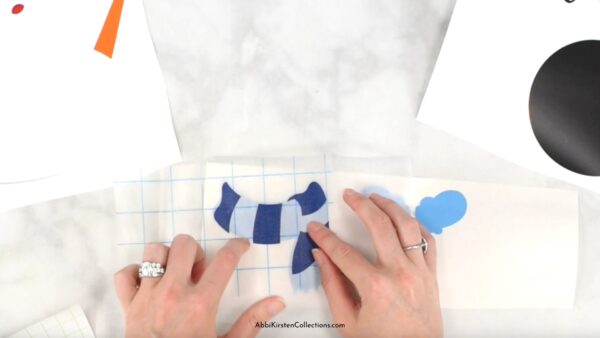
After you’ve added the scarf, go ahead and repeat the process with the snowman’s mittens. Don’t place the mittens on the transfer paper with the other elements yet. These will go on top of the snowman with the buttons toward the end of the project.

Applying The Vinyl On Wood
Now, get ready to move the snowman over to the sign. Place down your transfer tape, get it burnished with the Cricut scraper on both sides. You can use the parchment paper trick here too and even use your Cricut mat to hold down the liner if needed!
Take your painted wood sign and get ready to add the snowman to it. Find more help with painting your own wood signs here.
At this point, we have most of the snowman’s features together besides the mittens and buttons. Burnish the front and back, peel off the liner, and then place the snowman down. If placing things down on a sign is a struggle for you, you can always use the parchment paper trick on the sign to scoot things around until you have the elements in the right spot. Make sure to account for the “Hello winter” phrase to make spacing adjustments before pressing things down.
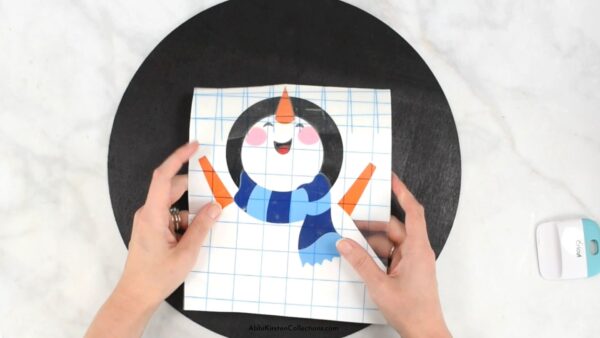
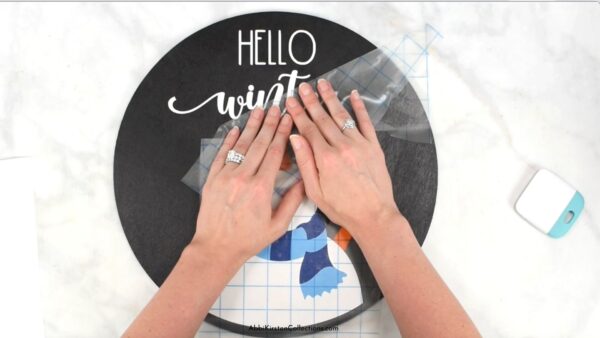
Once you’ve decided on placement, we’re going to press down the transfer tape and verify everything looks good before burnishing it.
Burnish the wording and snowman on your sign. Remove the transfer tape —slowly peel it towards you rather than lifting the transfer tape straight up. Make sure that everything is sticking properly. If it’s not, be sure to burnish it again!
How To Remove Air Bubbles From Vinyl
If there are tiny air bubbles, take a sewing pin and poke them. After releasing the air with the poke of the needle, you can flatten out that area with your Cricut scraper tool.
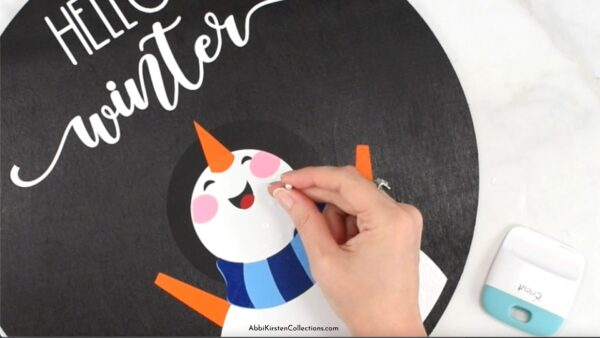
Now, it’s time to place the mittens on the sign. Pull them off their transfer tape, burnish them, and remove the transfer tape. Repeat the process with the snowman’s buttons.
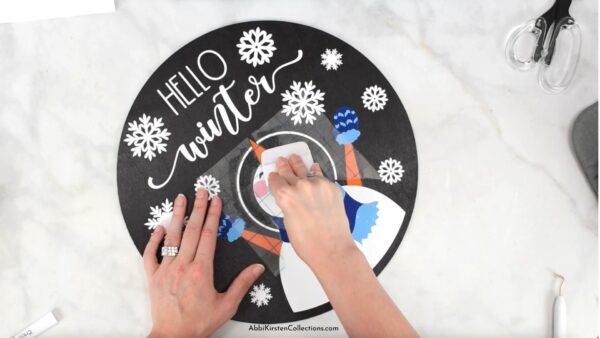
The final step is to add the snowflakes! You can pick up the entire sheet or place the snowflakes individually. I like to add each of the snowflakes individually because I feel like it gives me the most control. Don’t forget you can look back at the SVG in Design Space to guide you through this step!
You just completed a DIY snowman sign that will make your home feel festive this winter season! What do you think about using vinyl on wood? Did these tips and tricks help you to feel more confident abut how to layer vinyl on wood? Let me know your thoughts in the comments!
How To Layer and Apply Vinyl To Seasonal Wood Signs: Cricut Crafts
Colorful, hand-made signs are a great way to welcome the changing of the seasons. This craft will help you learn how to layer vinyl on wood blanks and provide you with some SVG cut files you can use, too! Celebrate the seasons with these easy and detailed seasonal signs!
Materials
Instructions
Get your SVG files set up in Design Space
- For this tutorial, we will be using the Snowman “Hello Winter” design.
- Upload the SVG file to Design Space.
- Scale your design to your wood blank size if needed - and leave some room around the edges.
- You can use the “Guide” feature and “Shapes” to get an exact shape and size.
- Insert your design into the chosen shape and use the “Guide” tool to see how it will look when printed.
- Ungroup your design once it is scaled.
- Regroup and attach objects to print together. For example, we want to keep the words “hello” and “window” together. Click on “hello”, hold the shift key, and then pick “winter” to group together.
- The layers window will show whether objects are attached or not. When you have the layers selected, you will click the “Attach” tool, and your objects will be in the same position on the canvas.
- Always save your work frequently.
How To Layer Vinyl
- Click the “Make It” button and select your material - with this craft, select permanent vinyl.
- Load each color of vinyl onto your Cricut mat and cut the designs out.
- Trim needed transfer tape while the Cricut cuts out your design.
- Place the outermost layer onto the layer beneath it using transfer tape. Be sure to burnish your vinyl. Using the “hello winter” design as an example, you would burnish the snowman’s cheek onto transfer tape, then add the cheek to the white snowman base.
- Repeat with each layer.
- To help align layers, you can use parchment or butcher’s paper. Place the paper over the bottom layer and put the top layer over the parchment paper. Once everything is aligned, slide the parchment paper out and apply the transfer.
Applying The Vinyl On Wood
- Apply the whole layered design to transfer tape and burnish it front and back. You can use parchment paper here, too, if you need help with alignment. In this example, apply the whole snowman layered design onto the wood.
- Peel off the liner of the transfer tape and place the layered design on the wood sign. Be sure to leave room for other elements like the words.
- If the design isn’t sticking properly, burnish it again!
How To Remove Air Bubbles From Vinyl
- Use the sewing pin to fix air bubbles in the transfer.
- Use the scraper to smooth down the open bubbles.
- Once the snowman has been placed and smoothed down, add the mitten layers, snowflake layers, and all the rest the same way.
You’ve done it! Try making the remaining three seasonal wood signs and learn to love the changing of the seasons!
About Abbi Kirsten
Welcome to my colorful corner of the internet, where we play with vibrant crafts and unlock your creative magic! Hang out with me and get lost in a fun array of projects, tutorials, and products, from stunning papercraft ideas to flower templates, Cricut help for beginners, and endless crafter’s hacks.
Join the Member Vault and participate in my monthly Craft-Alongs in my Facebook group to access all the magic!