How to Make a Pin for Pinterest: Easy Ways to Create Pins
This post may contain affiliate links that won’t change your price but will share some commission.
 How to Make a Pin for Pinterest
Learning How to Make a Pin for Pinterest shouldn’t be rocket science, but it is an essential part to driving traffic to your site. However, that traffic is going to depend on how well your pins not only communicate your point but resonate with your audiences needs. Your images as well as your text are equally as key to the success of your pin.
In this article we want you to walk away not only knowing the practical side of making a pin, from building images to uploading to Pinterest, but also know how to create a powerful pin that is evergreen to your business and constantly provides consistent traffic.
WIIFM Theory
Before you actually create your pin you want to step back and look at the bigger picture by stepping into the shoes of your reader or buyer.
This is called the, what’s in it for me theory.
Everybody who is scrolling on social media or a blog is looking for one thing only, what is in it for them? What’s in it for them if they buy your product? What’s in it for them if they read your blog post? What’s in it for them if they start following you?
Are you solving a problem? (problems could be anything from finding a Christmas gift for their in-laws or helping them start a blog)
Are you providing advice?
Are you sharing a story that connects with your readers feelings?
Are you providing a service to make something easier for them?
All these and more are examples of questions you want to answer before starting to create you pin. It’s a good idea to actually write down questions your reader or buyer might have and then work the answer into part of your text and image combo on your pin.
Choosing Images for Your Pins

Once you’ve got ideas for your main message you need to think about what images are going to grab attention and click in the minds of your reader or buyer. If you are a writing a post about easily starting a blog then you might want to find some images of a person working at a computer or desk who looks at ease and happy with their job.
While there are some who say that using faces in pins is a no no, we think this is conditional on the topic. If you are trying to connect with someone who is frustrated with blogging, then channeling with their current feelings can help draw them into the pin, making them feel as though you totally understand them on a personal level. This is key to just about any marketing strategy.
On the other hand, if you are more product based you will want to highlight the details of your product. Do this with a mix of up close images and images of the item in action (example: a person wearing a necklace).
If you don’t take your own images, don’t worry! There are so many fantastic sites that offer outstanding images to make sure you pin success doesn’t suffer just because you aren’t a skilled photographer. Check out this article on 24 Top Stock Photo Websites: Beautiful Stock Images for Your Business.
Magnetic Headline
Your pin’s headline is as important, if not more than the image you choose. I like to call it a ‘magnetic headline’ — a headline that instantly draws the reader in like a super strong magnet. It doesn’t just get them to stop mid-scroll but also attracts them to click to your site!
Have you ever studied the words of the most viral pins on Pinterest? If you haven’t yet, take a moment and look at some pinners in your niche who have a lot of re-pins and followers. After looking for a few minutes you will probably notice a couple things..
- Strong key words in the title (things that your reader is searching for)
- Numbers or lists
- Conveys emotional words or urgency (easy, exciting, must haves, fun, happy, best, now, fast etc.)
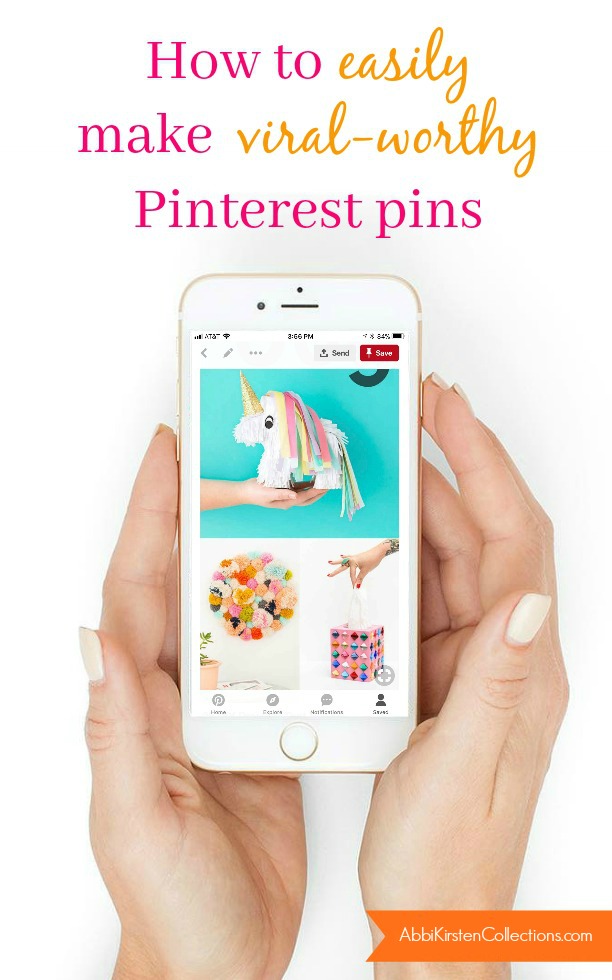
For example, you are reading this post because want to know how to make great pins on Pinterest. Did you notice our image at the top, which is one of our pins for this article? The text is clearly communicating how to solve the problem of someone who needs to figure how to make awesome pins. Our pins reads, “How to Easily Make Viral-Worthy Pinterest Pins.”
Not only do we convey emotion by using the word “easy” but we also feed off your hopes and elevate it to a “viral-worthy” pin, making the article seem even more promising! And hopefully we are living up to those expectations! But let’s continue mmmkay?!
Testing and the 3 Pin Rule
Okay, for this next point some of you will initially love us for passing along this epiphany, and some of you will come to love us later when you see the incredible results it can bring.
The 3 pin rule is a method that means you commit to creating a minimum of 3 pins per post or product page. You don’t have to add them all to your page but can still upload them and link multiple pins the same page.
Did you know that on average it takes consumers 5 times of seeing or interacting with a product or business before they want to buy? Yeah, 5 times…
So if you want to take things to the next level, make sure you are committing to at least 3 pins and if you are brave go for 5! This doesn’t have to be super difficult nor does it mean you have to come up with completely different titles or tons of images.
A title can be ever so slightly tweaked here and there. For example, here are 2 titles that have the same message yet are different.
1. How to make easy viral-worthy pins for Pinterest
2. How to create amazing pins that go viral
The other benefit that you will find in doing this is understanding your audience better. Running multiple pins like this will allow you to test what works and what doesn’t work, by watching which ones get a better response.
Building a Pin
Okay, now for the making it all come together! We will show you exactly how we build pins. Counting present and past business experience we have had our pins get anywhere from 2,000 repins to 120,000+ repins. So we think our method works and hope you will too!
There are 2 free websites we recommend when it comes to creating stellar pins. The first is Pic Monkey, which is our personal favorite, and the second is Canva, which has it’s own awesome benefits.
Creating a Pin in Pic Monkey
The most important thing to remember when making a pin for Pinterest is that the image should be vertical. Not square, not horizontal, but vertical.
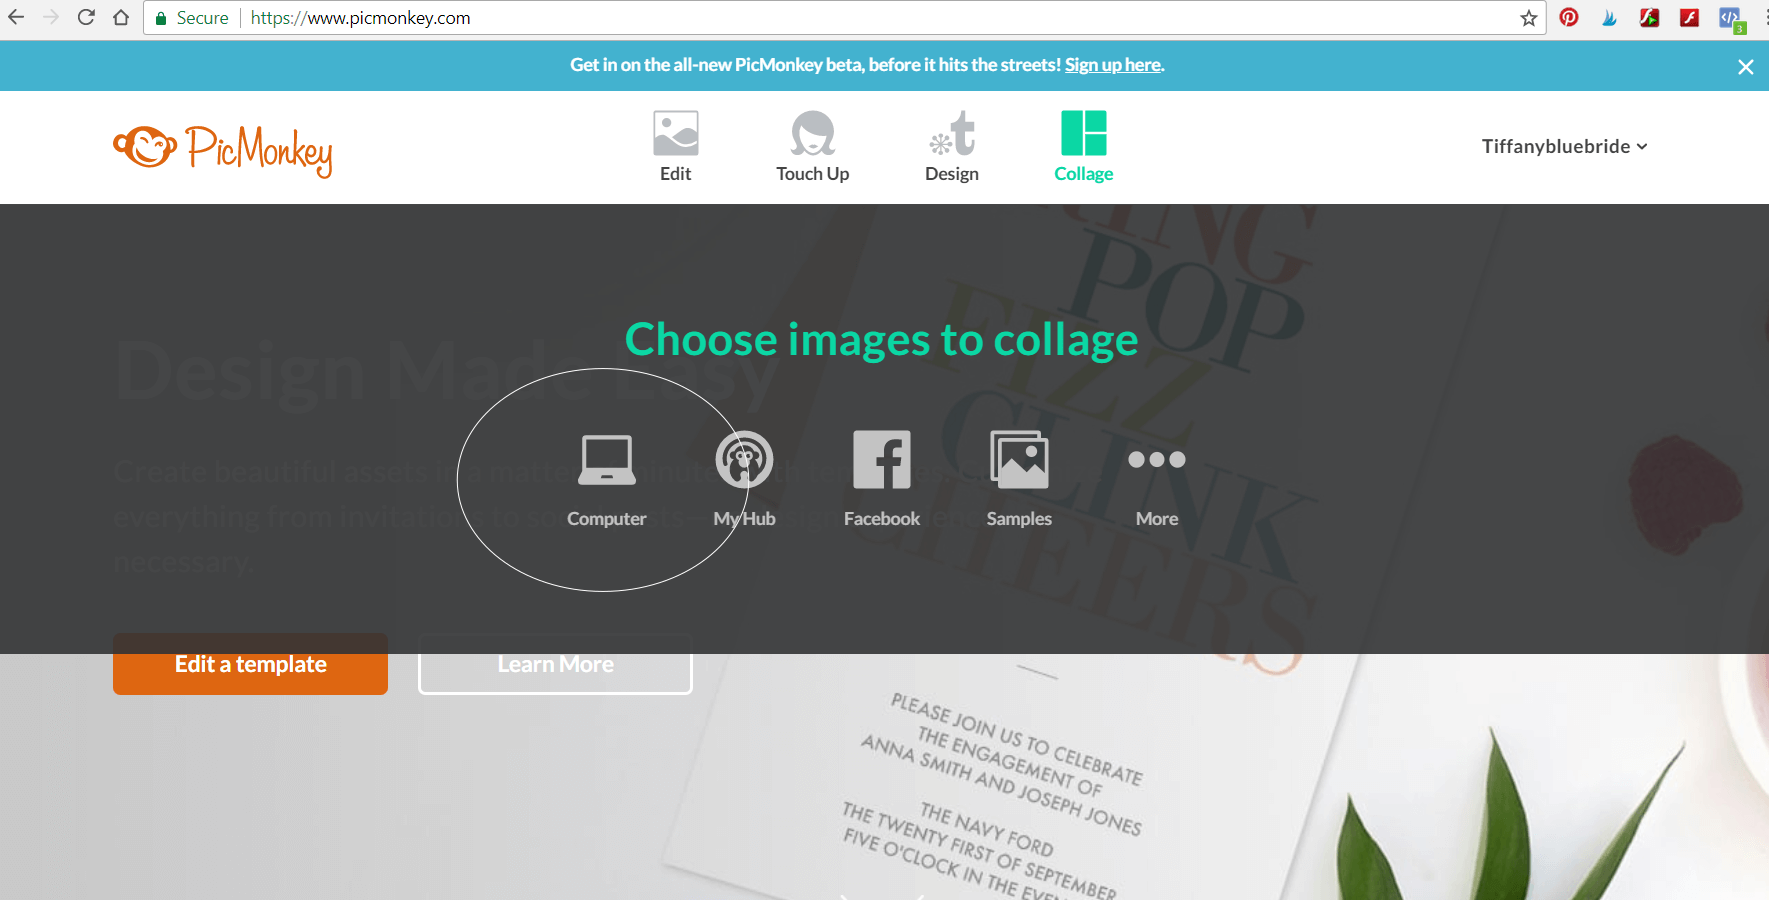
To get stated first, log onto the site and hover over to collage option near the top right. You will be presented with the option to upload your image files from your preferred source. For most of us that will be our computer.
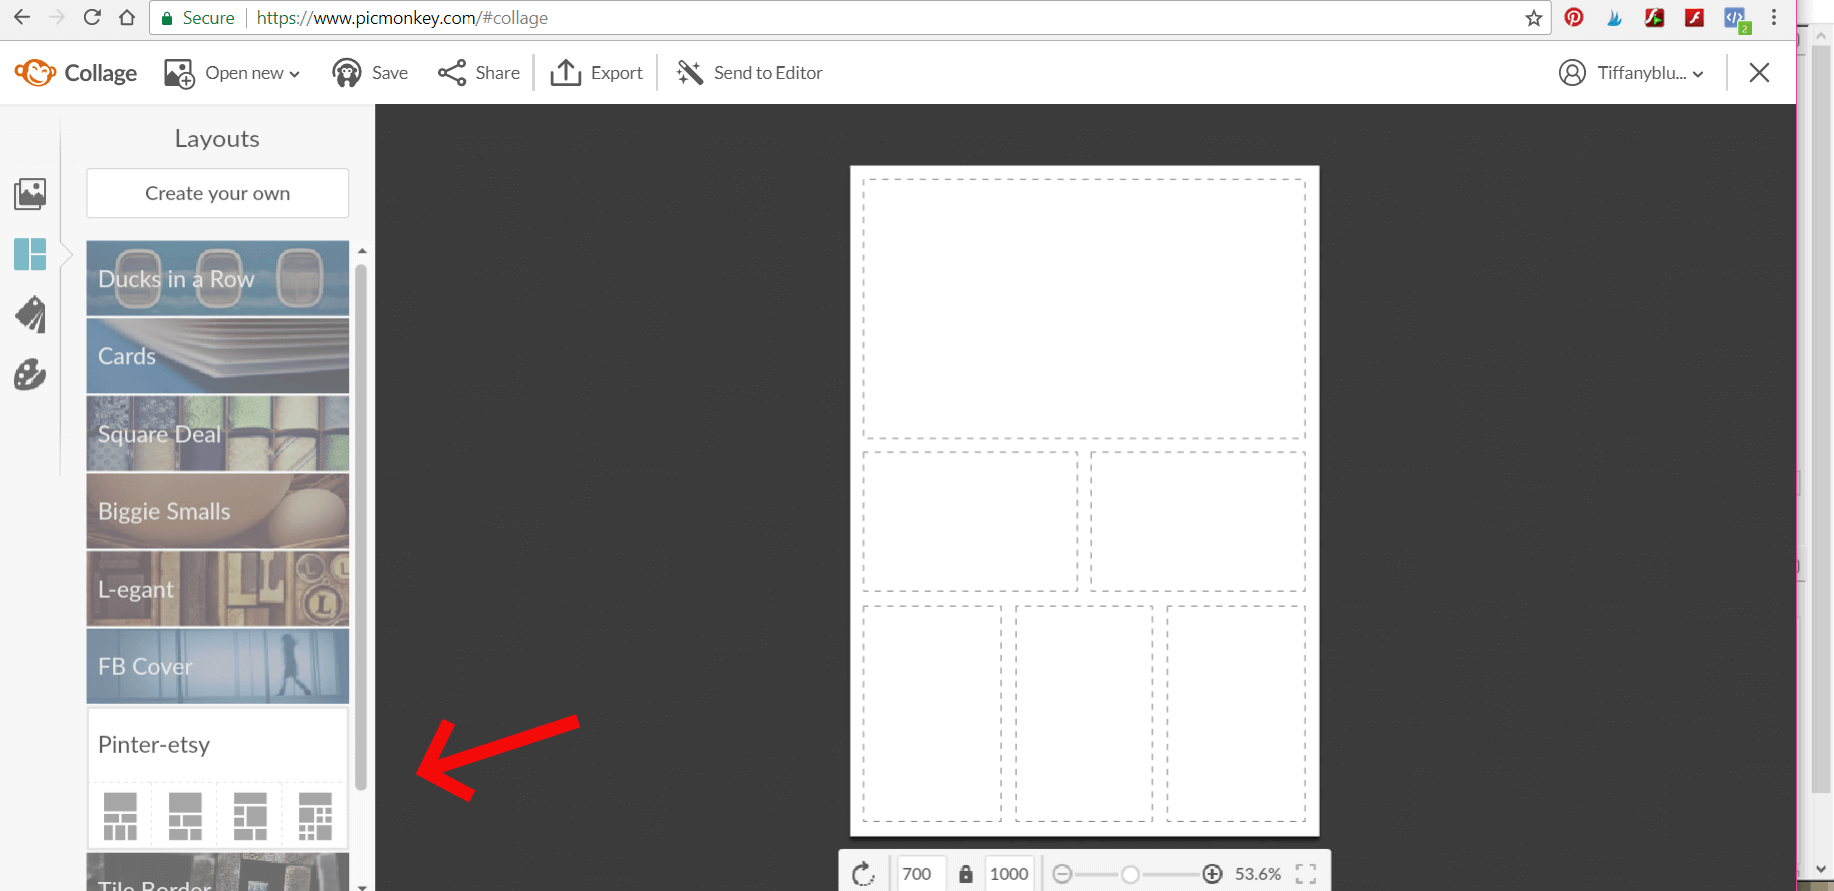
Collage Layouts
Once your image(s) load they will appear on the left hand side. You will see 4 design options on the left hand side which represent your uploaded images, the collage layouts, swatches and backgrounds. Click the second one down for layouts. Once there you will be presented with a bunch of preset layout options. Click on the one labeled ‘Pinter-etsy.’
Adding Images
Once your template layout has been chosen you will be able to hover over each collage box to reveal an ‘x’ to remove one of the image boxes or you can drag additional pictures to create more image boxes.
Personally, I like to take it down to 1 box and drop a whole image in. See how it’s done below. You can also stretch the whole vertical box itself to make it longer or shorter. Longer is usually how we roll.

Adding Text
Next comes the headline. At the top of the screen you will see where it says send to editor. Once you are happy with your image(s) go ahead and send the image to the Pic Monkey editor. You won’t be able to go back so make sure you are happy with your collage first.
Once in the Pic Monkey editor you will get to see all the options to decorate your pins, whether with overlays, your own overlay images or numerous styles of text.
You can access all of these functions for free but if you want to upgrade to more fonts you can do their $5 plan to access everything. Plus Pic Monkey will sync with your own fonts on the computer! Pretty cool, right?!
If you look on Pinterest at popular Pinterest pins you will see a common theme that really helps the text and your motive of the text pop. Mixing 2 fonts, sizes and/or colors in a title can really make the difference in having your pin stand out among the rest or just blending it.
Once you type in some text you will see a text editor box pop up, which allows you to change the colors or size of the font. Here is a brief look below.
See how I changed 2 of the words with a different font AND how the different font coordinates with key word emphasis? Be cautious though of not using more then 2 fonts or colors because then we start to cross the line to messy and confusing. When you are ready to save your image just click the export button at in the top bar and save it to your computer.


Making Pins in Canva
Canva is pretty awesome too. Some of the fantastic perks of Canva include:
-
- A wide variety of pre-made templates for all social media platforms.
- The ability to design your own templates and save them
- Sharing your designs across Canva
-
- Access to 300,000 free photos and illustrations
-
- Organize your uploads and designs with unlimited folders and share with your team
-
- Easily resize your designs with Magic Resize for any social media platform or design type
- Save your brand colors, logos and fonts
I’m going to let Canva do the talking here because they have created an amazing resource library of tips and tutorials for using their site. Find all the knowledge you need to create images, collages and templates in Canva here!
Take Away
The most important take away tips to learn how to make a pin for Pinterest successfully is making sure you are creating content that is clean, bright and grabs the readers attention. Be intentional about your chosen image, pin vertical pins only, make sure to have a magnetic headline, and be sure to create more than one pin with all these attributes.
Did this help you create better pins? What other questions do you have? Tell me below!
Taking it to the Next Level
Looking for more ways to get a better repin rate? Grab our list of 220+ active group boards to join!
Wishing you creativity and success!