How to Make Your Own Wood Window Valence with Curtains
This post may contain affiliate links that won’t change your price but will share some commission.
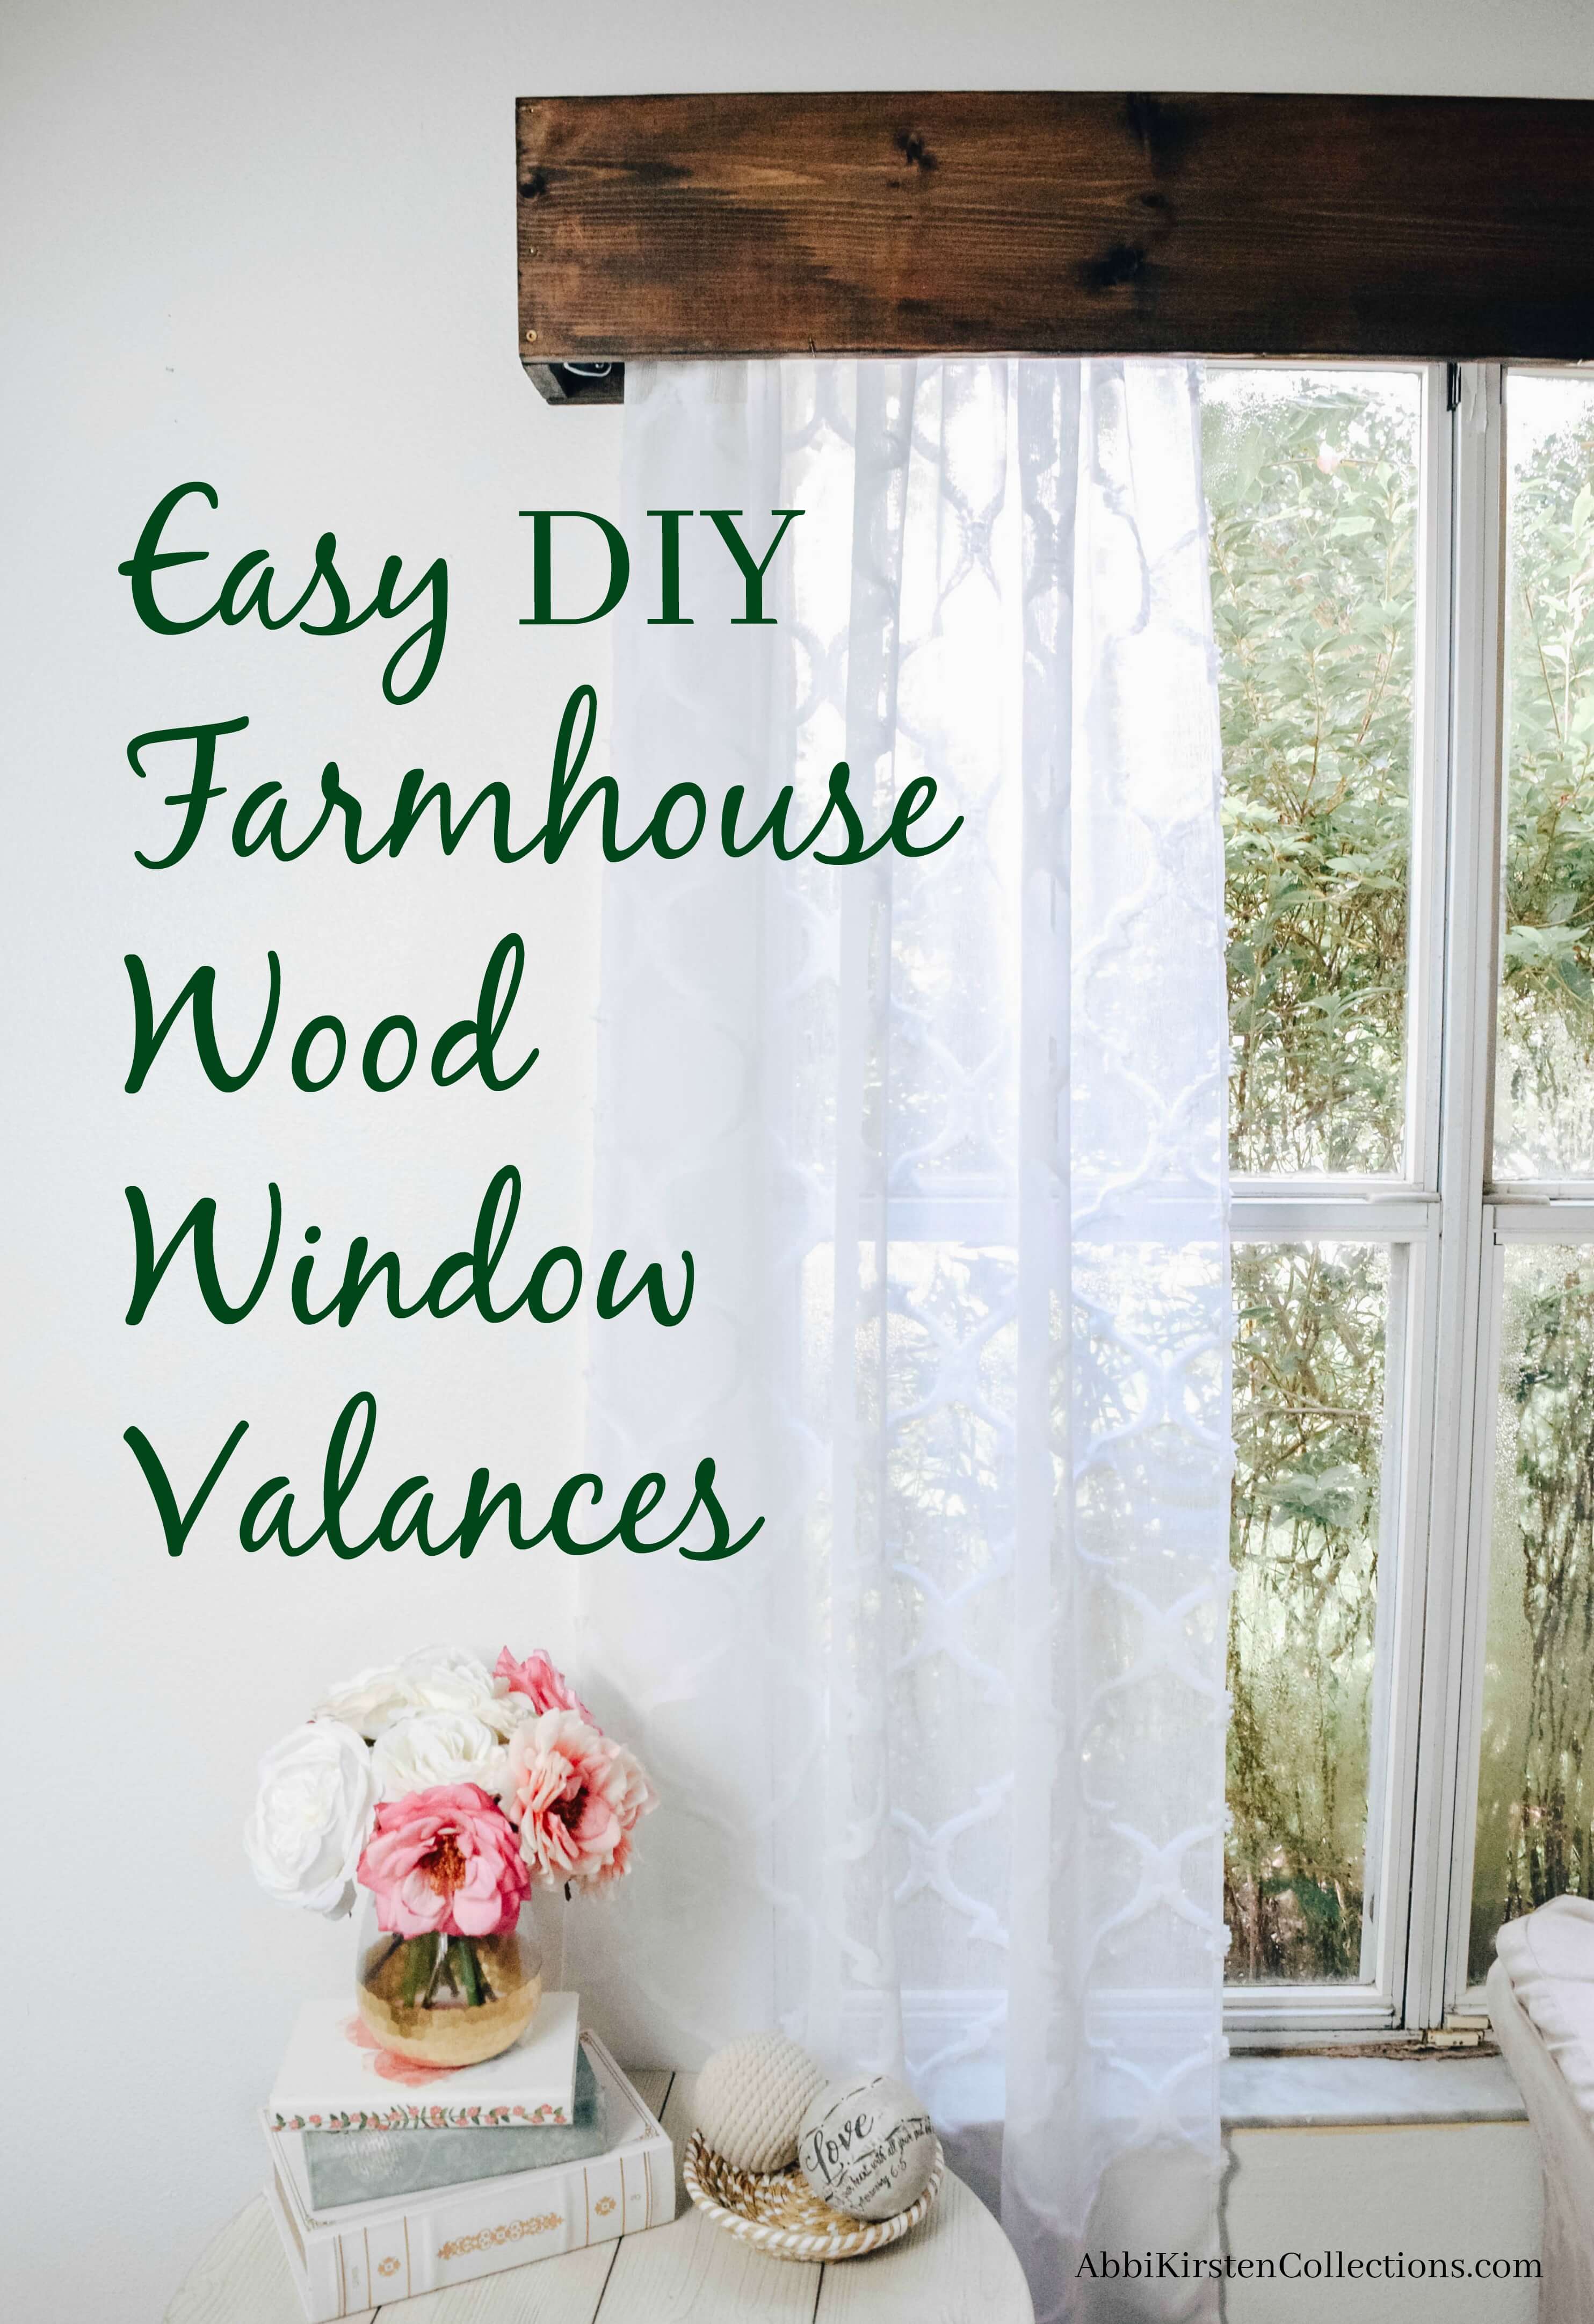
Wood Window Valence Tutorial
Buying a home is one thing but purchasing a fixer upper is a whole different game! Through the process I have been working hard to save money where I can by DIY-ing any furniture or decor for the home. One of the things I love about my house is all the natural light. I have 3 large windows downstairs and 3 small ones, which leads me to today’s post – wood window valance tutorial!
These valances can dress up your windows and whole living space, but they don’t have to cost a fortunate! You can do them yourself for as little as $20!
Supplies
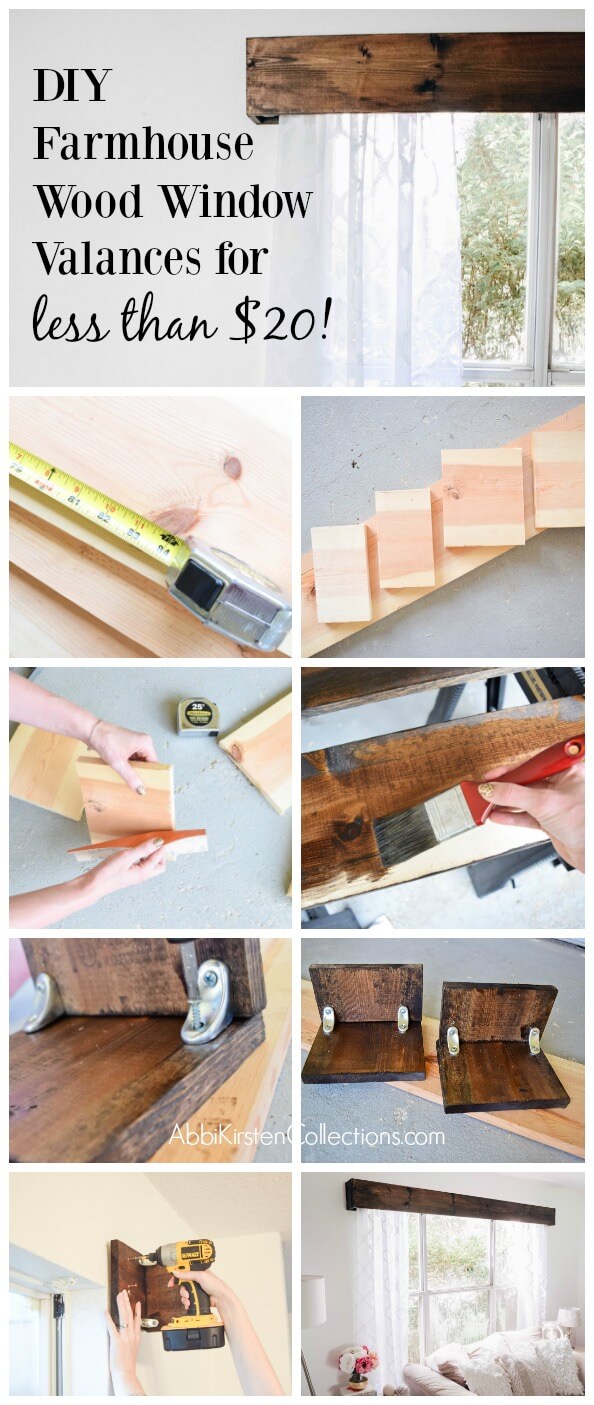
- 1 inch x 8 inch x 12 ft in your choice of wood (I used pine wood)
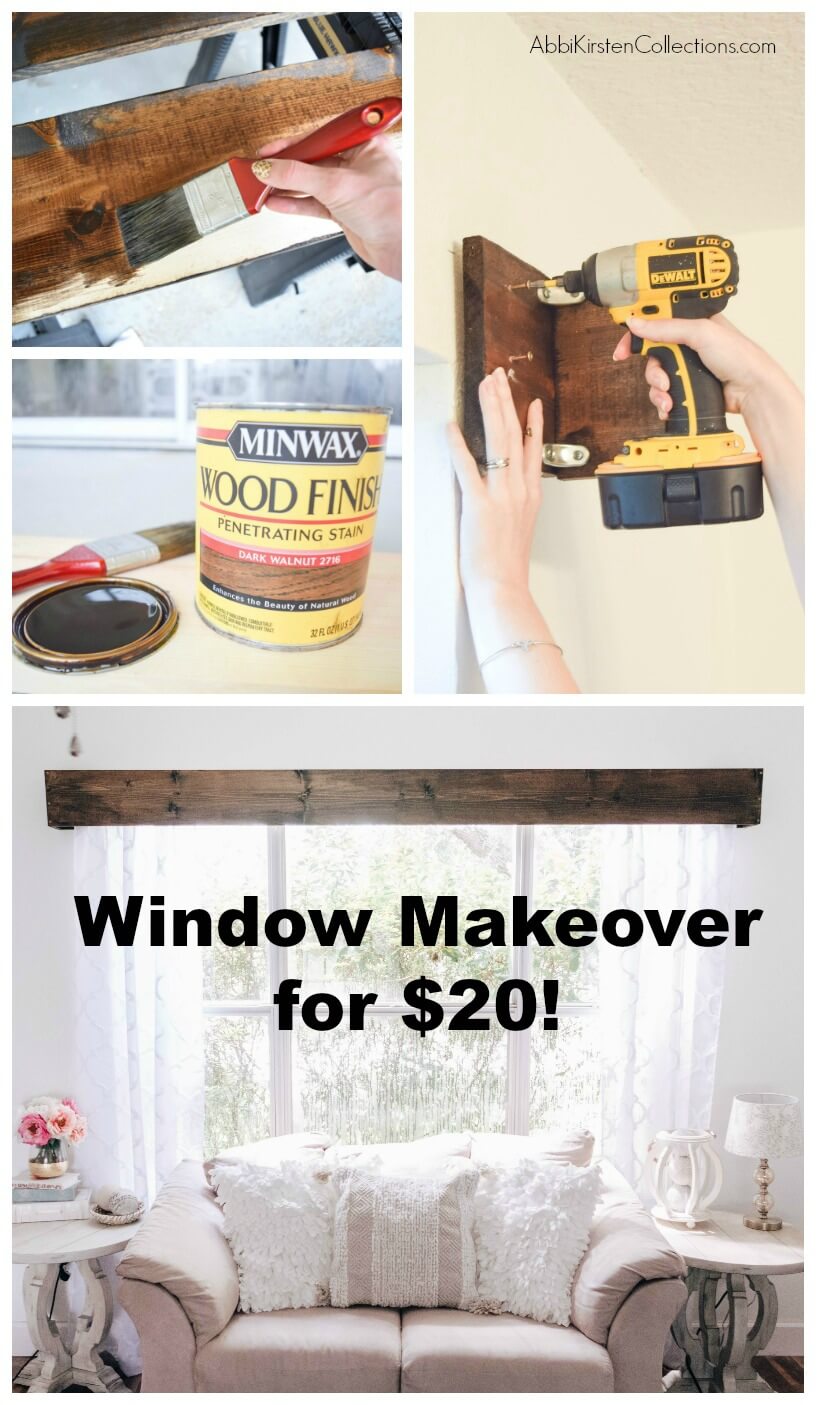
- Wood stain – I choose a dark walnut
- Miter saw (I already had this so it was not a cost factor. If you don’t have a saw ask a friend or have Lowe’s cut the wood for you)
- 1 inch wood screws
- 2 1/2 inch wood screws
- Metal corner brackets
- Paint brush and rags
- Sheer curtains – optional (I found mine for $10 at TJ Maxx!)
Cutting your wood
When it comes to cutting your wood I want to note that everyone’s cuts will be a little different because your windows are different! I’m going to list my dimensions and you can scale yours accordingly. Another key note is when you measure your windows make sure to add 10-12 inches at least to the length you will cut. You are not going to want the wood window valance to be flush with the window – you want it to look like a frame.
For example my sliding glass door is 6 ft wide but I cut my length of wood to be 7 ft wide so that I will have a 6 inch over-extension on each side.
Here are the measurements I used for my 3 big windows
Measurements
For my two 7 ft windows – One 8 ft piece, two 6 inch pieces, and two 4 inch pieces.
For my one 6 ft sliding glass door – One 7 ft piece, two 6 inch pieces and two 4 inch pieces

The first thing you need to do is cut all your wood. Like I mentioned, your measures will probably be different the the ones I listed above. Make sure to measure twice, cut once! I used a miter saw to cut with. Please be careful and take safety precautions.
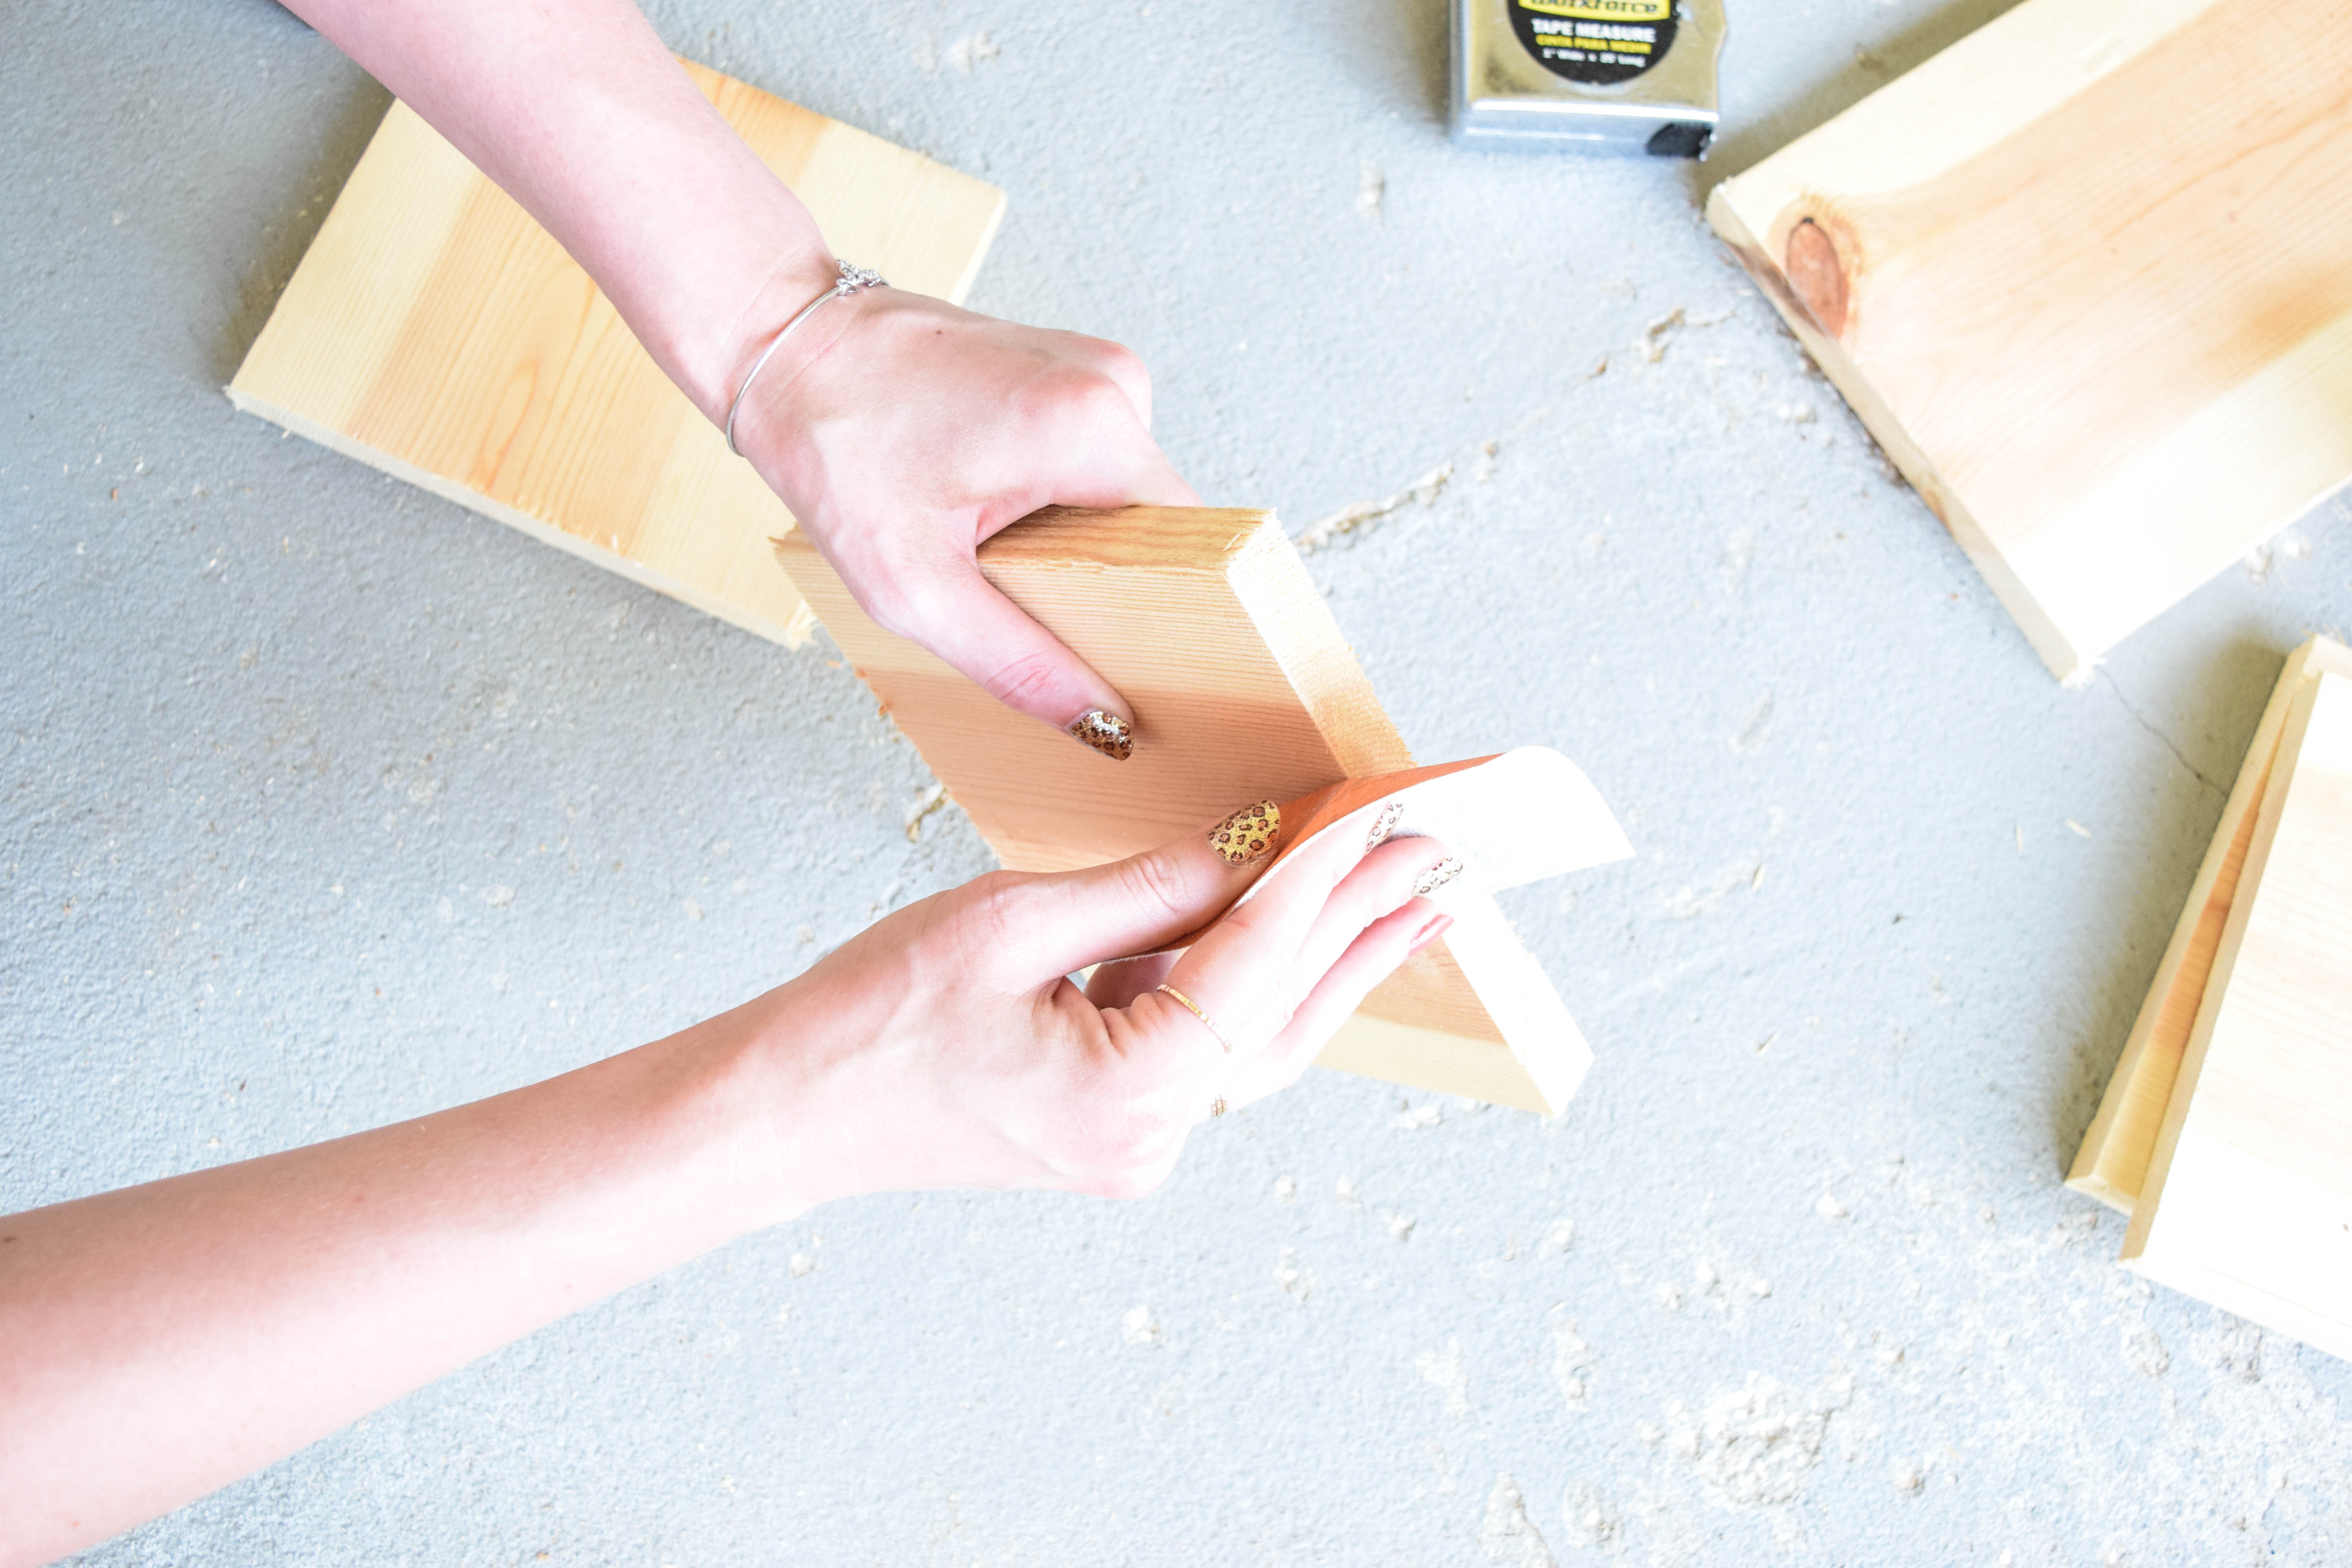
Once cut, before you do anything else, make sure to sand down the rough edges.
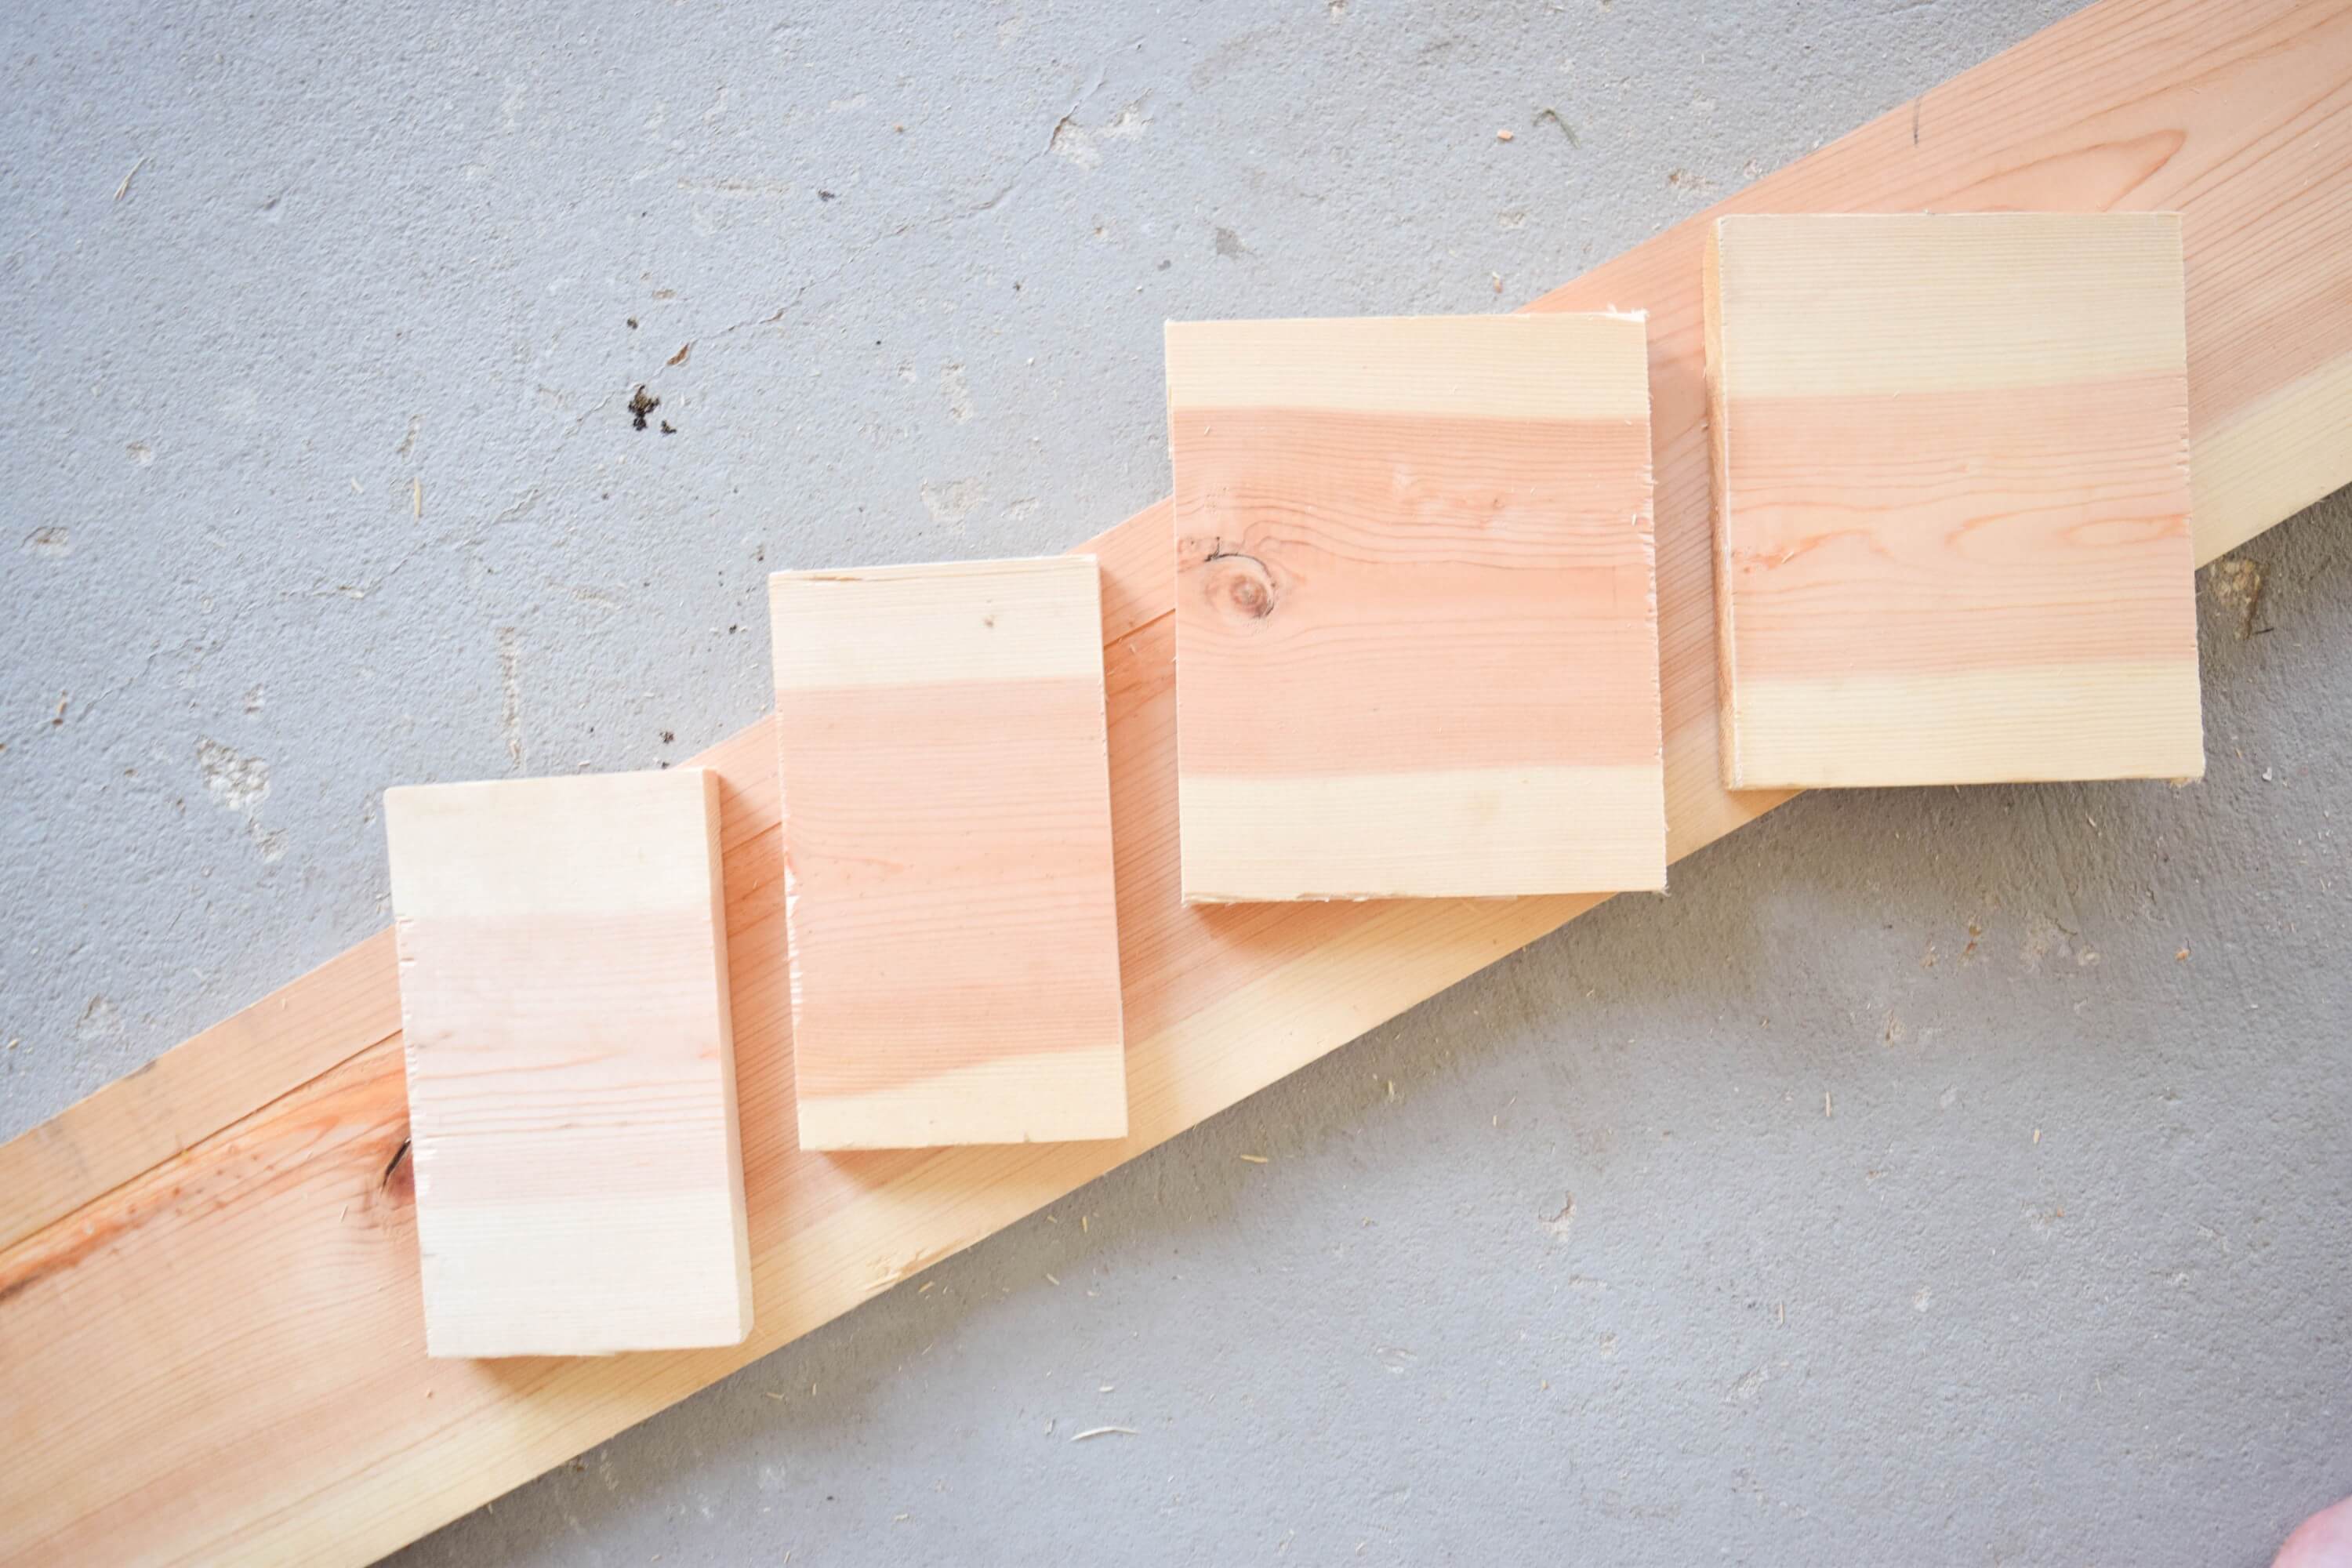
Ultimately you should have 5 pieces for 1 valance. Here are mine above.
Staining your wood

For my wood I went with a nice dark wood stain but you can choice a lighter wood stain or a driftwood grey, whatever matches your decor best!
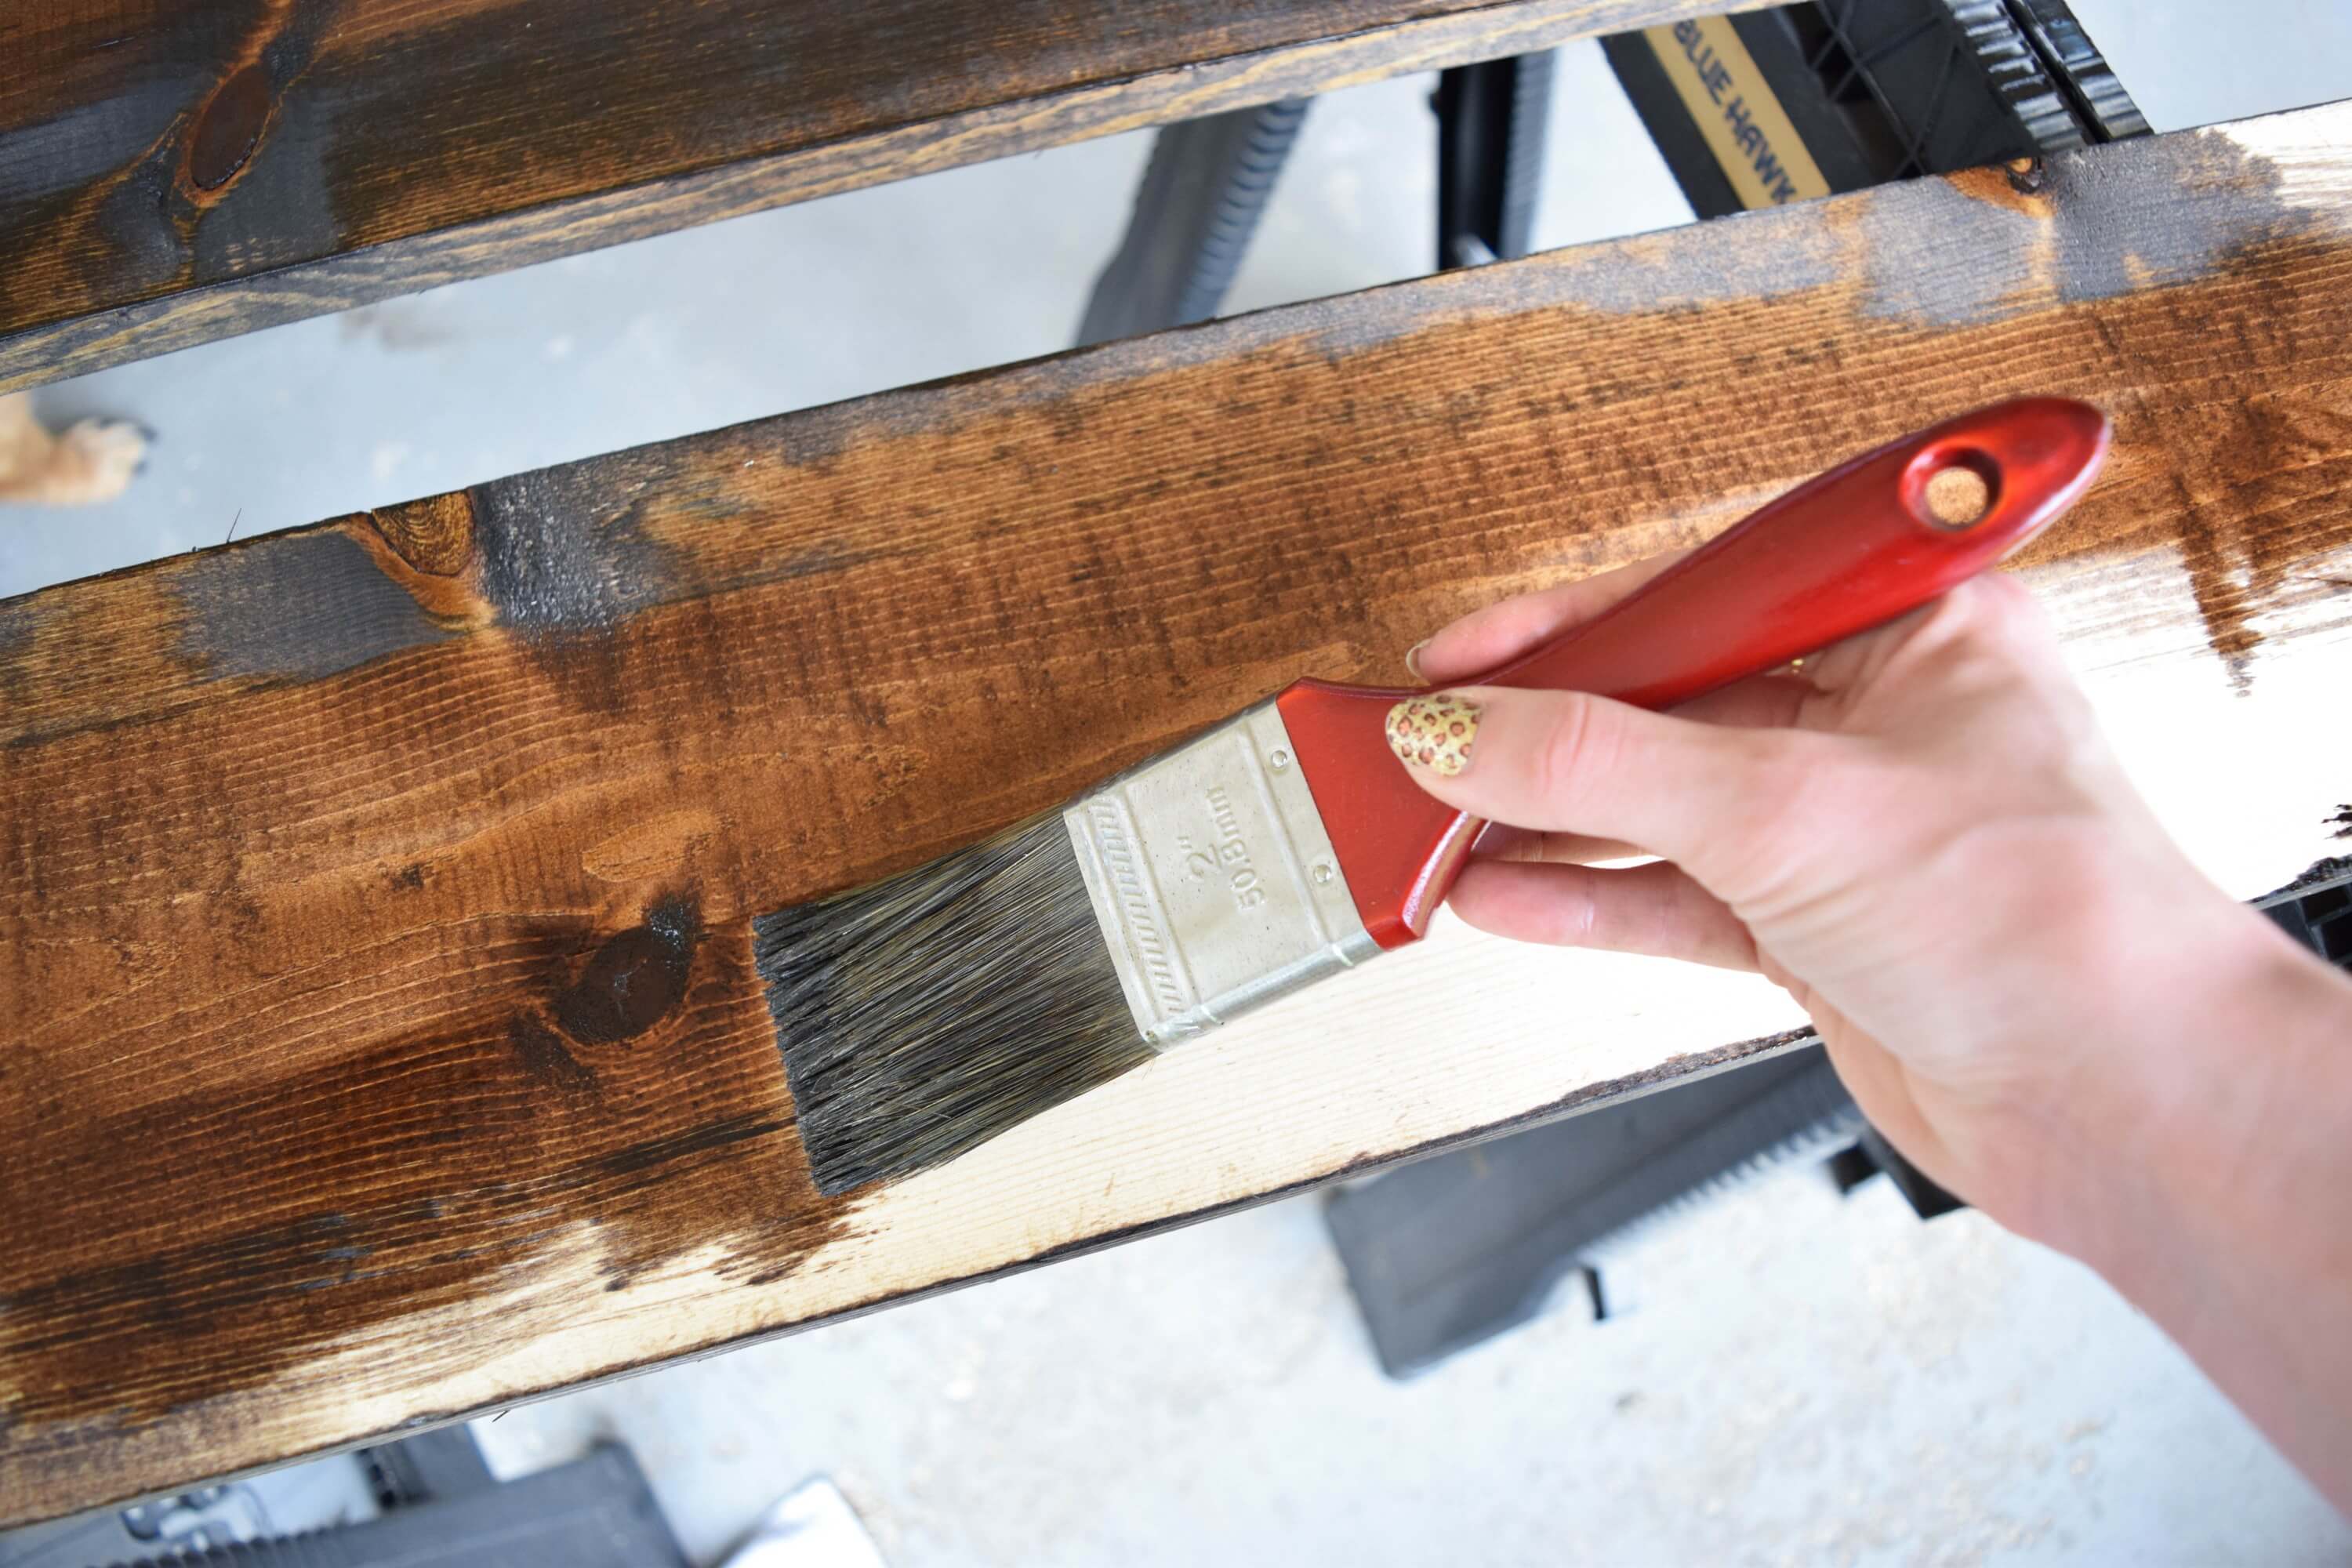
When you stain wood you can use a cotton rag or a brush. To me, a brush is less messy so I opted for that. Stain will go a loooong way. Slightly dip your brush in a wipe the excess before starting on your wood, otherwise you may end up with an almost black piece of wood because it is so stain soaked.

Let your pieces dry, preferably overnight.
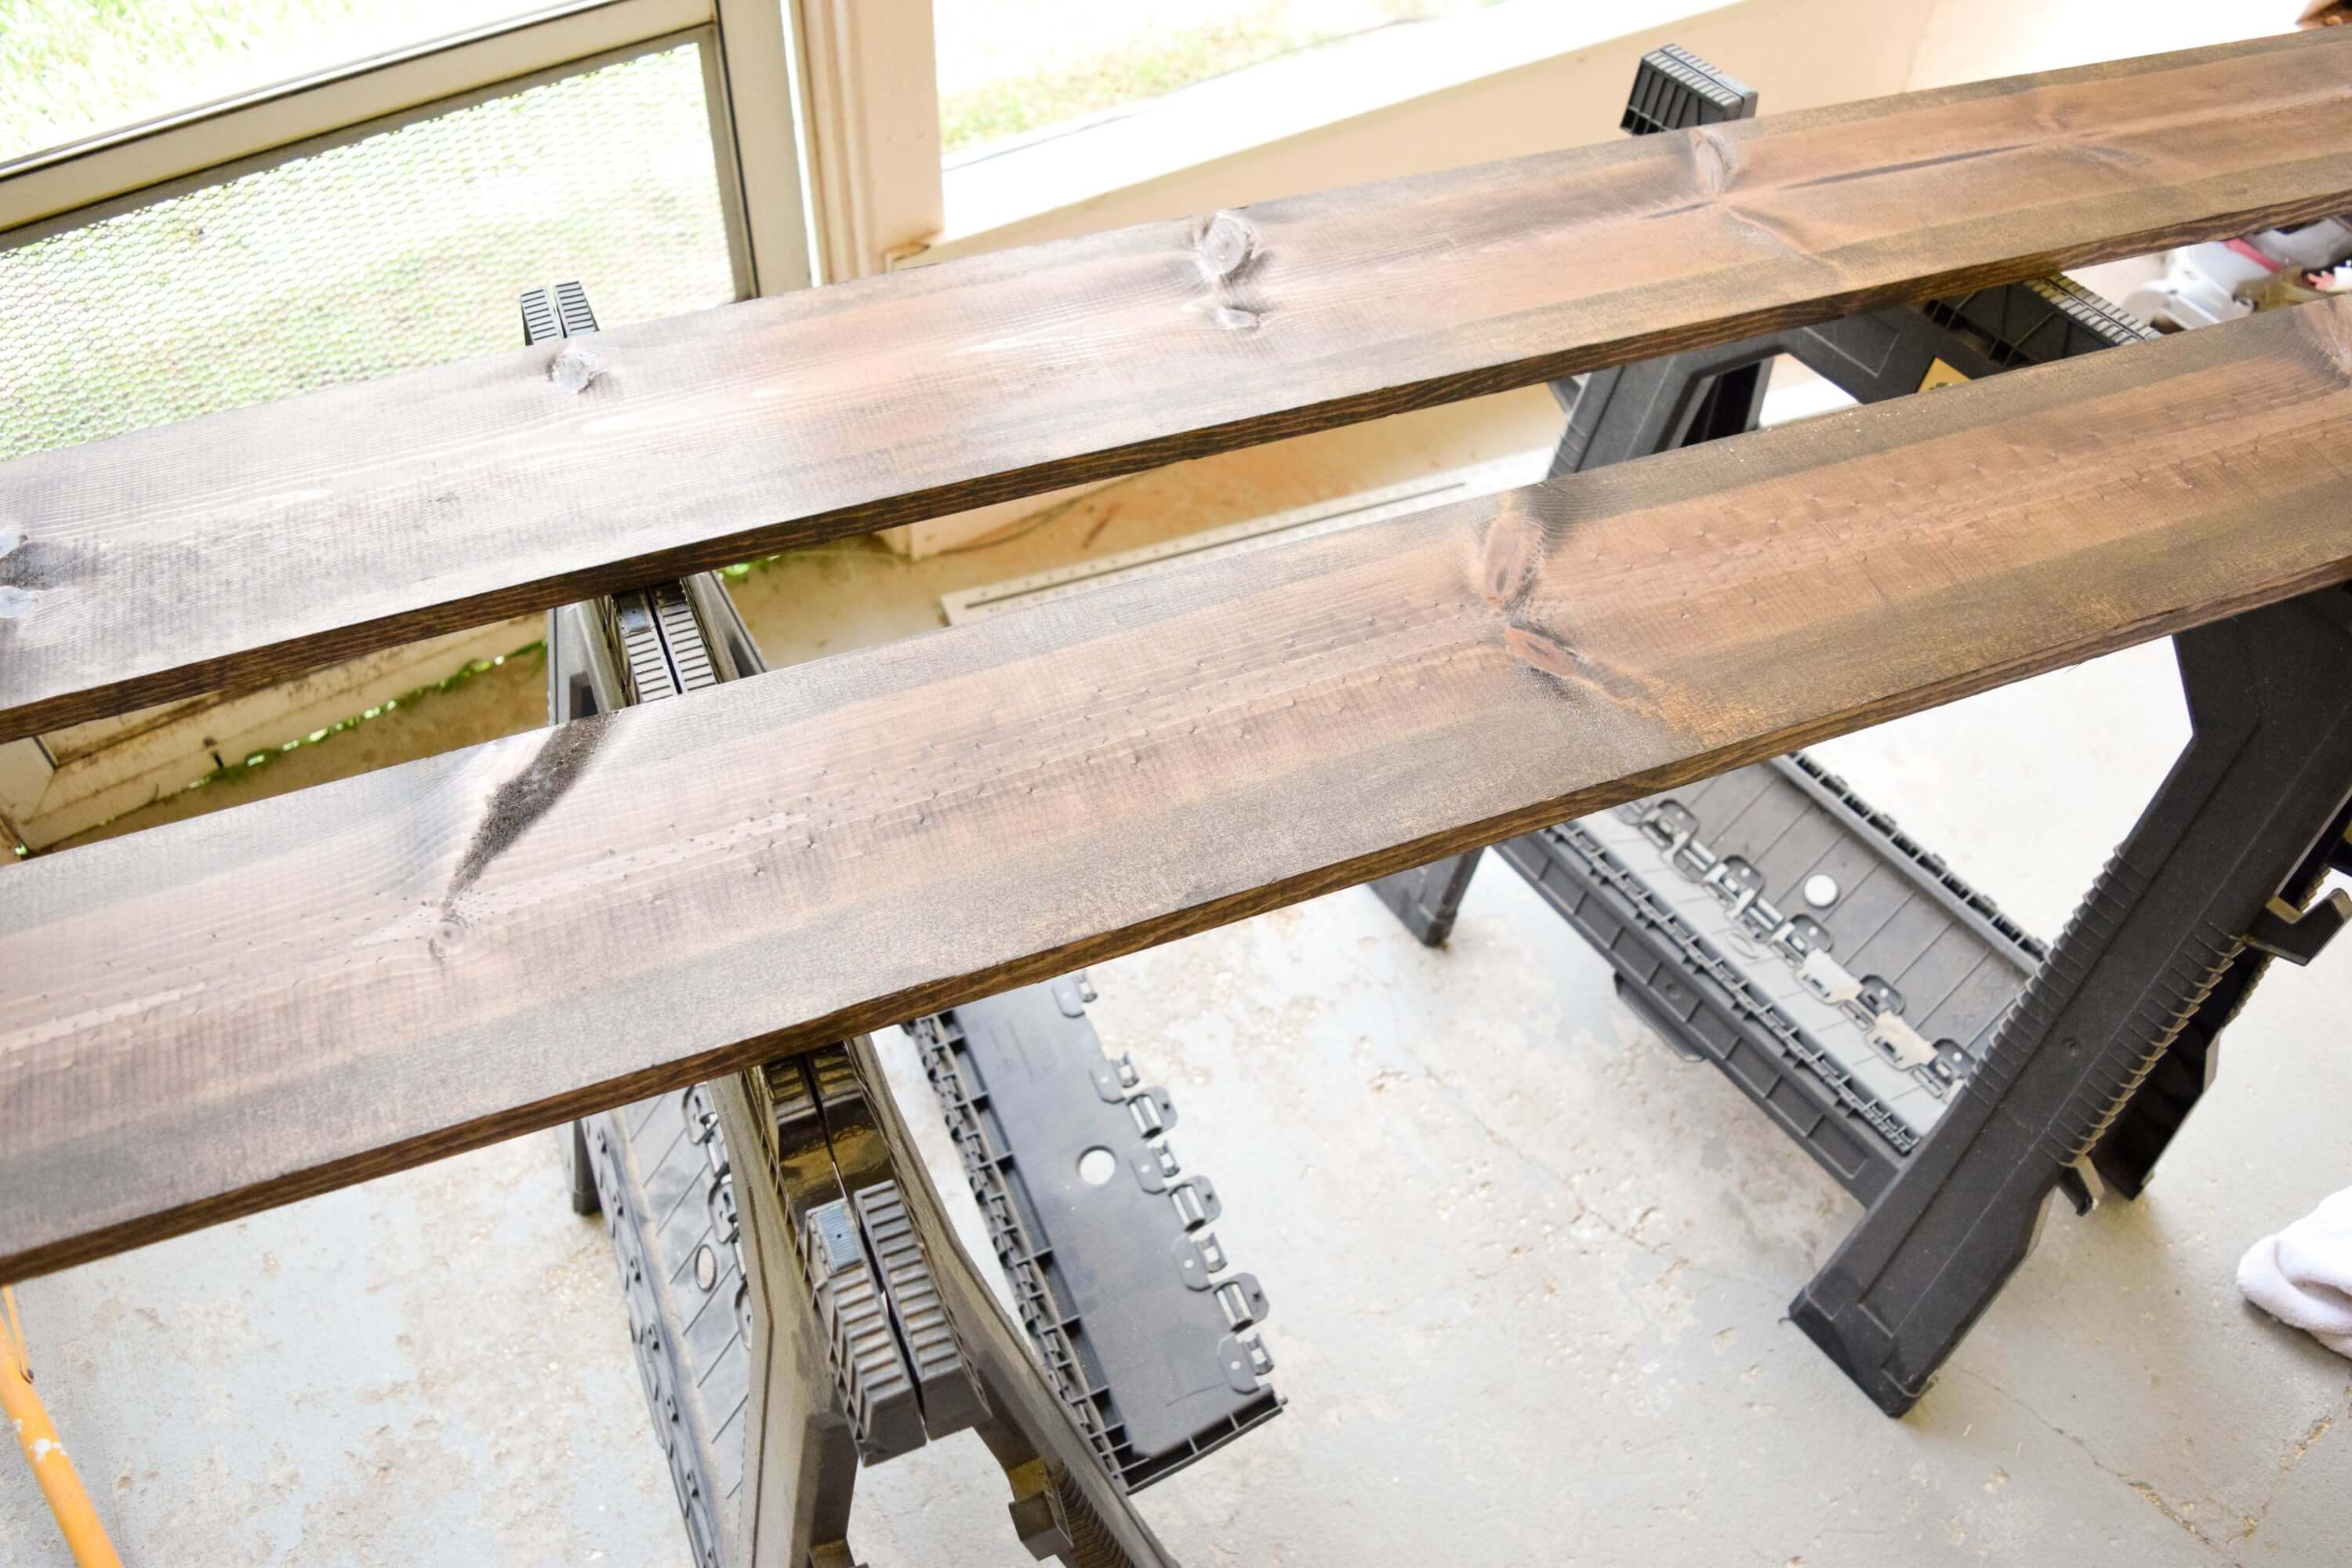
For the larger pieces it is helpful to paint the stain on with them on saw horses and then let them dry on there as well.
Assembly
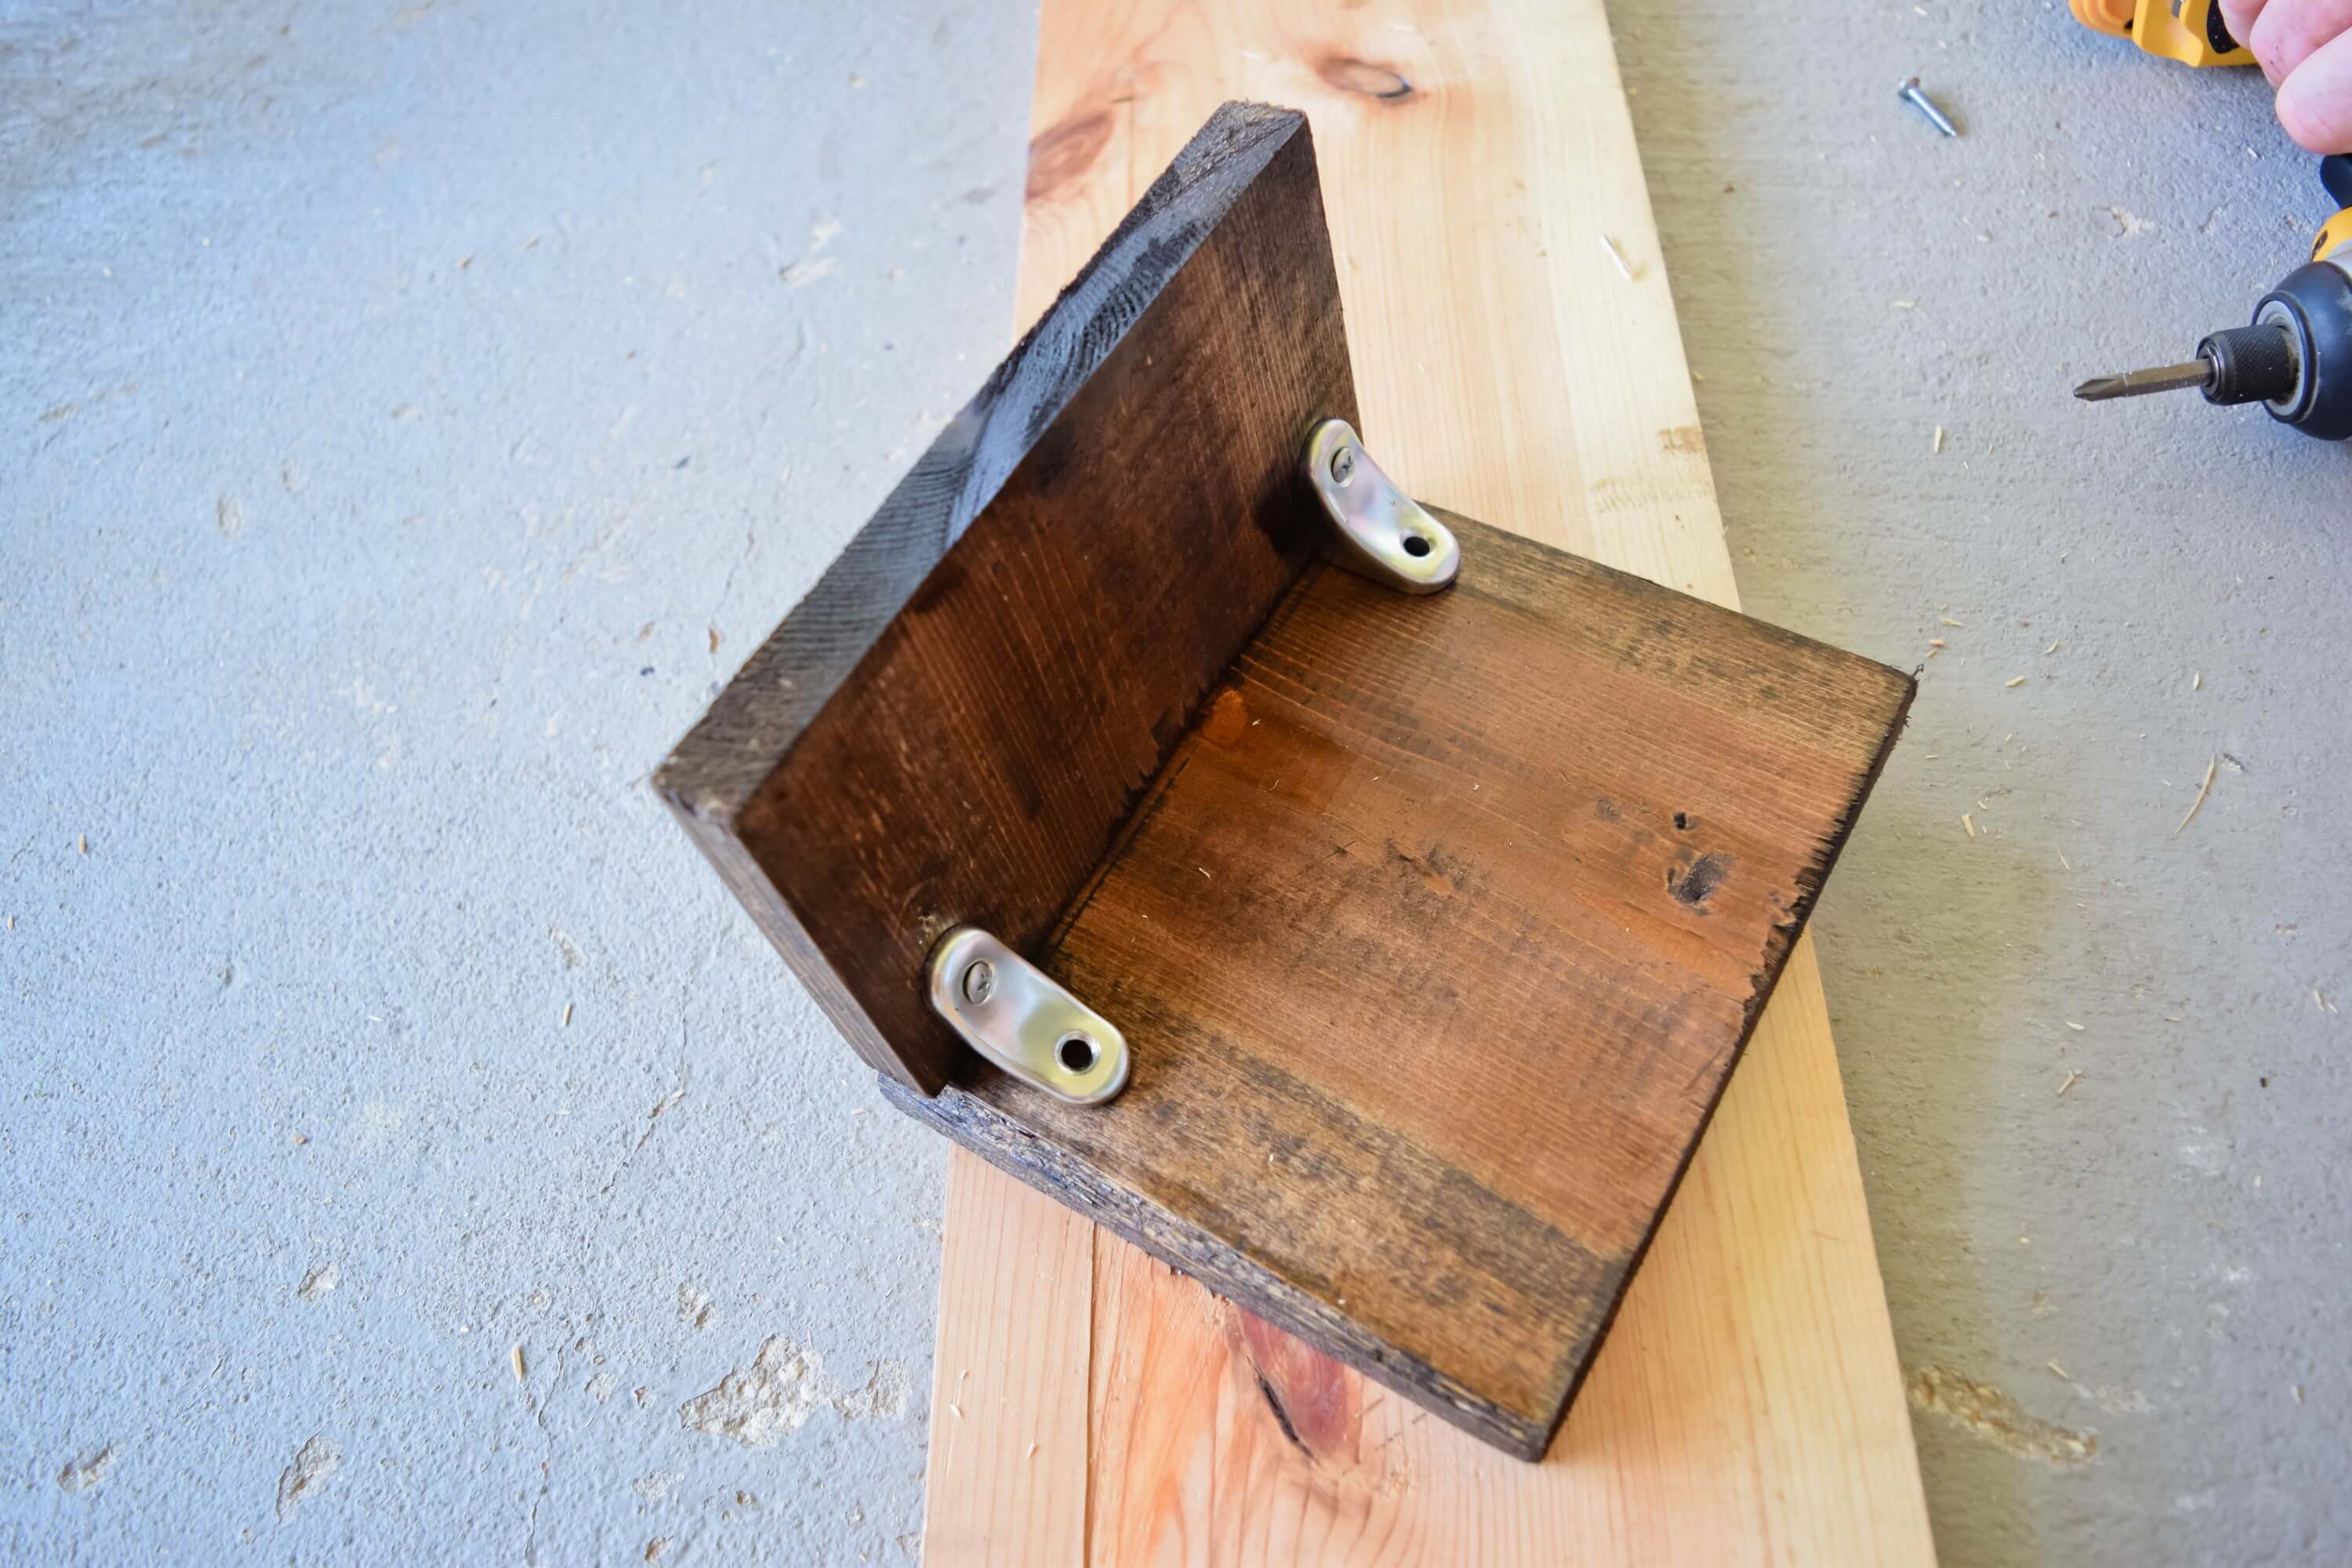
Next comes the assembly. You will be using the corner brackets to connect your 4 inch and 6 inch pieces together to form the corner edges of the wood window valance. Don’t worry you won’t see these once the valances are hung.
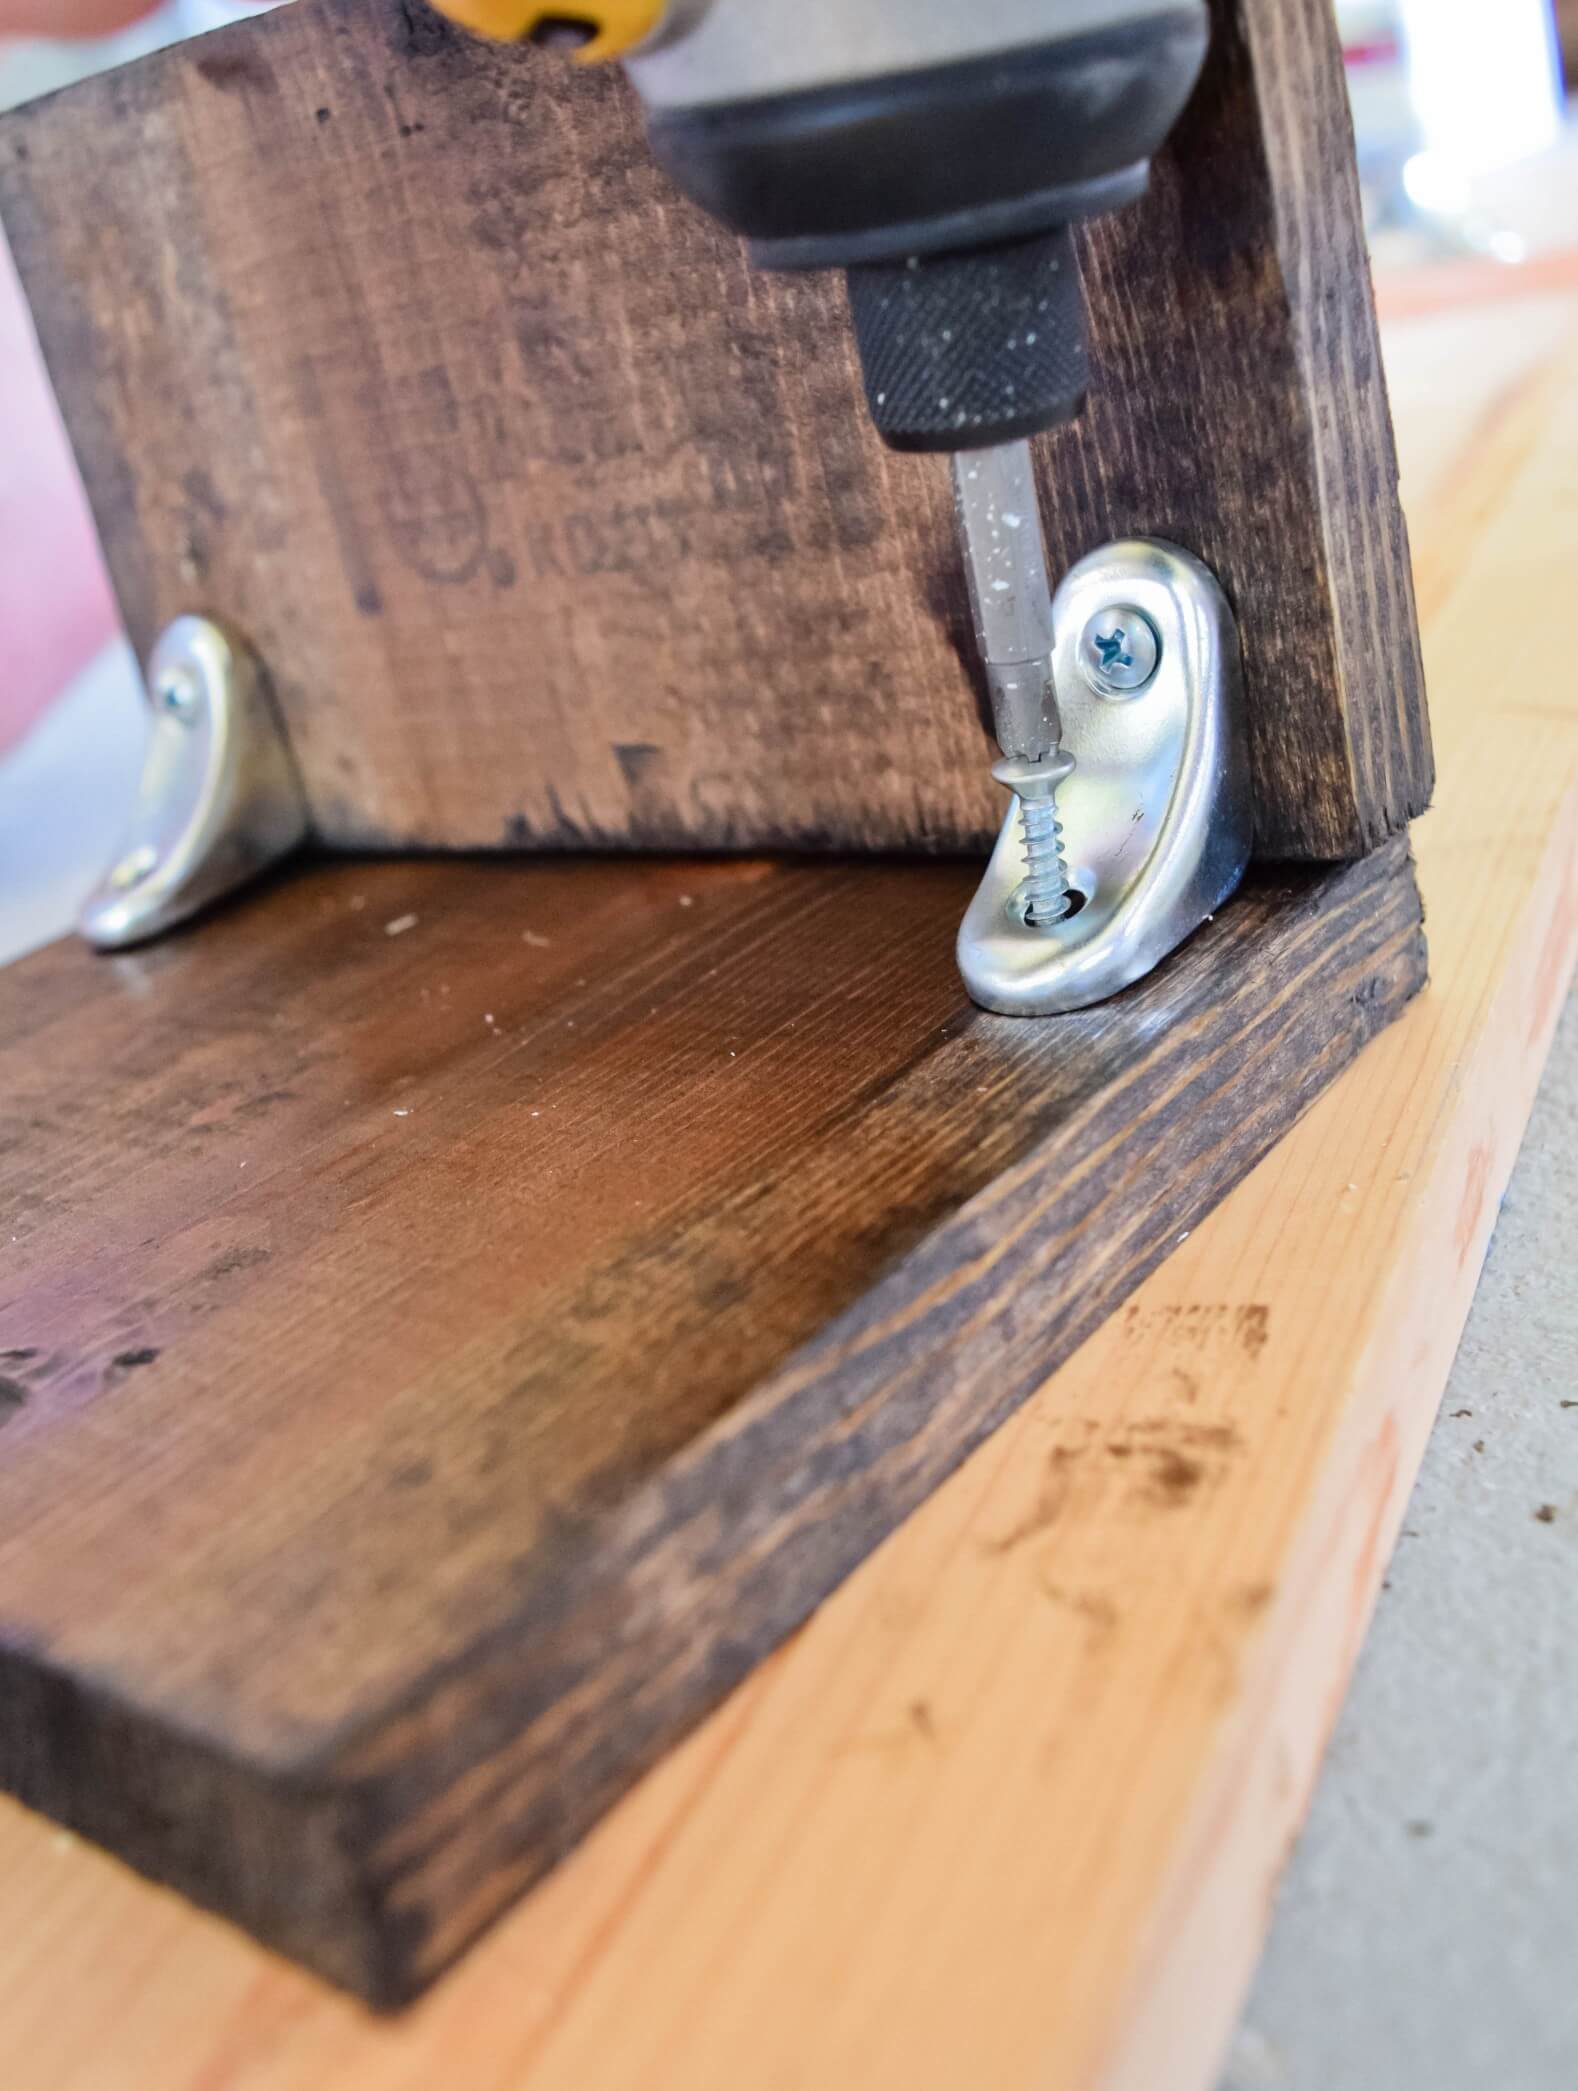
Your corner brackets should come with their own screws. Using these, screw them into the wood forming a corner. Try to make sure the outside edges remain flush.
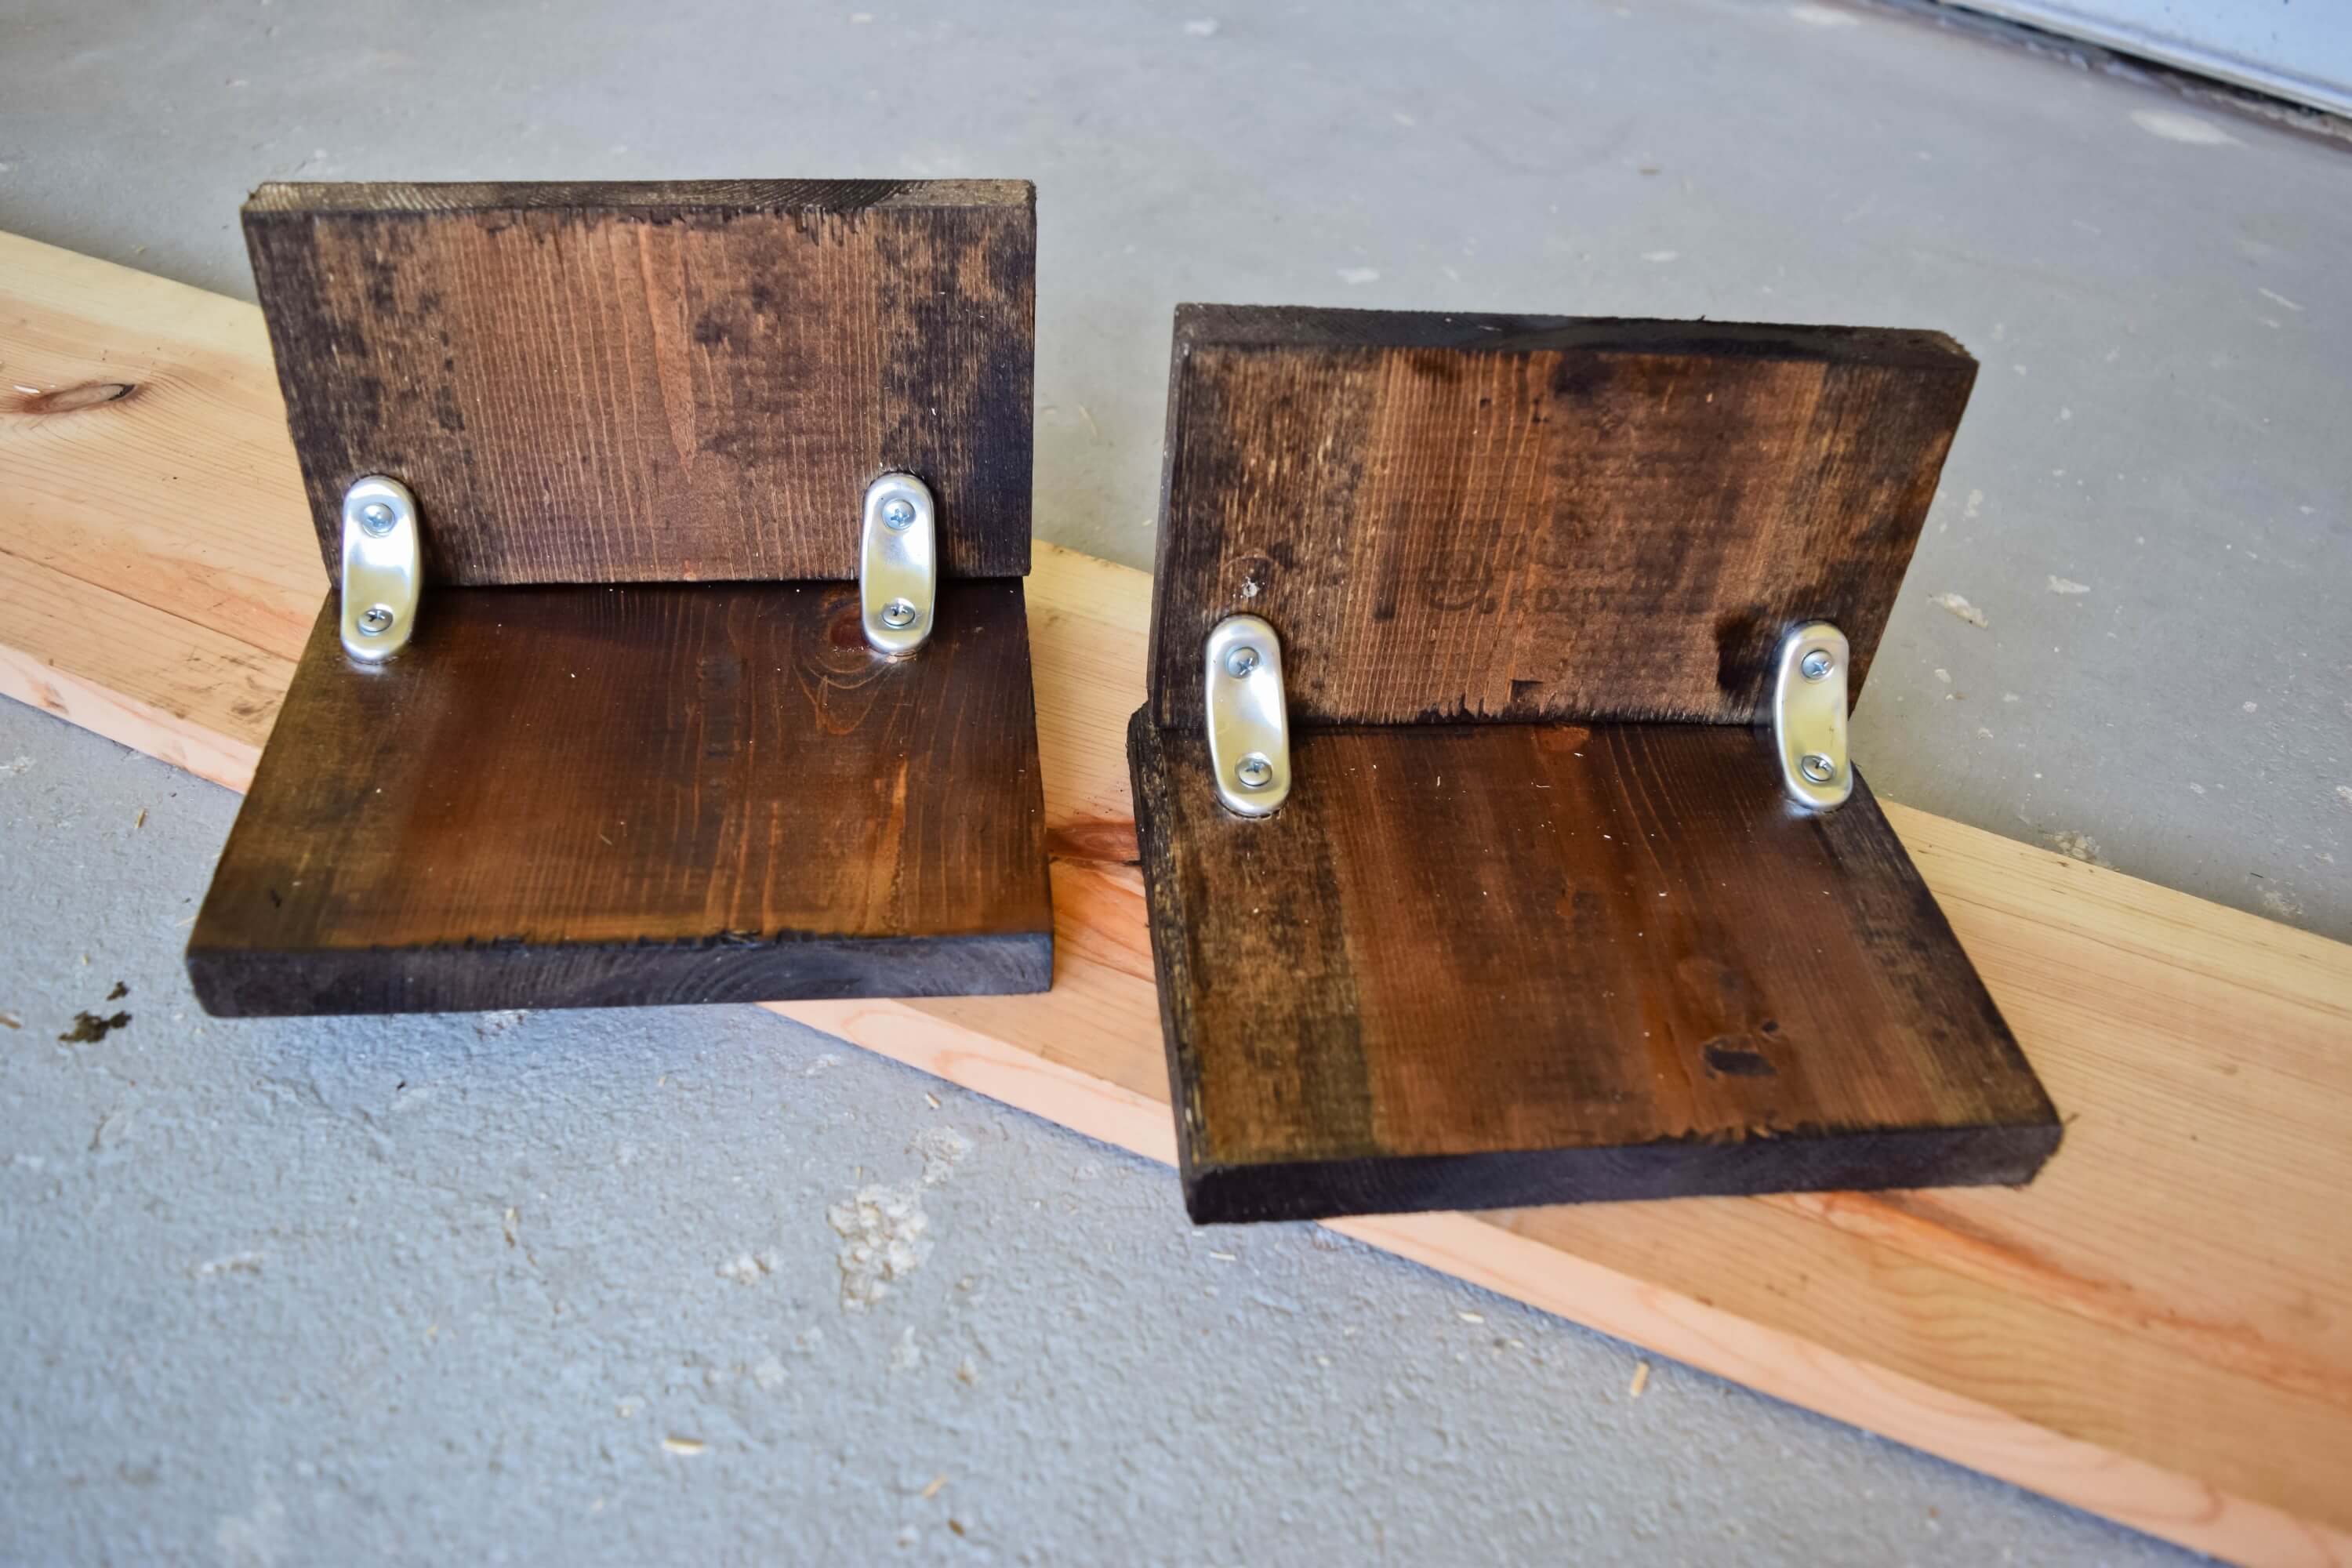
At this point you should have 2 of the valance corner’s complete and connected.
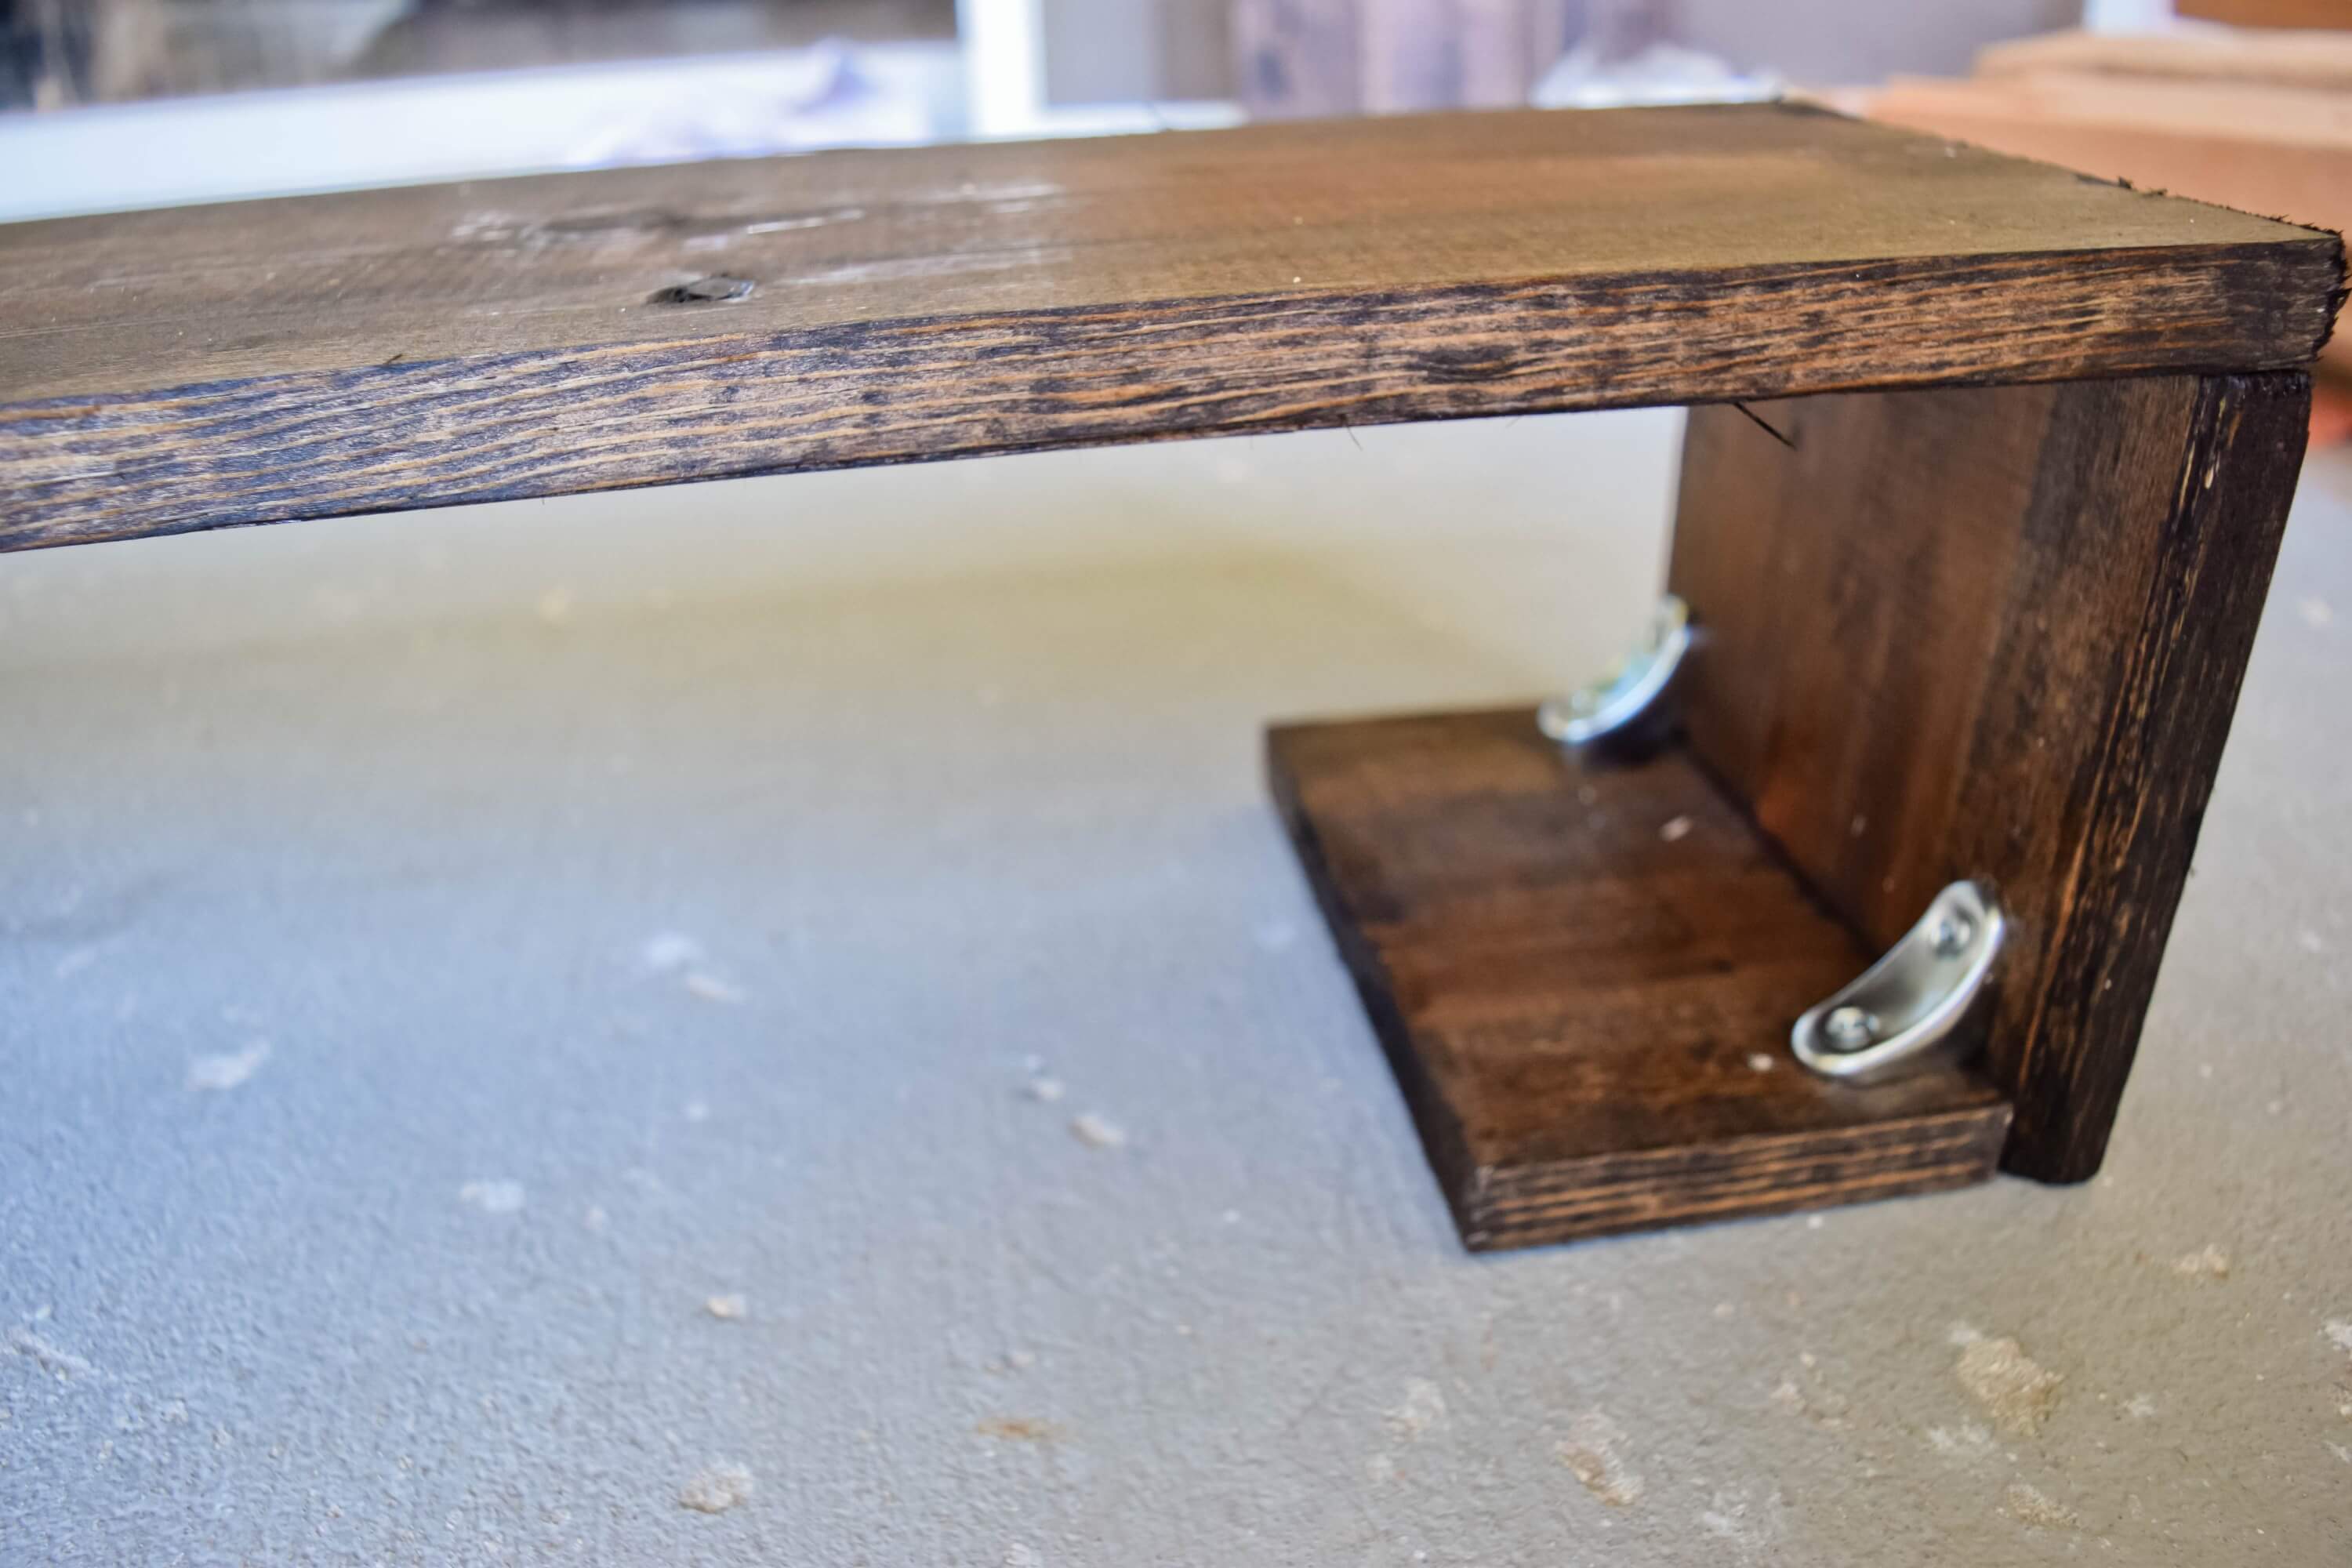
Naturally you would think we are going to attach the long large piece, but we actually are only going to drill pilot holes.
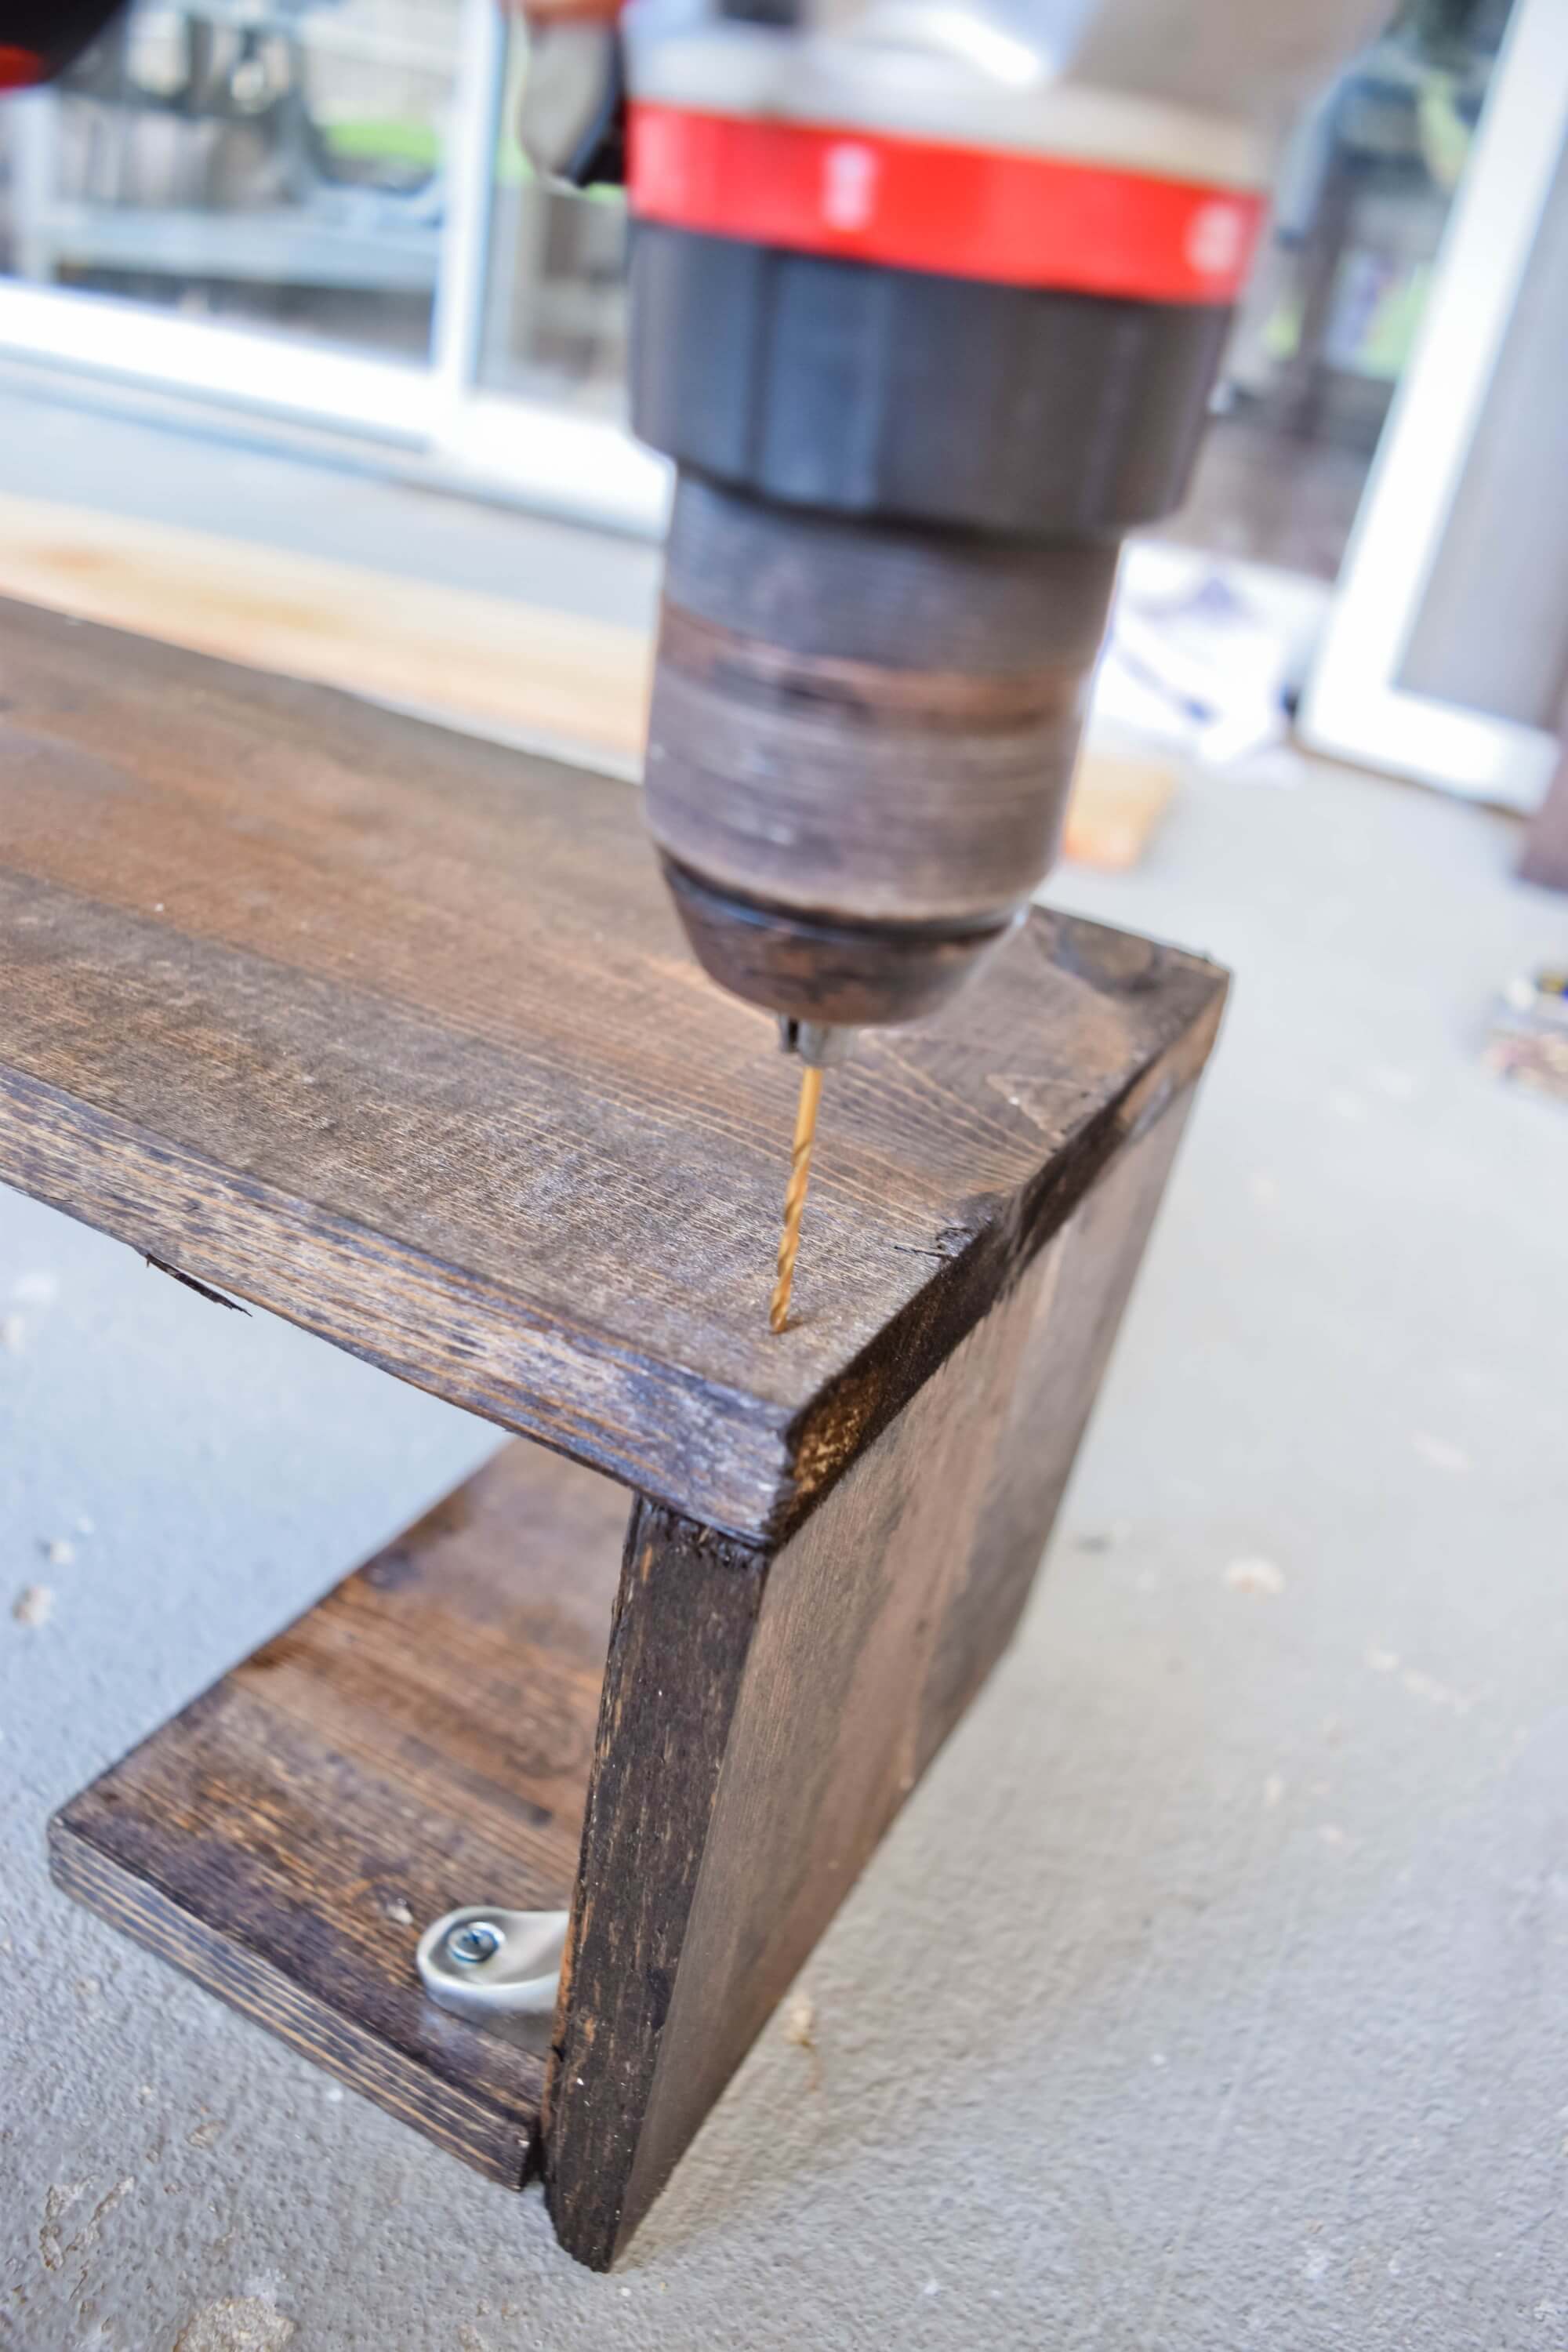
Balance your large piece on top of the 2 corner pieces we just made (it is helpful to have a partner at this point). Making sure your outer edges are lined up then drill 2 pilot holes, one on the top and one on the bottom, on each side.
Adding Curtains
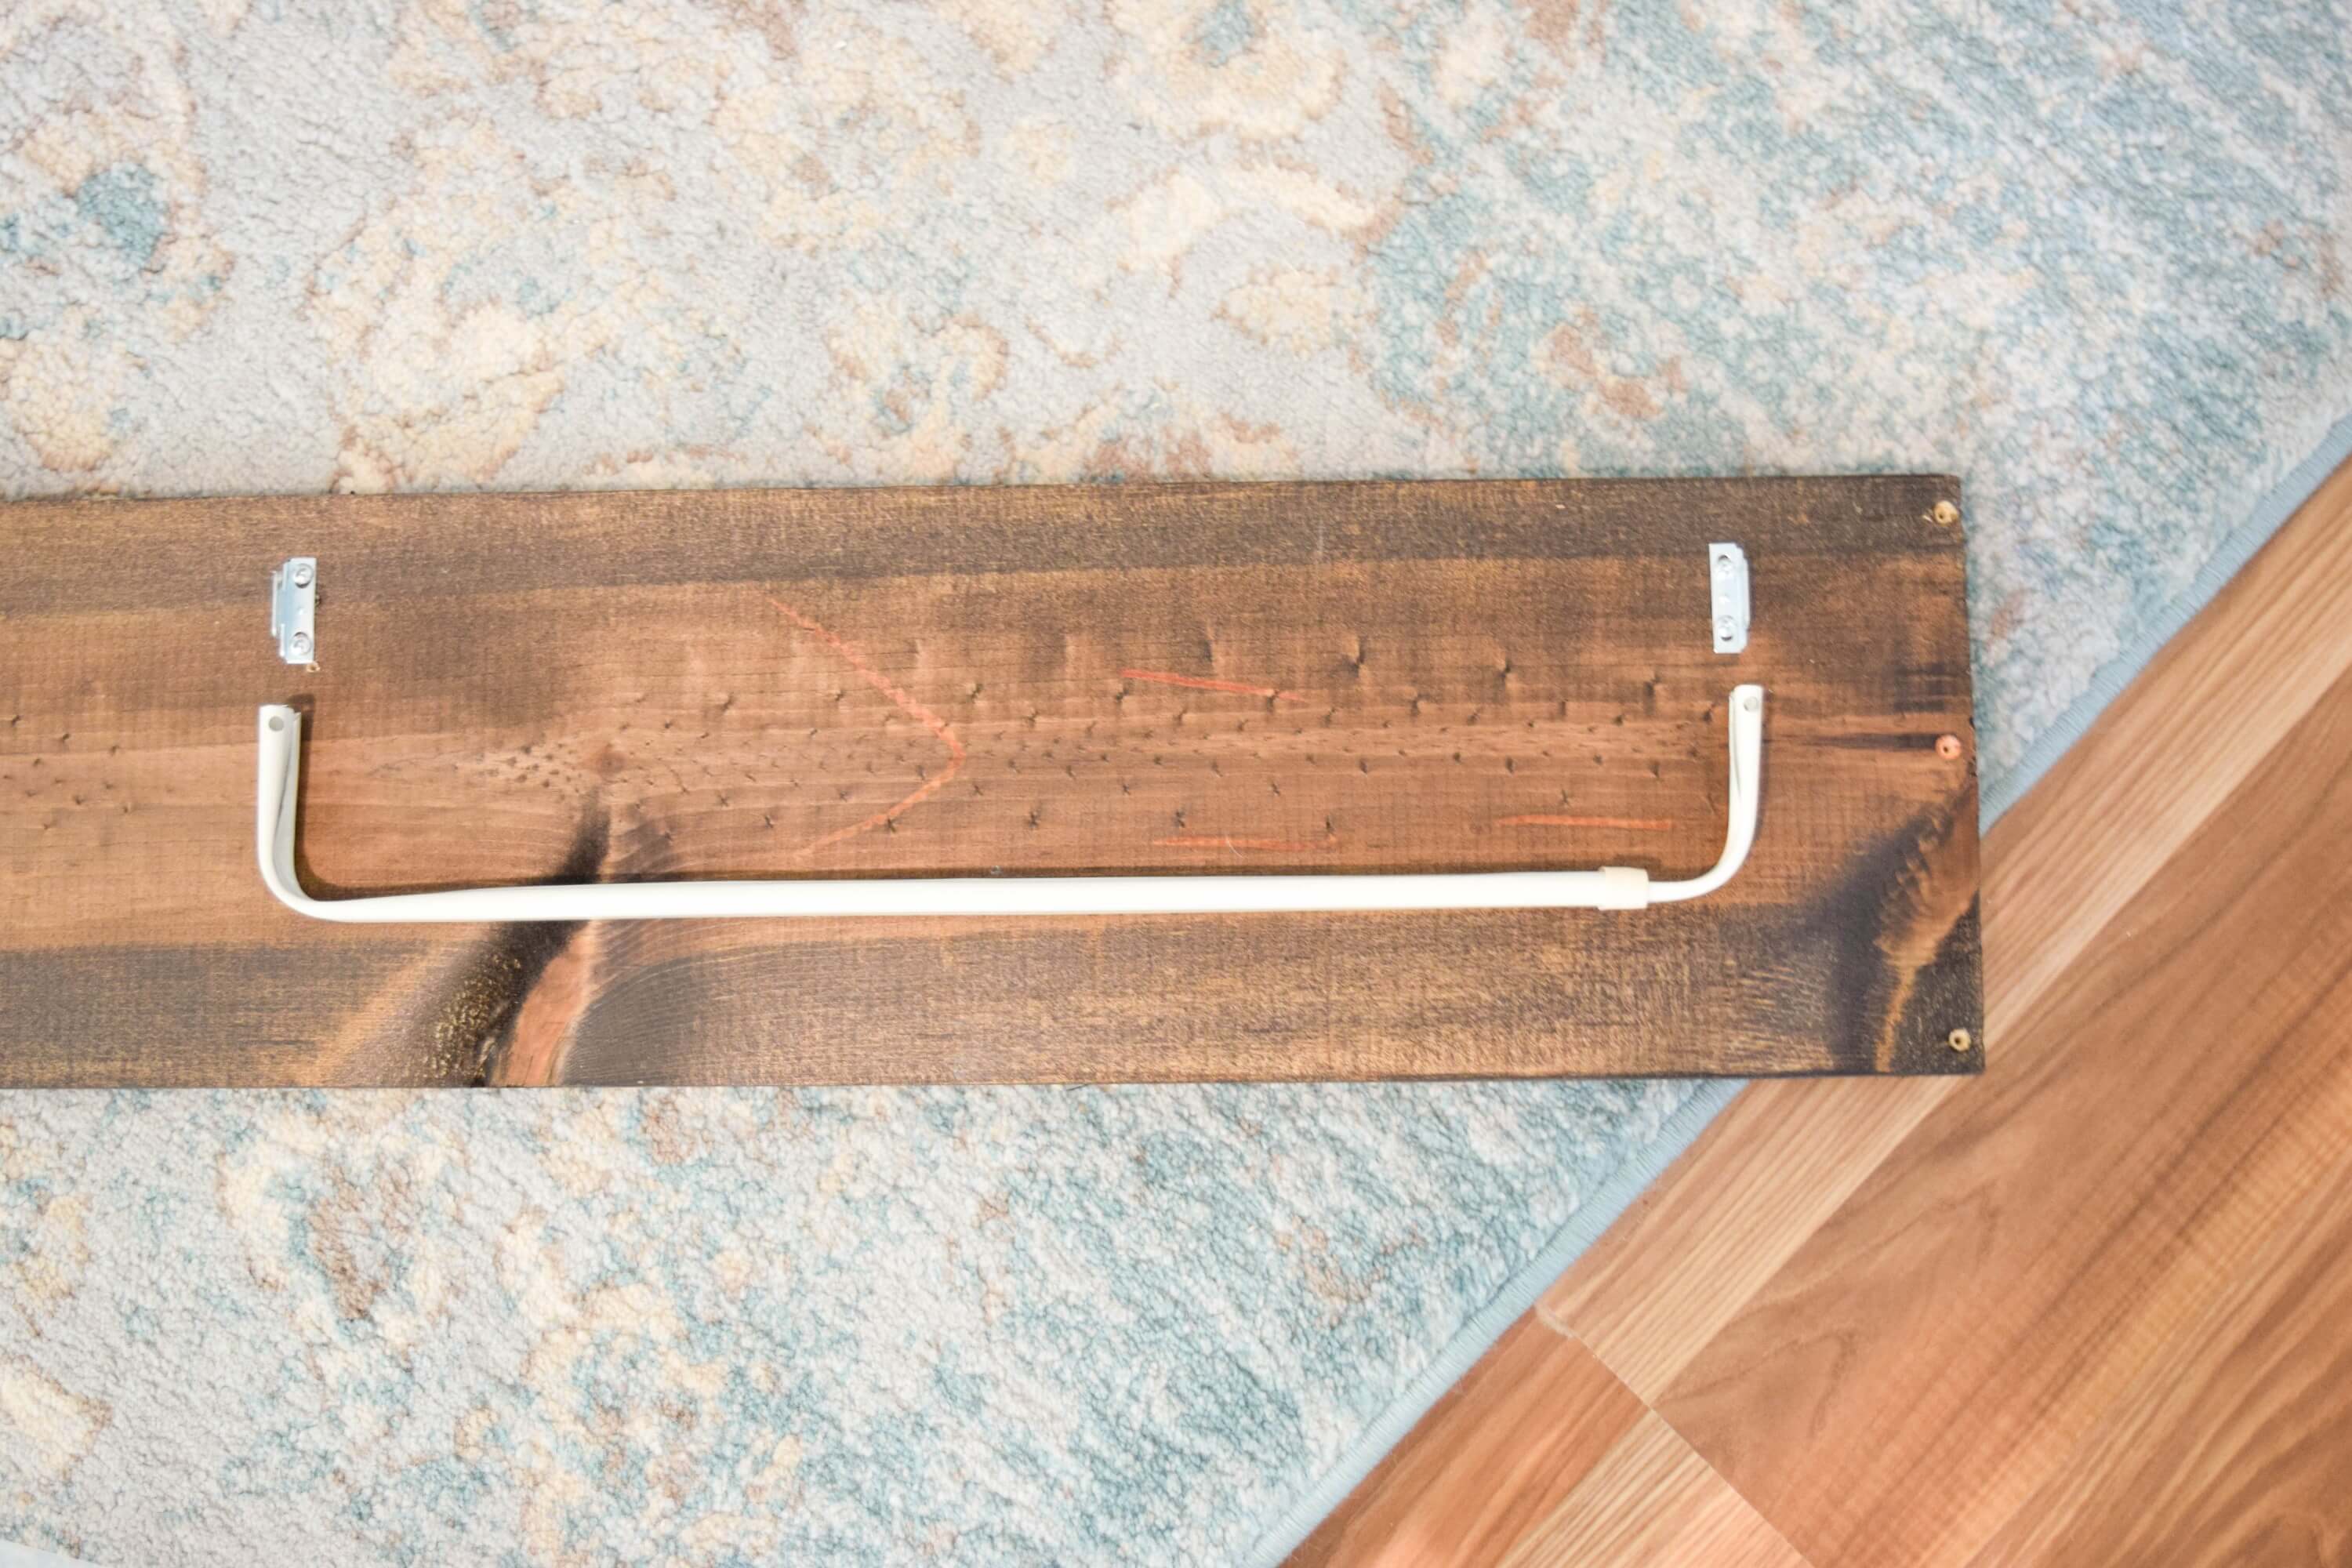
There are several creative way to add curtains if you want that option. Once easy way is using a tension rod (like for a shower curtain) to hang your curtains inside the valance. However I found that if you have larger windows, like mine are, you will have a hard time finding a rod that is 7 or 8 feet long. And if you do, they will be very expensive!
So I chose to use simple curtain brackets, specifically shorter ones because I want my curtains to only be decorative accents to the wood window valances, not close all the way.
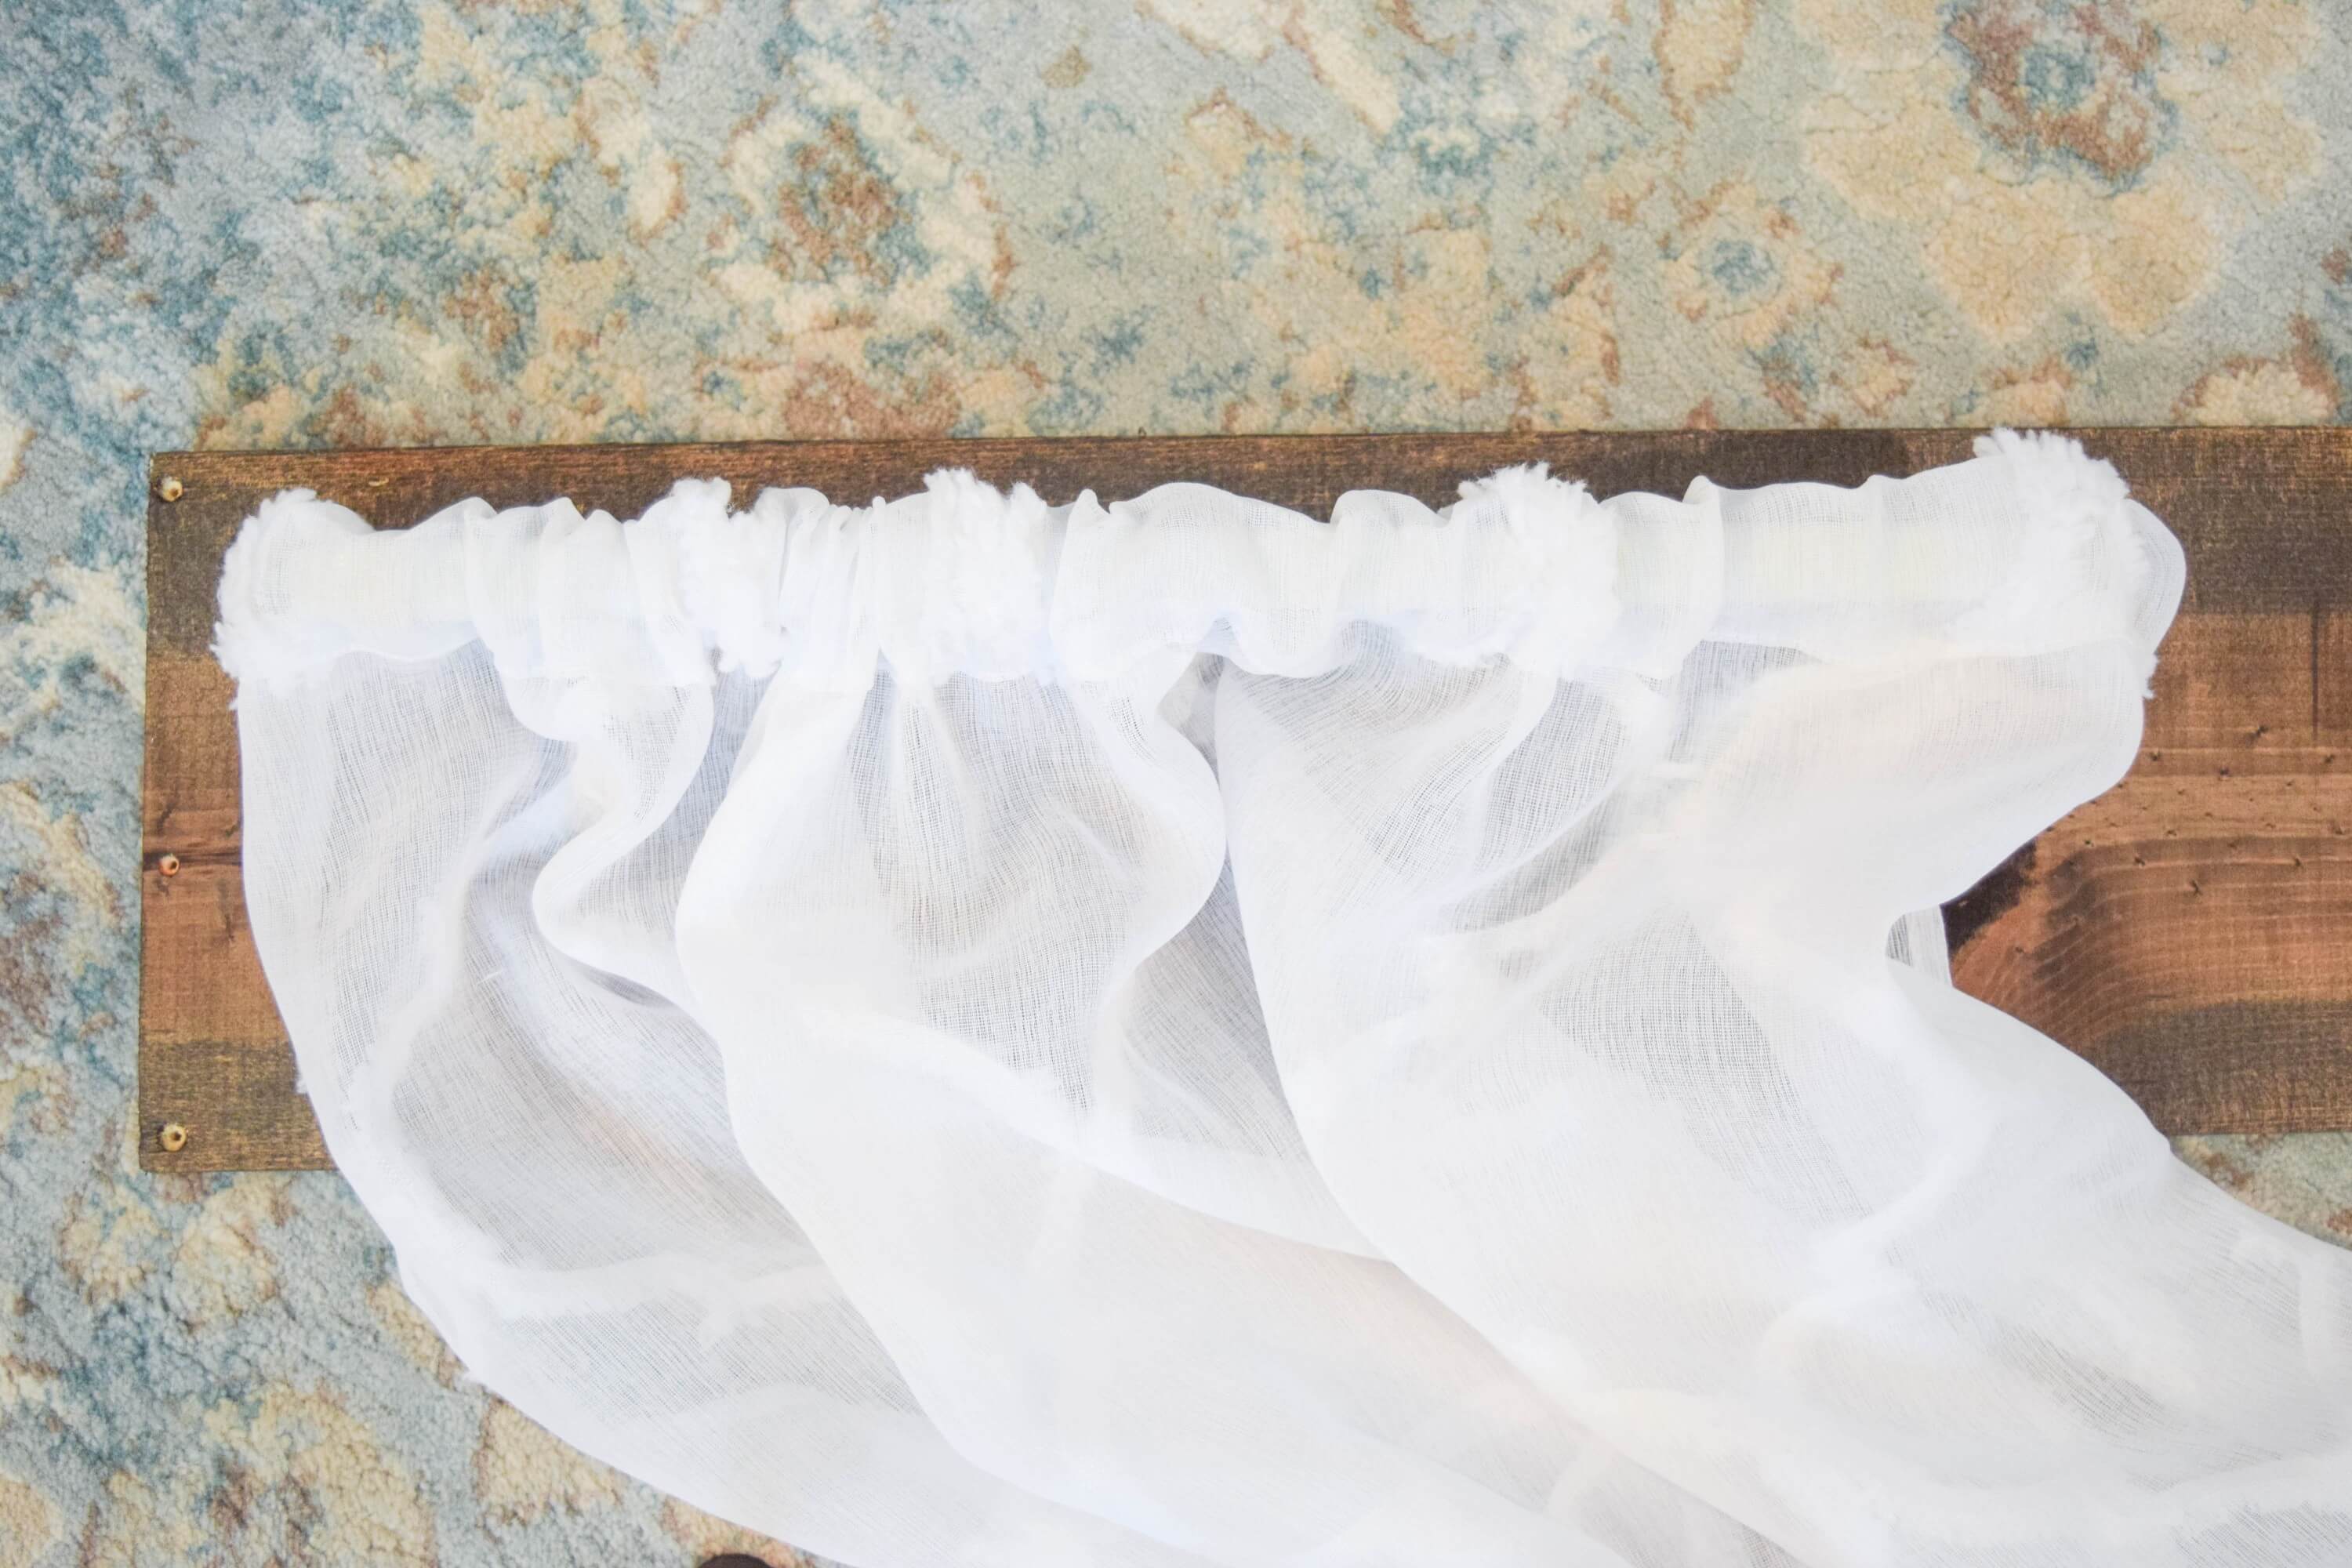
Make sure to hang the curtains on before we get to hanging the whole valance. It can be tricky otherwise to get them up.
Hanging the Valances
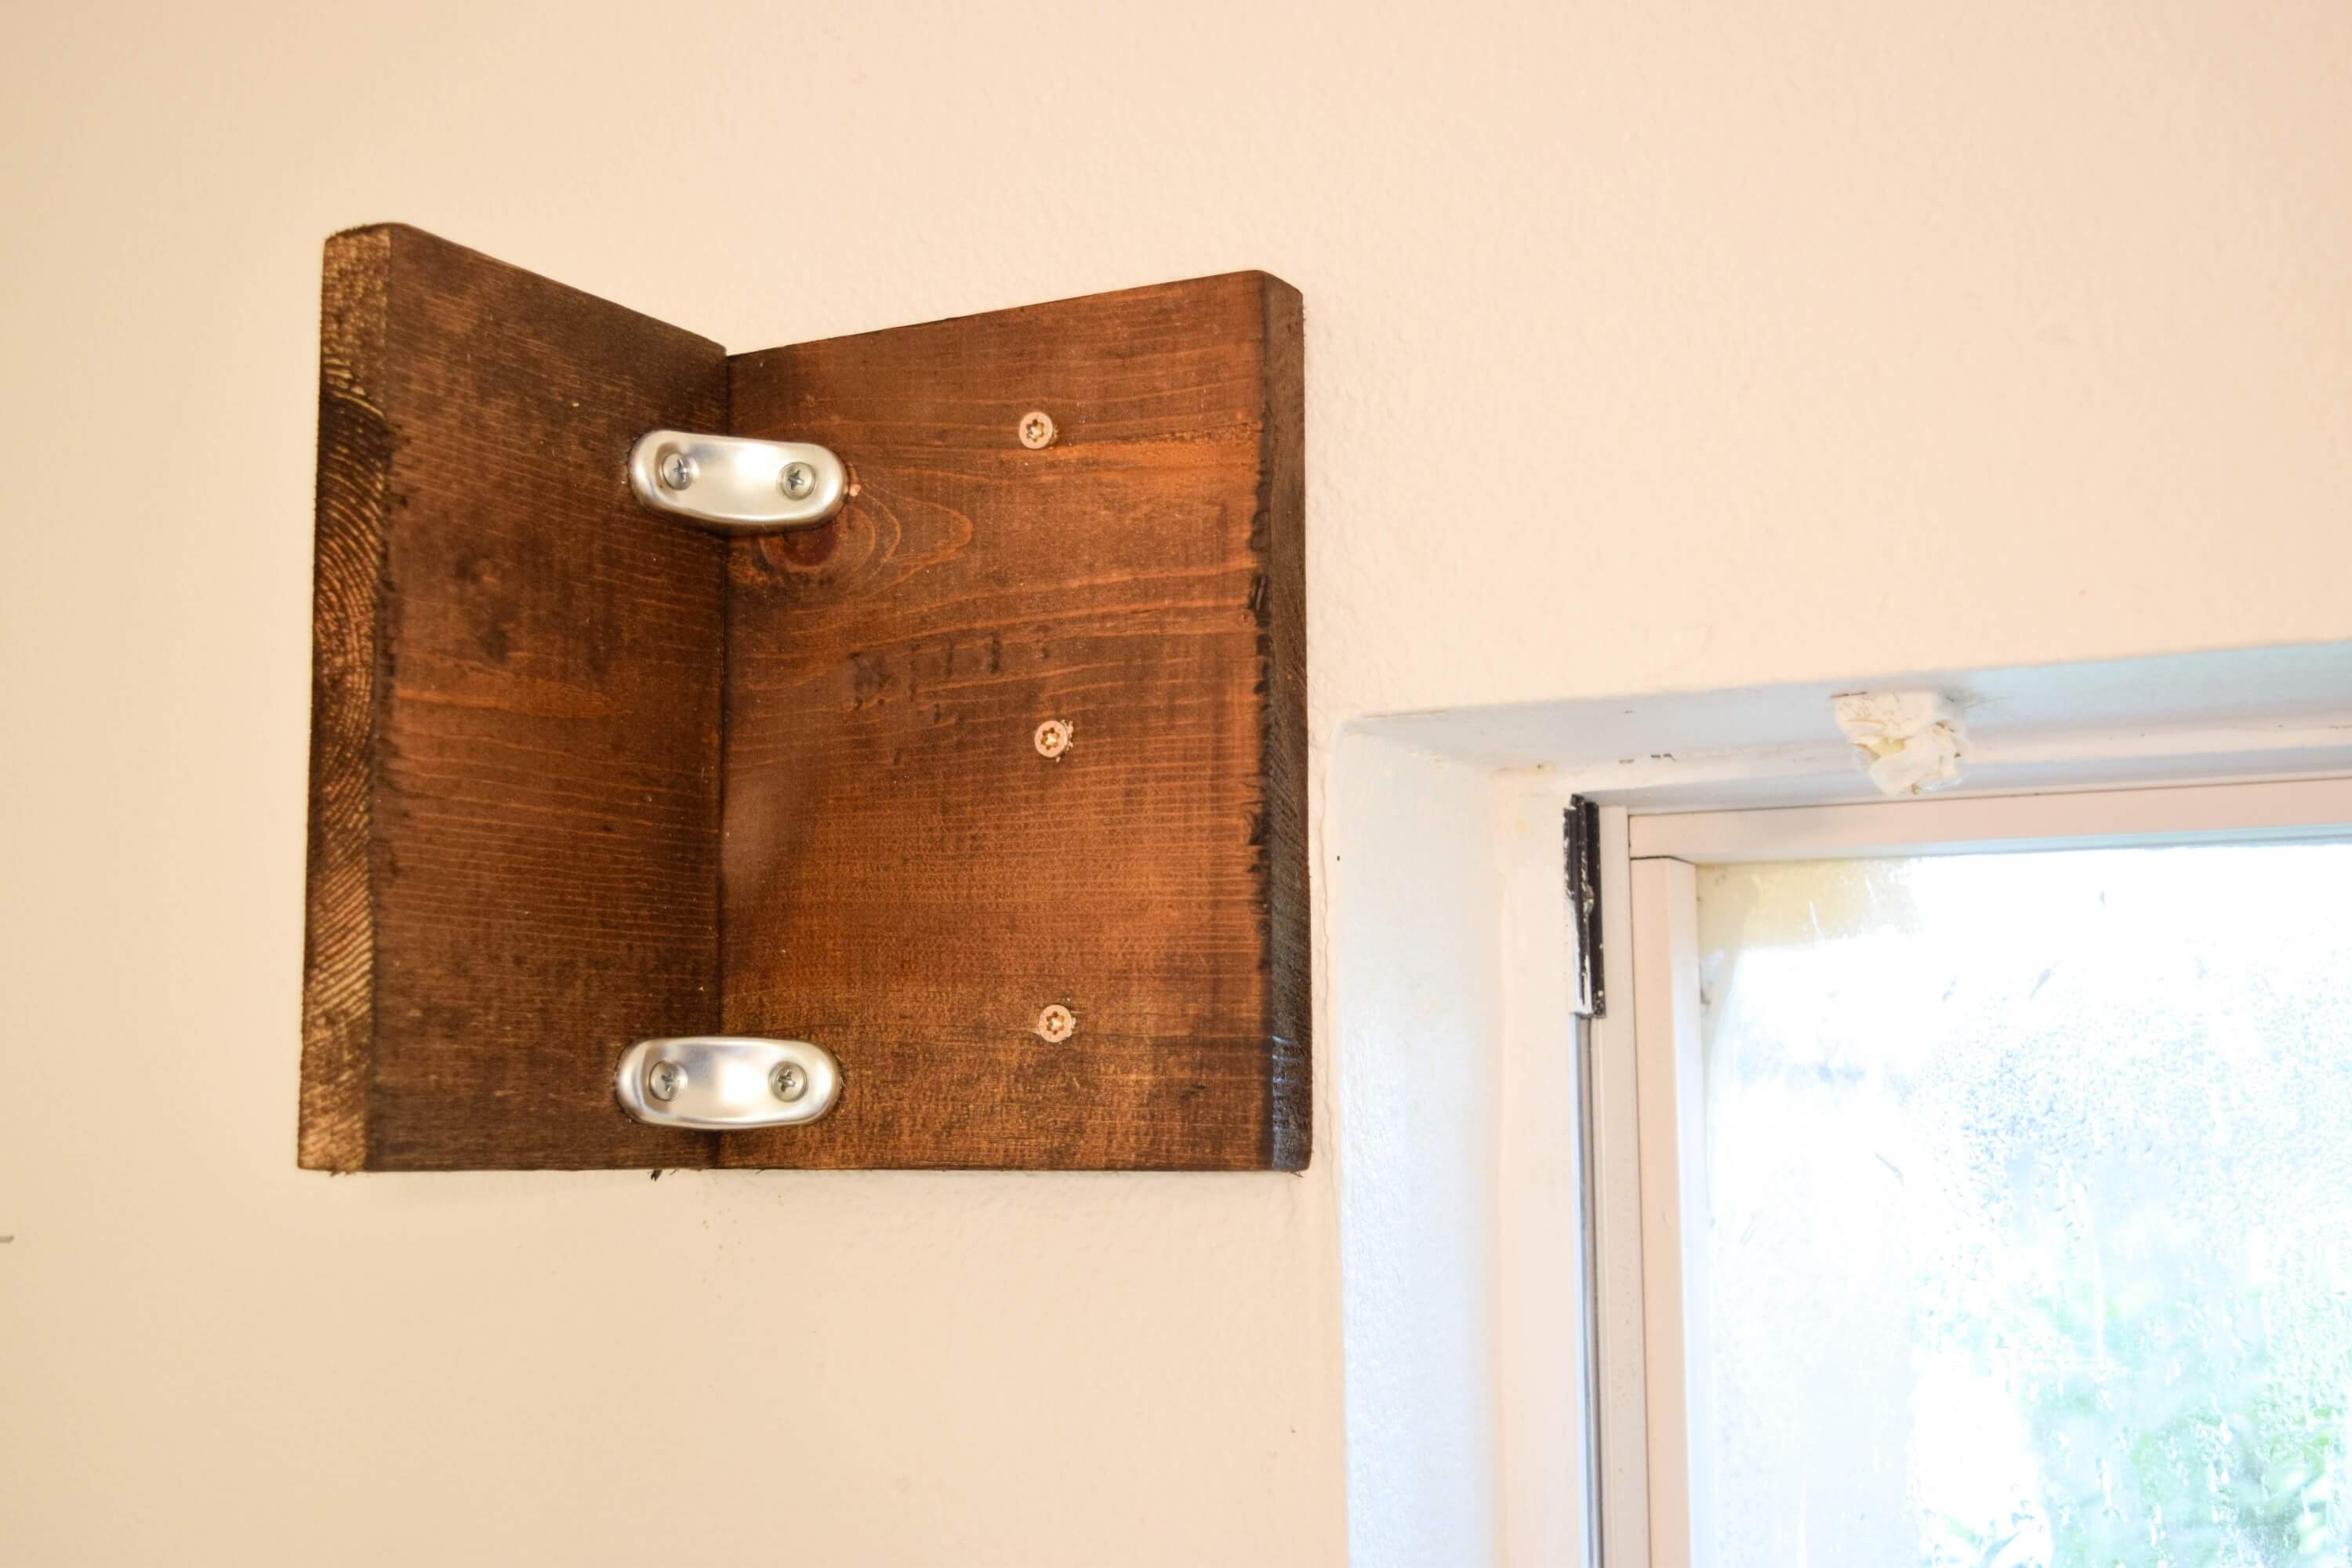
When it comes to hanging it is all about placement. The first thing you want to do is attach each of your 2 corner ends to the wall. Use your window’s edge as a guide to align.
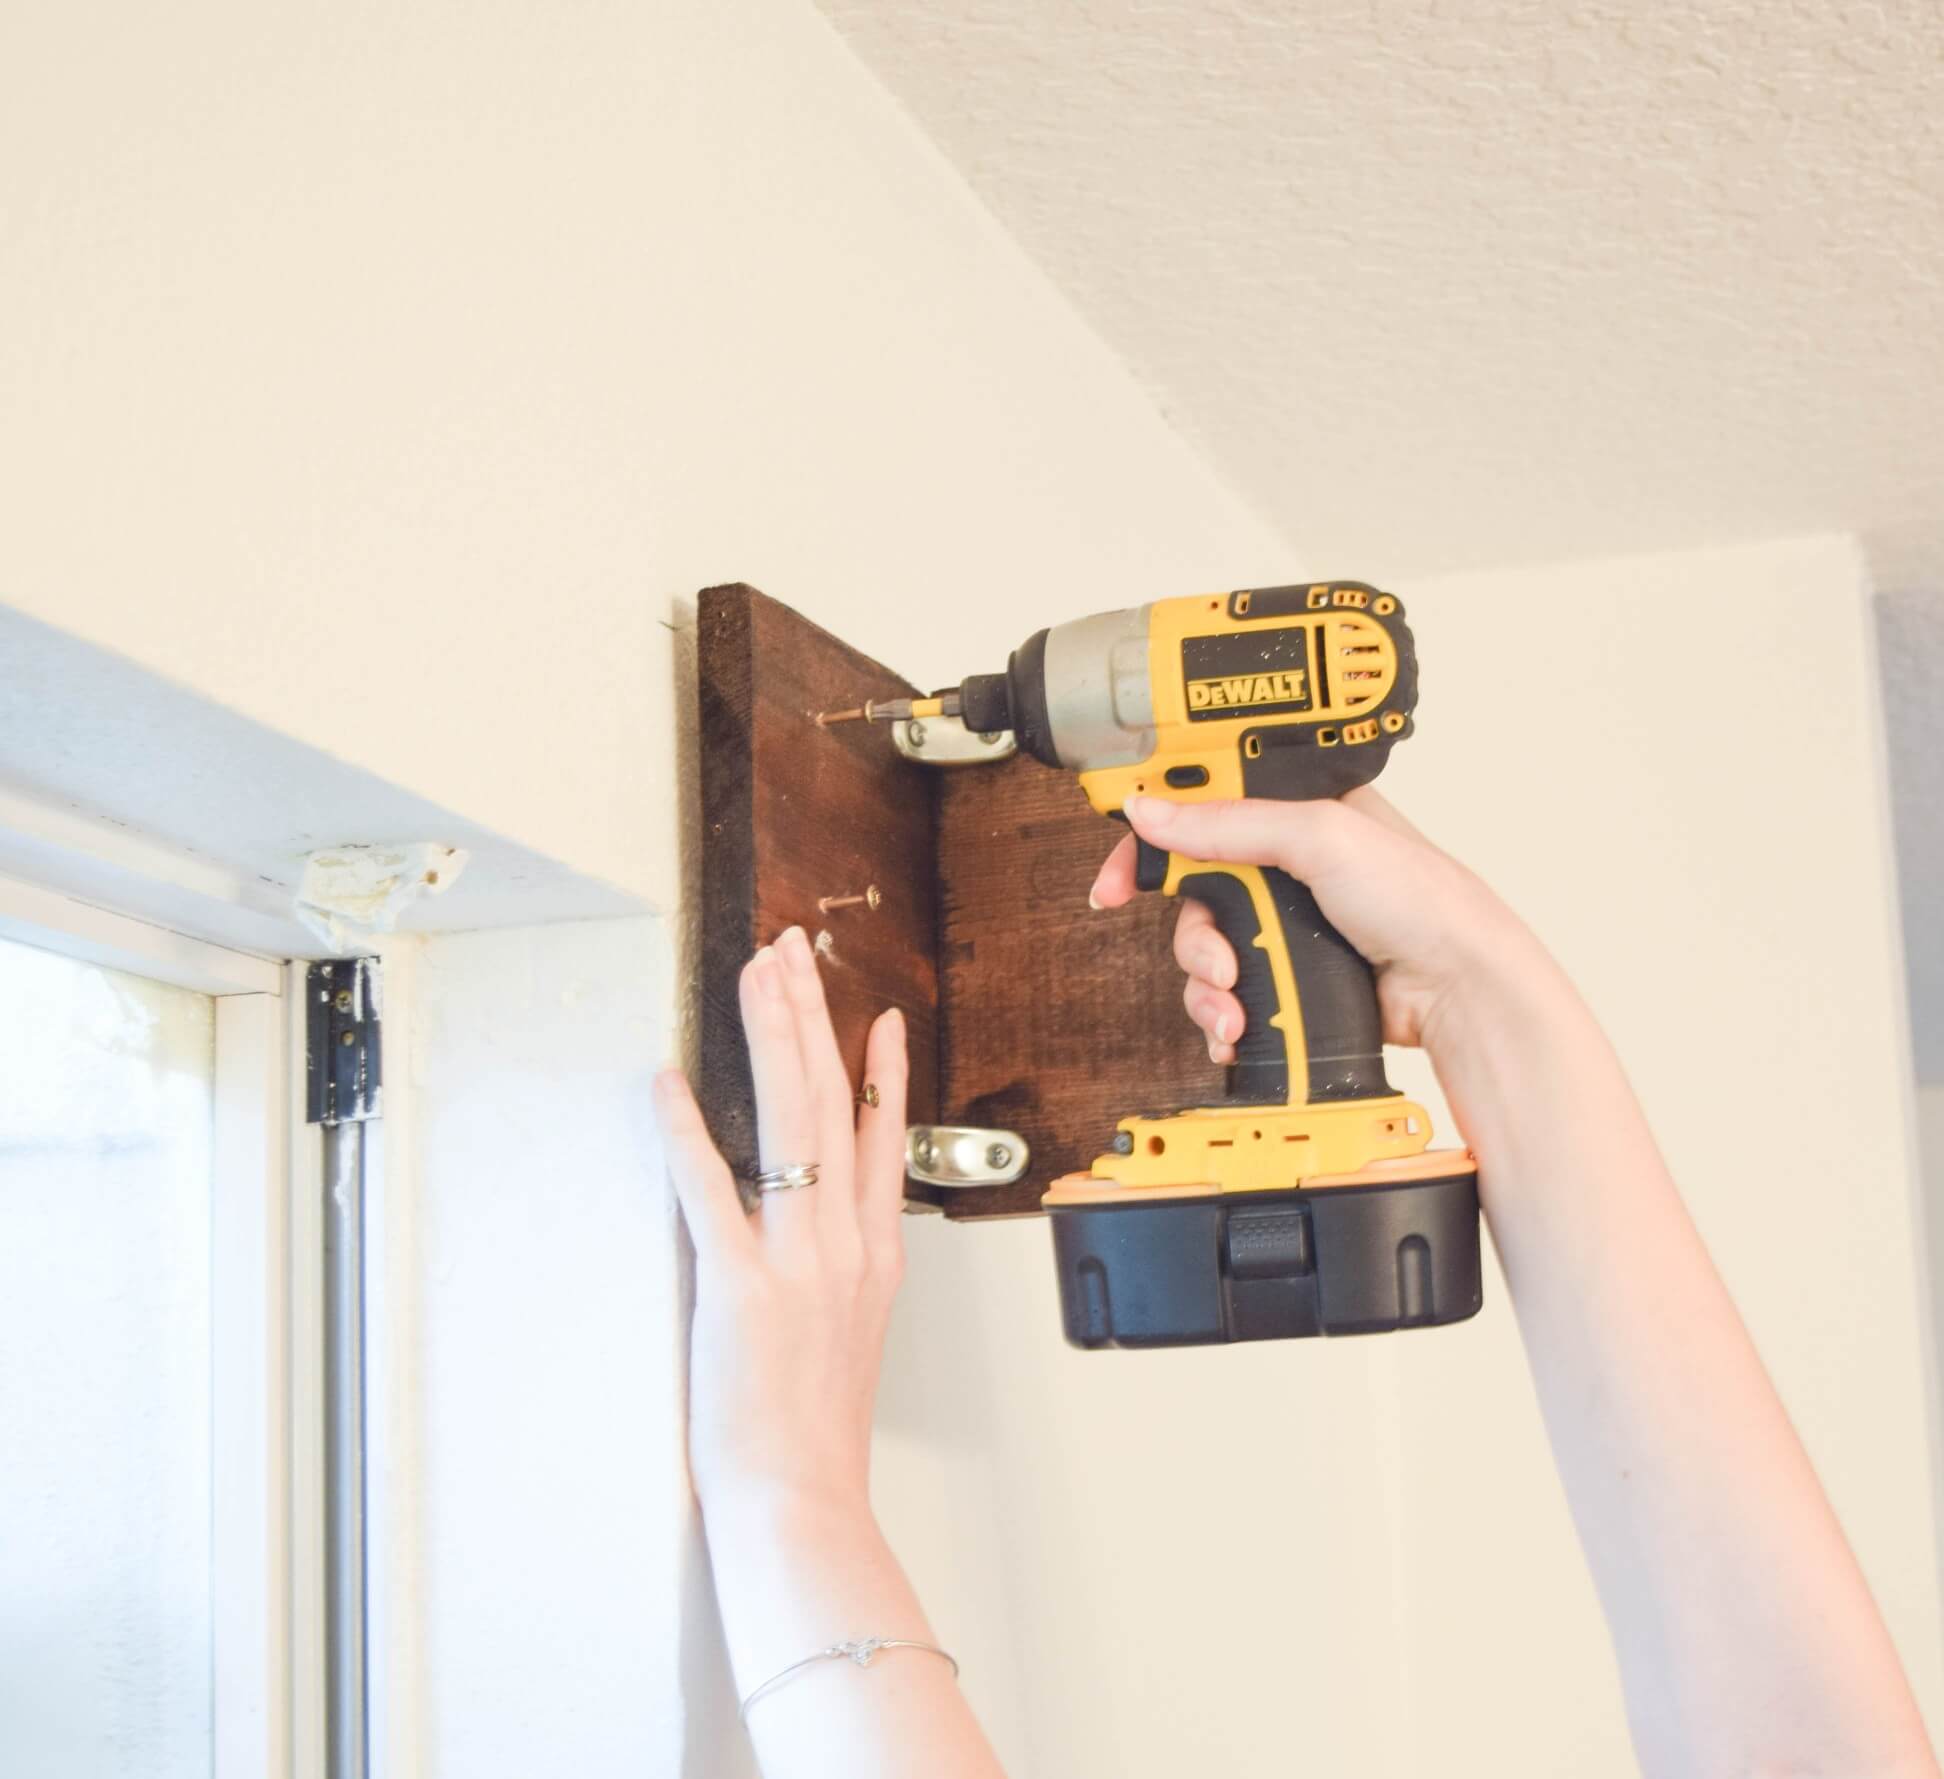
Use your 2 1/2 inch screws to attach the wood corners of the valance to the wall. I suggest finding a stud to screw into, if you cant find one make sure to use wall anchors.
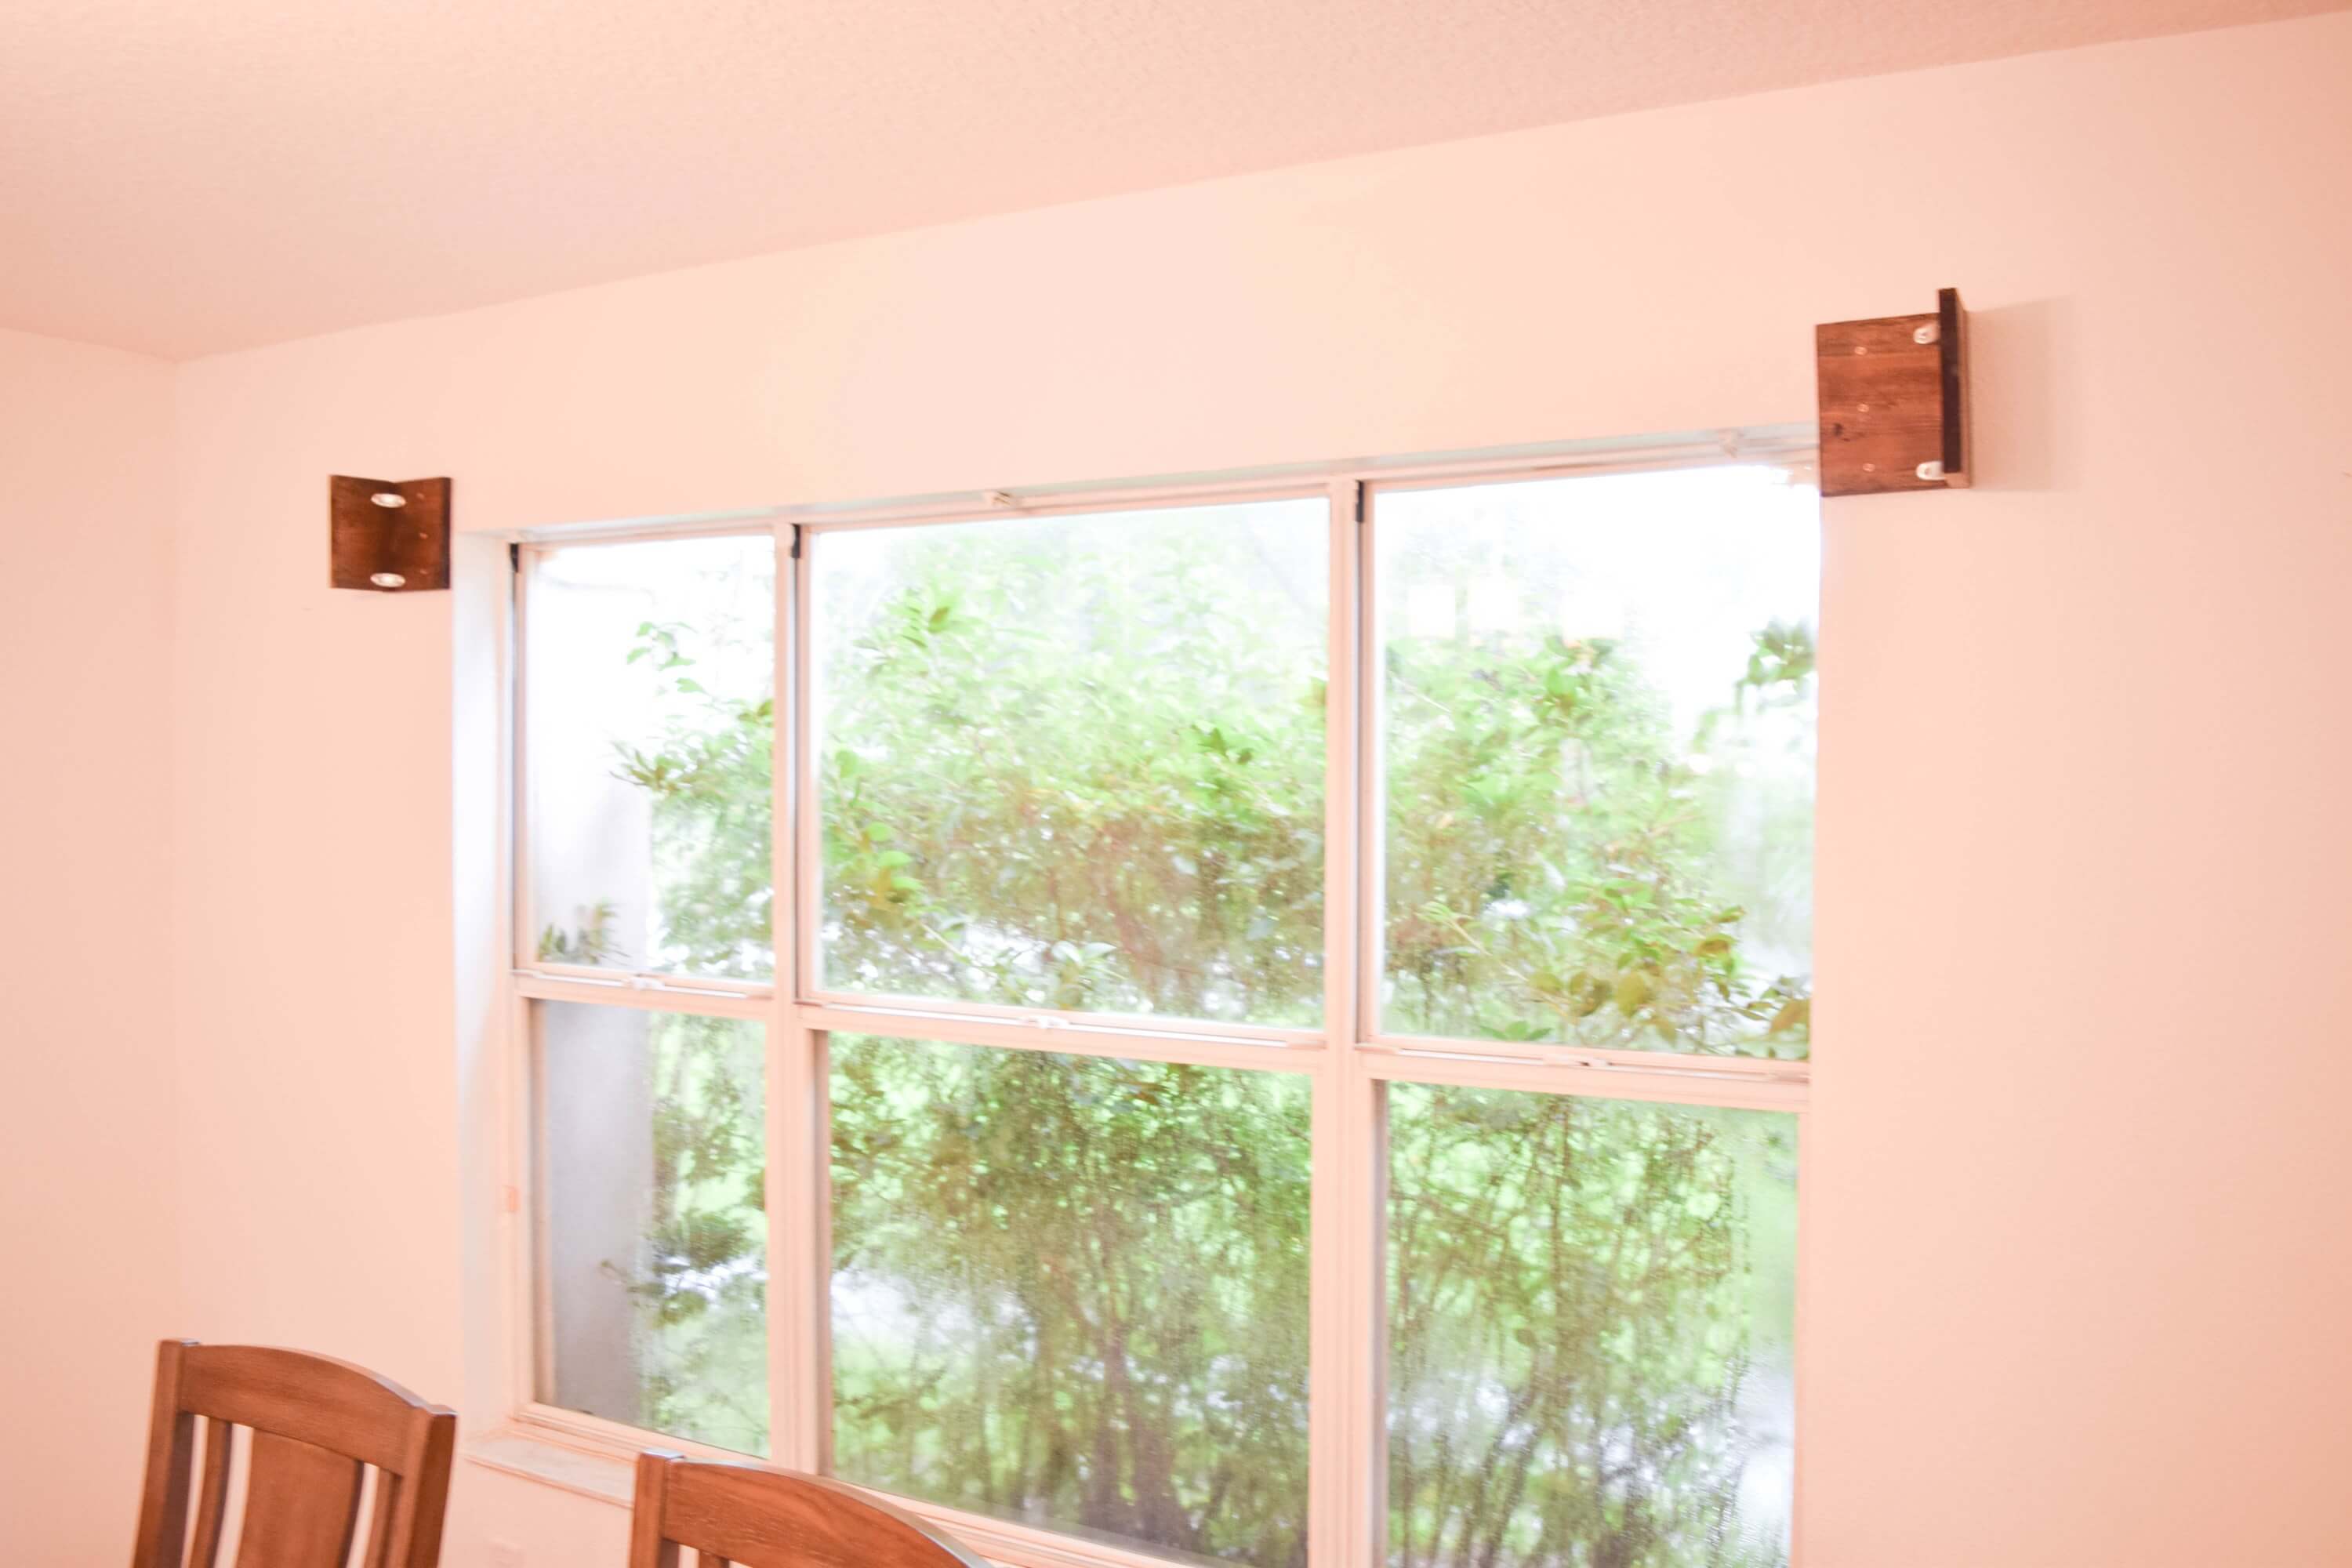
You will next add the other corner of the valance on the opposite end but this time make sure to measure and use a level to ensure your valance as a whole does not end up lopsided (true story, we made that mistake. 🙂
For the final step you will DEFINITELY need a partner. Have your partner hold one end of the long wood valance while you attach the other side with your 1 inch screws through the pilot holes you created in the last series of steps.
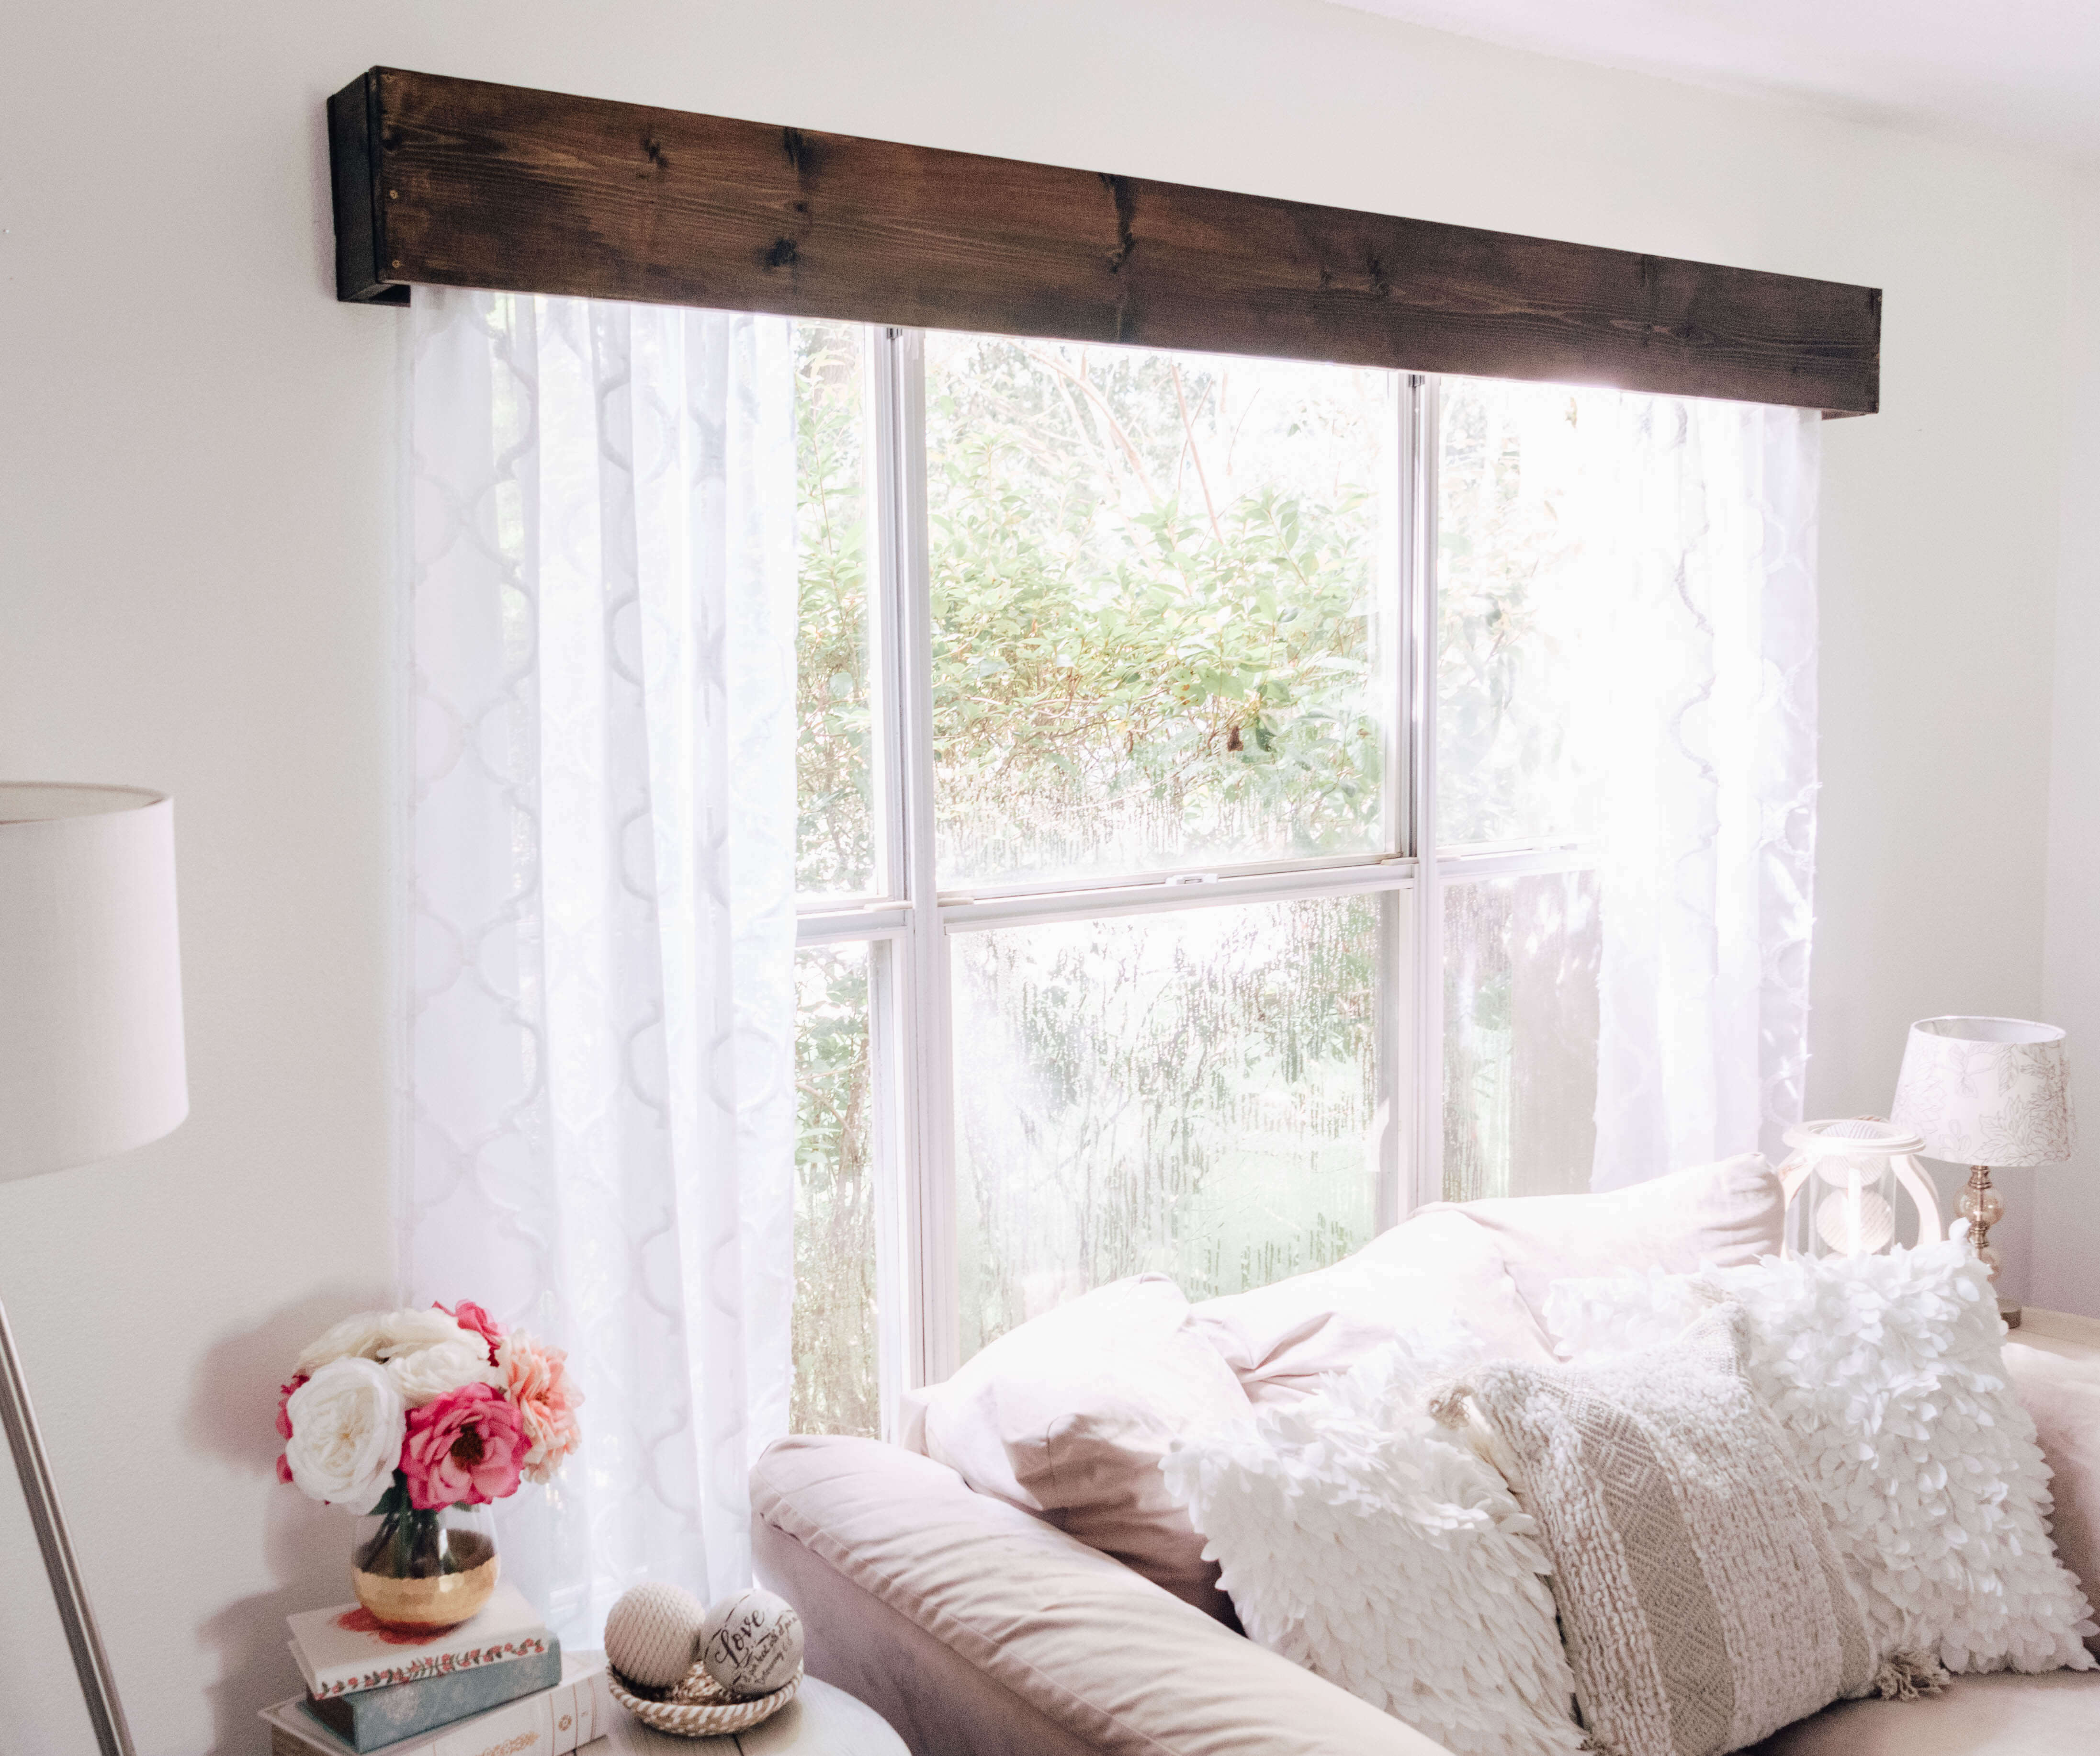
Your easy farmhouse wood window valances are complete!! These look like a million bucks but you spent only a few dollars to makeover your windows.
Side note: I personally like have a little peak-a-boo with the bronze screws on the front. If you don’t want to see these then you can cover the screws with a little wood putty, sand once dried and add a touch of your stain over it to cover them up.
Do your windows need a remodel? Would you consider wood valances? Tell me below!