How to Make Paper Pineapple Party Decorations: DIY Paper Pineapple Template
This post may contain affiliate links that won’t change your price but will share some commission.
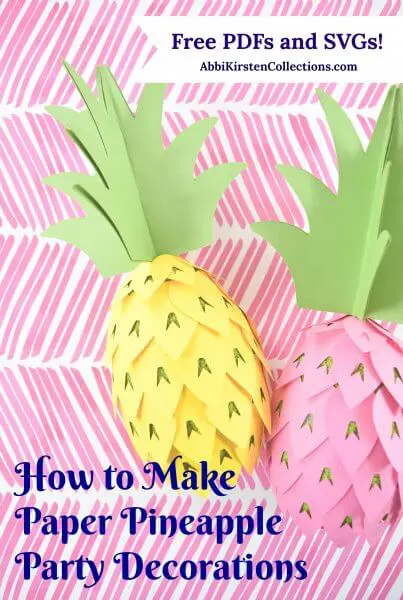
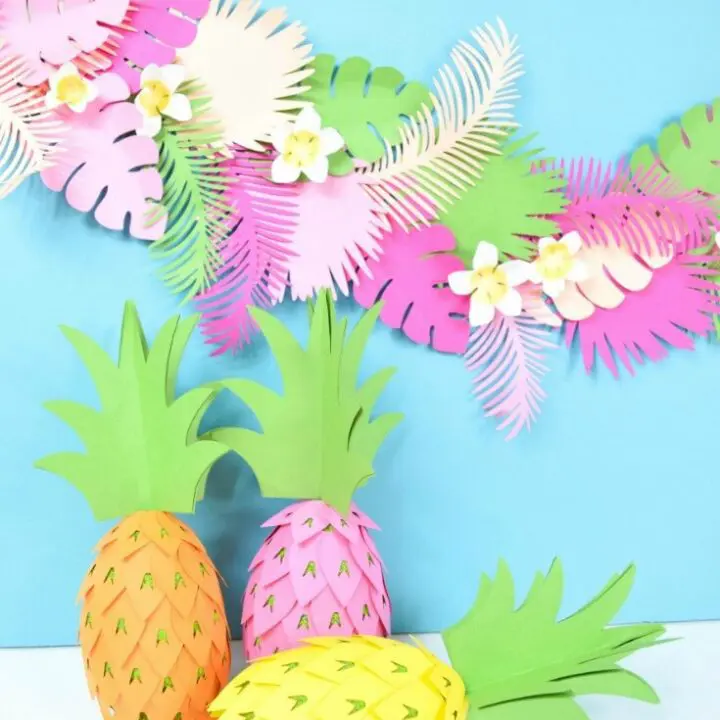
DIY 3D Paper Pineapple Craft
Today, we are going a little outside the paper flower box and thought I would try some paper fruit – paper pineapple party decorations, to be exact. This paper pineapple craft project is super easy and even a great option to let the kids get a little crafty this summer; even younger kids can do this craft with some basic Elmers glue.
You will also receive free pineapple templates – both printable PDFs and SVG cut files are inside the Craft Vault when you get started with a free account.
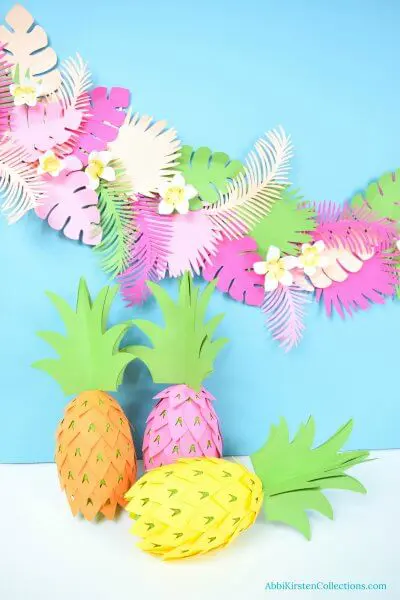
These paper pineapple decorations will give you the Ha-WOW-ii look you will want for any tropical party or luau. If you need a little more snazzy paper summer decor, I’ve got you covered with these Hawaiian paper flowers – Hibiscus paper flowers and even Chrysanthemum flowers.
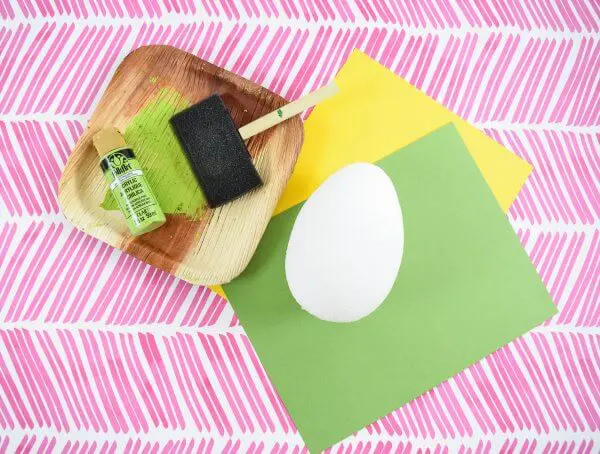
Supplies for Paper Pineapple Party Decorations
- Glue Gun
- 65-pound cardstock in choice colors plus green for the stem
- Foam egg – mine measures about 9 inches
- Bamboo skewers
- Green acrylic paint
- Foam paint brush
- Scissors and/or cutting machine (Cricut Explore Air 2 Machine)
- Pineapple templates (download below for free)
Download Your FREE Paper Pineapple Templates
Download these free paper pineapple templates by signing up using the form below. Once in the Vault use the keyword “pineapple” at the top search bar to find this template. If you already have an account, just log in and download the pineapple SVG and PDF printables templates here.
Paper Pineapple Step-by-step Instructions
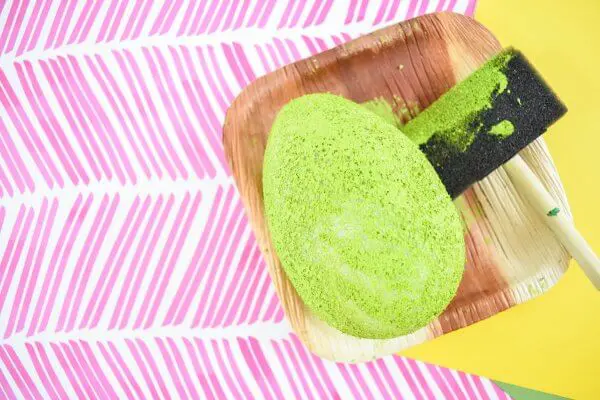
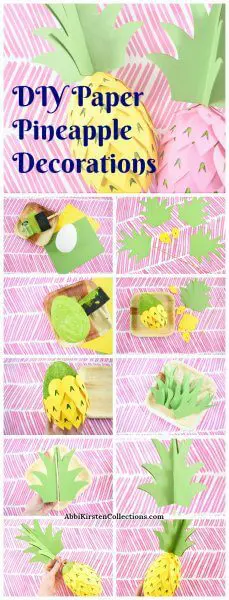
Step 1: Paint Your Foam Egg Base
Gather your supplies from the list above. I chose to paint my foam egg green underneath because I didn’t want the white to show through, and it also gives the pineapple a more authentic look.
For best results when painting, try using smooth foam. If you have to use the foam that sheds, try to use a foam brush and dab the paint on it. You may not want to use a brush motion because it can cause the foam egg to shed, and you may get covered in paint (true story, ya’ll!).

Step 2: Cut Out Your Pineapple Templates
Get all your paper pineapple template pieces cut out. The number of pineapple pieces you will glue on will vary for everyone, but I used about 40 for mine. You will also want to cut out 4 of the green-topped crowns for these paper pineapple decorations.
Step 3: Assemble Your Paper Pineapple
Begin gluing on each of the pineapple pieces. Glue in a circle to try to stay fairly even and slightly overlap on the bottom and sides as you go. Keep all the paper pineapple pieces flowing in the same direction for a nice, uniform look.
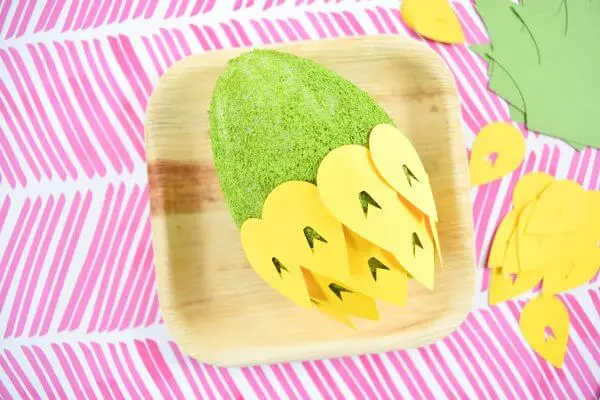
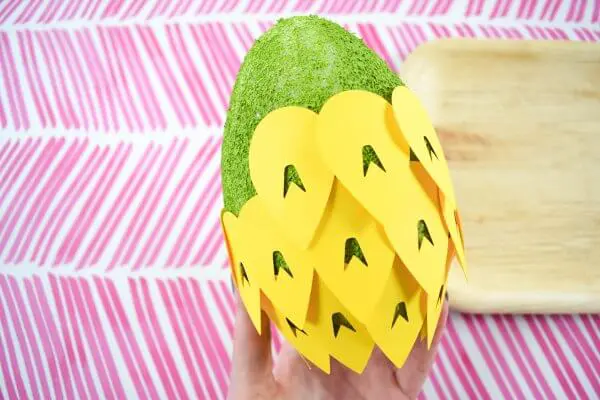
Keep going till the foam egg is totally covered. The idea here is to only have the green base showing through the center cutouts of each pineapple piece you are adding.
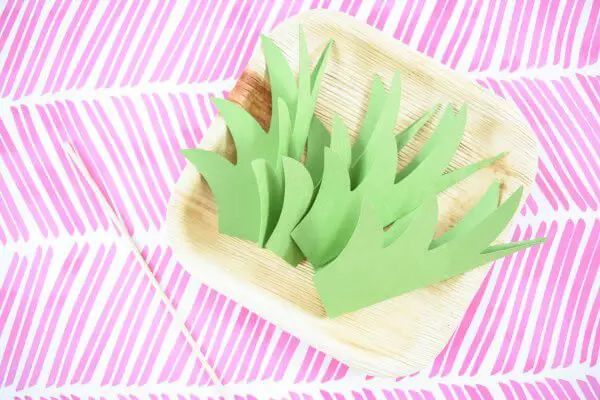
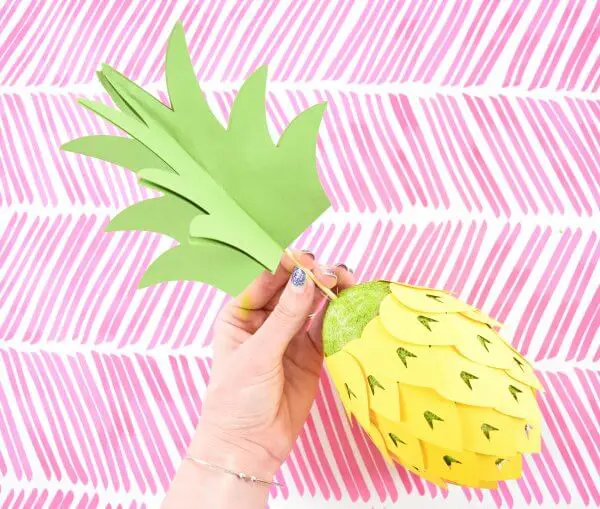
Step 4: Make Your Paper Pineapple Crown
To finish the top of the paper pineapple decorations, take your 4 pineapple crown cutouts and fold each one in half down the center. Next, glue all 4 folded crown pieces together in a stack.
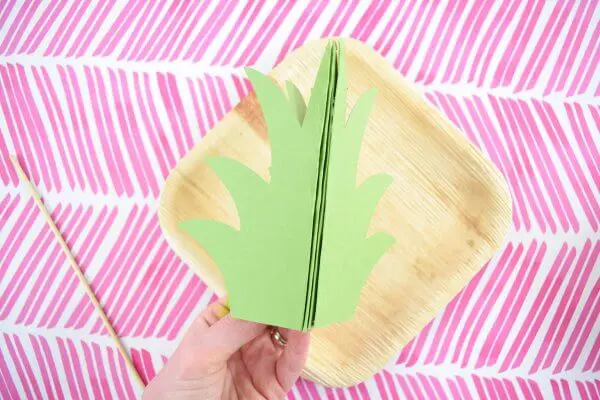
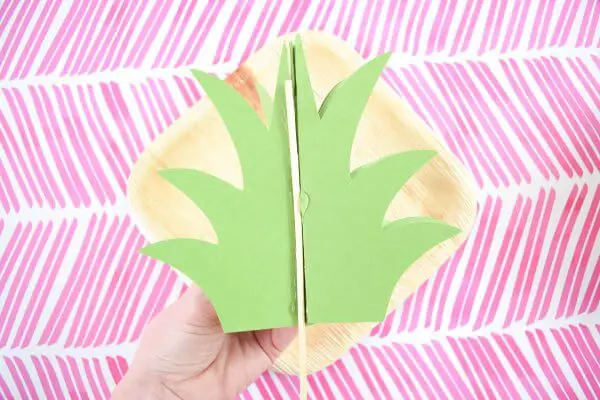
Before closing the pineapple crown, glue your bamboo skewer into the center. Then glue the crown closed around the wooden stick.
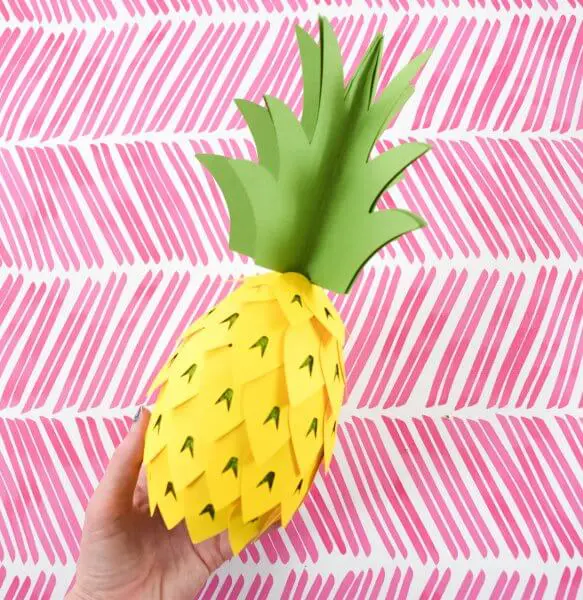
The final step to complete your paper pineapple decorations is to insert the crown into the base of the pineapple. If it feels like it is struggling to go in, use a gentle twisting motion to make it easier. You may also need to trim the bamboo skewer excess off the bottom – use scissors or wire clippers for this.
Finally, once your pineapple crown is on, add in any extra pineapple cutouts around the top to make a seamless transition from the bottom yellow part of the pineapple to the green crown.
This project was so much fun to make. I really think I will see some more fun paper fruit and food crafts in the future if I ever get caught up with the other hundreds of ideas swarming in my head!
How would you use these fun-tastic paper pineapple decorations?! Is there anything you would like to see me create?! Tell me in the comments below!
More Fruit-Themed SVG Files You May Love
- Layered Citrus Fruits Wreath | Like Love Do
- Berry Sweet Gift Tag | Gina C. Creates
- Just Peachy | The Denver Housewife
- Easy, Peasy, Lemon Squeezy | The Quiet Grove
- 3D Pineapple Box | Dinosaur Mama
- Cherry Bow | Kiy’s Craftroom
- One In A Melon | Crafty Life Mom
- So Berry Cute | Artsy-Fartsy Mama
- Life is Sweet Watermelon | Simple Made Pretty
- Watermelon Slimline Card | The Bearded Housewife
- One in a Melon Watermelon SVG | Sunshine and Munchkins
- Strawberry SVG | Persia Lou
- Layered Citrus Fruits | Like Love Do
- Watermelon Piggy Bank | Dinosaur Mama
How To Make Paper Pineapple Party Decorations (with Templates!)
Aloha! Your tropical luau will be unforgettable when you make these easy, kid-craft-friendly paper pineapple party decorations! This papercraft is as sweet as the fruit itself and makes great centerpieces or decor for your buffet. You can add more Hawaiian flair with my Hibiscus paper flowers, and Chrysanthemum flowers! Grab your grass skirt, coconut cocktails and craft your way to summer fun!
Materials
Instructions
Step 1: Paint Your Foam Egg Base
- Gather your all supplies.
- Paint your foam egg and let it dry.
Step 2: Cut Out Your Pineapple Templates
- Cut out all the paper pineapple pieces from the templates.
- About 40 pineapple pieces (depending on your foam egg).
- 4 green crowns for the top of the pineapple.
Step 3: Assemble Your Paper Pineapple
- Glue the pineapple pieces on the foam egg in the same direction.
- Start at the bottom, and proceed around the egg in layers.
- Slightly overlap the sides and bottoms of the pineapple pieces.
- Cover the whole pineapple except for the final top layer.
Step 4: Make Your Paper Pineapple Crown
- Fold each of the four green crown cutouts in half.
- Glue all the folded pieces together along the creased line in a stack. Remember, these pieces need to open for a 3D effect.
- Glue the skewer into the center, then glue the crown closed around the skewer.
- Open the crown and, using the skewer end, insert the skewered crown into the top of the pineapple.
- Add more pineapple pieces around the crown to hide the bottom edge.
Congrats on finishing the paper pineapple party decoration, and aloha!
About Abbi Kirsten
Welcome to my colorful corner of the internet, where we play with vibrant crafts and unlock your creative magic! Hang out with me and get lost in a fun array of projects, tutorials, and products, from stunning papercraft ideas to flower templates, Cricut help for beginners, and endless crafter’s hacks.
Join A-Star Crafters and participate in monthly Craft-Alongs in our community Facebook group!


These are so cute! Perfect for this summer.
These are adorable! I love how perfect they are for summer and how beautifully you displayed the process through pictures. I will have to keep these in mind for when the right event comes along to use them!
Hi Chelsie! Thank you for the kind compliments. Glad you like them!
Wow these are so freaking cute and ridiculously clever! I can’t stop staring at the pics xo
Thank you Amanda!
Thanks so much for this cute tutorial! I shared it via my newsletter and it’s proving to be really popular.
Thank you! I love your site!
Heey, this looks so cute and has so much summer vibe – I love it. Definitely good idea for any party.
I am relatively new to this; but I want to compliment you on your tutorials. They are so easy to follow and I love the way you explain everything!
My daughter in law uses pineapples in her classroom! These are awesome. I did try to curve the bottom of the green paper a little so it was somewhat closer to the yellow pieces.
Thank you for making this so much fun!
Janice Heith