How to Make Paper Rosette Fans Using Cricut – Free Templates for Easy Party Decorations
This post may contain affiliate links that won’t change your price but will share some commission.

I created some foldable paper fan rosettes with scissors and paper many years ago. I decided it was time to create some specialty templates that can be used with your Cricut machine and Design Space.
Rosettes are open circular representations of flowers used in architectural sculptures, fashion accessories, food and instrument design, decoration, and art pieces. The first use of these symbols has been traced back to Mesopotamia and Ancient Greece, and rosette designs were heavily used in the 1950s.
Today, rosettes give any gathering a touch of vintage elegance. They can be used for a baby shower, an outdoor ceremony, or as a sweet little keepsake from a beautiful summer wedding. From a Christmas get-together to a winter birthday party, these rosette paper fans will be the hit of the season for a low price, no matter what your party theme. Rosette paper decorations can be made in a variety of sizes, and all supplies can be found at local craft stores or online.
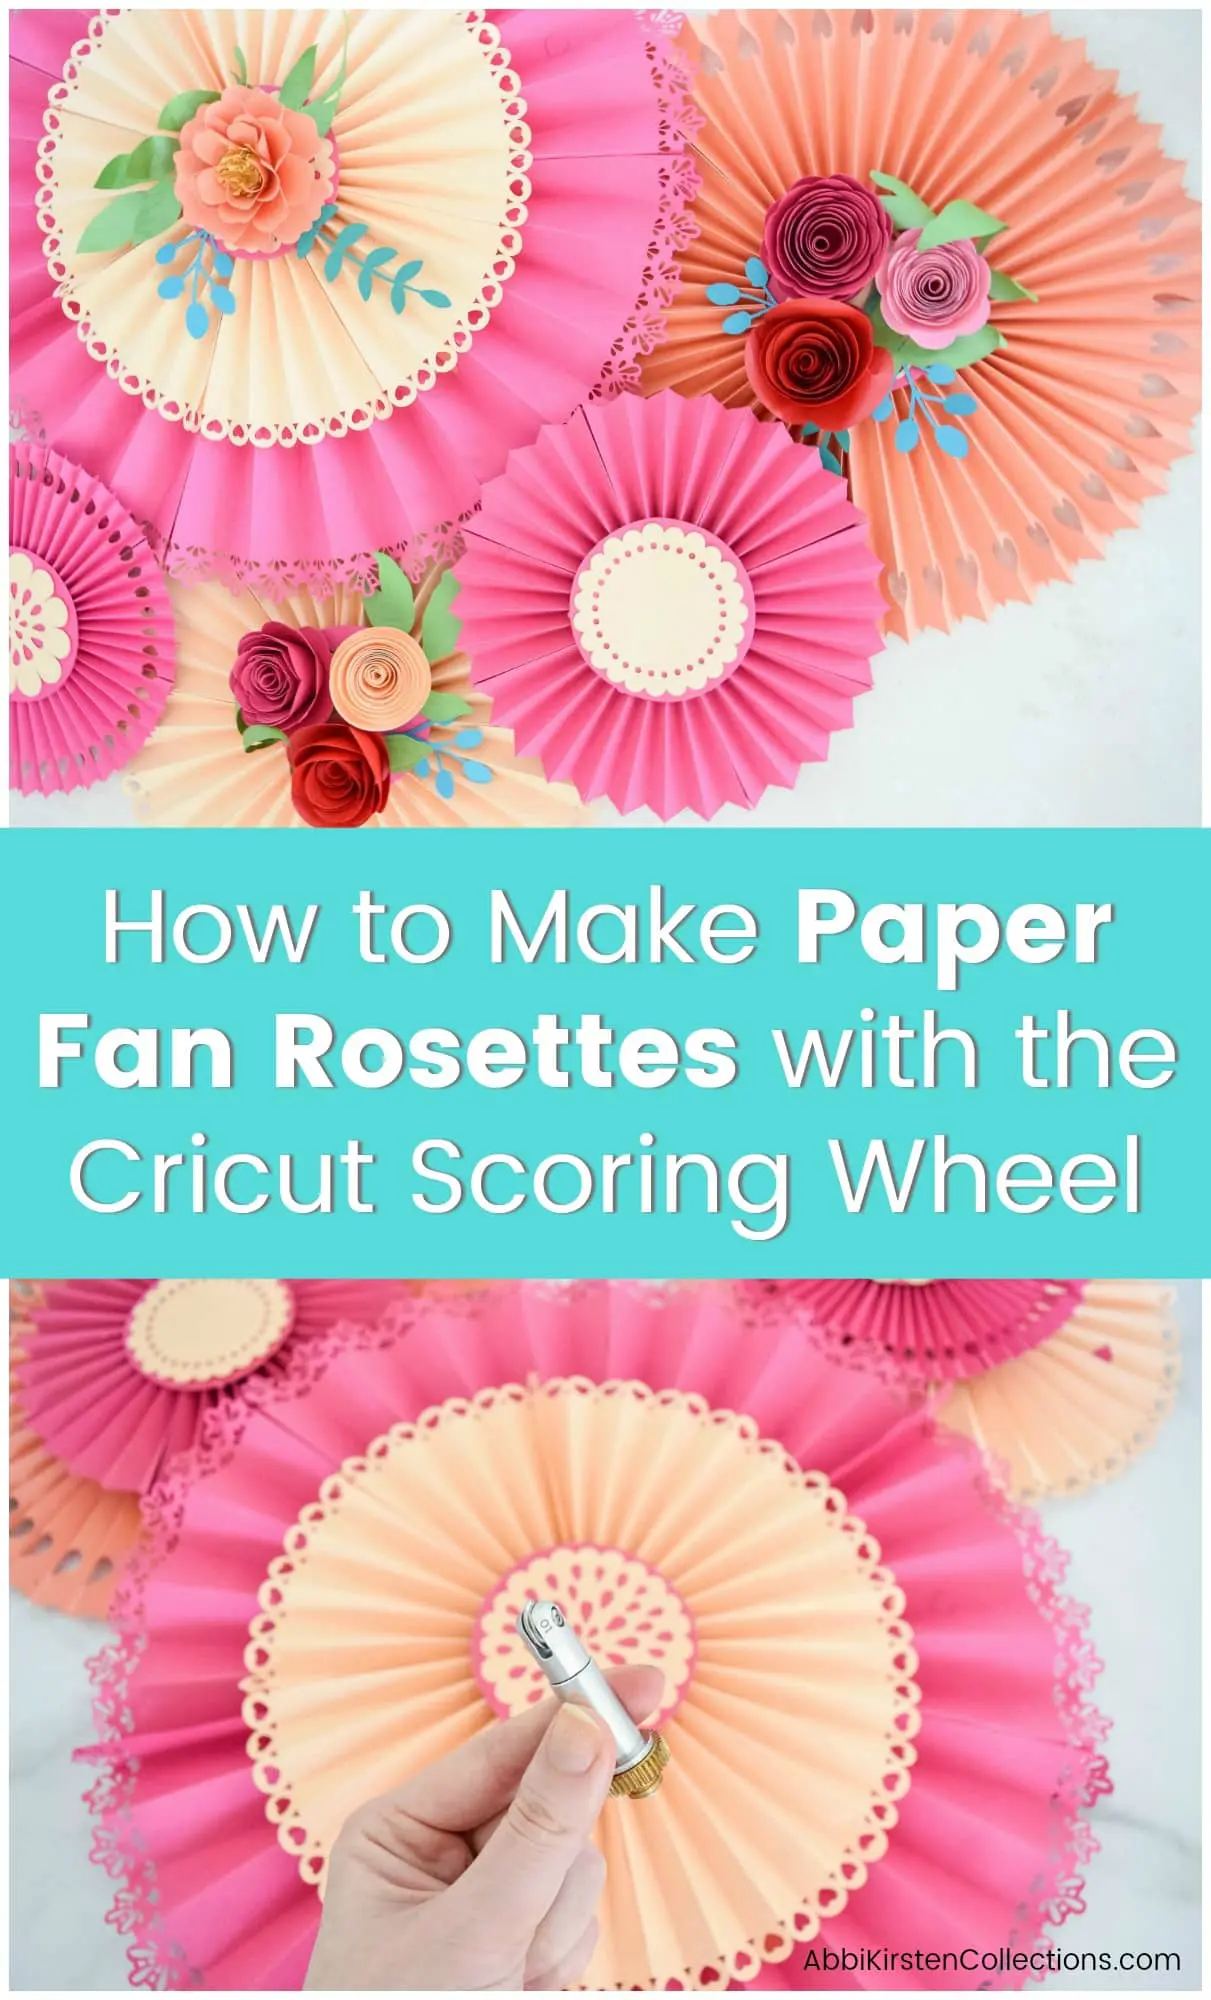
This tutorial teaches you to make elevated, easy paper fan rosettes with cut-out details. I will also show you exactly how I use the Cricut scoring wheel (or stylus) with my Cricut machine. This paper rosette fan project turns out so well when you let your Cricut do the heavy lifting because all the folds are perfectly accurate!
Below you can find full step-by-step written and video tutorials, including how to set up the template in Cricut Design Space!
First, let’s review the supplies you will need for this project.
Supplies for Making Paper Rosette Fans
- 50-65 lb text weight Recollections cardstock. You can see my complete paper recommendations list in my post, Best Paper For Paper Flowers/Crafts.
- Cricut machine
- Quickswap housing and Scoring wheel or scoring stylus
- Rosette templates – find them available for download below!
- Hot glue gun
- Optional: Paper flowers for added decoration. Shop my numerous paper flower designs at my Etsy shop or download my ebook and template bundle, The Joy of Paper Flowers.

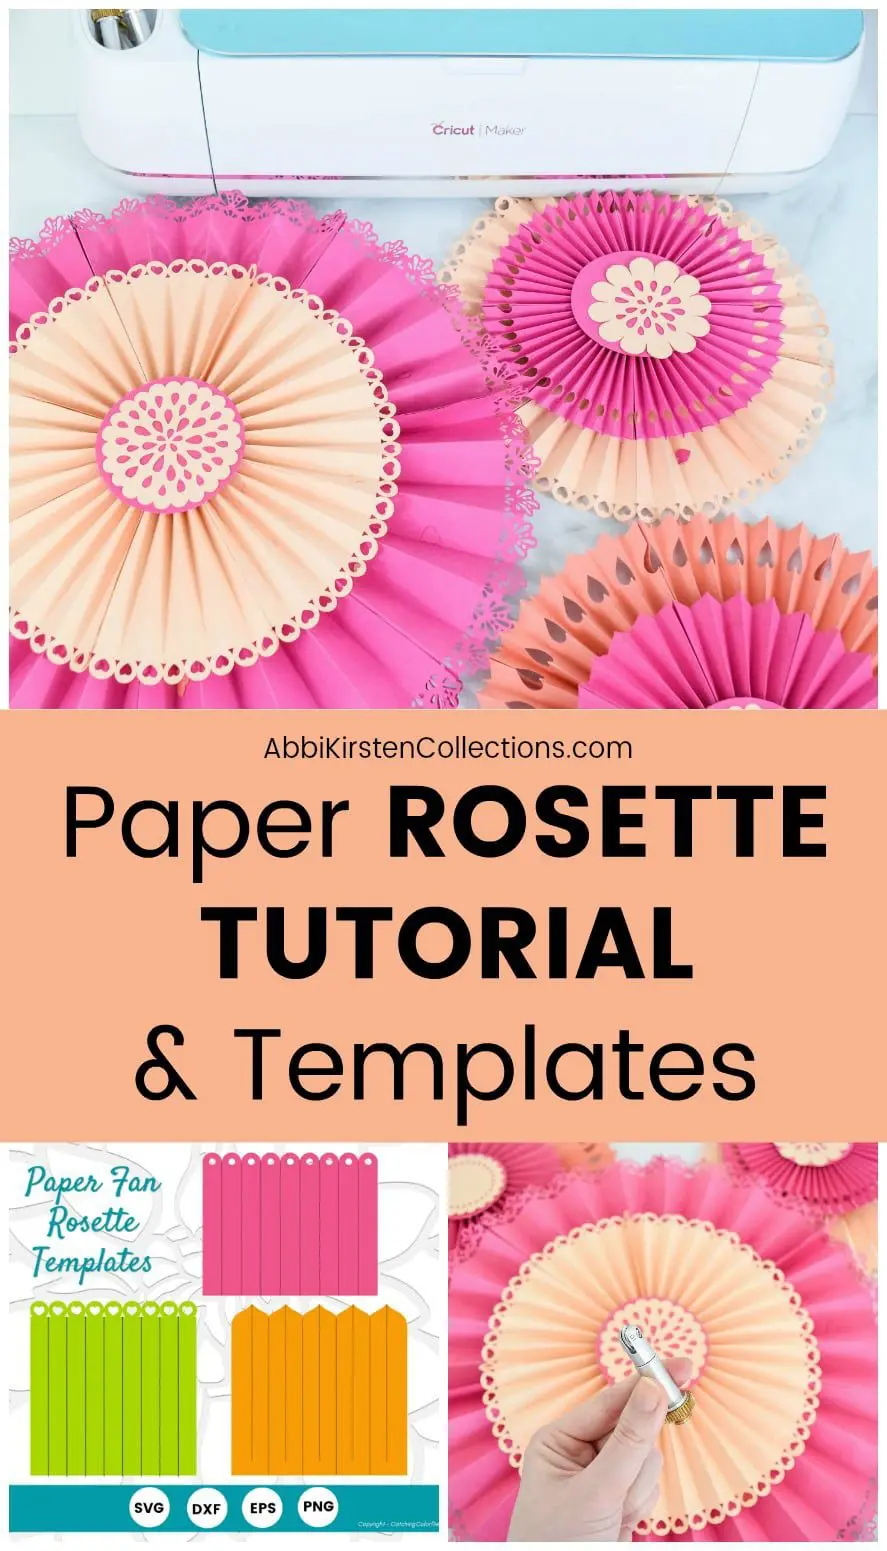
How to Download the Paper Rosette Fan Templates
Get three of my paper rosette fan templates for Cricut machines FREE through the Abbi Kirsten Craft Vault. If you are already a member, log in to the Craft Vault and find it by searching “fan rosettes” or “Design #28′′. Read this helpful Member Vault How-to post.
You can get all six of my signature paper rosette fan templates for Cricut machines through my Etsy shop.
How to Make a Paper Rosette Fan
These simple step-by-step instructions will walk you through setting up score lines in Design Space and how to make a paper rosette fan. You can also follow the video tutorial below.
Design Space and Template Set-Up
The two most important things to remember when setting up scoring lines in Design Space are:
- Change the black lines to score lines under Operation type.
- Use your Attach tool to hold the score lines in place on the paper rosette fan image.
Step 1: Upload the paper rosette fan template SVG file onto a new canvas in Design Space. Read the complete tutorial for uploading SVG cut files to Cricut.
Step 2: Setting Scorelines
- Click “Ungroup” at the top of the layers panel.
- Select the line(s) you need to change.
- Go up to “Operation type” and select “Score.”
Step 3: Select the score lines and the whole template and click “Attach” at the bottom of the Layers panel.
Step 4: You can now scale to your preferred size if you want. Use 8.5’ by 11” or 12” by 12” for large rosettes that measure 16” to 18” for a regular sheet of paper or about 24” with a sheet of 12” by 12” scrapbook paper when completed.
Step 5: Go to the Cut Screen and click “Make It.”
Step 6: Load your paper on the mat length-wise and click the flashing “Go” button. NOTE: The Cricut machine will prompt you when you need to change the scoring tool for a fine-point cut tool. Cricut machines usually score first, so be sure to have your scoring wheel or stylus in place before you begin.
Step 7: Once you have swapped out tools, hit the flashing “Go” button play icon on the top of your machine to proceed with the cut.
Assembling the Paper Rosette Fan
Before you start assembly, ensure you have all your supplies ready and all templates cut out and scored. If you are adding embellishments, have those ready as well.
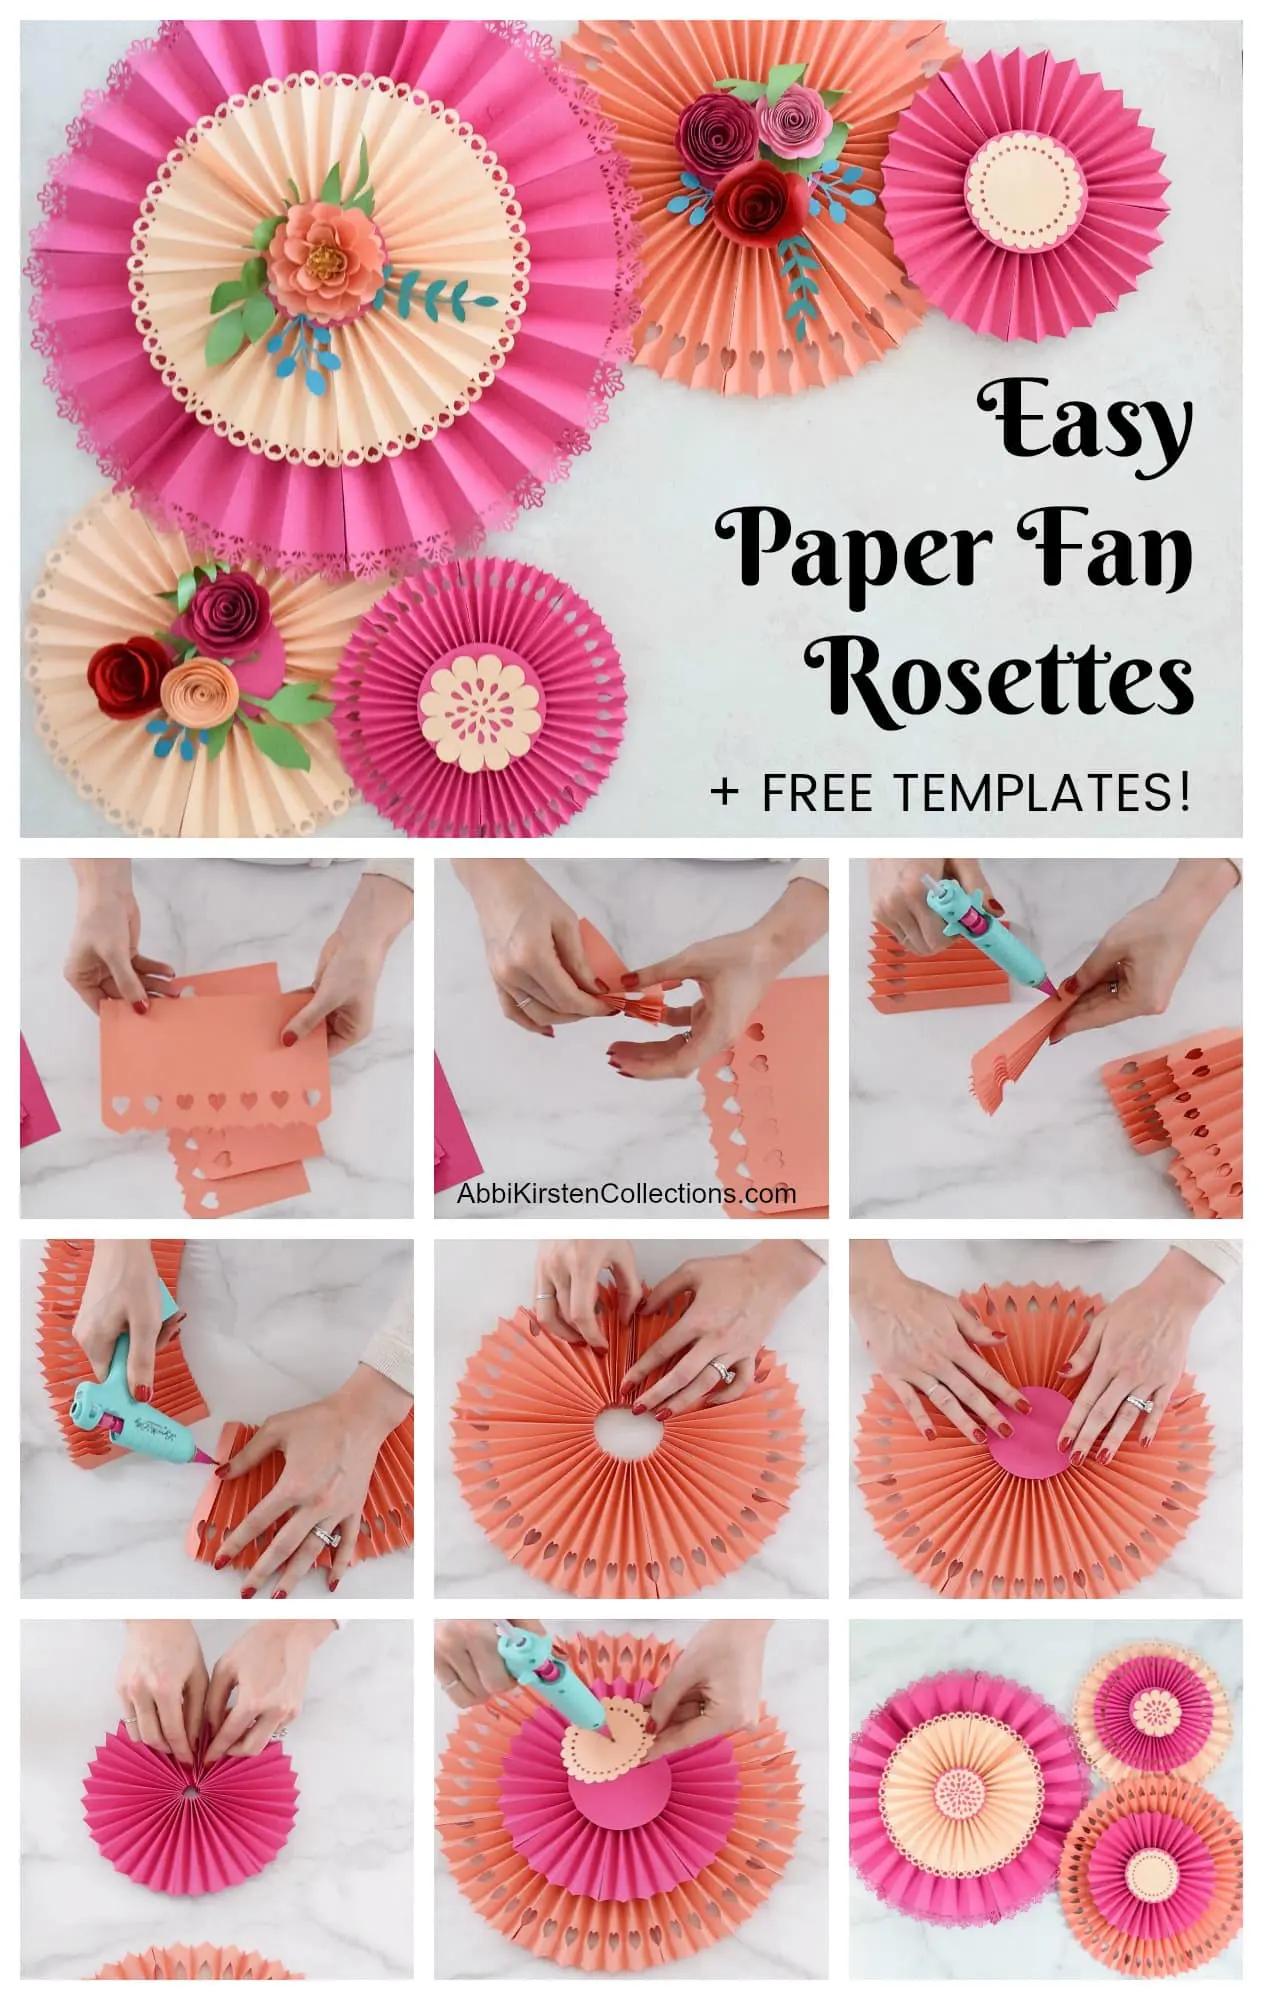
Step 1: Fold your rosette pieces along the score lines in an accordion style. Folding these easy paper party decorations is much quicker and simpler when using score lines.
Step 2: Glue the edges of one folded rosette piece to another folded piece using hot glue or strong double-sided tape. Press the sides together and be sure they are aligned correctly. Repeat with all 6-8 pieces or more to achieve the desired paper rosette fan circle shape.
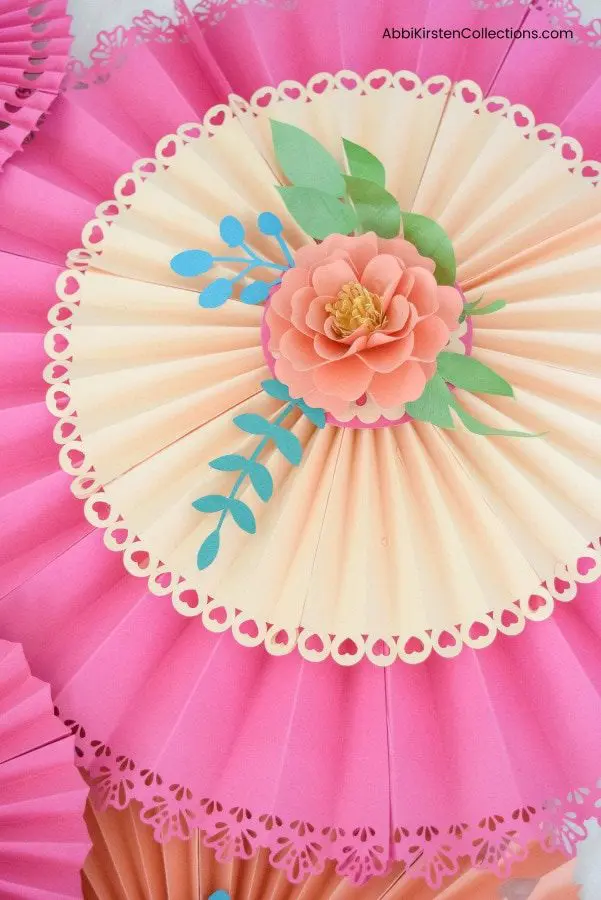
- Optional 1: Finish the center by cutting about a 3” circle of paper with your Cricut machine and gluing that circle to the center of the rosette to hide the empty center.
- Optional 2: Add paper flowers, cut-outs, or any embellishments to the center of your paper rosette fan. Adding small rosettes on a large rosette can create a fanciful layered look.
Congratulations! You’ve learned how to make party decorations with Cricut that can be part of a celebration guests will not forget!
How to Hang the Paper Rosettes
There are many options for hanging paper rosettes or paper flowers. Find them all in my guide, How To Hang Paper Flowers.
Video Tutorial – How to Make Paper Rosettes

How to Make Paper Rosette Fans
Learn how to make easy, elegant paper rosette fan decorations using a Cricut machine! This tutorial includes complete instructions and all the templates you need.
Materials
- 50-65 lb text weight Recollections cardstock
- Rosette templates
- Hot glue gun
- Optional: Paper flowers for added decoration
Instructions
Design Space and Template Set-Up
Step 1: Upload the paper rosette fan template SVG file onto a new canvas in Design Space. Read the complete tutorial for uploading SVG cut files to Cricut.
Step 2: Setting Scorelines
- Click “Ungroup” at the top of the layers panel.
- Select the line(s) you need to change.
- Go up to “Operation type” and select “Score.”
Step 3: Select the score lines and the whole template and click “Attach” at the bottom of the Layers panel.
Step 4: You can now scale to your preferred size if you want. Use 8.5’ by 11” or 12” by 12” for large rosettes that measure 16” to 18” for a regular sheet of paper or about 24” with a sheet of 12” by 12” scrapbook paper when completed.
Step 5: Go to the Cut Screen and click “Make It.”
Step 6: Load your paper on the mat length-wise and click the flashing “Go” button. NOTE: The Cricut machine will prompt you when you need to change the scoring tool for a fine-point cut tool. Cricut machines usually score first, so be sure to have your scoring wheel or stylus in place before you begin.
Step 7: Once you have swapped out tools, hit the flashing “Go” button play icon on the top of your machine to proceed with the cut.
Assembling the Paper Rosette Fan
Before you start assembly, ensure you have all your supplies ready and all templates cut out and scored. If you are adding embellishments, have those ready as well.
Step 1: Fold your rosette pieces along the score lines in an accordion style. Folding these easy paper party decorations is much quicker and simpler when using score lines.
Step 2: Glue the edges of one folded rosette piece to another folded piece using hot glue or strong double-sided tape. Press the sides together and be sure they are aligned correctly. Repeat with all 6-8 pieces or more to achieve the desired paper rosette fan circle shape.
- Optional 1: Finish the center by cutting about a 3” circle of paper with your Cricut machine and gluing that circle to the center of the rosette to hide the empty center.
- Optional 2: Add paper flowers, cut-outs, or any embellishments to the center of your paper rosette fan. Adding small rosettes on a large rosette can create a fanciful layered look.
Notes
The two most important things to remember when setting up scoring lines in Design Space are:
- Change the black lines to score lines under Operation type.
- Use your Attach tool to hold the score lines in place on the paper rosette fan image.
More Crafts to Love
- How to Make A Paper Cactus: Prickly Pear, Aloe Vera, and Ferocactus
- DIY Cali Poppy Paper Flowers
- Make Fruit Pop-Up Cards With Cricut
- Butterfly and Bug Shadow Boxes
- Make A Spring House Explosion Treat Box
About Abbi Kirsten Collections
I have spent the last 9+ years building my creative skills and sharing them with others. My flower designs are created with simplicity, color and crafty fun in mind. If you haven’t yet, be sure to join the subscriber community to gain access to all my freebies or visit my signature design shop!
Want to join my Facebook community to share your crafts and learn from the best? Click here to request access to my group, Crafters and Cricut Lovers.
For further color crafts and inspiration, join me on Instagram.


These are so lovely. I’m sure my niece will be over the moon for them on her bedroom wall. Thanks so much.