How To Cut Cardstock On Cricut: 5 Easy Ways To Fix Cricut Ripping Your Cardstock
This post may contain affiliate links that won’t change your price but will share some commission.
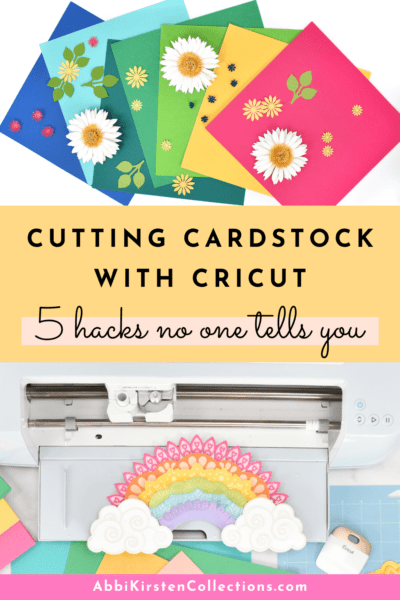
How to Cut Cardstock On Cricut, Fix Ripping, and Avoid Paper Waste
Making papercraft projects with your Cricut is one of the most popular and beginner-friendly crafts you can do with any Cricut Maker, Explore, or Joy model. There can also be a lot that goes wrong when cutting cardstock for Cricut, such as ripping paper, dull blades, finding the right setting or pressure, and more.
In this post, I’m sharing the 5 Reasons Your Cricut is Ripping Cardstock Paper and how to fix them. I’ll also cover the best cardstock paper for Cricut, where to find cardstock online and in stores, how to replace your fine-point blade, and lastly, how to properly clean your mats to achieve the best cardstock crafts.
Free Cutting Cardstock For Cricut Printable Troubleshooting Guide
Before we dive in, you can download this printable guide to cutting cardstock on Cricut – it’s a freebie in my Craft Vault.
How to cut cardstock with your Cricut machine: Video Tutorial
For those who prefer, I have made a video below discussing all my best cardstock tips and tricks. You can also keep reading for written instructions.
When it comes to cutting cardstock for Cricut, there are a lot of things you need to check off to ensure a perfectly cut design. Let’s cover my 5 best hacks for paper crafts below.
1. Your Cricut Blade Needs Replaced or Cleaned Off
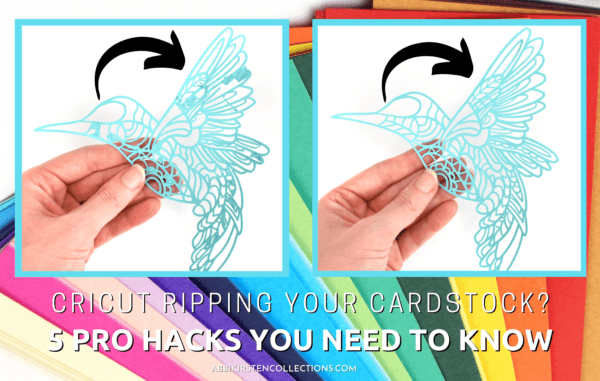
If you see your cardstock rip when Cricut is cutting, the first thing to always do is check the blade.
What blade do I use for cutting cardstock on Cricut?
Cricut cuts a wide variety of cardstock papers using the fine-point Cricut blade. The fine-point Cricut blade comes with every Cricut machine automatically.
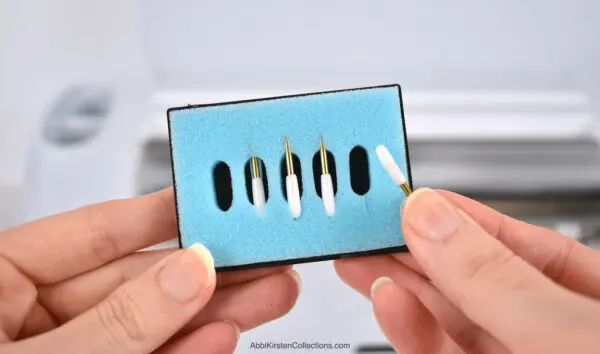
If your blade is dull and old or has debris stuck to it, this will disrupt the process of cutting the cardstock and cause tearing.
Best practice involves always checking your blade for any debris in between loading mats. You would be surprised how many tiny pieces of paper can cling to it, making the paper prone to tearing.
How to Clean Your Cricut Blade
As long as the blade is not too old or has been used vigorously for many weeks on end, you can usually clean the blade and achieve a better cut.
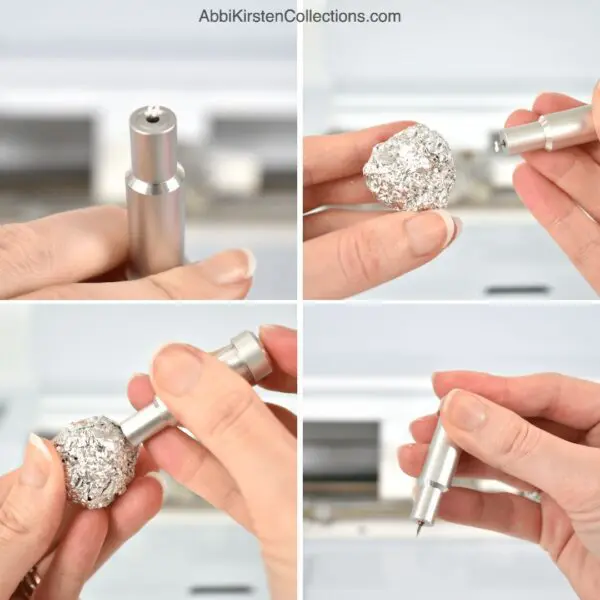
To clean your blade:
- Grab some tin foil and form a ball.
- Press the blade tip in and out of a ball of tin foil several times, holding the button at the top.
- The tin foil will not sharpen the blade if it is too far gone, but it can get off any extra debris. I find this trick super helpful after cutting glitter cardstock.
How to Replace Your Cricut Blade
Now if your blade is super old, you may need to change it out for a new one. To replace a Cricut blade, buy a value pack of fine-point blades. I like this generic brand set here, or you can also grab the on-brand Cricut set.
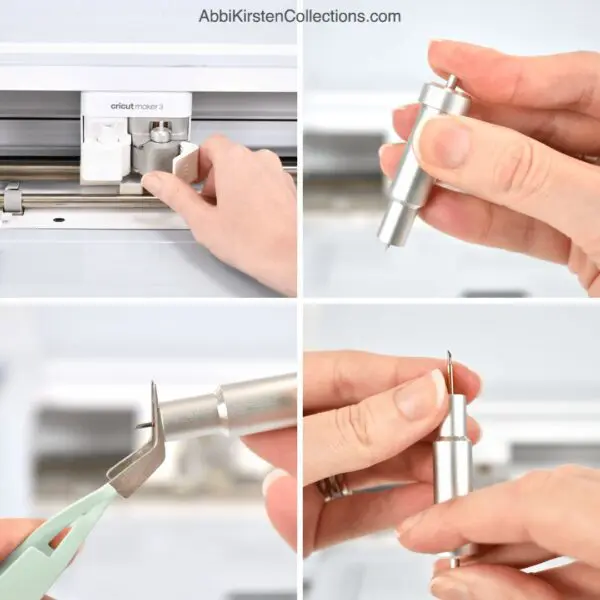
To replace the fine-point blade:
- Remove the fine-point blade housing from clamp B (there is only one clamp on the Joy machine).
- Press the top button down and carefully pull out the blade with craft tweezers.
- Remove the plastic top for the new blade and place it into the housing while holding the button at the top.
- Release the top button to retract the new blade into the housing.
2. Your Cricut Mat Needs to be Cleaned or Replaced
Which Cricut Mat Is Best For Cardstock?
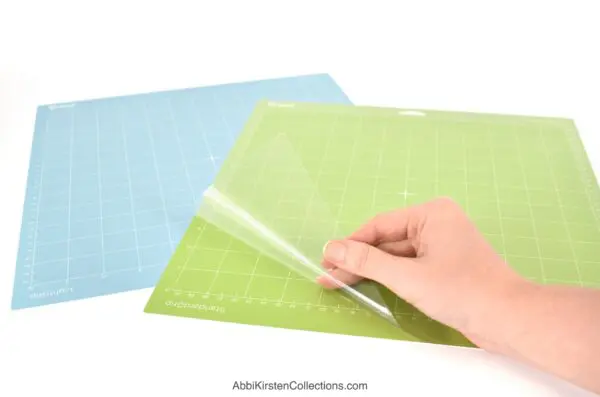
First, you need to know which mats are best for cardstock paper. In general, the light-grip blue mat is recommended. You can also use the standard green mat as well for medium and heavier-weight cardstock.
A Cricut mat can cause your cardstock for Cricut to tear if your mat is not sticky enough or the paper is not pressed securely and completely to the cutting mat. Even if there are minor shifts with your paper as the blade runs over the surface, it can lead to ripping. It is recommended to always use a fresh mat with intricate paper projects.
To keep your Cricut mats in as good a shape as possible, always store them with the plastic liner over the top, so dust, pet hair, and other materials do not stick to them while in storage. For more storage and craft organization tips, check out my craft room here.
If you believe the mat is the problem, you first need to decide if your mat just needs to be cleaned or if the mat should be replaced.
Your Cricut Mat May Need to be Replaced If:
- The mat has been actively used regularly for the last 4-6 weeks.
- The mat appears bent or bumpy.
- The mat has deeply cut lines covering the majority of the surface.
How to clean your Cricut mat
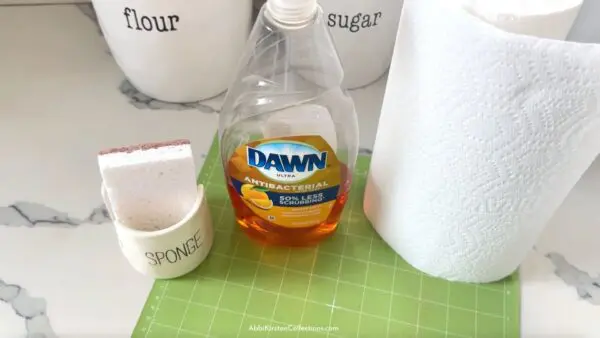
If your Cricut mat seems in good condition but is just not very sticky, try cleaning it with dish soap and warm water. Before washing, always remove any obvious paper bits or debris with the Cricut scraper tool.
How to clean your Cricut mat:
- Use dish soap and lukewarm water.
- With a soft sponge, work the soap gently over the surface of the mat. Before washing, always remove any obvious paper bits or debris with the Cricut scraper tool.
- Rinse with warm water (not hot).
- Pat dry with paper towels. The mat will still be damp, so let it completely air dry before using it with your Cricut materials again.
How to use a brayer tool to extend the life of your mat
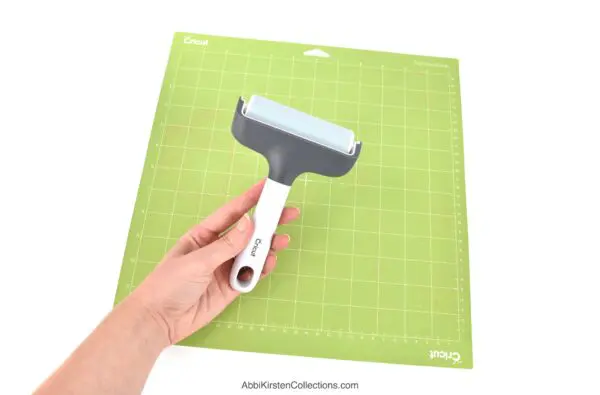
Cleaning your Cricut mat will bring the stickiness back to some degree, but your mat still may need a little extra encouragement. You can extend the life of your mat further by using a brayer tool. The rolling brayer tool helps to push the material to the mat, especially if it is not super sticky or brand new. I always use my brayer tool for the best results when cutting cardstock for Cricut.
Just place your material on the mat and firmly roll the brayer tool back and forth over the entire surface of the mat.
How to Remove Delicate Cardstock Cutouts From Your Cricut Mat
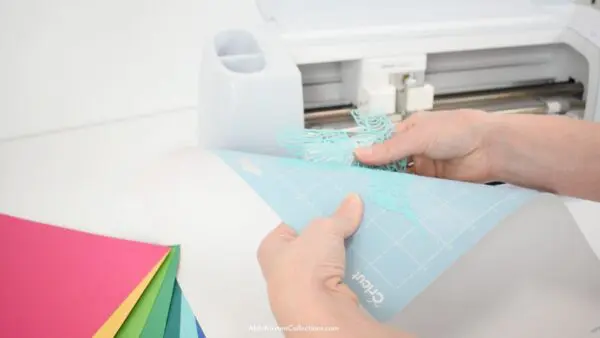
On the note of Cricut mats, I like to mention the proper way to remove cardstock from a Cricut mat. Beginners may think lifting from the top is best or even using the Cricut spatula tool is ideal. However, the best way to remove cardstock cut-outs from your mat is to flip the mat upside down and gently roll the mat away from your cut-out design. By rolling the mat away from the design, this helps to eliminate ripping and curling of the cardstock.
3. You Need To Choose The best Cardstock to Use With Cricut
Cricut can cut a wide variety of cardstock papers, from heavy to light cardstock, copy paper, scrapbooking paper, metallic and glitter cardstock. There are loads to choose from, but not all cardstock paper is created equally, and sometimes certain cardstock will just not work well with your Cricut or the SVG design you have chosen (more on that later).
Knowing the right brand of cardstock to use for your Cricut projects is a huge sanity saver. Below is a list of my favorite cardstock paper brands and suppliers. I have personally used these brands for many different projects, including intricate cut designs.
Where Can I Find The Best Cardstock For Cricut?
12×12 Cardstock Shop
My favorite online shop for cardstock is the 12×12 Cardstock Shop. This online paper store has hundreds of types of paper and every color and pattern you can imagine.
A few of my favorites from 12×12 Cardstock Shop are:
- BAZZILL CARDSTOCK
- AMERICAN CRAFTS SMOOTH CARDSTOCK
- GLITTER SILK CARDSTOCK
- BAZZILL TEXTURED CARDSTOCK
- Check out more here
Cards and Pockets
Cards and Pockets is another excellent online resource. They offer loads of metallic text-weight papers that are wonderful for paper flowers. Check out all my favorite metallic papers here.
Michaels Craft Store
One local option I love is Michaels Craft Store. They sell Recollections paper in packs of 50 and 100 sheets. If you have a Michaels near you and need to pick some cardstock up for your next Cricut project quickly, be sure to check them out.
4. You Need To Adjust Your Material Settings In Design Space
Using the wrong material setting or pressure in Cricut Design Space can make or break the success of your cardstock for Cricut. Material settings are crucial to the success of cardstock cutting smoothly. There are more paper settings than most crafters realize with Cricut.
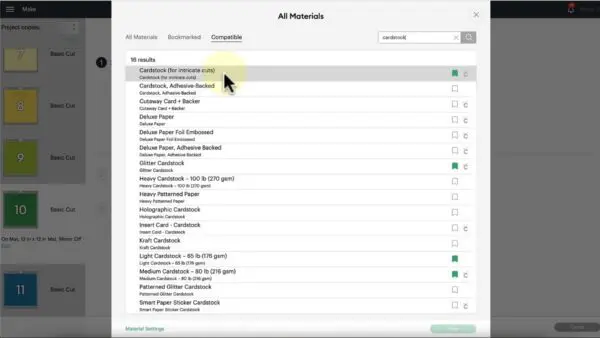
While the Light Cardstock setting and the Medium Cardstock setting work most of the time, this varies with very detailed or smaller designs. For intricate cardstock projects, you’ll need to use the Cardstock for Intricate Cuts setting. Likewise, if you’re using something like shimmer pearl metallic paper or textured paper, be sure to select the corresponding material setting.
Popular Cricut Cardstock And Paper Material Settings
Here are a few settings you can find in Cricut Design Space that work well with a variety of the most popular papers cut out with Cricut:
- Cardstock For Intricate Cuts Setting – Best for any SVG design that has small details and numerous intricate cutouts, such as layered mandala designs.
- Light Weight Cardstock Setting – Text-weight paper or 50-pound weight cardstock.
- Medium Weight Cardstock Setting – The most popular cardstock setting; works well with 65-pound cardstock.
- Heavy Cover Weight Cardstock – Heavier weight papers like cover weight or 80-110 pound cardstock.
- Glitter Cardstock Setting – Use with glitter papers or textured glitter cardstock.
- Pearl Paper Setting – Use with light-weight shimmery frosted metallic papers.
- Scrapbooking Paper Setting – Use for any lightweight patterned scrapbooking papers with printed images.
- Foil Poster Board Setting – Ideal for any heavier metallic foil textured cardstock.
- And there are loads more! Browse them all by searching the keyword “cardstock” or “paper” in the material options of Design Space.
Adjust Your Pressure
Another tip for Cricut material settings is adjusting your pressure. If your material needs only minor tweaking, whether it needs to cut a little deeper or a little less, using the Pressure dropdown on the final cut screen can help you achieve a perfect result.
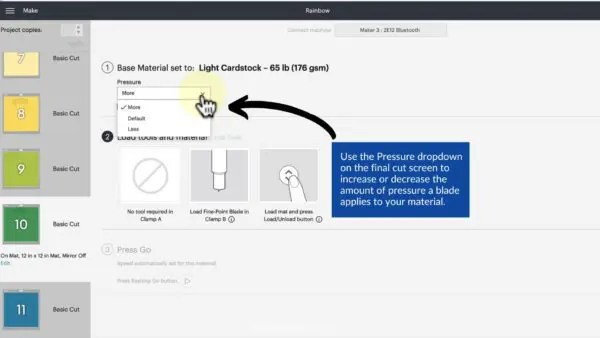
- Once you’ve selected a base material, Cricut will prompt you to load your mat.
- On the screen, you’ll see a pressure dropdown menu option.
- This Pressure dropdown allows you to fine-tune how much stress the blade is putting on the cardstock.
- The pressure will always be at the default automatically, but you can select more or less pressure according to how your cut needs to be adjusted. For example, if you’re using heavy cardstock and it’s just not cutting all the way through, you may stay with the heavy cardstock setting but just increase the pressure to More for a better result.
5. Your SVG Design File Is Scaled Too Small or Not Ideal for Paper Crafts
The last thing that can affect cardstock for Cricut, especially for detailed paper crafts, is the size of your design or the design itself.
Even though Cricut machines are amazing, they have their limitations. Trying to cut a 1-inch delicate and highly detailed design is not going to work due to how tiny the cuts are. (See an example in this video here.)

If your design is super small and keeps tearing, you may need to increase it by a couple of inches to see better results. If your project has to be a certain size, then you may need to opt for a less intricate SVG file.
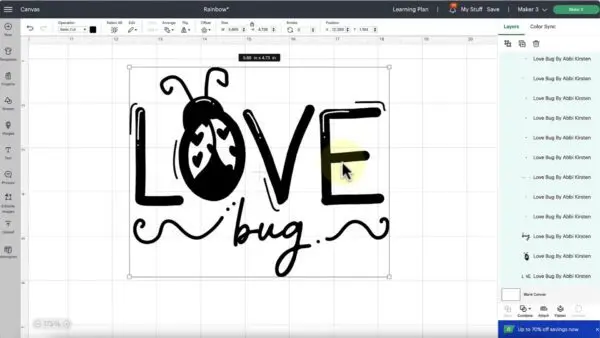
Choose SVG FIles That Are Designed For Papercrafts
Similarly, some SVG designs just don’t work out with paper but are more successful with vinyl or iron-on projects. For example, this love bug SVG (free here) would not work well with paper because of the delicate swashes along the words, not to mention piecing this together with paper would be very difficult.
There you have it! When it comes to cutting cardstock for Cricut, there are lots of things that can go wrong, but if you follow this list, you’re guaranteed to have the best possible result with your projects. What other questions do you have for me about cutting cardstock on Cricut? Ask me below in the comments!
About Abbi Kirsten
Welcome to my colorful corner of the internet, where we play with vibrant crafts and unlock your creative magic! Hang out with me and get lost in a fun array of projects, tutorials, and products, from stunning papercraft ideas to flower templates, Cricut help for beginners, and endless crafter’s hacks.
Join A-Star Crafters and participate in monthly Craft-Alongs in our community Facebook group!