How to Make Giant Paper Flowers – Step by Step Tutorial
This post may contain affiliate links that won’t change your price but will share some commission.
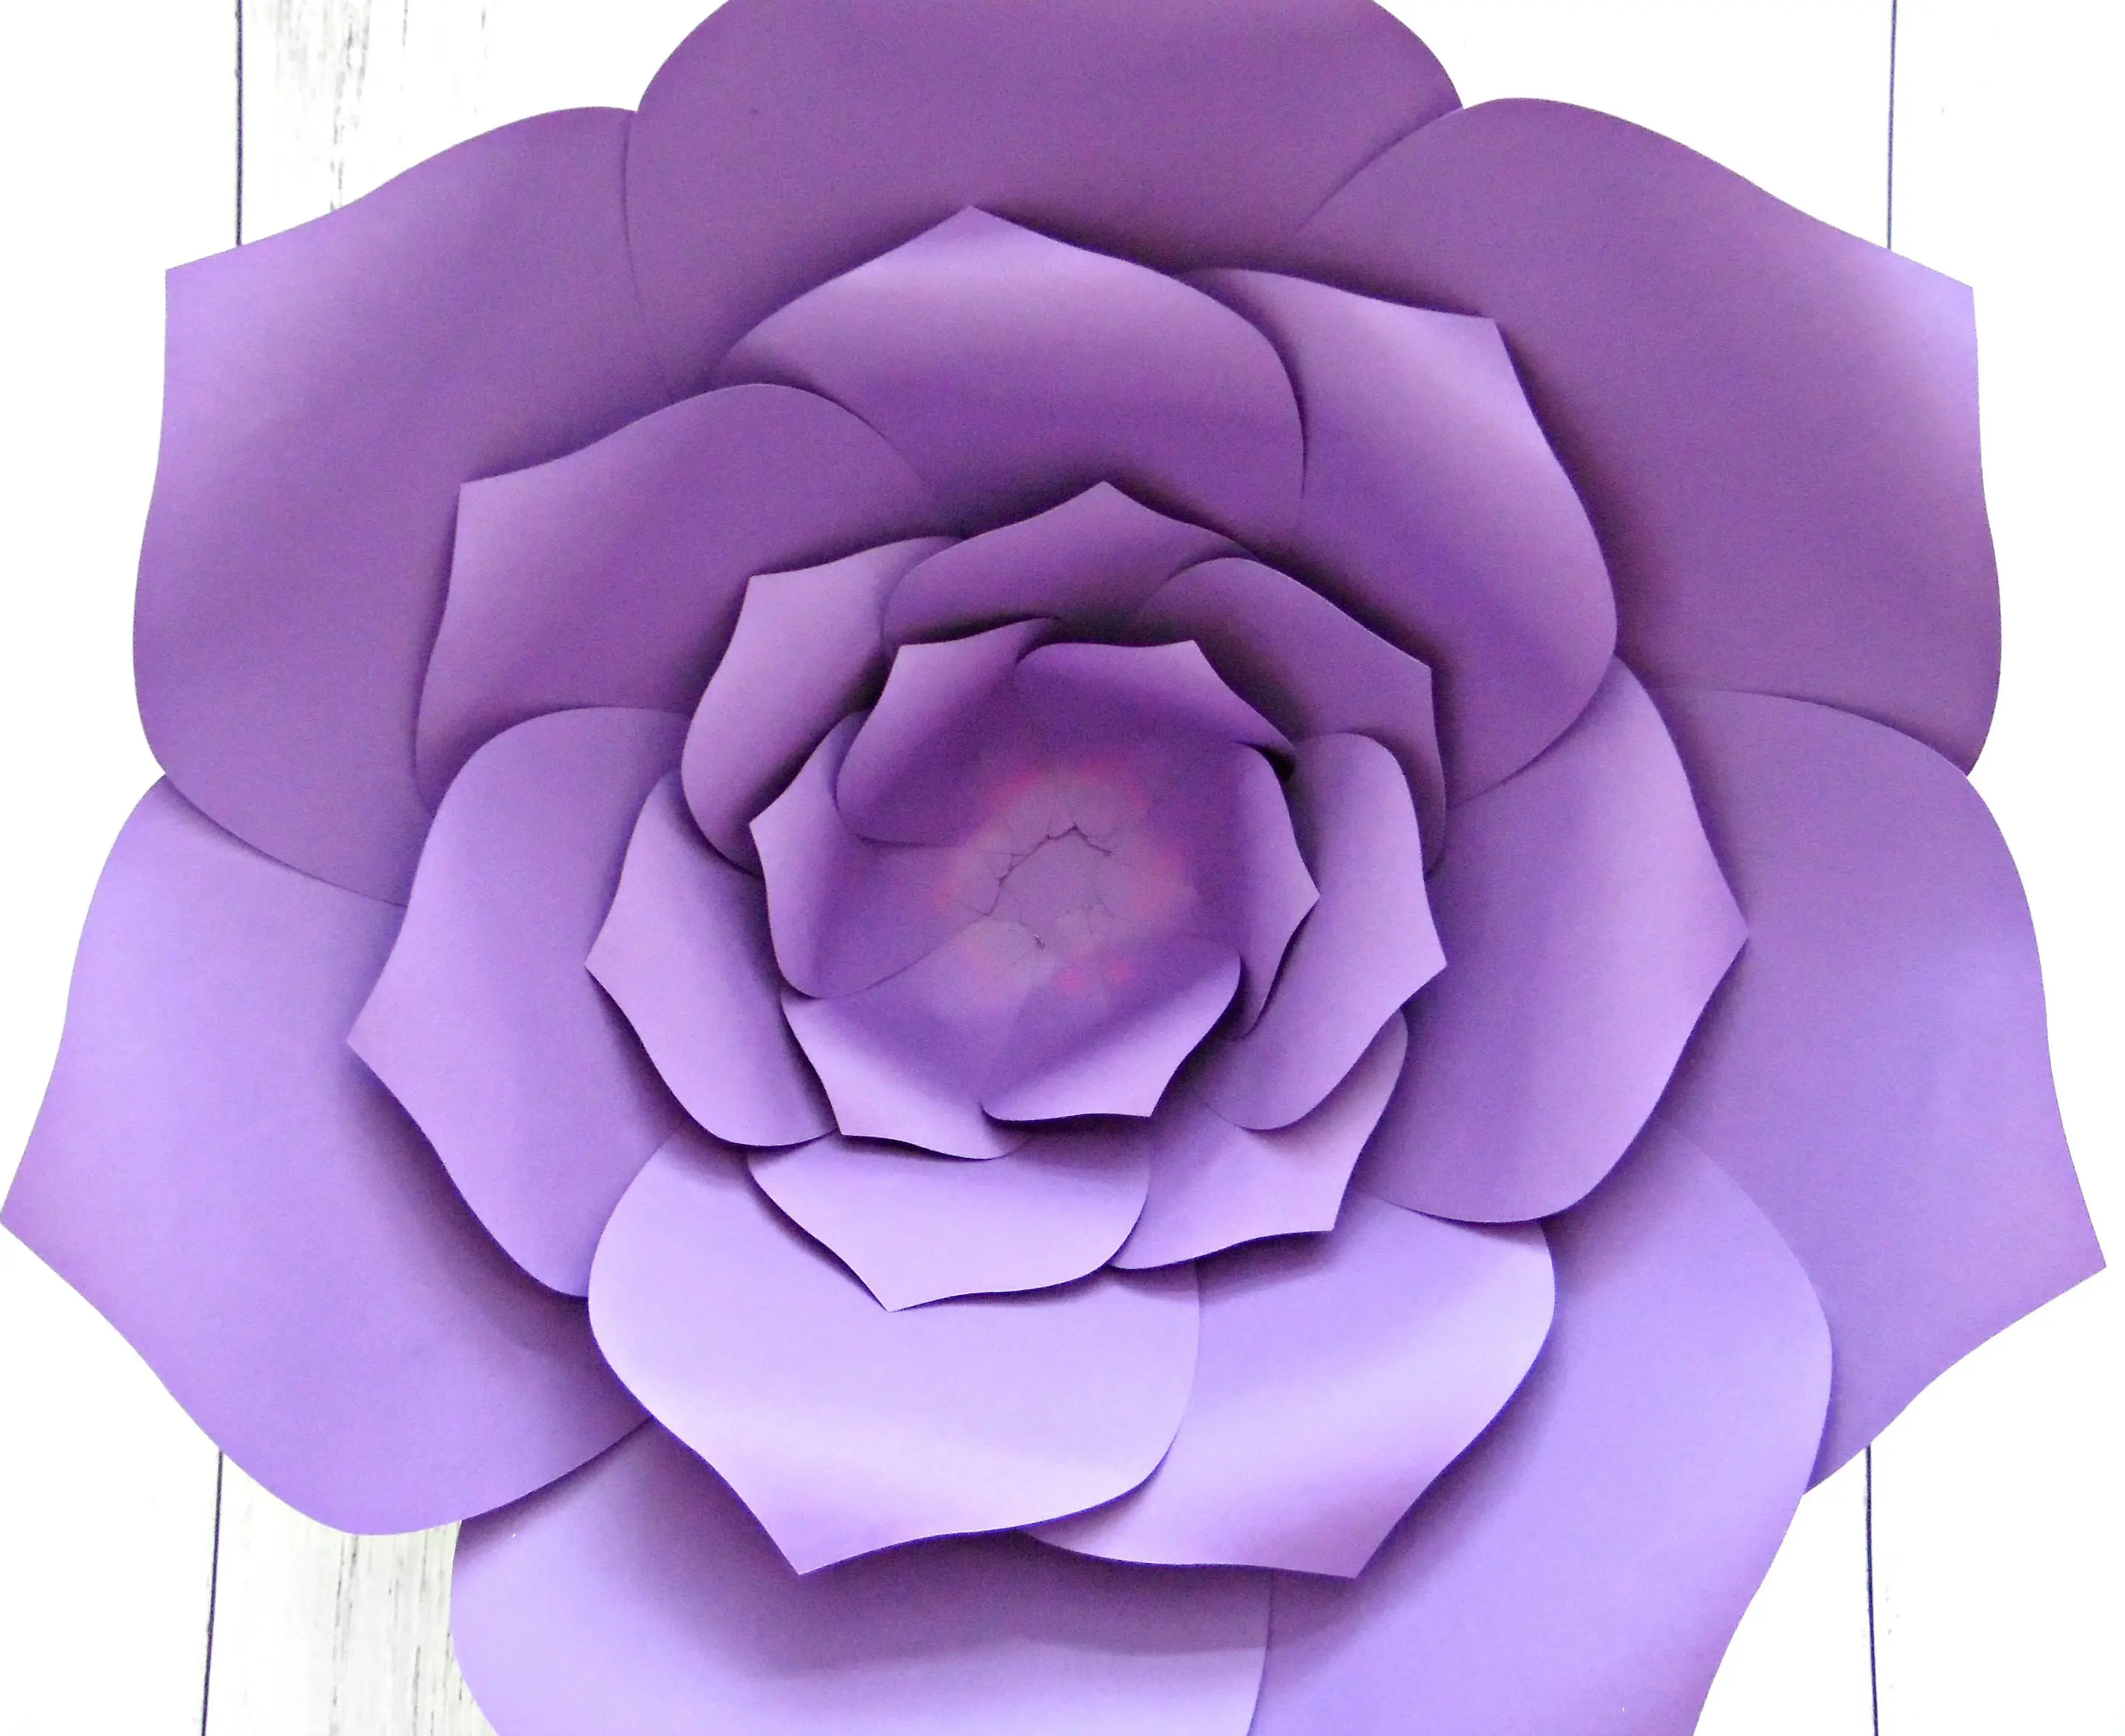
How to Make Giant Paper Flowers
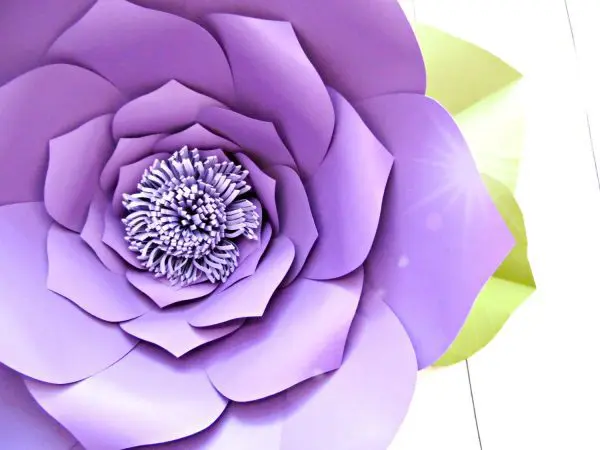
This Giant Paper Flower Tutorial is our easiest step-by-step beginner’s tutorial.
The instructions I’m teaching you today is basically an updated version of the “Easy Method when DIY-ing any Giant Flower” post that made our blog so popular! This method I am teaching you below is wonderful because it is a simple method that can be applied to successfully create any giant flower template, no matter the petal shape.
Giant flowers are great to use at any event, from weddings to baby showers to even home decor! And a lot of people want to know how to to this for themselves to customize it just like they want.
Supplies:
- Flower templates (sign up below to receive this one for FREE! Or shop all my signature templates at Catching Colorflies!)
- Glue gun
- Scissors or Cricut machine
- 176-gram weighted/65lb Card stock
- Wooden dowel
- 3-inch circle punch
- Patience
- Update: I made this Petal Curling Variation video for more unique ways to make your flowers!
Get this template for FREE HERE! Click the pink button below!
Getting Started
I am using my Priscilla-style flower template in this tutorial, which I am providing for free to you when you sign up above!
If you prefer something different, don’t worry I have over 50 different giant flower templates! Files are all compatible with cutting machines and easy to use for those who want to hand cut instead, which is the method I will be using here.
For hand-cut method- You will need to print out the templates from your computer onto a heavy card stock, cut the templates once and use these to trace over the card stock you will use to actually build the flowers from.
 Step 1
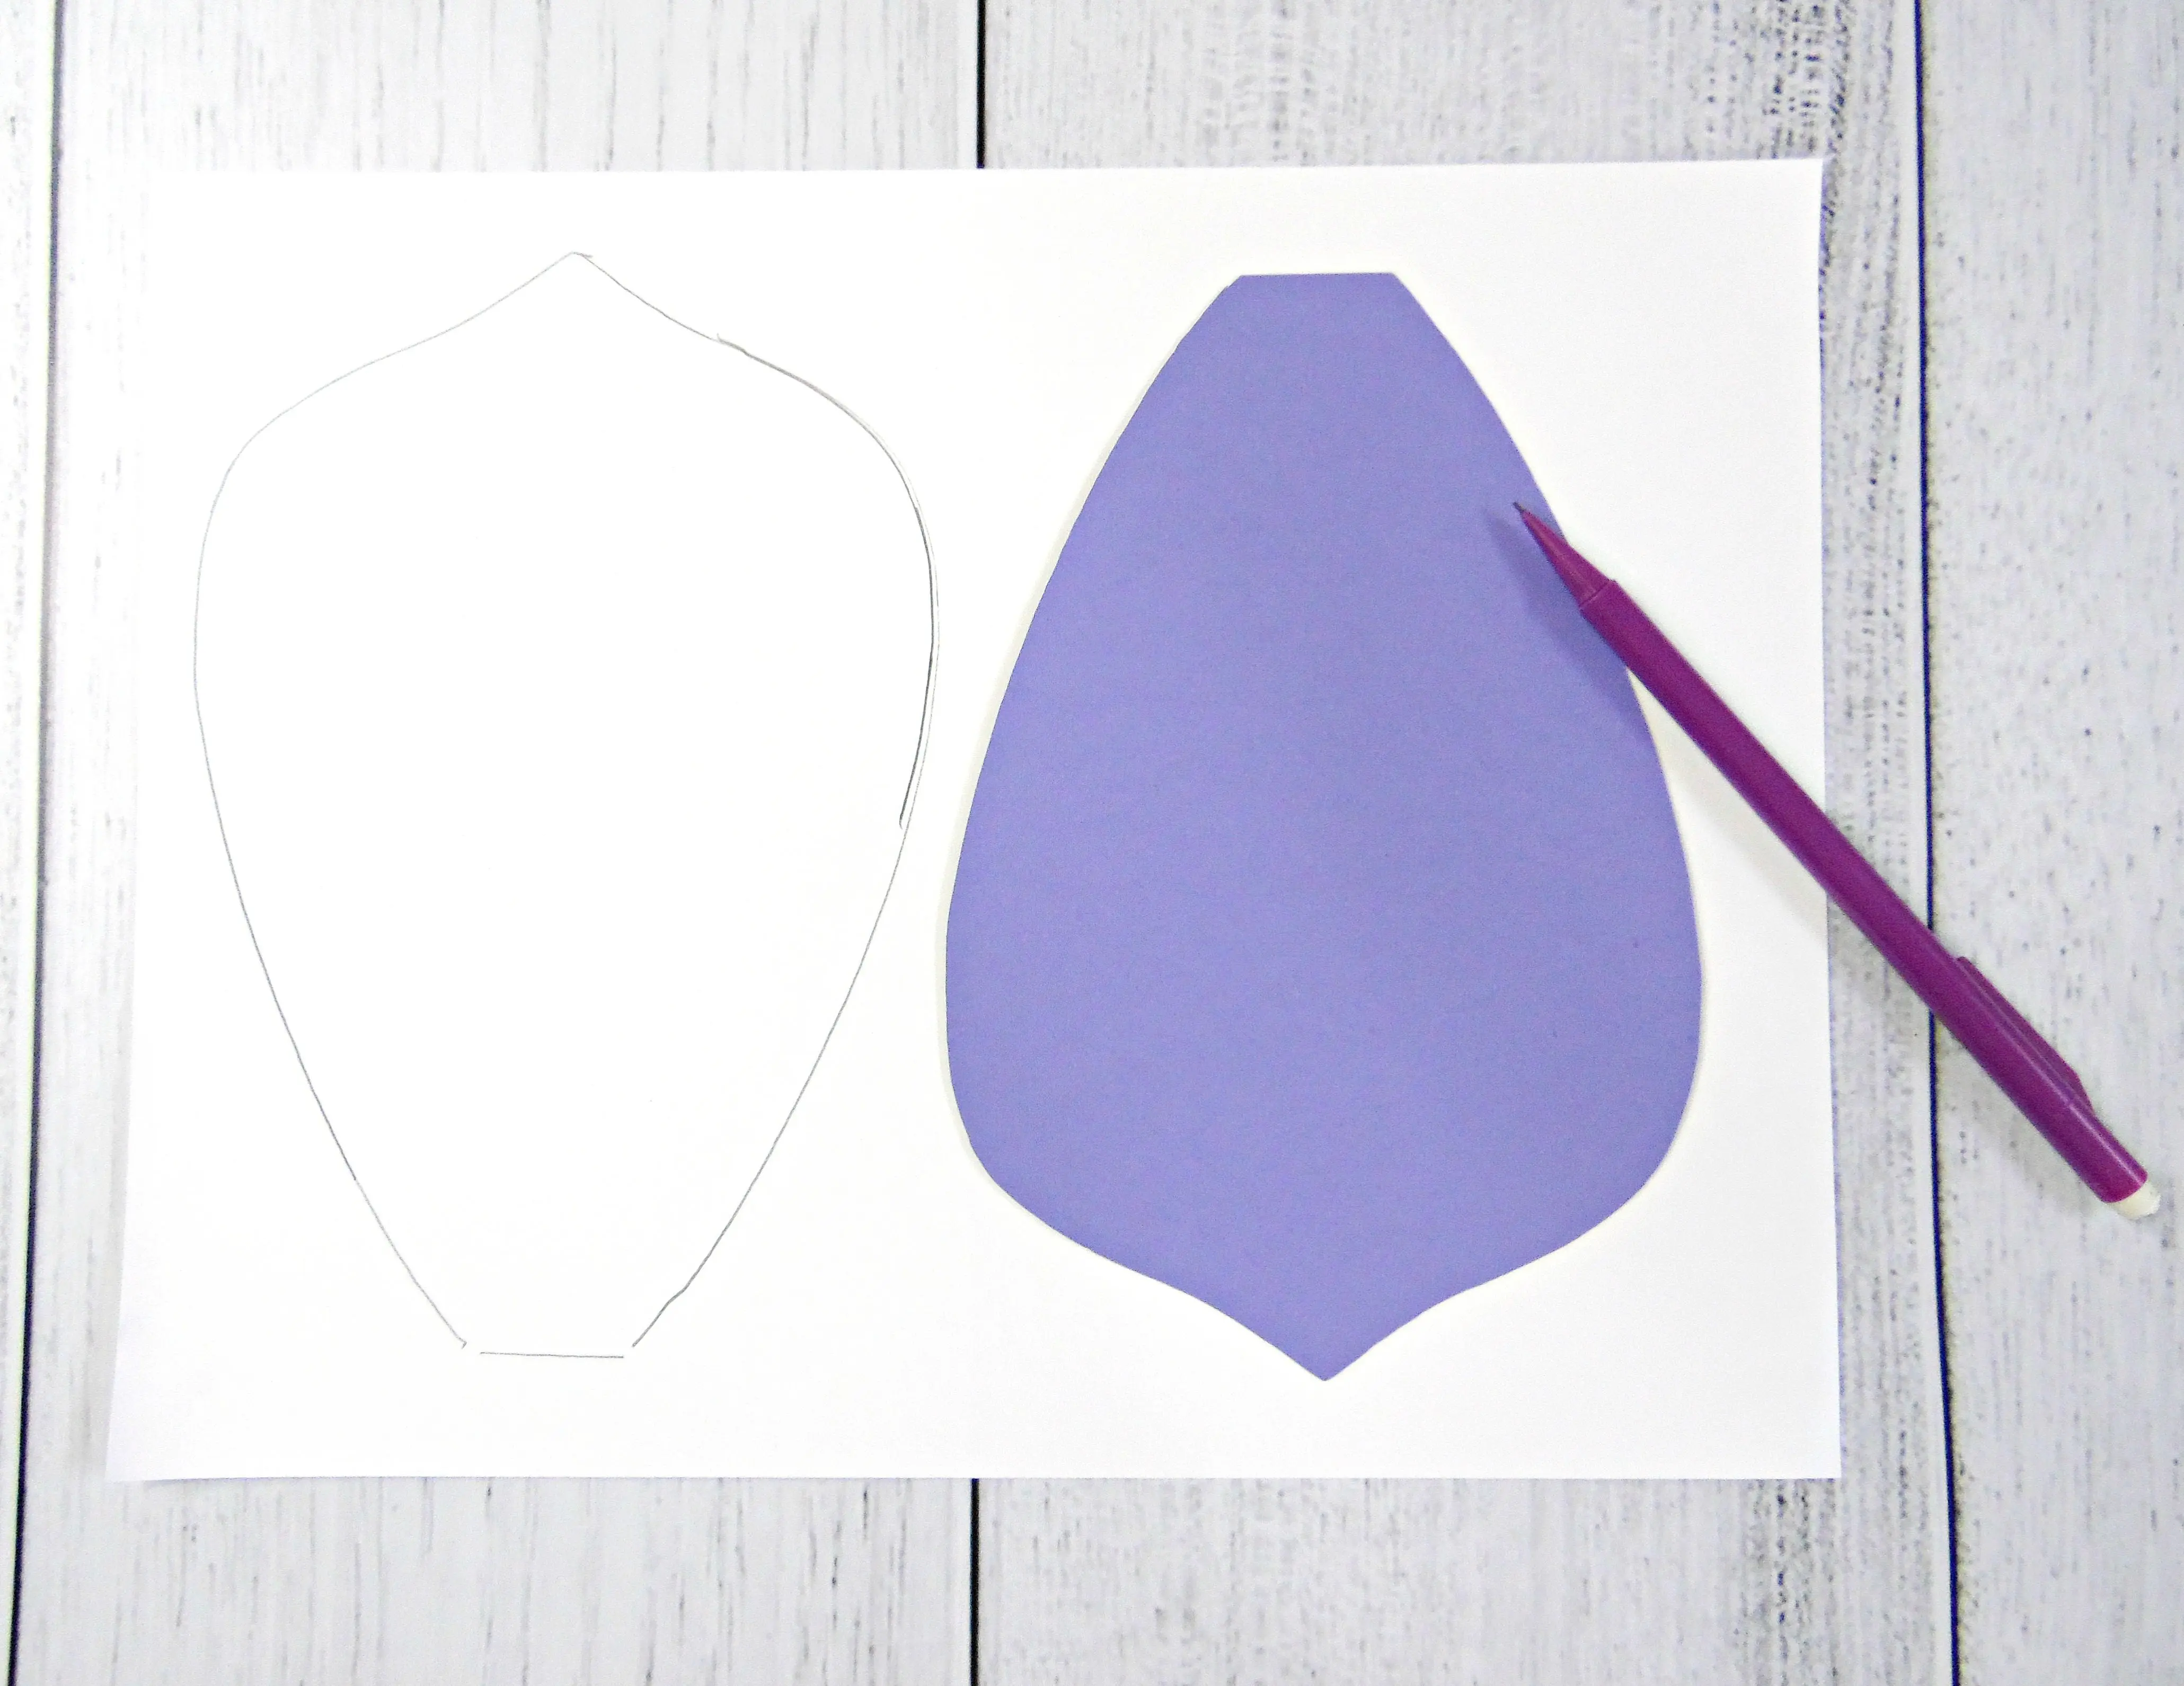 Step 1
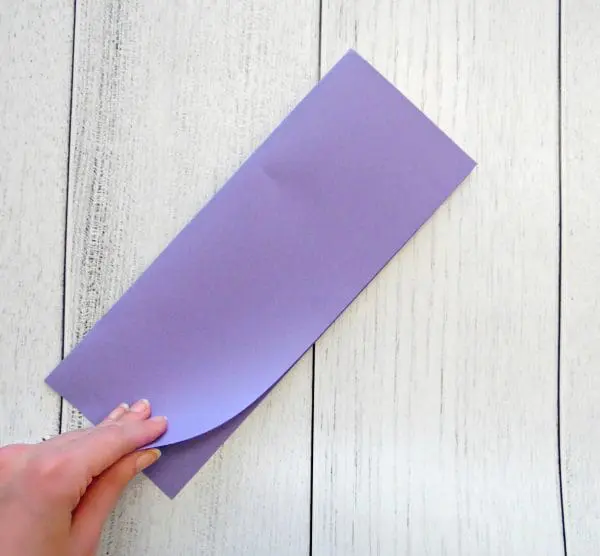
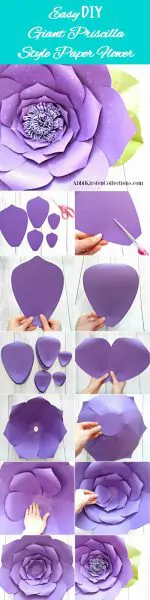
Begin by laying your template on your card stock of choice and trace your petals.
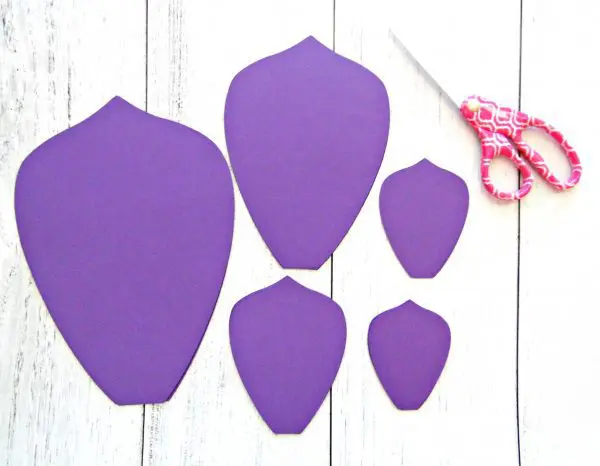
Largest base petal– 6-8 cuts
2nd layer– 6-7 cuts
3rd layer– 6 cuts
4th layer– 5-6 cuts
If you are using a machine, skip down to step 3.
Cutting machine measurements in inches
- Extra large 7.5 x 10.5
- Large 5.5 x 8.5
- Medium 4.5 x 5.5
- Small 3.5 x 4.5
- Extra Small 3 x 4
Step 2
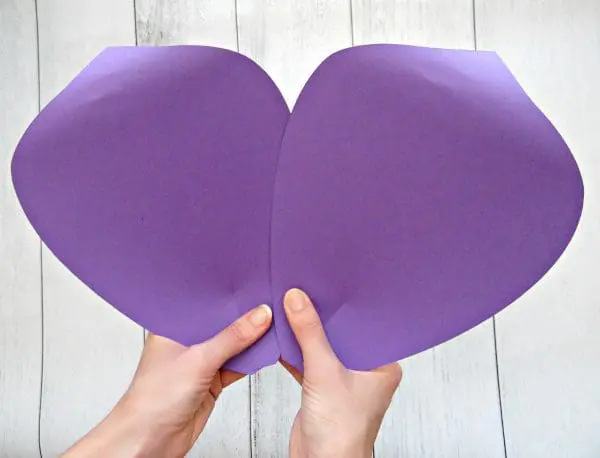
Cut all your petals out once you have finished tracing.
You can make this process quicker by stacking 2-3 sheets on top of one another and cutting several out at once. Use binder clips to help keep paper from moving
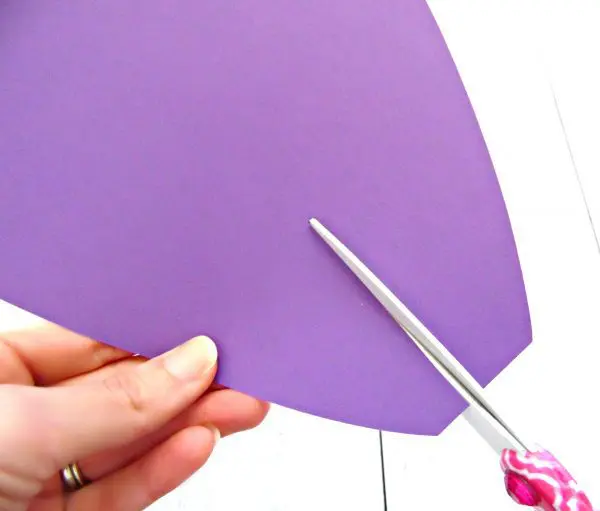
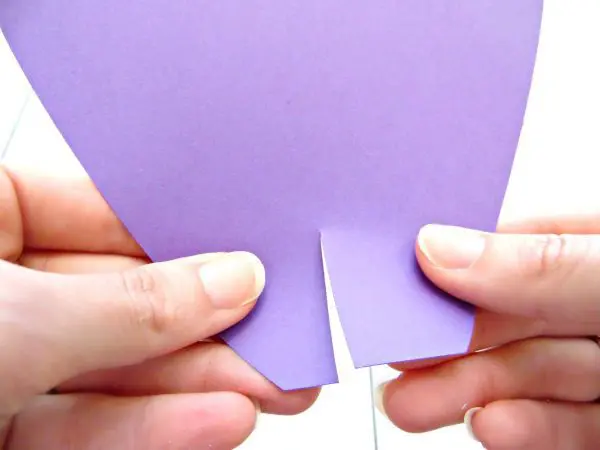
Step 3
Now you want to cut slits at the bottom
center of each petal, about an inch, slightly less on the smaller petals.
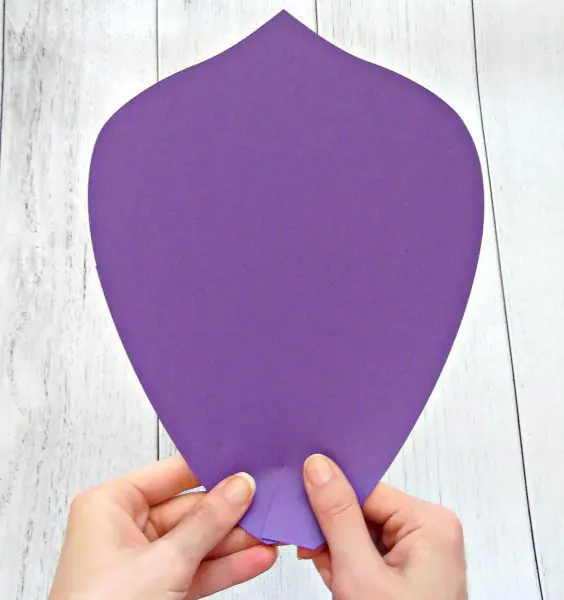
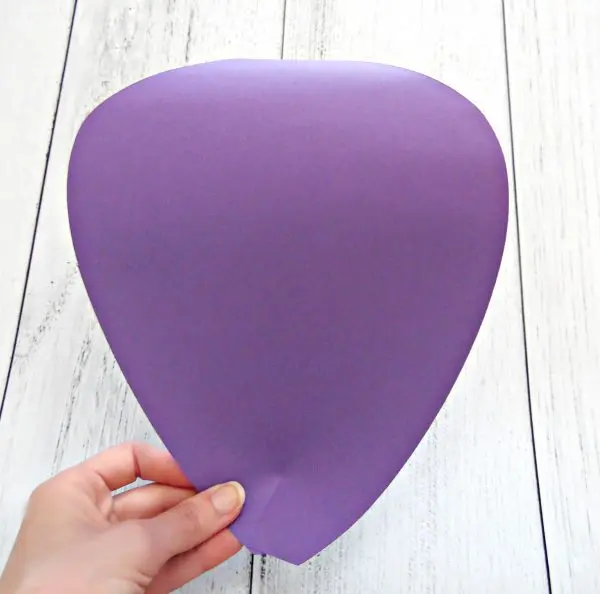
Step 4
Now to start building the giant paper flower begin with the 1st layer, put glue on the inside edge and overlap the slit, but not too much or your petals will be too tight when assembled to get all the smaller layers in. Do this with all the petals. You can overlap a little more on the 3rd & 4th layer.
Step 5
Next you will curl all the petals back. You can do this by hand or use a thick wood dowel or a fat pencil works too.
Step 6
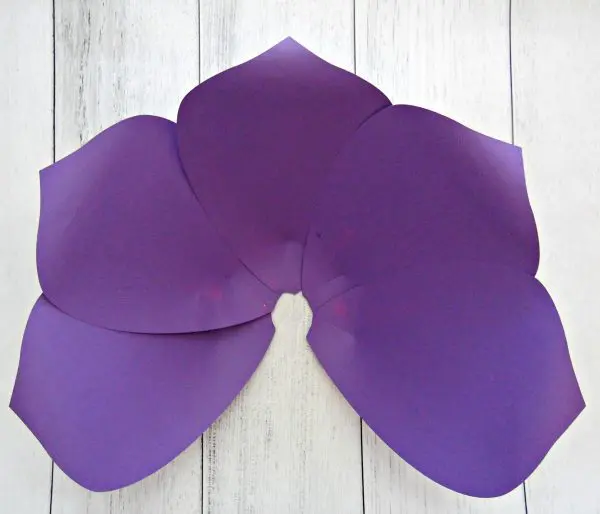
Assembly time. Starting with your 1st layer of base petals, you want to add some glue to the outer edge of one petal and precede to overlap another petal at about a 45` angle and press firmly for a second or two.
Continue in this fashion until all the base petals meet together forming a circle in the center of the flower. Watch the angle of placement as you go around making sure you leave enough room for the petals to come together evenly at the end of the circle.

Step 7
Use a circle punch or cut out a small square if you don’t have one to glue over the open bottom.
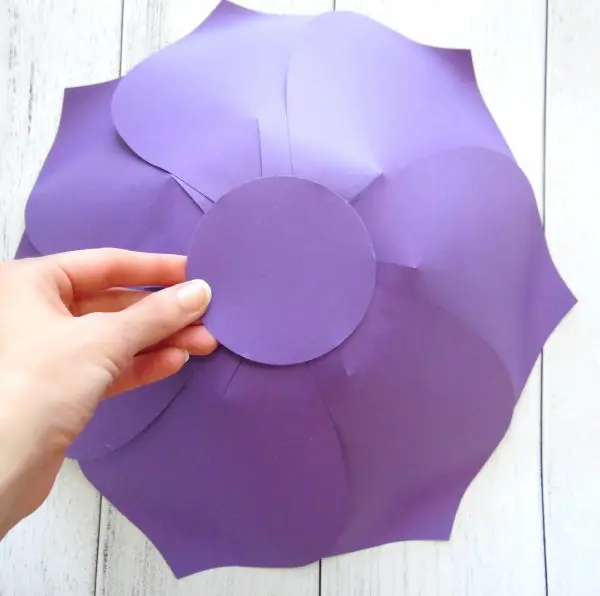
Step 8
Start the 2nd layer of petals alternating between the base petals as shown above
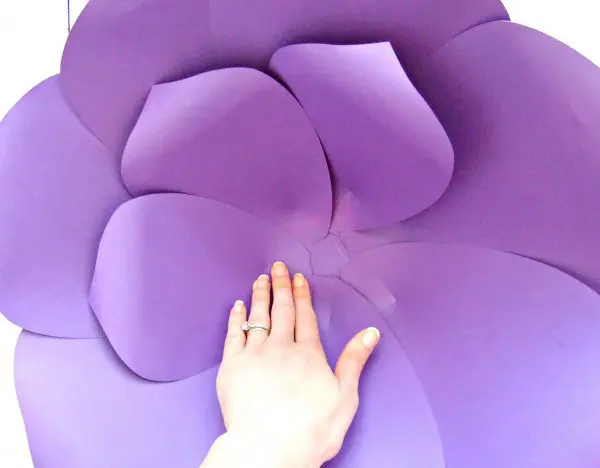
Step 9
Continue alternating petals adding the 3rd layer.
Step 10
Continue alternating petals adding the 4th layer.
 Step 11
 Step 11
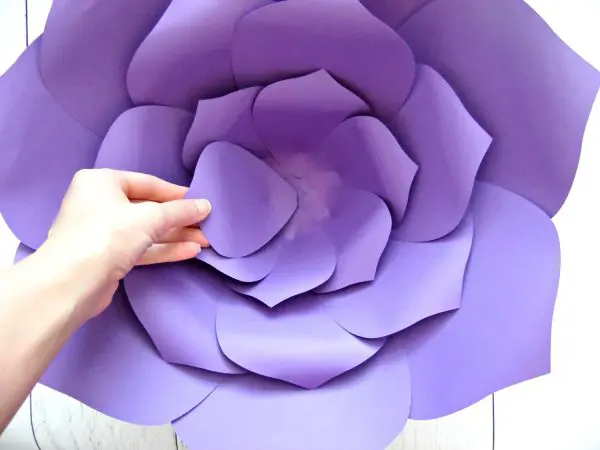
Add in your extra small 5th layer of petals.
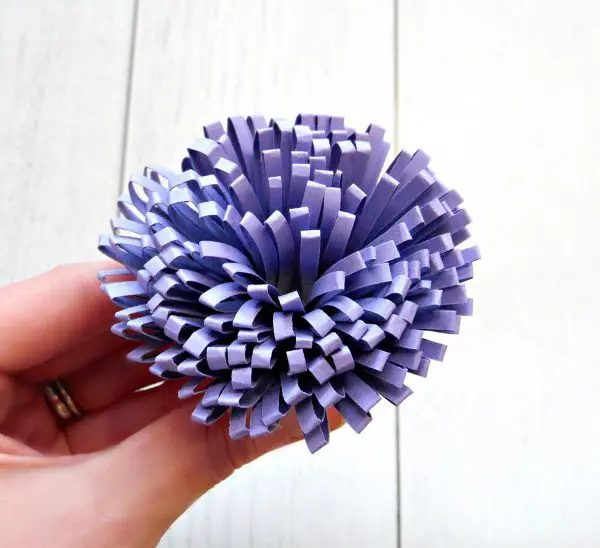
Pompom center
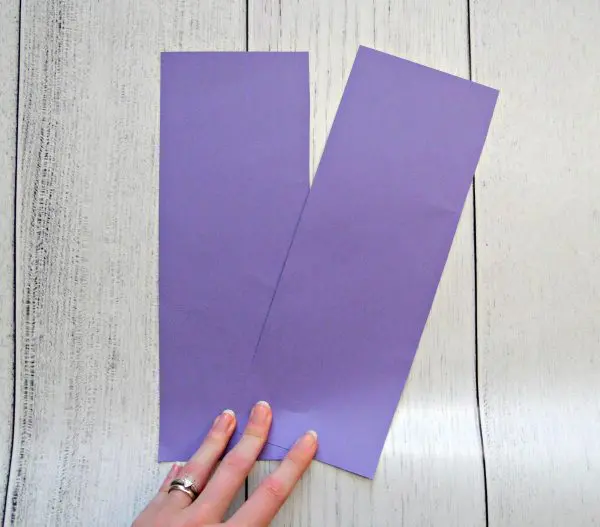
To create the rolled center fold a piece of card stock in half length wise, cut the paper down the middle. Lay the 2 pieces on top one another and fold in half again.
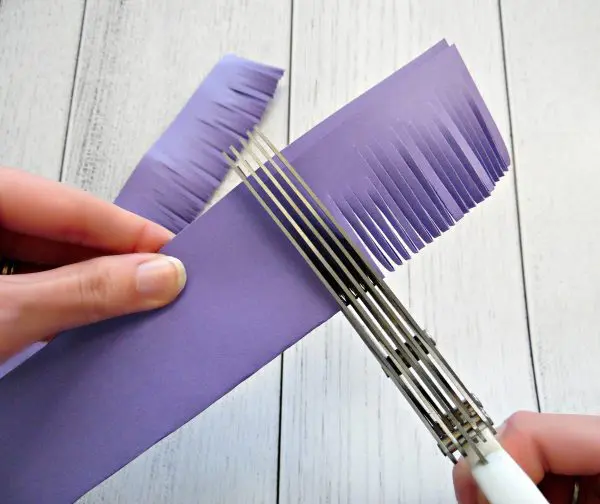
Step 12
Begin cutting slits all the way down the paper.
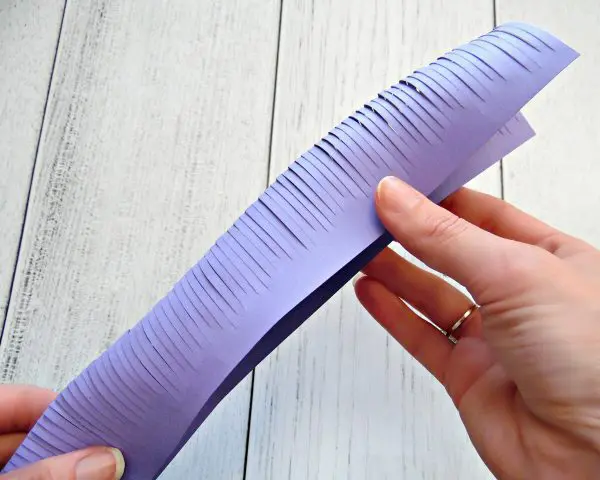
Separate the two pieces after you are through cutting all the slits.
Step 13
Open the fringe piece up, flip inside out and glue the open ends together.
Step 14
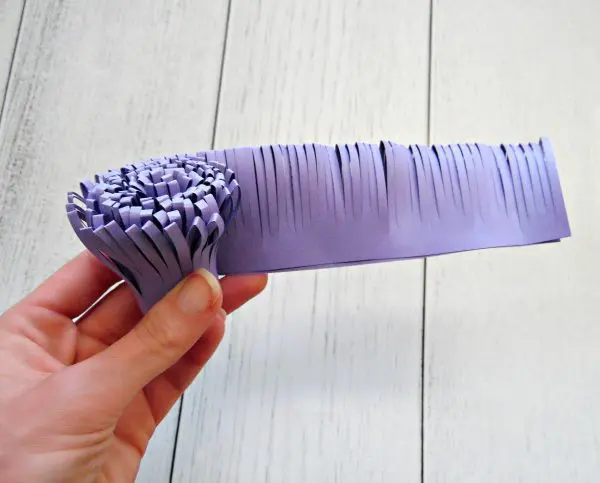
Start rolling the first piece adding glue along the edge as you go.
Optional—you can use the dowel to make the rolling easier.
Step 15
After you finish rolling up the first piece continue by adding on the next one.
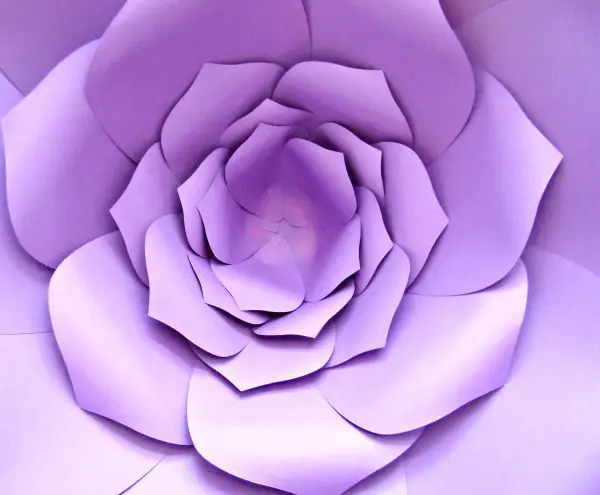
Step 16
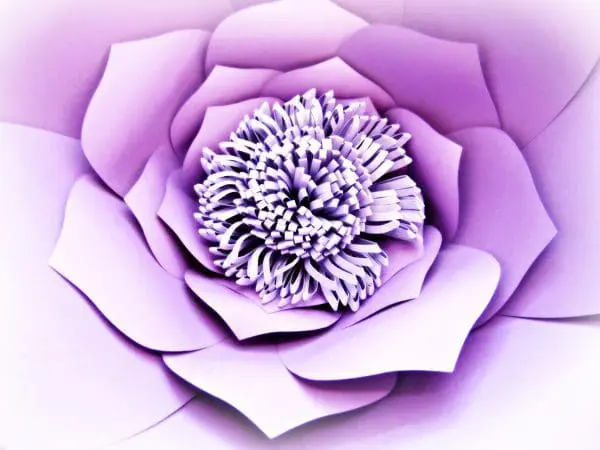
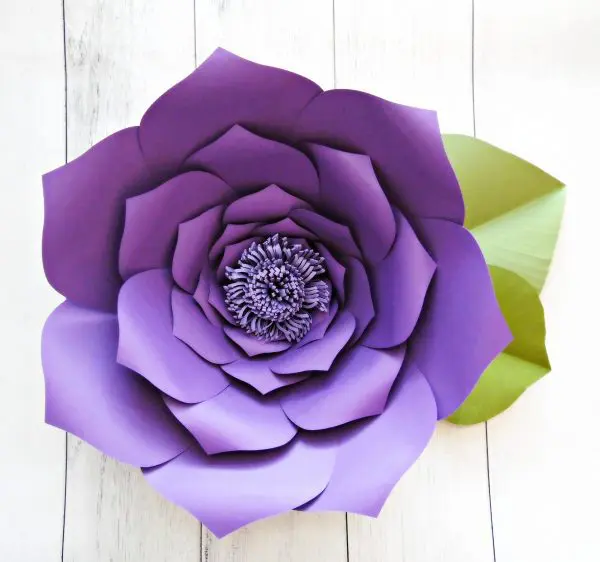
Glue the center in and admire you pretty flower!
Keep reading below to learn how to make a giant leaf!
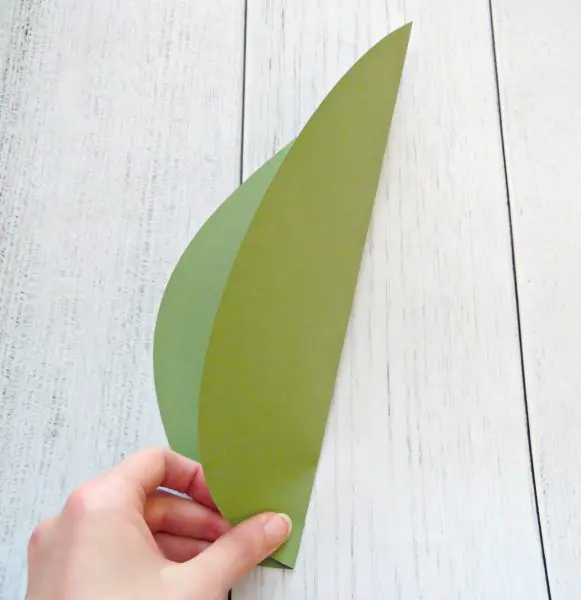
Giant Paper Leaf
Step 1
Use your leaf template to trace onto card stock like we did with the petals.
Step 2
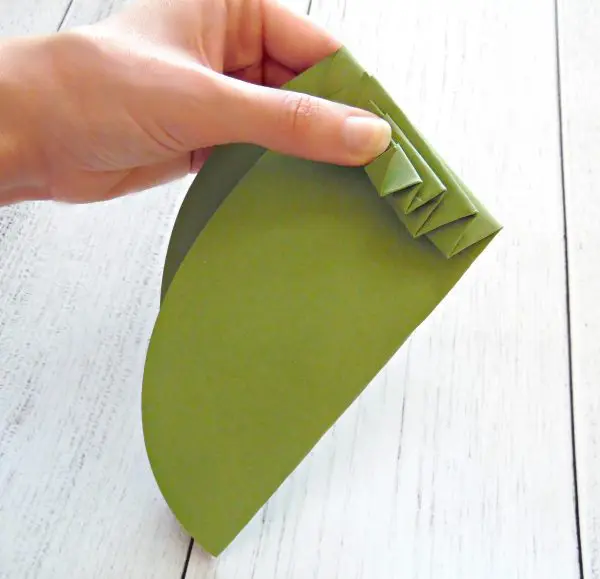
Fold your leaf in half.
Step 3
Begin folding back and forth like you were making a paper fan.
Step 4
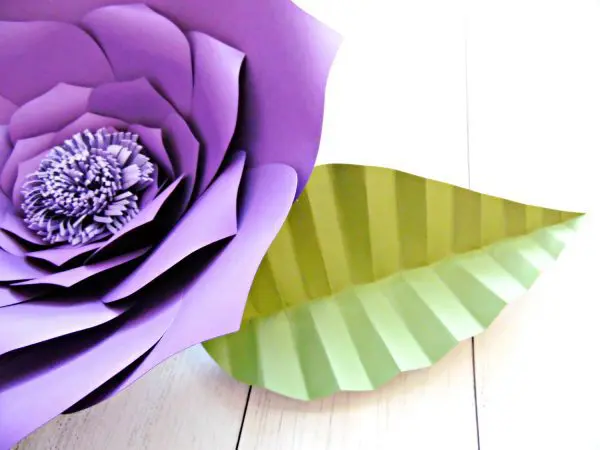
Open the leaf up and add it to your pretty flower.
Step 5
Give yourself a pat on the back for being so smart and learning to make your own DIY giant flowers!
How To Make Giant Paper Flowers – Step-By-Step Tutorial
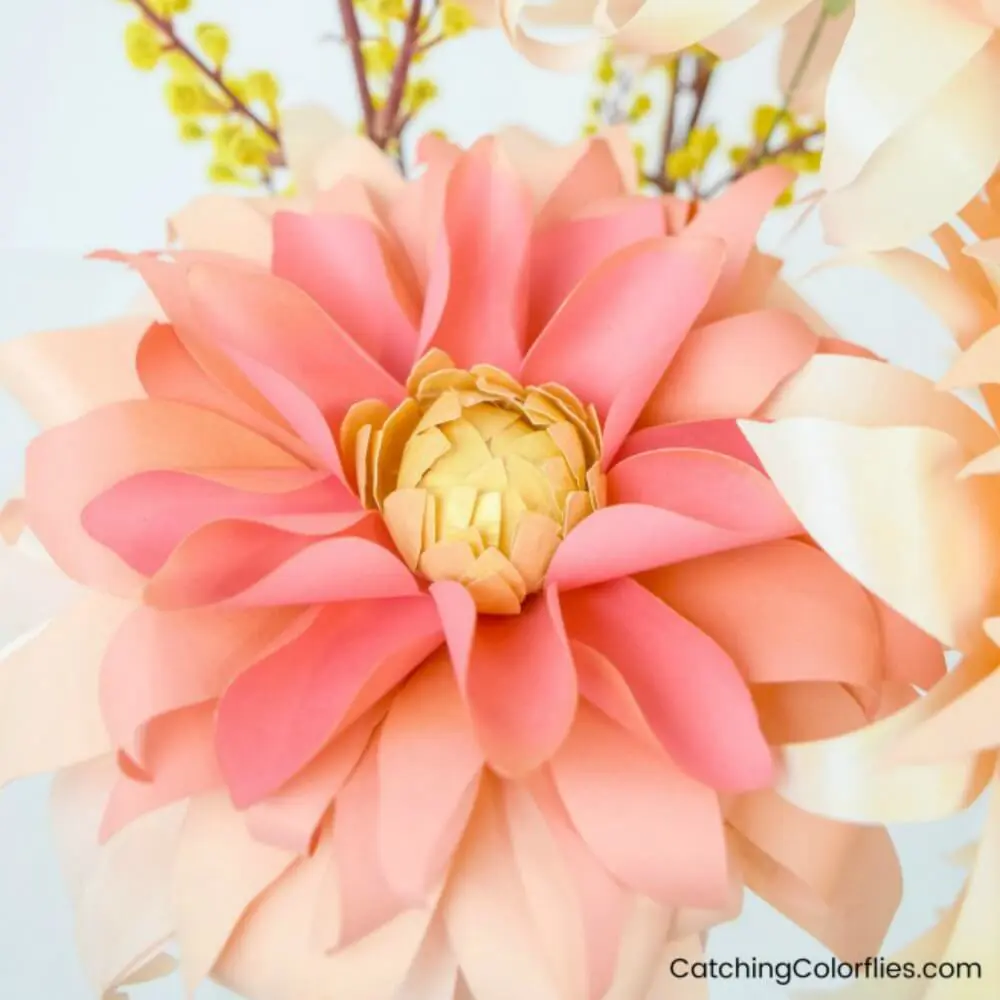
Sure, you could make small flowers, but why not go big for your home? Create easy, giant paper flowers in a few simple steps. These blooming beauties can be used for home decor, special occasions, or whenever you want to feel like Alice in Wonderland in a field of huge flowers you made yourself. These Priscilla-style flowers can be made with scissors or a cutting machine!
Materials
Instructions
Part 1: The Giant Paper Flower
If you are using a cutting machine like Cricut, skip to step 2.
If you are cutting by hand, begin at step 1.
Step 1: If Using Scissors, Trace The Petal Template On Cardstock
- 6-8 extra large petals1st layer (outer)
- 6-7 large petals2nd layer
- 6-7 medium petals3rd layer
- 5-6 small petals4th layer
- 1 circle punch
Step 2: Cut Out The Petals
Cut all your petals out once you have finished tracing. If you are using a Cricut cutting machine, use these measurements for your petals:
Cutting Machine Measurements In Inches
- Extra large 7.5 x 10.5 petals
- Large 5.5 x 8.5 petals
- Medium 4.5 x 5.5 petals
- Small 3.5 x 4.5 petals
- Extra Small 3 x 4 petals
Step 3: Cut Slits
Cut slits in the bottom of each petal, about an inch from the petal base toward the center.
Step 4: Glue Slits Together
Add glue on the inside edge and overlap the slit slightly. Do this with all the petals. You can overlap a little more on the 3rd & 4th layers.
Step 5: Curl the Petals
Using your wood dowel or a pencil, curl the tops of all the petals backward so the flower looks like it is blooming.
Step 6: Assemble the 1st Layer
Begin with the 1st layer (extra large petals). Add glue to the outer edge of an extra large petal and adhere to another extra large petal at about a 45-degree angle.
Continue until all the base petals are glued together and form a circle in the center of the flower.
Step 7: Center Punch Circle
Use a circle punch or cut out a small square to glue over the open bottom on the underside of the outer petal layer.
Step 8: Assemble the 2nd Layer
Glue the second layer to the first layer by placing the 2nd layer petals in an alternating pattern with the outer layer.
Step 9: Assemble the 3rd, 4th and extra small 5th layer
Continue alternating petals and add the 3rd layer, then the 4th layer, and the 5th and final layer if you have them.
Part 2: The Pompom Center
Step 10: Create the Pompom Center
Fold a piece of cardstock lengthwise. Then cut the paper down the middle. Lay the 2 pieces on top of one another and fold in half lengthwise again.
Step 11: Cut the Fringe
Using scissors or shredding scissors, cut slits up from the bottom open ends of the paper towards the fold, but don’t cut into the fold.
Step 12: Glue and Roll the Pompom
Unfold the fringe piece. Flip it inside out and glue the open ends together. Start rolling the first piece, adding glue along the edge as you go.
After you finish rolling up the first piece, add the second piece and glue it together.
Step 13: Finish the Pompom
Glue the pompom into the center of your assembled giant flower, fringe up, to create the flower stamen.
Part 3: Giant Leaf (Optional)
Step 14: Cut Out A Giant Leaf
Use a leaf template to trace the leaf onto cardstock, or use a template and SVG file for Cricut to cut out your giant leaf.
Step 15: Fold the Leaf
Fold your leaf in half.
At the top of the leaf, begin an accordion fold like you are making a paper fan.
Step 16: Add the Giant Leaf
Open the leaf up and add it to your pretty flower.
Give yourself a pat on the back for learning to make your own DIY giant flowers!
View Priscilla flower video tutorial here
Discover More
Share what you’ve been up to by using #DIYwithAbbi. I would love to see your creativity in the works so flaunt your flower power magic! You are a huge source of my inspiration!
My mission is to inspire you to nurture the creative magic inside your soul – bringing you fun, easy to learn DIY projects, and quality template designs. Interested in more flower tutorials?! I’ve created dozens of signature designs for you to enjoy – starting with my best seller, The Art of Giant Paper Flowers, the Giant Flower Library, and Catching Colorflies, my shop of endless paper designs and flower templates.
Feeling overwhelmed? Start here with my tried and true Resource List!
Thanks for letting me pop into your day!

Don’t forget to pin for later!

Marvellous
Hi i was wondering if you could supply us with the website that you order your paper from?
Hi Rosie, I buy all my paper from Michael’s craft store. 🙂
Hi…I noticed you using a tool in one of your video’s (Daisy? Dahlia?) that helps you to curve your flower layers. It has 2 rounded ends of different size.
What is it called and where can I get it?
Beautiful creations, BTW, thanks for sharing your talent
I use my Paper Blooms shaping mat and tool kit. Find it here: https://catchingcolorflies.com/paper-blooms-shaping-mat-rolling-tool-kit/
Hi Abbi-
What size paper do you use to get the largest petals?
Thank you-
Katie
I use 8.5 x 11 cardstock for all my flowers.
I signed up but did not receive my free flower template. Hopefully in svg format. Thank you.
You will need to confirm your email and then a box will pop up to access it. Check your spam and promo folder for the email confirmation.
Should I buy 8 1/2″ or 12″ cardstock for XL flowers?
All my templates work with 8.5 x 11 cardstock. But you can always use 12 x 12 if you like.
Hello, what are all of the measurements of each layer (petal) for cutting on the Cricut machine? Thank you!
Hi, The measurements can be found in the description of the Youtube video here: https://www.youtube.com/watch?v=diKqBpUVL6I
I made a flower last night. I love it!
I can’t wait to make more now that I know
What I’m doing, lol
Yay! So happy I could help!
Hello the scissors that you use to cut for the center of the flower where can I get it.
Thank you
Hi Valeria! Those are fringe scissors. You can find them here: https://amzn.to/2O8eeOr
Can we buy the already made from you?
Unfortunately, due to my schedule, I am not selling pre-made flowers at this time. 🙂
WOWSA!! This is great thank you so so much for sharing this. Have been wanting to make these forever. Blessings
Oh … you’re so clever. I love it. I want to ask that do you sell these products? If yes, where can I buy it? Thanks you!
I sell the templates here – https://catchingcolorflies.com/