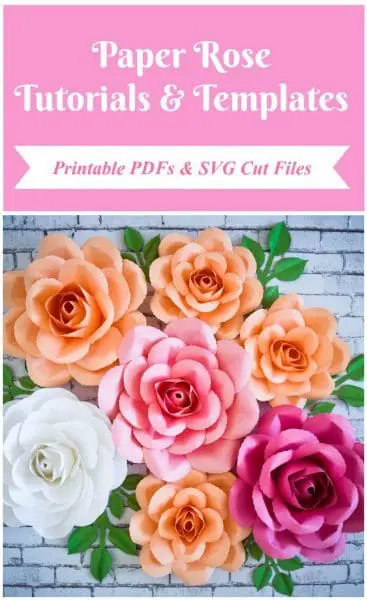
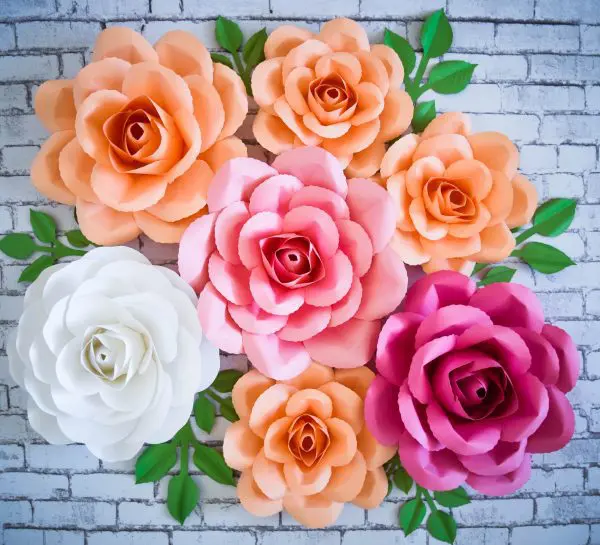
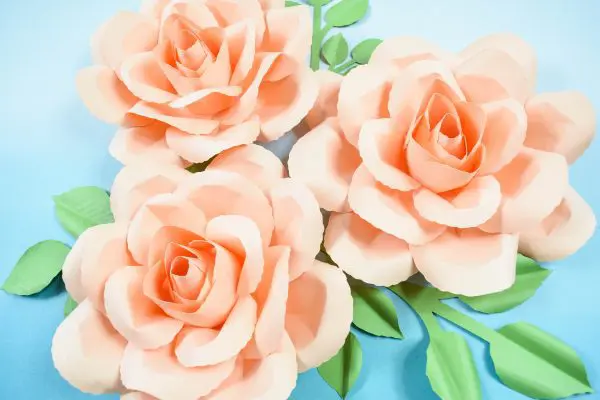
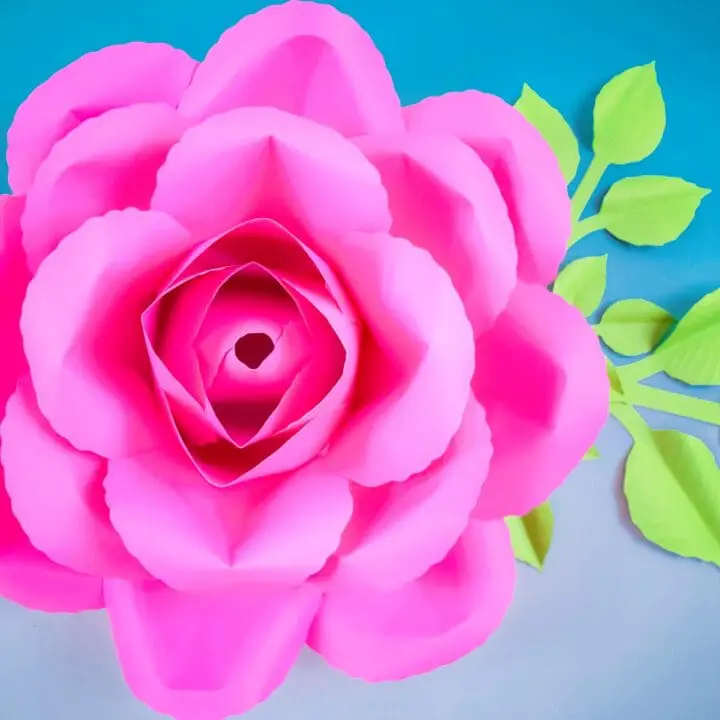
DIY Paper Rose: Serena Rose Tutorial
This post may contain affiliate links that won’t change your price but will share some commission.
There’s something serene about roses, wouldn’t you agree? (Yes, every pun intended). They make you pause to reflect and if not anything, to stop and smell the roses.
This new month might have a tendency to be a bit hectic with goals, jumping back into a rhythm after the holidays and figuring out where all of the Holiday goodies are going to be stored until next year. So, in the spirit of serenity, I thought I should share something relatively simple for you to try. Today we will be crafting a DIY Paper Rose: Serena Rose Tutorial.
Here’s an easy and elegant paper rose tutorial. Nothing too difficult because simple is still beautiful.
And yes, beginners, I can see the smile on your face because this DIY Paper Flower is perfect for you to try!
For this tutorial, we’re making DIY Paper Rose: Serena Rose Tutorial.
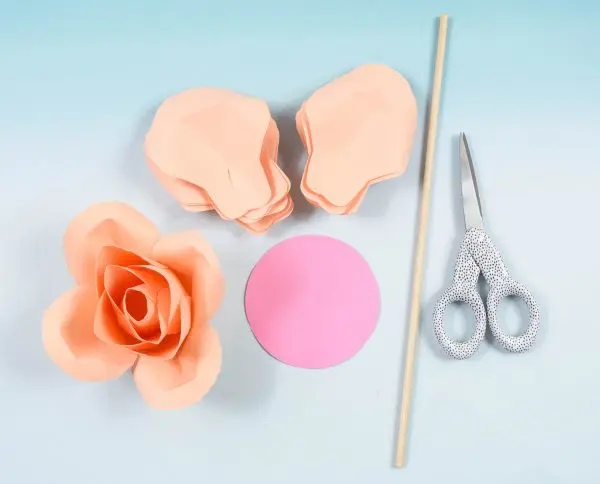
Supplies
– 65-pound 8.5 x 11-inch cardstock
– Scissors
– Glue gun
– Templates (download my serena rose PDF and SVG cut files)
– Thin dowel or glue stick
– Cutting machine measurements

Prep
Cut out 24 petals in total from the paper cards. You can use my downloadable templates.
Let’s Get Started:
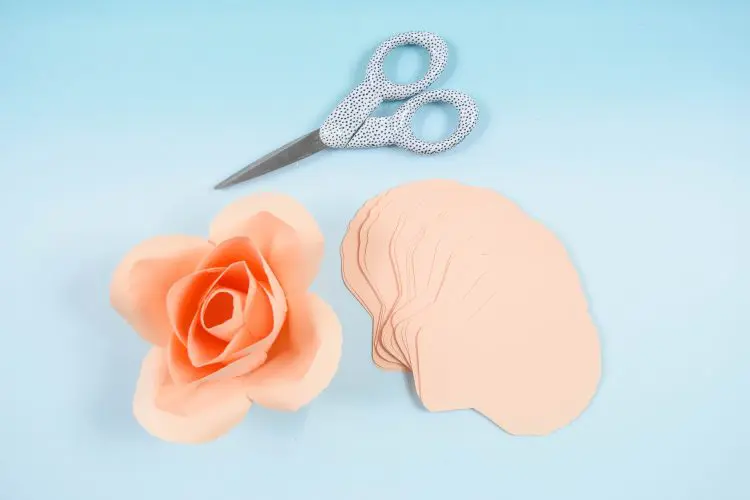
Step 1
We will start with the rose center. To do so, count 12 out of the 24 petals. Then set the rest aside.
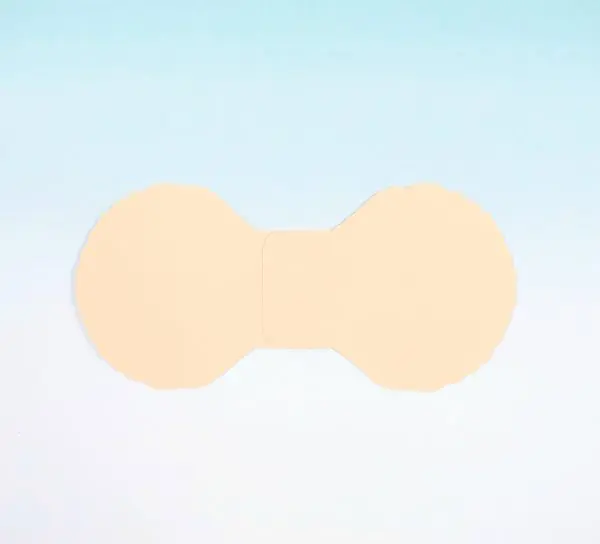
Step 2:
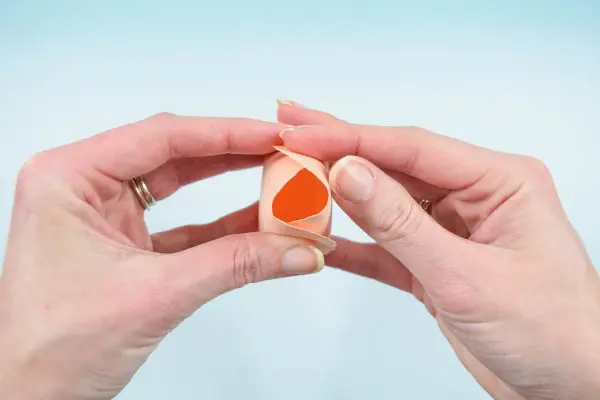
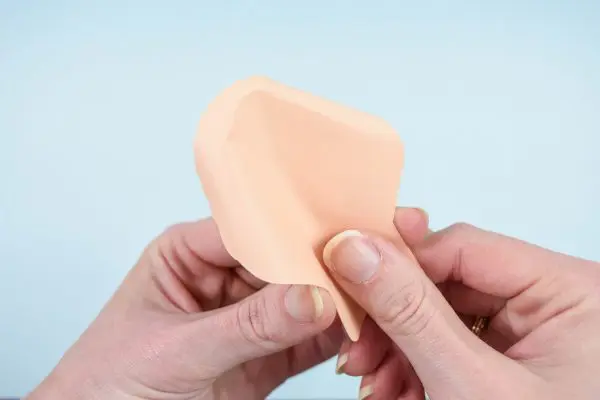
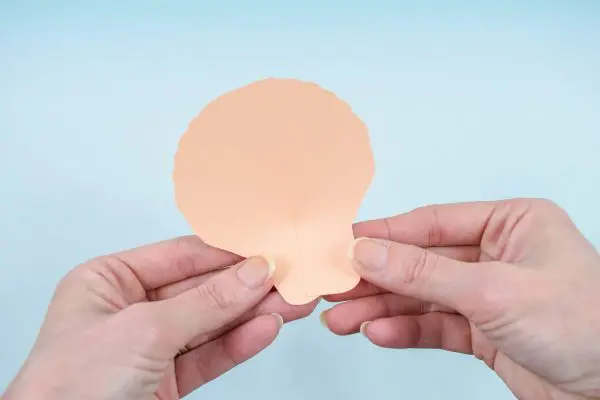
Pick up two petals. Lay them side by side with their bottoms facing each other.
Overlap the bottoms and fasten them together with glue.
Step 3:
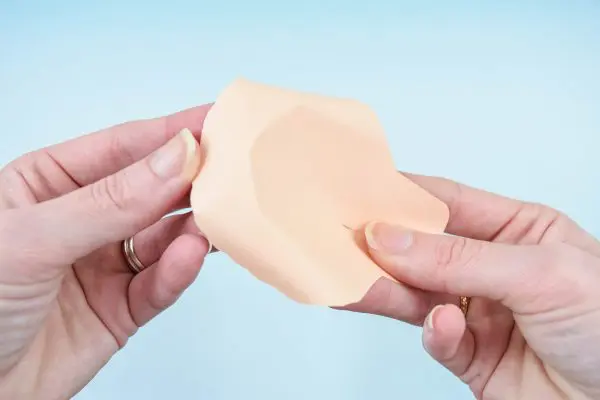
Fold the now glued petals up, wrapping them around each other.
Step 4:
Secure the overlapping outer edges with glue.
Step 5:
Repeat Step 2 with a new pair of petals. Glue the petals together.
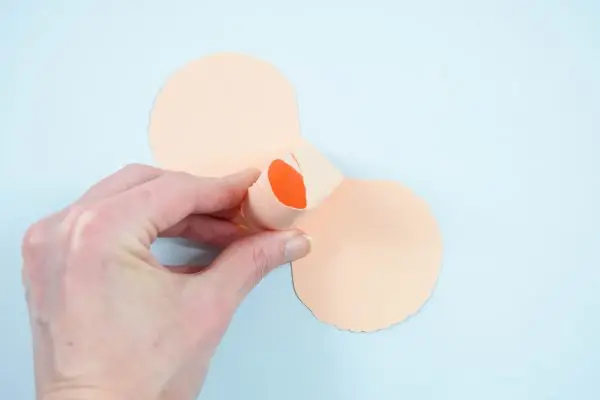
Step 6:
Glue the first folded set of petals to the center of the new pair of petals
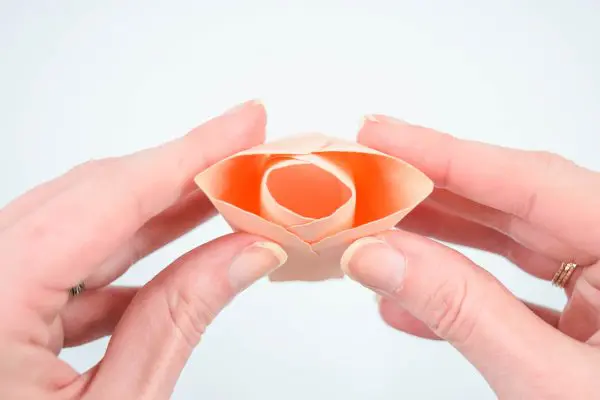
Step 7
Add dots of the glue to the outer edges of each laying petal. Then wrap them around the first set of petals.
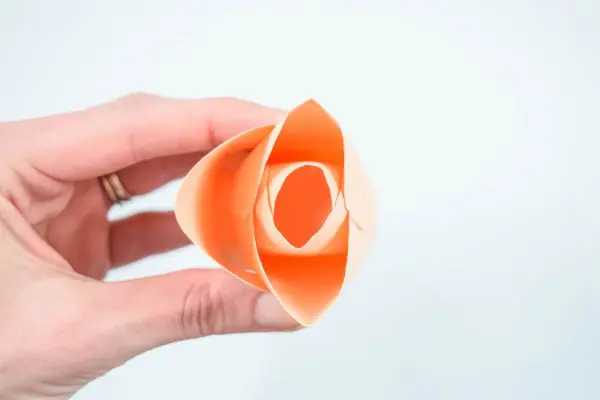
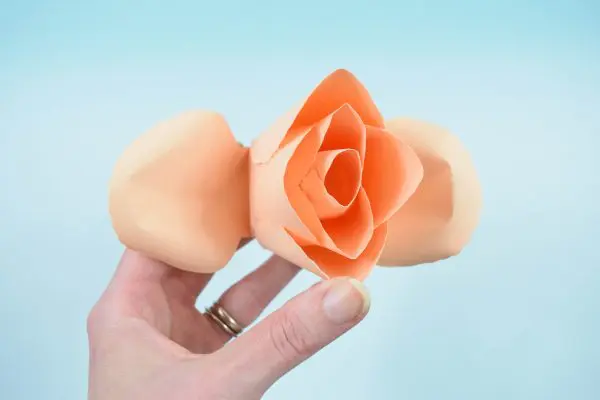
We now have the rosebud.
From now, we’ll add one petal at a time to keep the center bloom even.
Step 8:
Add glue to the bottom of one petal and press it to the bottom of the rosebud. Add two dots of glue to the upper outer edges and wrap around the bud.
Repeat on the opposite side.
Step 9
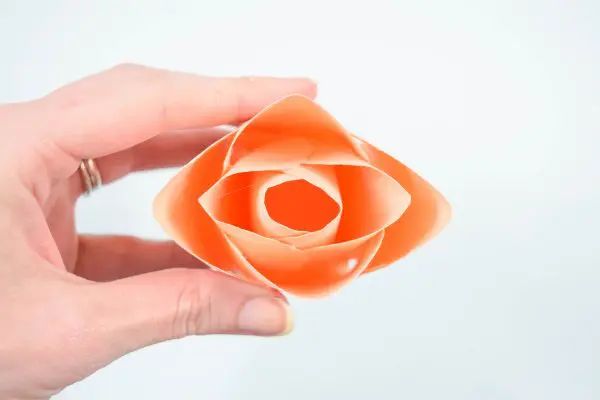
Do the same thing for the remaining two sides of the rosebud.
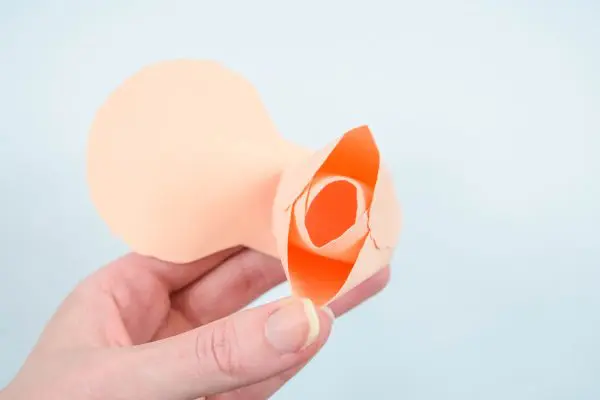
Count the remaining petals. You should have 4 left. These 4 will be curled back and glued around each of the 4 sides.
Step 10:
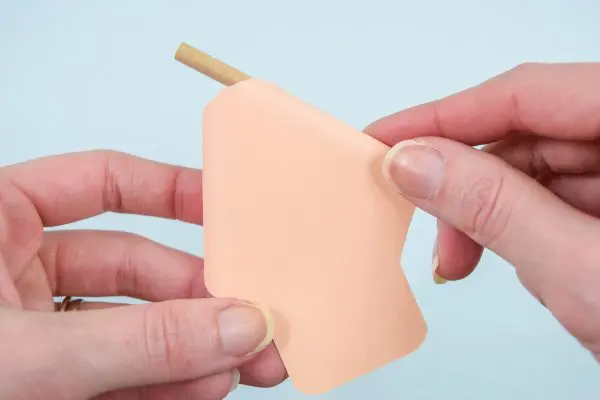
Using a thin wood dowel, curl the edges of the petals backward.
Step 11:
After that, crease the center and lightly fold the tips of the petal down and back.
Repeat the same for the remaining 3 petals.
Step 12:
Take one of the 4 petals. Glue to the base on one corner of the rosebud.
Step 13:
Add two dots of glue to the outer bottom corners. Fold up and press firmly to attach it to the rosebud.
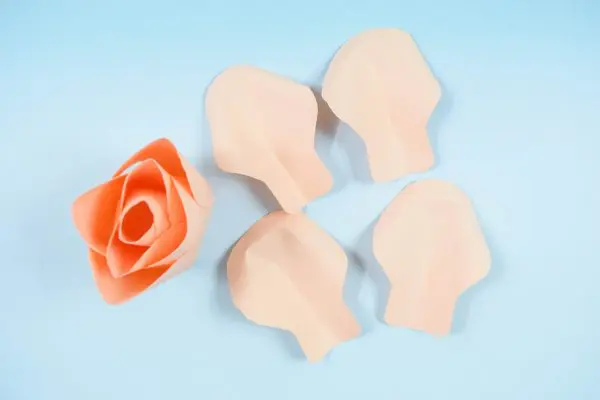
For the remaining 12 petals:
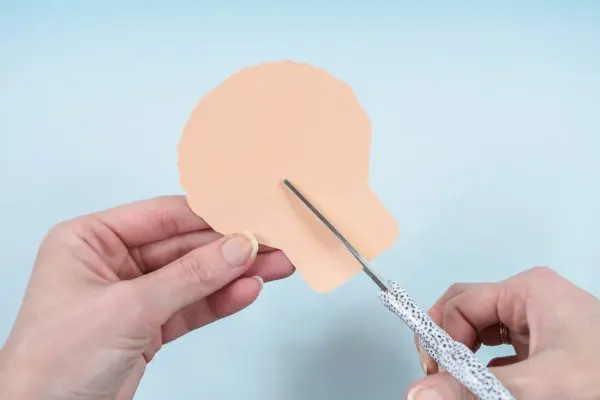
- Cut 1-2 inch slits at the bottom of all 12 petals.

- Overlap the slits slightly and glue them together.
- Repeat the curling technique as explained in steps 10 and 11.
Finishing Up:
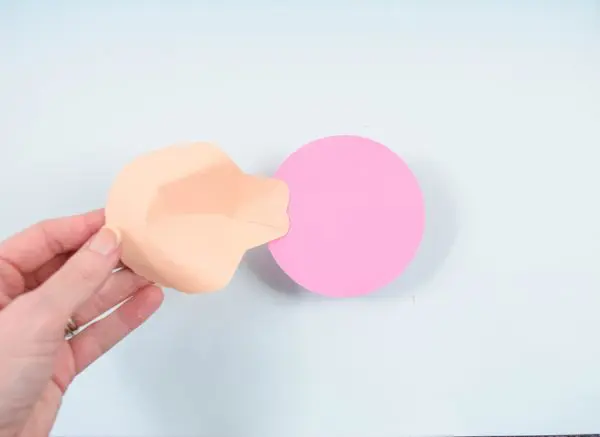
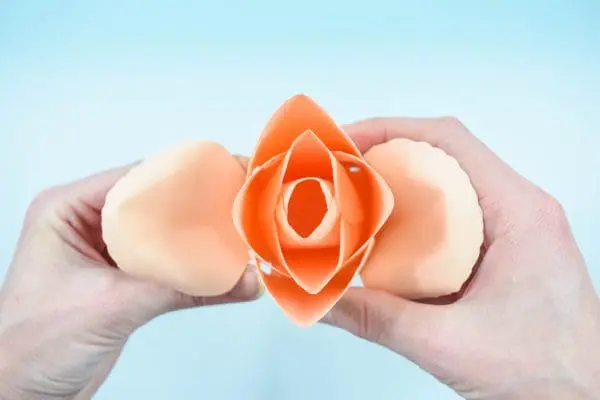
I used my 8-sided base, which is included in my Serena rose template. One petal will be glued to each of the 8 sides.
These bases are a great guide to help your process easier and the flowers more beautiful.
Glue the last petal down and tuck one side under the starting petal to give it a more even look.
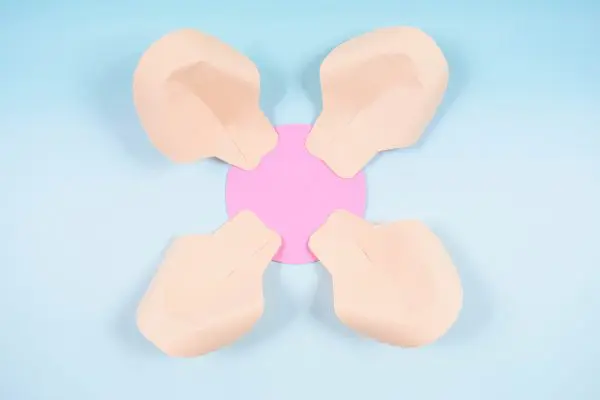
Glue the remaining four petals about one inch in into the rose base, placing each one in between two petals. Each of the four petals should be opposite facing.
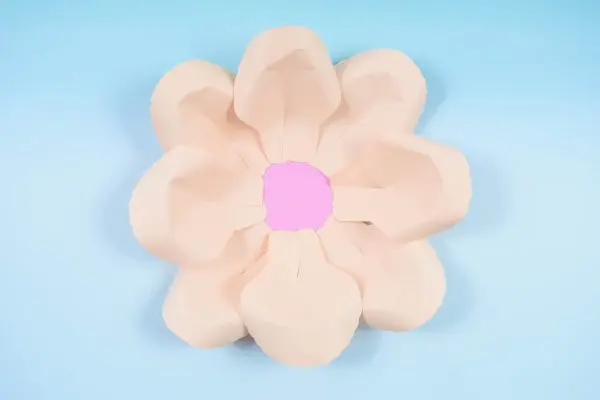
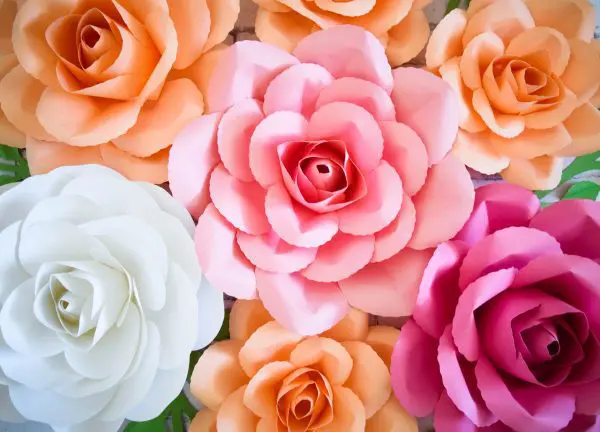
Congratulations! You just finished your rose base.
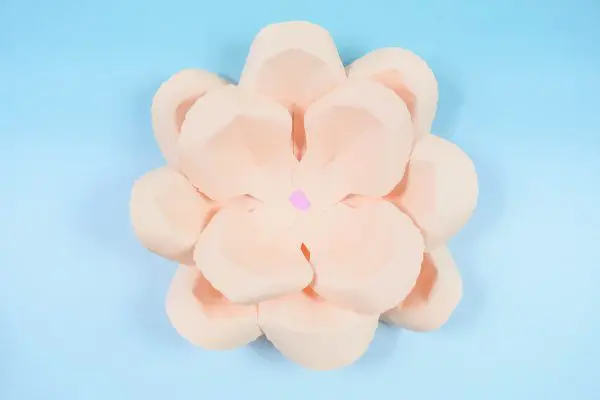
All that’s left is to add the rose center. So, place your rose center in the center of the rose base making sure that the center petals alternate to the petals underneath them.
Once you’re happy with the placement, glue it down firmly and use the dowel to ensure it is firmly glued.
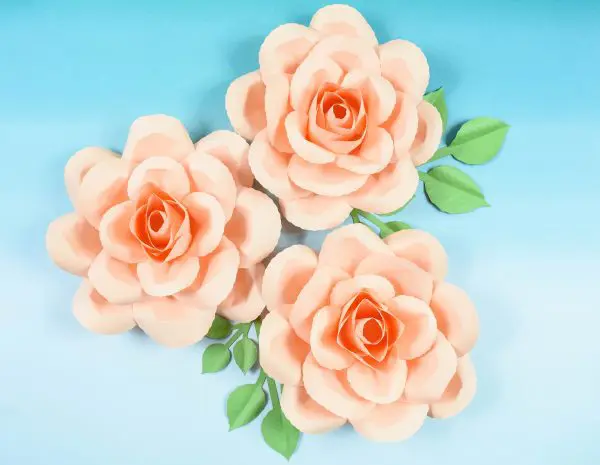
There you have it, your very own Serena Paper Rose. If it isn’t perfect, give it time, practice makes progress.
If you get stuck, you can check out the video below for video instructions.


For more tutorials like the Bella Rose Paper Flower or the DIY Iris Unicorn Flower. Be sure to keep up with the blog or follow me on Pinterest!
DIY Paper Rose: Serena Rose Tutorial
This DIY paper serena rose is a beautiful and elegant flower that will brighten up your home! The tutorial shows how easy these flowers are to create and allows you to use any color of cardstock you desire to decorate your home, add dimension to gift-wrapped presents, or as one of many in a paper bridal bouquet.
Materials
Instructions
Prepare
- Gather all your supplies
- Cut out a circle for a base or use the 8-sided base included in the tutorial.
- Use a cutting machine or scissors to cut all 24 paper petals as outlined in my template.
Assemble the Rose Bud
- Keep 12 paper petals and put the rest in a stack to the side.
- Slightly overlap the bottom edges of two petals and glue them together.
- Fold the two ends of the glued petals upwards so they can wrap around each other. Glue the overlapping wrapped edges to each other. This is the center of your rosebud.
- Glue the bottom edges of two more petals together.
- Fold up the edges and glue the overlapped edges together.
- Glue the first rosebud layer into the center of the second rosebud layer.
- Wrap the petals some more and add dots of glue to secure them. From now, we’ll add one petal at a time to keep the center bloom even.
- Glue the bottom of one petal to the bottom of the rosebud. Add two drops of glue to the outer petals and secure them to the rosebud.
- Repeat on the opposite side.
- Repeat on the remaining two sides of the rosebud.
- You should have four petals left from the 12 you counted out.
- Curl the four remaining petal edges backward using the wooden dowel.
- Crease the center of each of the four petals, and gently fold the petal tips down and back.
- Repeat with the remaining 3 petals.
- Glue each of these four petals around the bottom of the rosebud.
Assemble the Outer Rose Layers
- Use the remaining 12 petals for these steps.
- Cut a 1-inch slit from the bottom edge up toward the top of each petal.
- Overlap the slit edges slightly and glue these edges together.
- Repeat the curling steps from the rosebud section.
- Using the circle or 8-sided base, glue the bottom petal edges to each side of the base.
- Tuck the edges of the last flower under the petals of the first petal for a clean look.
- Glue the remaining 4 petals one inch in the rose base in an alternating pattern with the outside layer. The four petals should be opposite facing.
- Finishing the DIY Serena Paper Flower
- Glue the rosebud to the center of the rose base.
- Shape the petals and fluff the flower to finish the look.
Congrats! You just made a DIY large paper flower! You can also find templates for leaves and foliage on my Catching Colorflies website for extra fun!
Discover More
Share what you’ve been up to by using #DIYwithAbbi. I would love to see your creativity in the works so flaunt your flower power magic! You are a huge source of my inspiration!
My mission at Abbi Kirsten Collections is to inspire you to nurture the creative magic inside your soul – bringing you fun, easy-to-learn DIY projects and quality template designs. I share a variety of projects but specifically love paper crafting and paper flowers. Interested in more flower tutorials?! I’ve created dozens of signature designs for you to enjoy – starting with my best seller, The Art of Giant Paper Flowers, the Giant Flower Library, and Catching Colorflies, my shop of endless paper designs and flower templates.
Feeling overwhelmed? Start here with my tried and true Resource List!
Thanks for letting me pop into your day!