DIY Rolled Paper Flower Shadow Box With Cricut: Free Rosette Template
This post may contain affiliate links that won’t change your price but will share some commission.
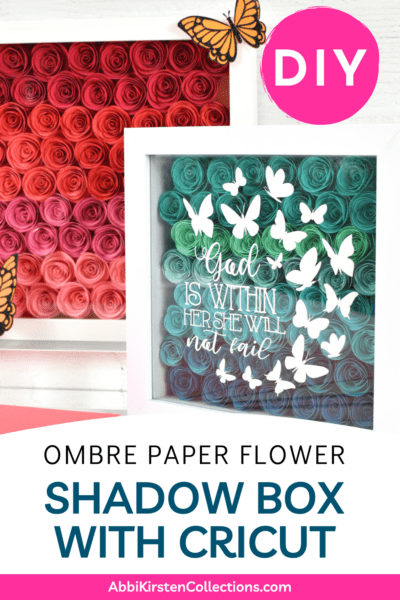
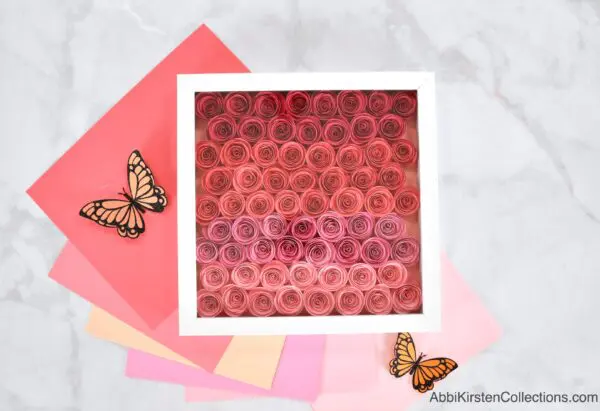
Today I am sharing with you how to make a DIY shadow box with rolled paper flowers! For an extra touch, I will also show you how to add permanent vinyl on the front of the glass. In addition to this fun project, I will also share with you the best cricut shadow box ideas for more inspiration.
I made one of these shadow boxes as a mother’s day gift for my Mom – she loved it! Shadow boxes are a perfect gift to give for many occasions; from weddings to baby showers shadow boxes, there are many ways you can use them. Aside from gifts, shadow boxes also make lovely home decor.
In this post, I will cover the most important things you need to know when making a paper flower shadow box with Cricut and give you a full video tutorial step by step. I am also linking several other Cricut shadow box ideas at the end.
I’ve included several templates here for your DIY flower shadow box, and I even created a rolled paper flower sizing chart to help you! Let’s talk about the supplies you will need first.
Supply List for Paper Flower Shadow Box With Cricut
- Cricut Machine: You can use the Cricut Maker, Maker 3, Cricut Explore Air 2, or Explore 3. Because we are making small paper flowers, you can even use the Cricut Joy machine to make this shadow box.
- Brayer tool
- Fine point blade: This is the standard blade that comes with all Cricut machines
- Cardstock paper in different shades of paper to create the ombre effect. Learn my favorite paper resources here.
- Cricut scraper tool
- Hot glue gun
- Permanent adhesive vinyl
- Weeding tool
- Transfer tape
- Weeding tool
- Cricut cutting mat
- Quilling tool (optional)
- DIY shadow box frames. This shadow box is the one I used, but there are many shadow box options available online and at craft stores.
- Rolled rosette paper flower SVG files – Try the wavy design for free below! You can also get ALL my rosettes by becoming an A-Star Crafter or pick them up in the shop here.
Free Template: Wavy Rolled Rosette Flower Template
To get access to the free wavy rolled flower rosette template, log into the Craft Vault here and search the keyword “rosette” or design #19.
If you’re not yet a part of the Abbi Kirsten community, you can easily join by creating a free account via the form below. Once you set your password via the link sent to your inbox, find the wavy rosette by searching “rosette” or design #19 at the top.
For more gorgeous paper flowers, check out all my paper flower tutorials and templates on Abbi Kirsten Collections.
Rolled Paper Flower Rosette Size Chart
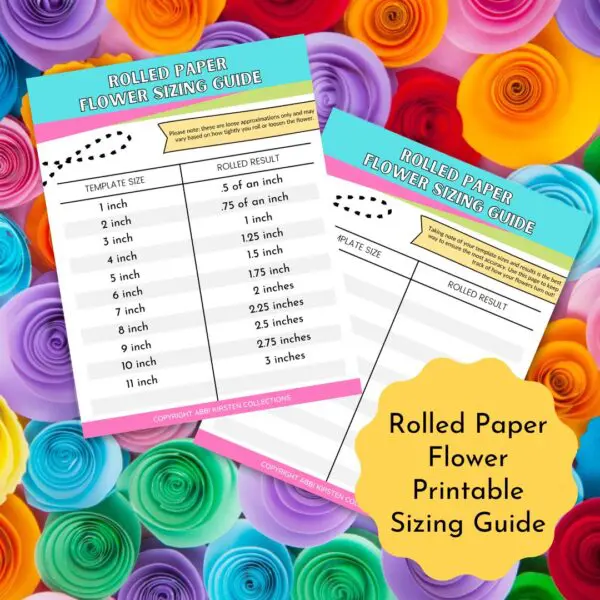
I have provided a printable rolled flower sizing chart to help you figure out the difference between the rosette template size and the final rolled result. You can download the Printable Rolled Paper Flower Size Chart in the Abbi Kirsten Collections Craft Vault. Search the keyword “rosette” or design #573. If you are new to the community, enter your name and email below to set up your free account and log in.
Paper Flower Cricut Shadow Box Video Tutorial
Watch the full step-by-step video tutorial to learn how to make a DIY shadow box with Cricut. Keep reading for more instructions and more Cricut shadow box ideas!
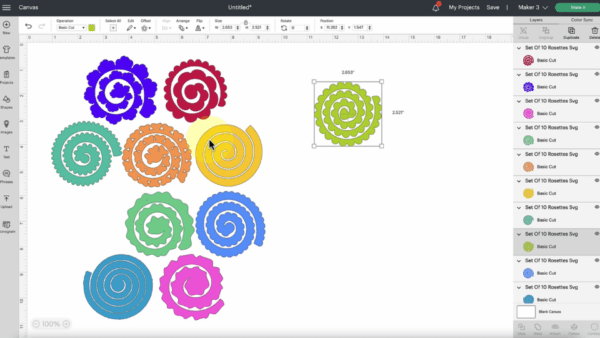
Uploading and Cutting the Files in Cricut Design Space
The first step is to upload your flower templates to Design Space. Remember, you can get all the rolled paper flower rosette templates when you join A-Star Crafters or pick them up here. Otherwise, assume you will use the free wavy design in the Craft Vault.
If you’re new to Cricut, visit my in-depth post on uploading your own SVG cut files to Cricut here.
What Size and How Many Flowers Do you Need for a shadow box?
Next, decide on the size of your rolled paper flower template. I scaled mine to 4.7 x 4.7 inches for a result of a 1.4-inch flower.
- With my 10 x 10-inch shadow box, I used 68 rolled rosette flowers.
- For my 8 x 8 shadow box, I used 52 paper flowers.
I decided to create an offset of the rolled flowers; if you choose to go straight up and down, you may need to add 4-5 additional rosettes to the amount listed above.
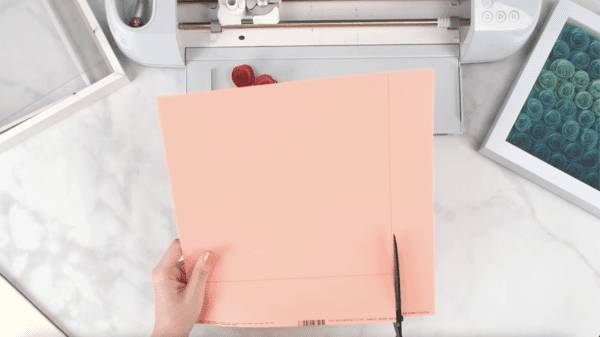
Place your cardstock on a Cricut cutting mat and proceed with cutting out all your flower templates until you reach the desired number. I used the medium cardstock setting.
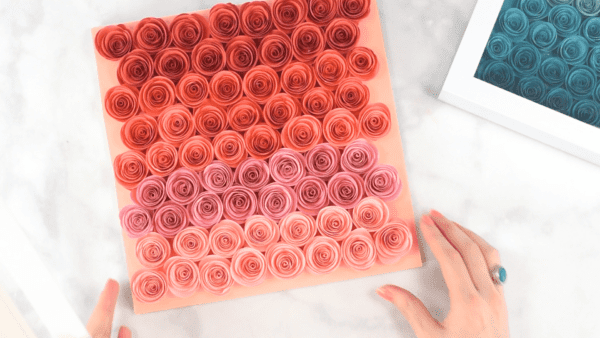
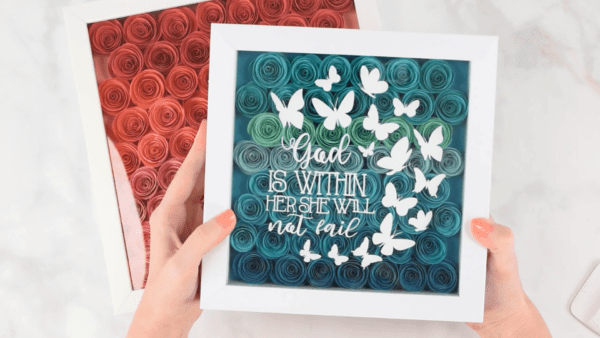
Creating an Ombre Effect For Your Paper Flower Shadow Box
Keep in mind your different colors and shades of paper as you go. Choose between 3-6 shades of one color to achieve an ombre effect.
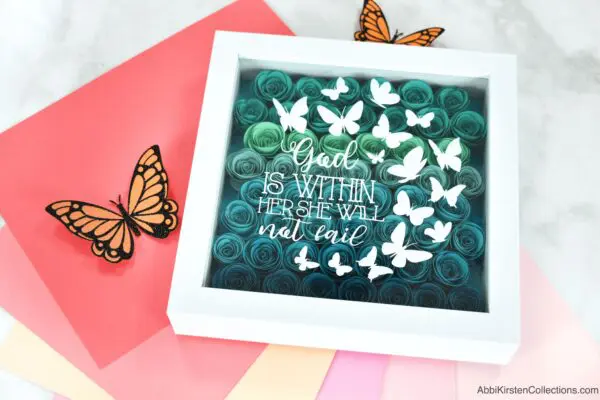
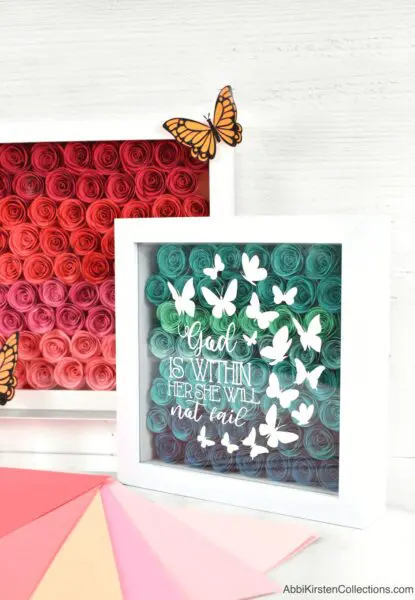
I used pink and reds for my largest shadow box and blue and turquoise for my smaller one. You will either want to choose one color per row of flowers or one color for every two rows for best results. Whichever option you choose, just be consistent with it.
Prepping the Base of the Shadow Box
I recommend covering the back of the box with complementary colored paper. You could also do a fun scrapbooking paper.
To start, remove the back of the frame from your shadow box. Trace the backing of the shadow box onto your cardstock to cover the inside base with a pencil, then cut it out with scissors. Use liquid glue or your hot glue gun to attach it. Set this aside for now.
Rolling the Rosette Paper Flowers
Making a paper rosette is a super easy tutorial for beginners. The rosettes are fast to make without much effort. Be sure to watch my video to see how to do this in real-time.
I like to use a quilling tool to roll up my flowers, but you can absolutely use just your fingers in a pinch.
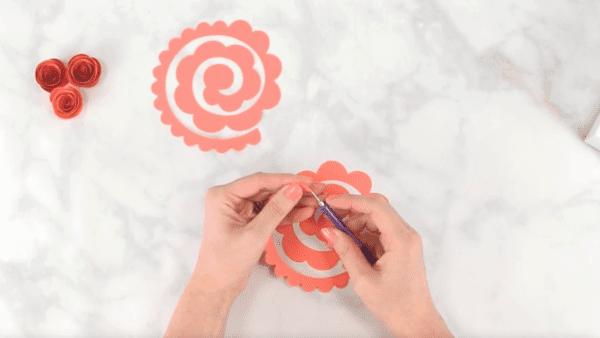
Step 1: Start with the open end of the rosette facing to your top-right if you are right-handed or to the top-left if you are left-handed. Place the quilling tool on the tip and begin rolling up the flower as if rolling up a ribbon – keeping it nice and taut.
Step 2: Once you have reached the end, you will naturally run into the base of the flower. Place the rosette down on the table and let it loosen slightly while still holding your finger on top to control how much it unravels.
Step 3: When you are happy with the result, add hot glue to the base and press the top of your flower over it to secure it.
Step 4: Repeat this for all your rolled rosette flowers to fill up your DIY shadow box.
Adding the Rolled Paper Flowers To the Shadow Box
Step 1: With the back of your shadow box covered with the cardstock, remove the glass (if applicable) and place the frame back on top without the glass.
Step 2: Begin to glue the rosettes inside the shadow box in rows. I recommend gluing the darker shades of flowers at the top of the shadow box and working your way down to the lighter colors. Ultimately, the order of colors is your choice.
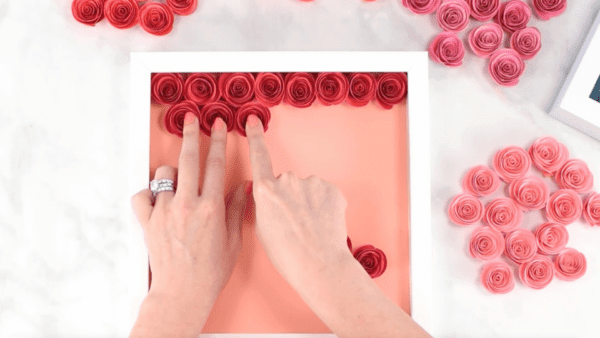
Step 3: Because I chose to do an offset with my rows of flowers, I’m doing 8 rosettes in the first row of my 10 x 10-inch shadow box and then 7 flowers in the next row. You can keep all the flowers in a straight line, too, in which case I would do 8 down and 8 across.
Step 4: If you wish to fill in any additional spaces, you can make smaller rosettes or add some greenery! Continue gluing in your flowers until you reach the bottom of the shadow box.
Apply The Vinyl Design To the Front of the Shadow Box
Step 1: To apply your permanent vinyl to the front of your shadow box, decide if you would like it on the outside or inside of the glass. I plan to place my vinyl design on the inside of the glass pane because I want to be able to dust my shadow box without catching on any vinyl.
Step 2: To place the vinyl on the inside of the glass, you will want to mirror the design in Cricut Design Space on the first cut screen so that it appears the right way, once placed facing the correct direction.
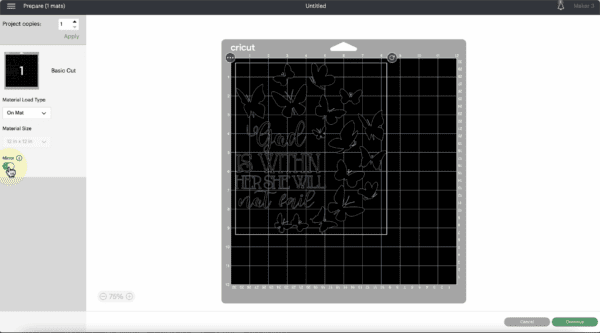
You can find my First my Mother. Forever my Friend SVG in the Craft Vault, as well as the butterfly design with my favorite Bible verse: God is within her; she will not fail. Search design #141 and #571 at the top search bar when logged into the AKC Craft Vault.
You can also use Cricut Access Images for this if you do not wish to use my designs.
Step 3: Cut out your permanent vinyl design, weed it, then transfer it with transfer tape. Apply the design to the inside of the glass of the shadow box. Watch my video here to see how.
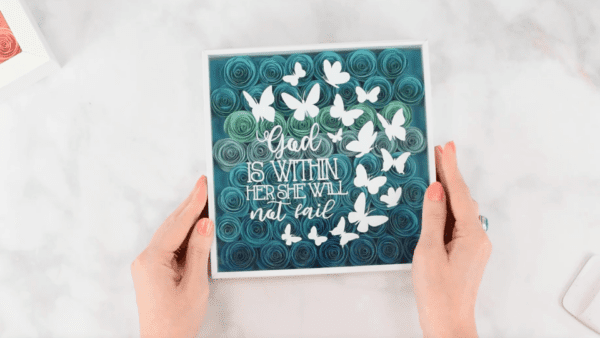
Step 4: Once you have added your vinyl design, remove the frame from the back of the shadow box now filled with rolled paper flowers. Place your glass back on top and close the shadow box back into its original state. Congrats! You have completed a DIY paper flower shadow box with Cricut!
What questions do you have for me about making a paper flower shadow box with Cricut? Ask me in the comments!
More Cricut Shadow Box Ideas You Will Love
Make sure to check all these pretty Cricut shadow box ideas, many with free SVG files!
- Angel Wings Memorial Shadow Box by Abbi Kirsten Collections
- 3D Layered Shadow Boxes by Hello, Creative Family
- Nursery Cricut Shadow Box by Extraordinary Chaos
- Bird Heart Shadow Box by Creates With Love
- Welcome Fall Shadow Box by Ellie Marie Home
- Merry and Bright Christmas Shadow Box by Ruffles and Rainboots
- Shadow Box Bank by A Mom’s Take
What did you think of this DIY shadow box tutorial with Cricut? Don’t shadow boxes make wonderful gifts to customize for family, friends, or home decor? Tell me your thoughts below!
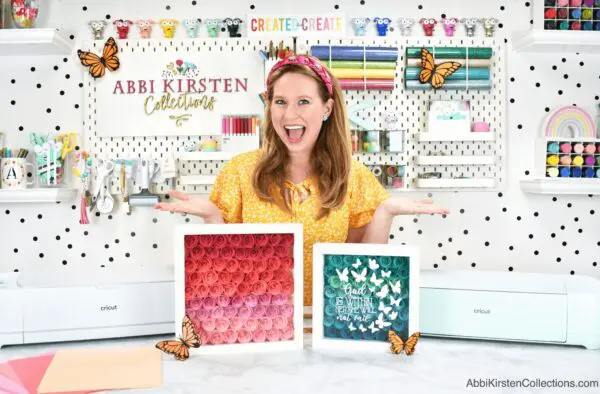
About Abbi Kirsten
Welcome to my colorful corner of the internet, where we play with vibrant crafts and unlock your creative magic! Hang out with me and get lost in a fun array of projects, tutorials, and products, from stunning papercraft ideas to flower templates, Cricut help for beginners, and endless crafter’s hacks.
Join A-Star Crafters and participate in monthly Craft-Alongs in our community Facebook group!


Oh Abbi I just love your craft projects!!!! I want to start getting back into crafting. I sure have missed it. You have such good ideas. I appreciate you taking the time out to share your ideas. My life was totally turned upside down a year ago. My husband was in the hospital almost all of last year. Doing crafts will help me so much and it would really be relaxing to get back into my favorite hobby! I love Crafts. Thanks for all your ideas. Hope you have a great day.