How to Make Crepe Paper Sunflowers: Templates and Tutorial
This post may contain affiliate links that won’t change your price but will share some commission.
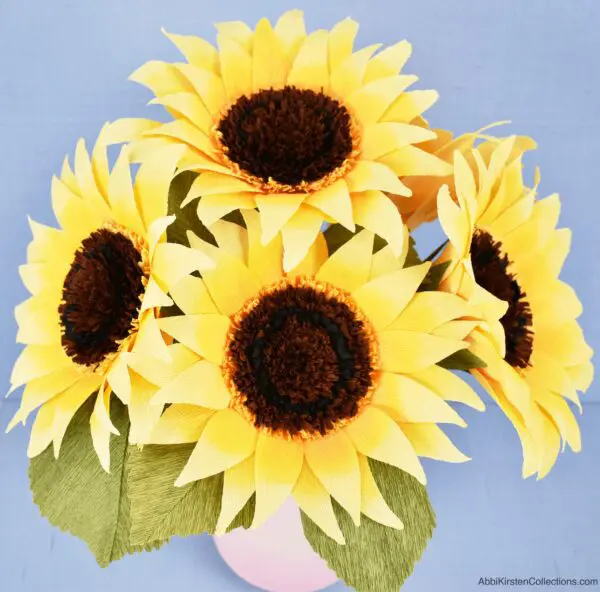
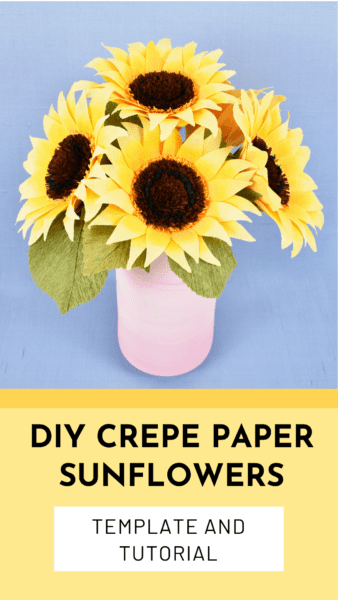
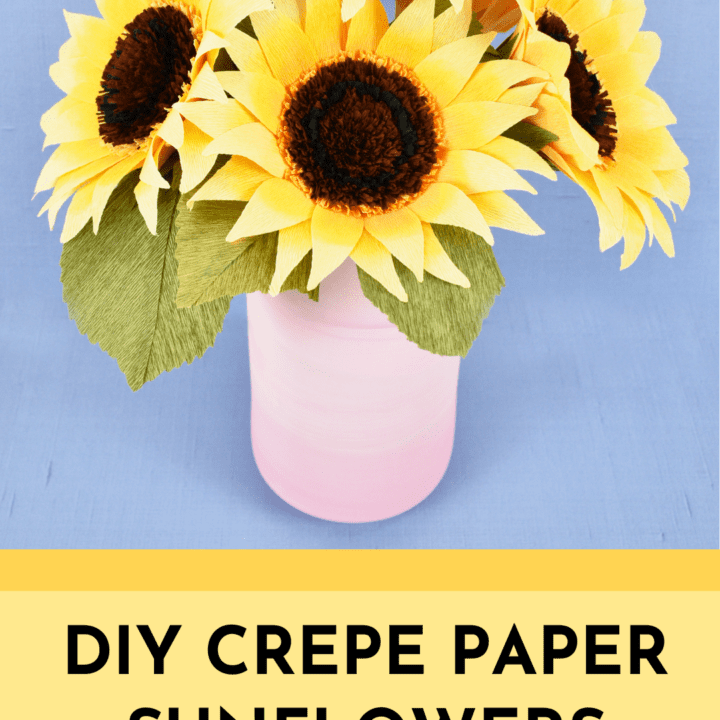
Ready to decorate your home with sunflowers that never wilt? These DIY crepe paper sunflowers will leave you with realistic-looking flowers and a paper craft you can enjoy for many years. You’ll need a little patience for this project, but our easy-to-follow step-by-step guide will make the process really smooth. You can use the sunflower SVG templates with your Cricut or the PDF printable sunflower template with scissors. Check out my other crepe paper flower tutorials!
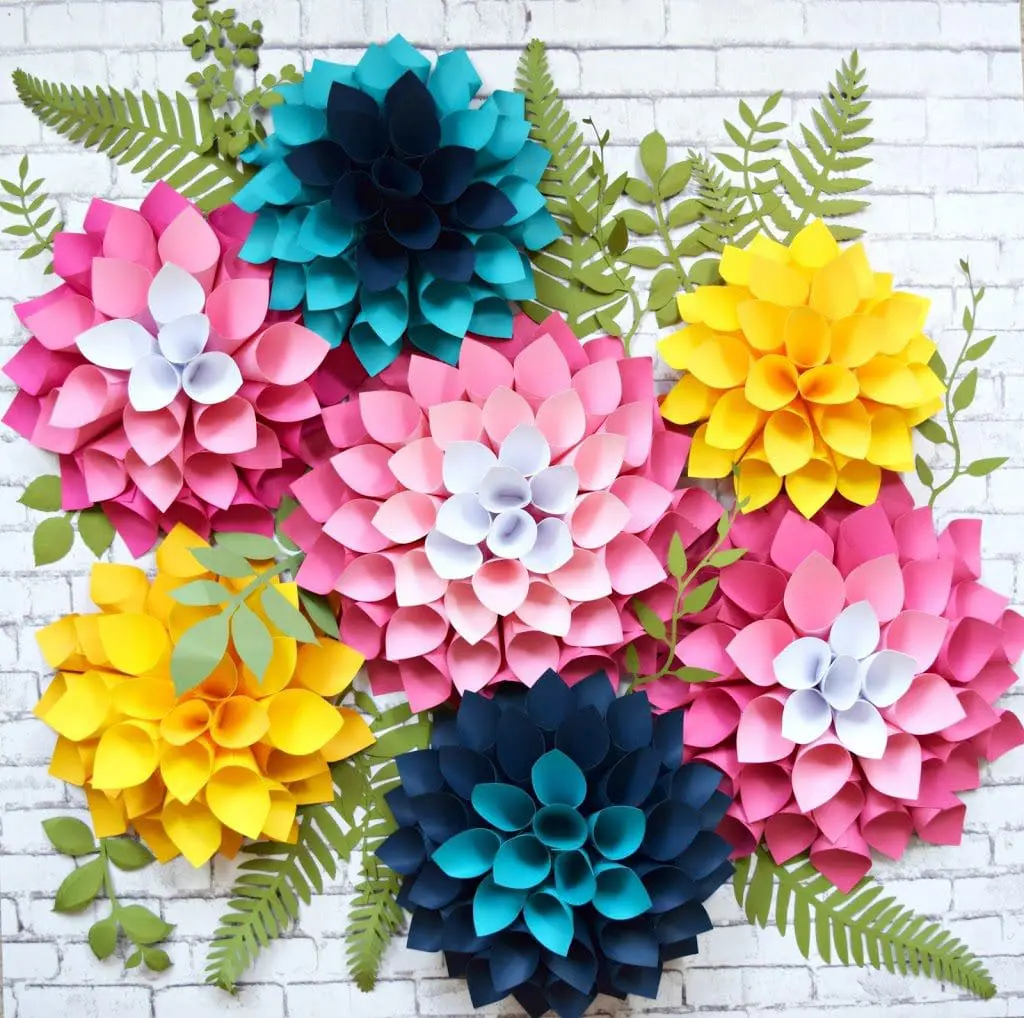
If you love paper sunflowers, be sure to check out my giant paper sunflowers, which make the perfect backdrop for weddings, baby showers, and home decor.
Supplies for making Crepe Paper Sunflowers
- Cricut Maker or Maker 3 that works with a rotary blade (optional). This allows you to cut the crepe paper with a machine instead of your hands!
- Fabric grip Cricut mat or blue Cricut mat (if using the Cricut Maker).
- Scissors
- Detail scissors
- 90-gram brown, yellow, green, and black crepe paper (you can use 180 grams as well, but I like the look of 90-gram crepe paper)
- Thick plastic-covered floral wire
- 24-gauge wire for the leaves
- Hot glue gun
- Optional: Distress Ink by Tim Holtz (adds extra color to the yellow petals and really brings the flower to life. If you’d like to opt for this extra step, you’ll need the ink and a blending brush for application)
- Paper sunflower templates or you can also pick up paper sunflower templates in the Etsy shop!
Pro-Tip: Get a full all-inclusive paper flowers supply list for beginners here.
Download the Paper Sunflower Templates
Get access to these sunflower templates and every design I’ve ever made inside the Craft Vault as a premium member. Indulge your creativity with hundreds of professionally taught tutorials, crafts, and new makes added every month!
Already a Member? Log in to the Member Vault and search the keyword “crepe sunflower” or design #636 to find this paper sunflower template!
OR
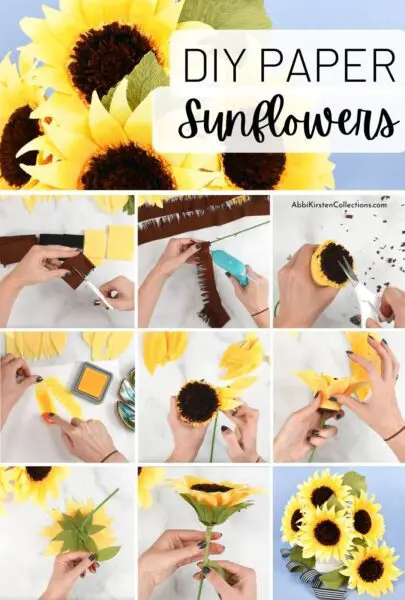
DIY Crepe Paper Sunflowers Video Tutorial
I’ve created an in-depth video tutorial for these DIY paper sunflowers, or you can keep reading for written instructions and pictures.
5 Quick Things to Note Before Getting Started
- Use the “crepe paper” setting in Design Space. If you’re using a cutting machine, you’ll need a rotary blade. Please keep in mind that the fine-point blade won’t work with crepe paper! At this time, the rotary blade only works with the Maker models.
- Any time you place crepe paper onto a cutting machine, you want to ensure the grain runs with the shapes you’re cutting out. Make sure the grain is running vertically on your mat- it’ll give you the best results!
- Gently press the crepe paper onto the Cricut mat. You can use a brayer roller to help the crepe paper’s ridges stick to the mat better.
- Don’t worry if you don’t have a cutting machine! You can use a pair of scissors to cut your petals out.
Cutting Out The Paper Sunflower Templates
In the templates, you’ll see a smaller petal and a bigger petal. Don’t worry if your sunflower ends up needing more or fewer petals slightly!
You’ll need the following number of petals:
- 14 of the smaller petals (in yellow)
- 12 larger ones (in yellow)
- 12 small green petals for the sunflower’s base
- The leaves are to your preference. You will need two halves to create one leaf.
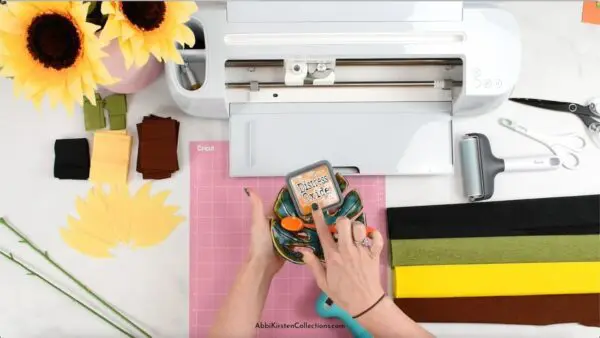
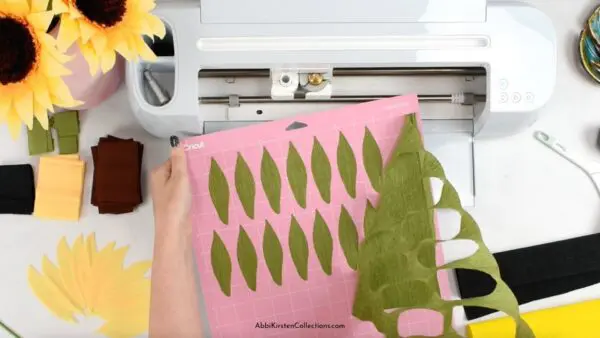
Cutting Sunflower Petals with A Cricut Maker
Cut down your roll of crepe paper so it can fit into the Cricut mat. You’ll use yellow crepe paper for the petals; the green crepe paper will be used for the base and leaves of the sunflower. Again, ensure the crepe paper’s grain is running vertically (up and down) on the petals when you cut it out on your Cricut.
I use the crepe paper setting in Cricut Design Space, but if that is not cutting through, you can try the Crepe Charmeuse, which has also worked for me.
Once the cut is complete, peel the excess crepe paper off. It’s best to flip the mat over and gently take the petals off to avoid any potential damage.
Cutting Out the Petals by Hand
If you’re cutting by hand, use our printable sunflower petal template to cut the sunflower’s petals. You can print on regular copy paper or cardstock for extra stiffness. Make the process faster by folding the crepe paper in half and cutting two petals out at once!
Center Measurements
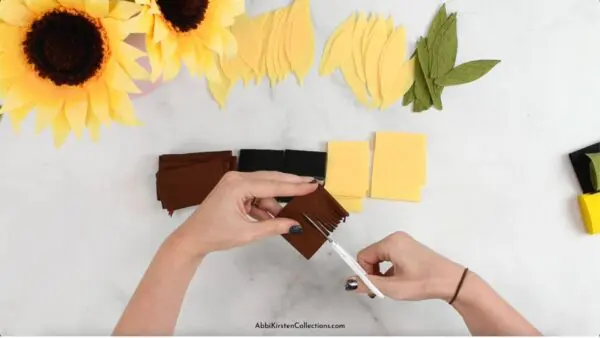
For the center, you will need brown, black, and yellow strips of crepe paper.
Take your crepe paper roll and cut 20” x 2” strips of each color. You’ll need 8 brown, 2 yellow, and 2 black strips.
Since there are more brown strips, you can speed up the process by unrolling the crepe paper roll, measuring out 20 inches, and trimming the paper down. Fold it over 2-3 times to cut about 2 inches at a time until you have 8 brown strips.
Repeat the exact same thing for the black and yellow strips!

Creating the Center of Your Sunflower
The next part is a bit time-consuming and repetitive. Put on your favorite music and enjoy the process!
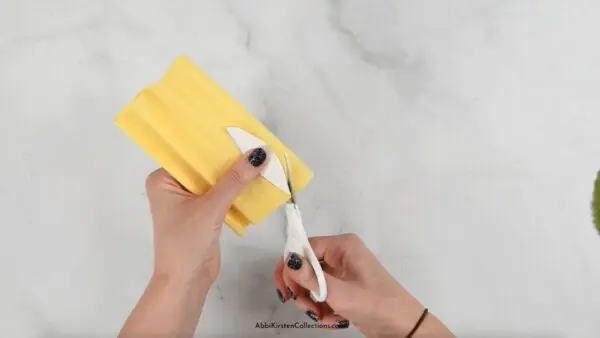
Turn the brown, black, and yellow pieces over 2-3 times, so they are folded.
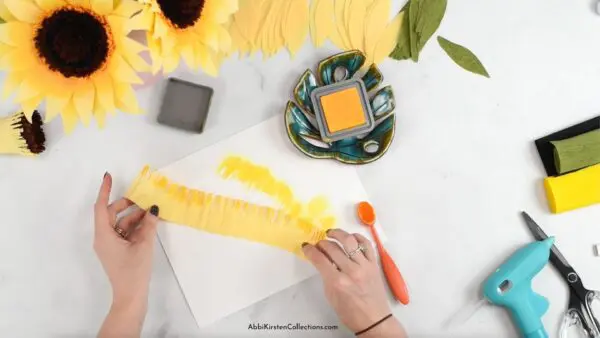
Take your detail scissors and begin cutting fringe slits all the way down the strips. When cutting, cut just over ½ of the way into the paper. It all needs to stay together — make sure you don’t cut it apart! We’re going to use the fringe to create the center.
When you open the roll up, hold the non-fringe side to stabilize the paper and roll the fringe between your index finger and thumb to make the sunflower’s center appear more natural. Sunflowers don’t look perfect in nature! The goal is to get your paper sunflowers to look as real as possible.

For the next step, grab a brown strip and your glue gun — place glue on the top of the stem.
Take an end of the brown strip and wrap it around the stem’s top. The fringe should be facing outward. Add a little bit of glue as you continue to wrap it! Crepe paper naturally has a bit of stretch to it, so you don’t need to pull at the paper much. Just roll it smooth and tight.
Repeat the process with three more brown strips. Each one should start where the last piece of fringe left off.
Next, continue the process with the 2 black strips. After rolling the two black strips onto the center, you can place the final 4 brown strips.
Adding Distress Ink To the Yellow Sunflower Center Pieces and Petals
Lastly, you’ll roll on the 2 yellow fringe pieces to the sunflower center.
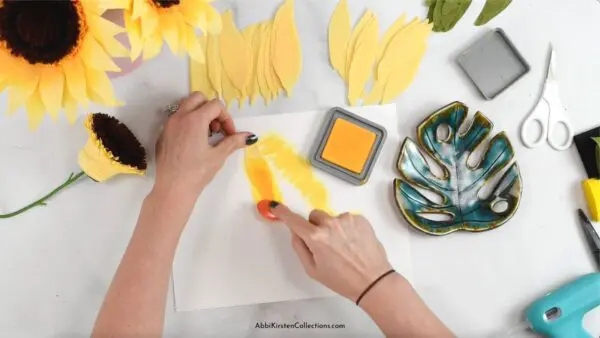
Optional: For the 2 yellow pieces, you can add golden yellow distress ink to complement the flow between the brown center and yellow petals. To make it look the most realistic, place the ink on one side (that will become the facing side that sits near the flower).
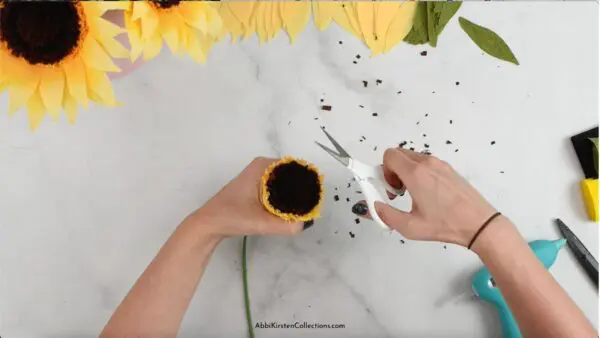
Take a pair of detail scissors and trim the top so the fringe looks even. It’ll bring the sunflower’s center to life that much more! The last step is to fan out the fringe — almost like a pom pom!
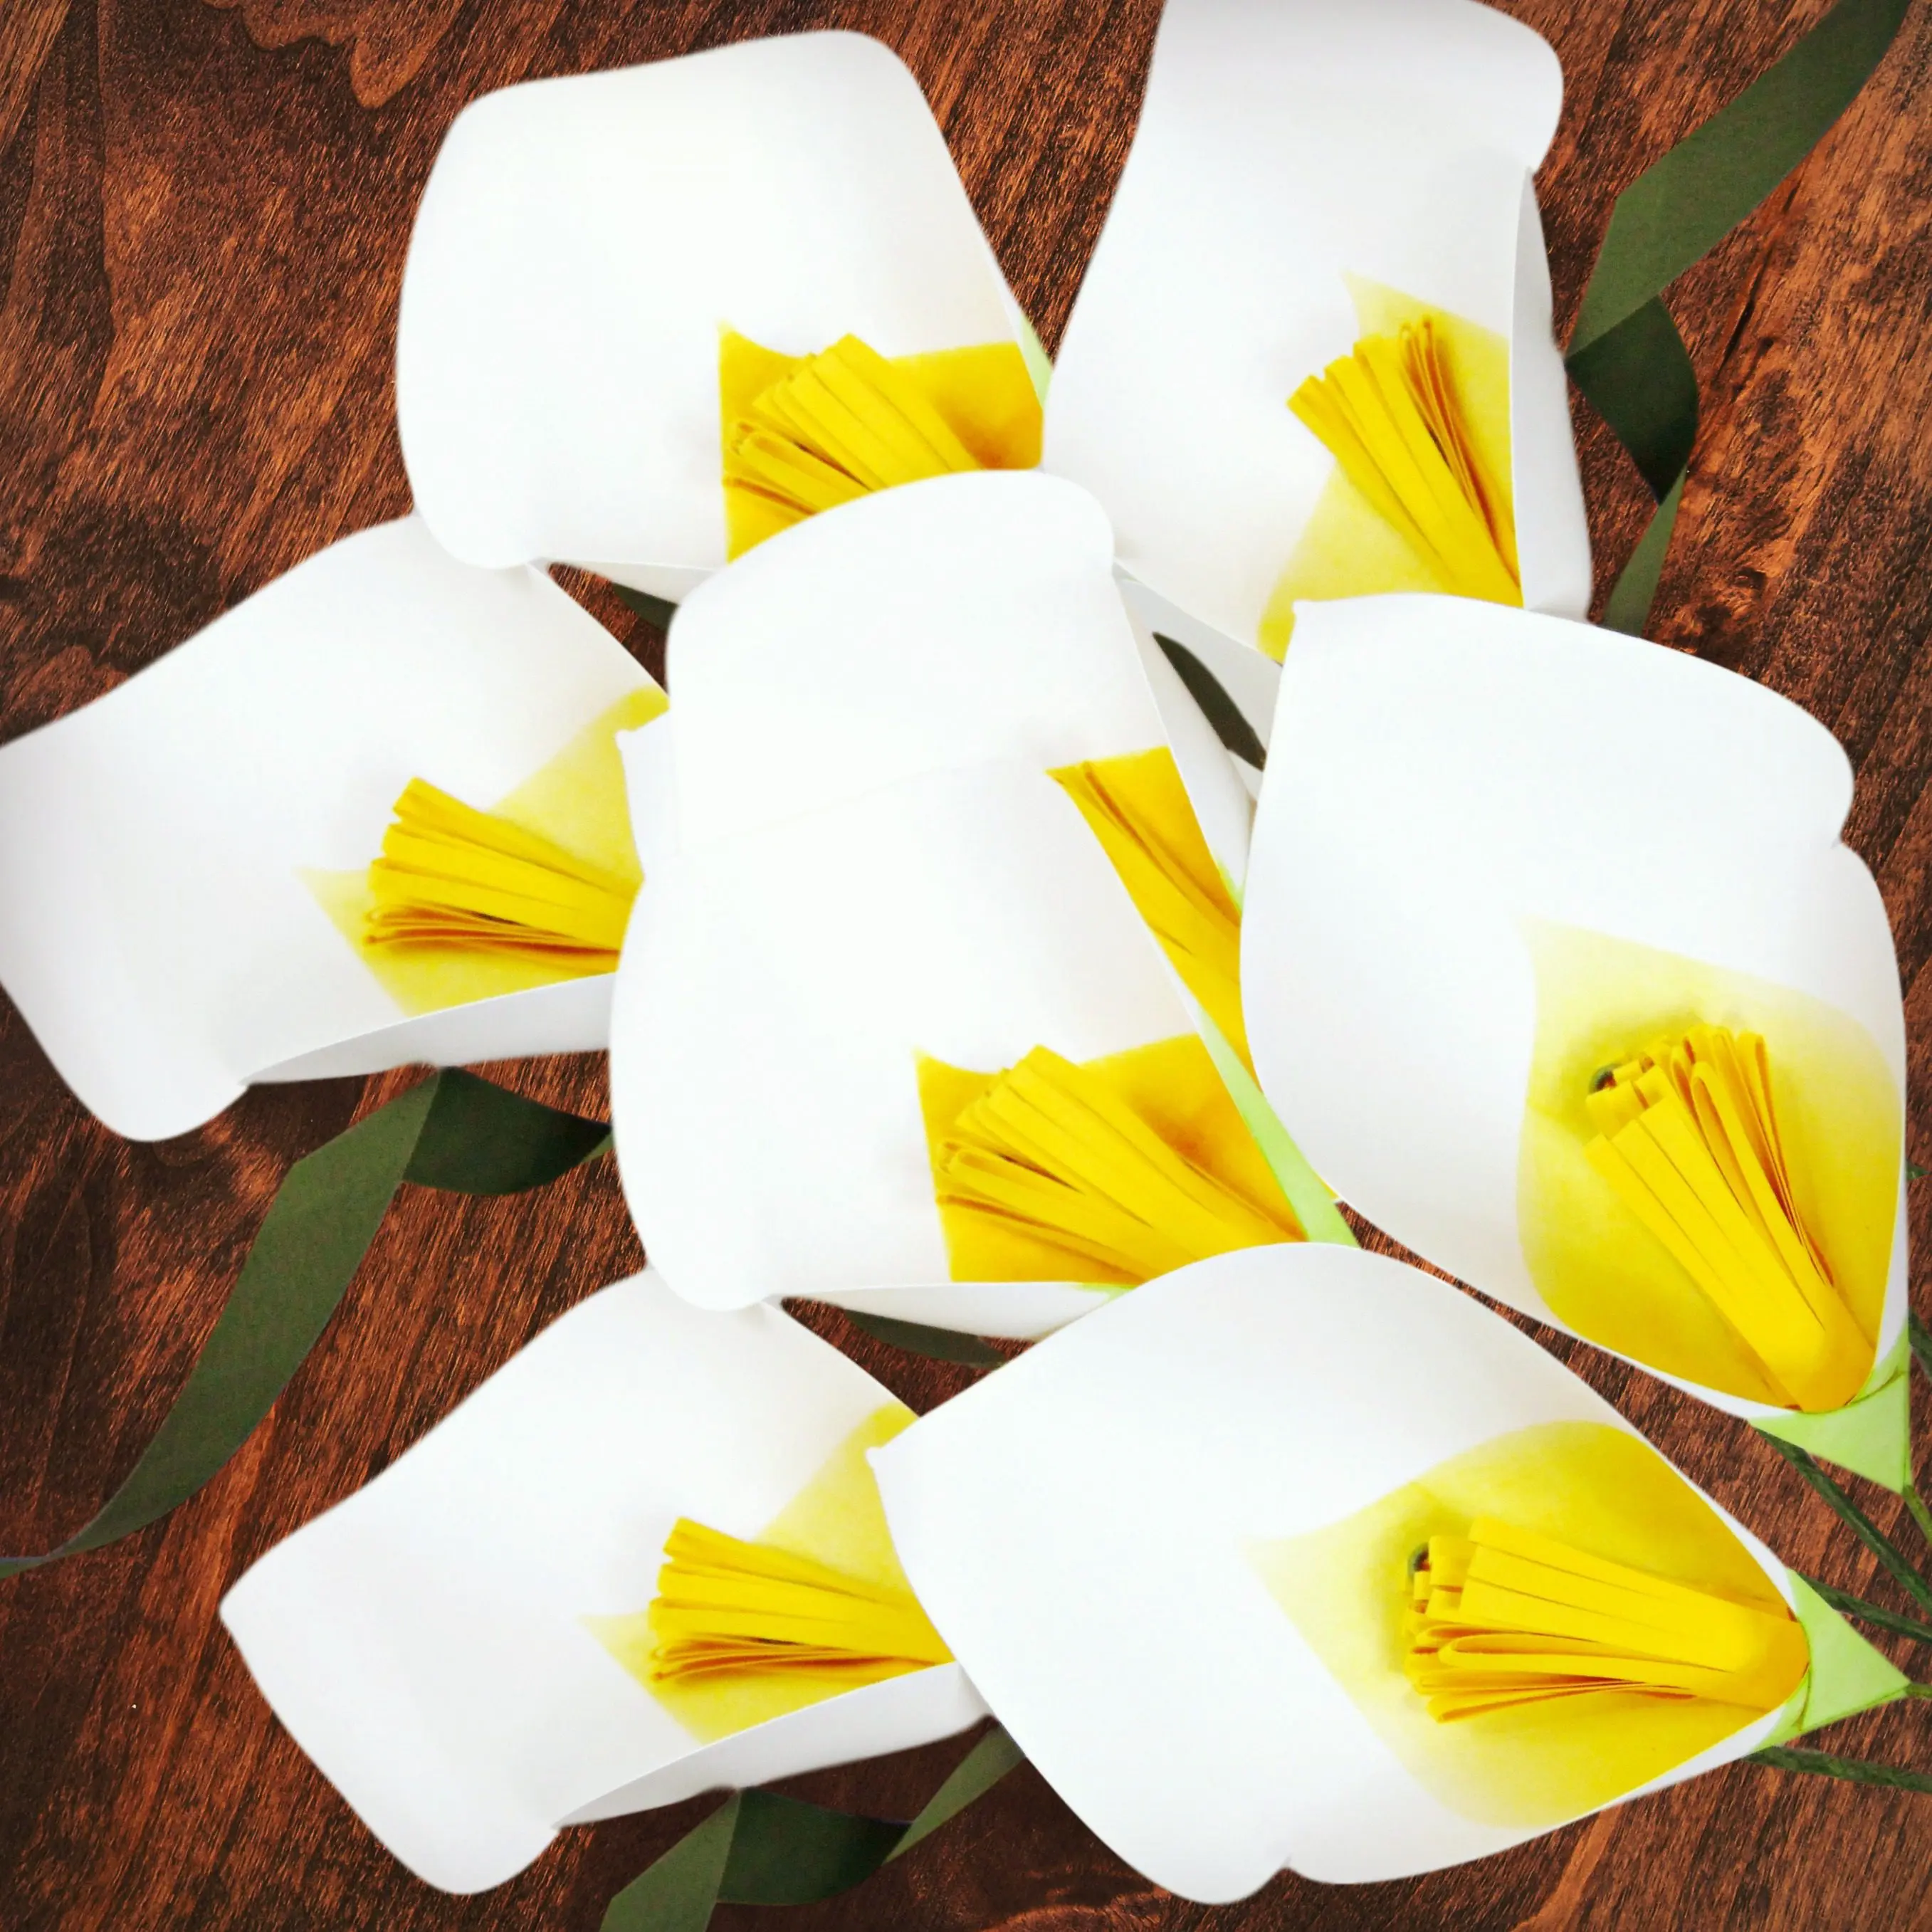
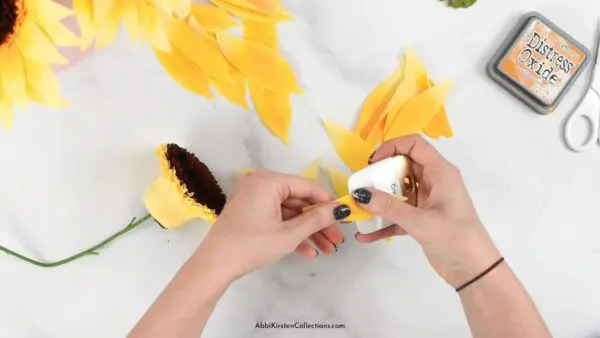
Decide which side of the petal is going to be pointed out. I like to have the narrow end be the top of my petal. In nature, the top part of the petal that has been exposed to the sun the longest is the lightest. Stroke the distressed ink on the bottom of each petal to create a deep yellow to light yellow fading effect. Distress ink is optional but adds a realistic and beautiful look to these DIY paper flowers.
Assembling The Sunflower’s Petals
Take your fingers and lightly run each petal across the tip to create a gradual roll of the petal. Sunflower petals aren’t perfectly straight! You can also use the Cricut scraper tool to curl the top edge of the petal back.
Now, it’s time to assemble the petals. You’ll start with the small petals first.
Before adding glue, get a feel for where to place the first petal. You should place the petal in line with the bottom of the sunflower’s center; you’ll end up only seeing ⅔ of the petal sticking up. You have between 12-14 small petals, so you can be generous with your overlap as you begin placing your petals around the center. (It doesn’t matter which way you work — just focus on being consistent!)
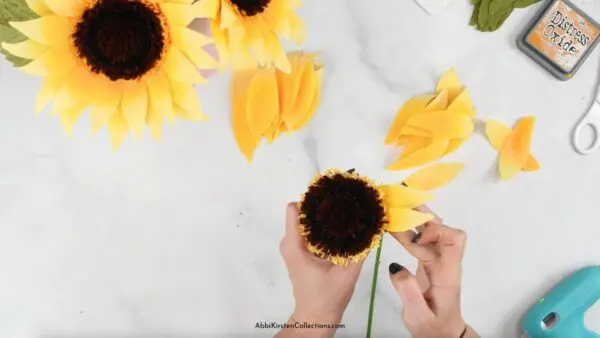
Add hot glue to the bottom of the first petal. You can tell which side is the bottom because the top of the petal is more pointed (it’s also darker if you opt to use the ink).
Continue until you’ve gone all the way around and it looks like you’ve evenly wrapped the petals around your sunflower. It’s okay if the space between the petals isn’t perfectly even — sunflowers aren’t completely even in nature!
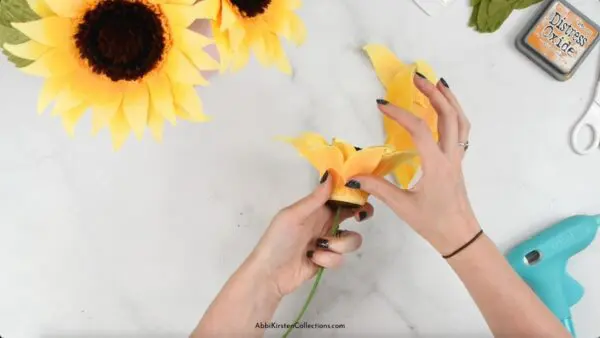
Begin adding the larger petals. For best results, aim to add the larger petals in between the smaller petals. You can always add an extra petal or two if you need to fill in space at the end!
Making The Base and Stem for the paper Sunflower
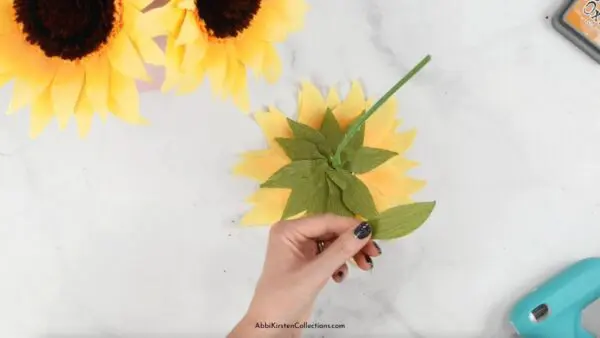
When you work on the stem, make sure to carefully place the sunflower down on its face. You don’t want to lay it down any other way to avoid bending the petals in an unnatural way.
You’ll need 10-12 green pieces (the same size as the small petals). Be sure to use your fingers to add a slight curl to the green petals too. Take one of the green pieces, add some glue, and press it into the bottom of each of your paper sunflowers. Press it up into the base. Go around until it’s covered.
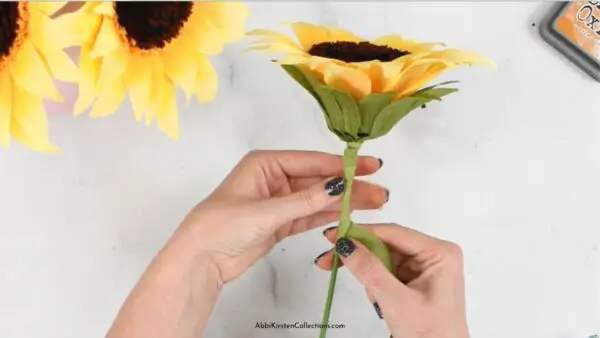
Cut out a 1” x 10” strip of green crepe paper and slightly stretch it.
Start at the base of the green petals attached to the sunflower’s stem. Add a bit of glue around that area and begin tightly wrapping the green crepe paper around the stem. You might not need additional glue in the middle, but you will at the end. Pull off any excess paper!
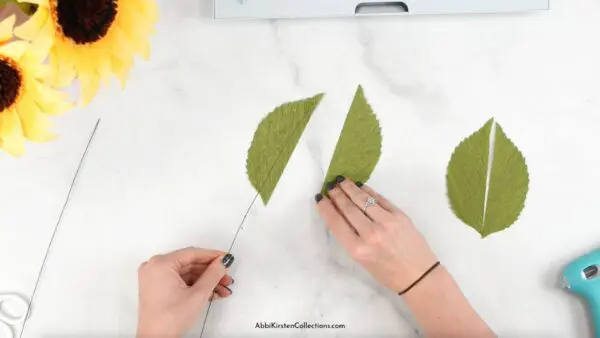
Making The Sunflower Leaves
In the sunflower templates, there is also a leaf included. Cut out two halves to make one sunflower leaf.
I recommend using a 22-24 gauge floral wire because it’s thinner and more flexible. Place hot glue on the straight side of the leaf, add the wire, place hot glue on top of the wire, and then overlap the other half. There may be an overlap point at the top. Simply trim it to shape it down. You can also use something like tacky glue or bearly art glue for this step.
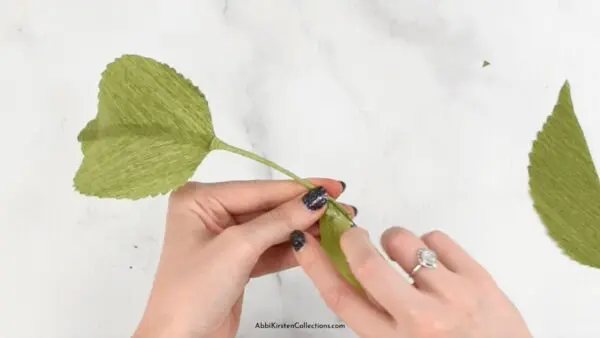
Press the leaves together to ensure there’s a good hold. You now have a complete sunflower leaf! You can use the wire in the middle to shape it, bend it, and give it a little life.
Take another green strip of paper and wrap it around the wire. You only need to go ⅓ of the way down if you’re planning to attach it to the sunflower.
Take the leaf and place the wire against the main stem. Hold it in place. Add a small amount of glue at the base of the paper sunflower and wrap another green crepe paper strip over both of the wires. This thickens the stem and makes the flower look realistic.
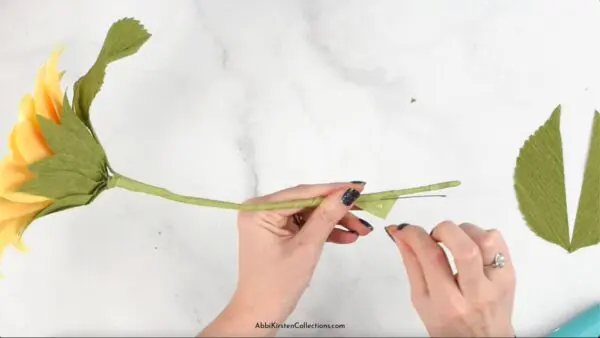
You can create as many leaves and sunflowers as you’d like for your particular project.
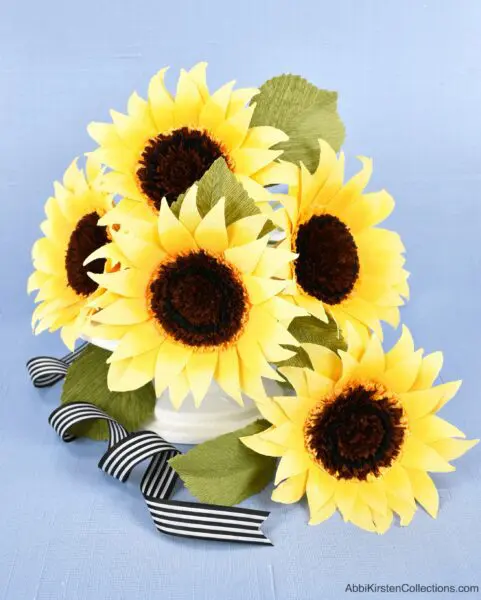
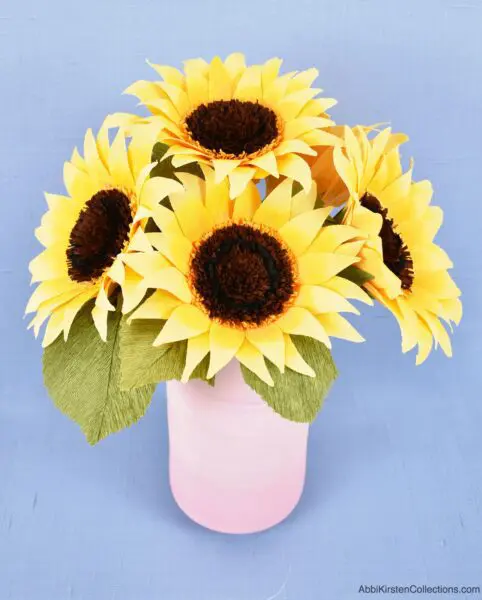
Place your sunflower(s) in a vase and enjoy! How would you display these beautiful DIY paper sunflowers? I think they could make a lovely arrangement or wedding bouquet!
More Paper Flower Posts You Will Love
How to Make Crepe Paper Sunflowers: Templates and Tutorial
Sunflowers are big, beautiful blooms that spread happiness and sunshine wherever they are! Bring the sun inside with these realistic crepe paper sunflowers that won’t wilt. You can use my sunflower templates to make as many yellow flowers as you like! Working with crepe paper can be challenging, but the rewards are worth it, and I’ll take you through the process step-by-step! Let’s get started!
Materials
- Cricut Maker (option 1)
- Maker 3 (option 2)
- Rotary blade (if you want to cut with a Cricut machine instead of by hand)
- Fabric grip Cricut mat -or-
- Blue Cricut mat (if using the Cricut Maker)
- Scissors
- Detail scissors
- 90-gram crepe paper in brown, yellow, green, and black (preferred)
- 24-gauge wire for the leaves
- Thick plastic-covered floral wire
- Hot glue gun
- Distress Ink by Tim Holtz (optional)
- Blending brush (optional if using Distress Ink)
- Paper sunflower templates, keyword “crepe sunflower” or design #636
Instructions
Before You Begin
- Use the “crepe paper” setting in Design Space and a rotary blade. At this time, the rotary blade only works with the Maker models.
- Ensure the crepe paper grain runs with the shapes you’re cutting out. Make sure the grain is running vertically on your mat for best results.
- Press the crepe paper gently into the Cricut mat, and use a brayer tool to help it stick.
- You can use a pair of scissors to cut your petals out.
Step 1: Cutting Out The Petals of the Sunflower
- Cut out the petals and leaves of the sunflower in the following quantities:
- 14 small petals (in yellow)
- 12 large petals (in yellow)
- 12 small green petals for the sunflower's base to your preference. You need two halves to create one leaf.
Once cut, remove the cut crepe paper from the mat by placing the mat upside down and peeling away the mat from the material.
Step 2: Cut Out the Center Pieces of the Sunflower
For the center, you will need brown, black, and yellow strips of crepe paper.
- Take your crepe paper roll and cut 20” x 2” strips of:
- 8 brown strips
- 2 yellow strips
- 2 black strips
Step 3: Creating the Center of Your Sunflower
- Fold the brown, black, and yellow pieces 2-3 times.
- Cut fringe slits along the edges that reach almost to the middle using your detail scissors. Make sure you don’t cut it apart!
- Open the roll up, hold the non-fringe side, and roll the fringe between your index finger and thumb to make the sunflower’s center appear more natural.
- Place glue on the top of the stem.
- Glue the end of the brown strip and wrap it around the stem's top. The fringe should be facing outward. Add a little bit of glue as you continue.
- Repeat the process with 3 more brown strips. Each one should start where the last piece of fringe left off.
- Do the same with the 2 black strips.
- Then, add the final 4 brown strips.
- Lastly, you’ll roll on the 2 yellow fringe pieces to the sunflower center.
Optional: For the 2 yellow pieces, you can add golden yellow distress ink to the edge before gluing on.
Use detail scissors to trim more of the top fringe, then fan out the fringe like a pom pom.
Step 4: Assemble the Sunflower
- Distress your petals if you choose.
- Gently add some roll into each petal using your fingertip.
- Start with the smallest petals.
- Add a drop of glue to the bottom of the petal.
- Place the petal in line with the bottom of the sunflower’s center. Be generous and overlap some smaller petals.
- Glue the larger petals on the outside of the small petal layer, using the spaces between the petals as a guide.
Step 5: Make the Base and Stem for the Sunflower
- Use 10-12 green pieces (the same size as the small petals).
- Use your fingertip to add some roll.
- Add glue to the base of the green piece.
- Press firmly into the base of the sunflower.
- Continue all around the base.
- Cut out a 1” x 10” strip of green crepe paper and slightly stretch it.
- Starting at the base of the green leaves, add a piece of glue and tightly wrap the green crepe paper strip around the stem. Remove excess paper and add some glue at the end.
Step 6: Making The Sunflower Leaves
- Place hot glue on the straight side of the leaf.
- Add the 24-gauge wire.
- Overlap the other half of the leaf. Trim excess down.
- Press the leaves together to ensure there’s a good hold.
- Take another green strip of paper and wrap it around the wire. You only need to go ⅓ of the way down if you plan to attach it to the sunflower. Repeat as needed.
- Add the leaf wires to the stem with glue.
- Wrap another green crepe paper strip over both wires once attached to the stem.
Use the sunflowers to brighten your breakfast table, or use them in a bouquet! Happy crafting!
About Abbi Kirsten
Welcome to my colorful corner of the internet, where we play with vibrant crafts and unlock your creative magic! Hang out with me and get lost in a fun array of projects, tutorials, and products, from stunning papercraft ideas to flower templates, Cricut help for beginners, and endless crafter’s hacks.
Join A-Star Crafters and participate in monthly Craft-Alongs in our community Facebook group!