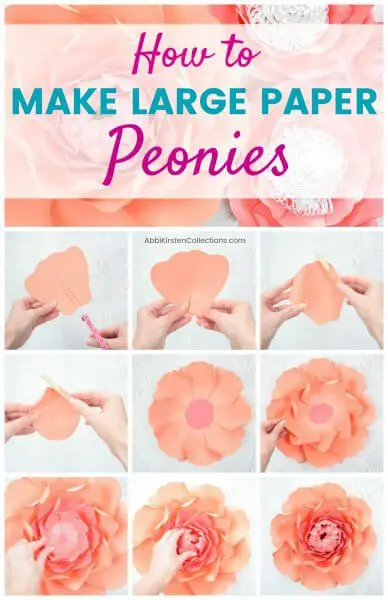
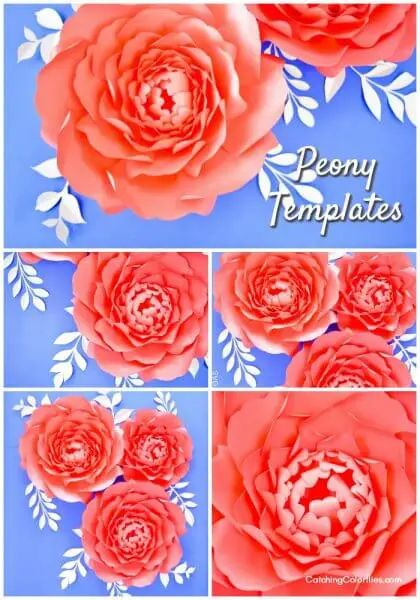
How to Make Large Paper Peonies: Templates and Tutorial
This post may contain affiliate links that won’t change your price but will share some commission.
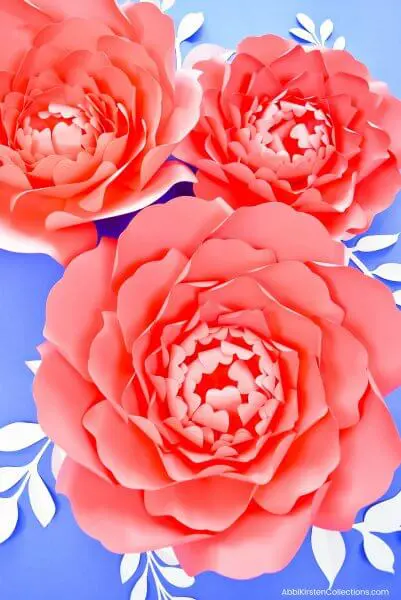
With the weather growing warmer, more and more flowers are blooming with the coming of spring! With the outdoors livening up, so with events like weddings, showers, and parties as we head into the season of matrimony. Perfect for a wedding backdrop, baby shower decor, or Easter events, giant peonies or small peonies are sure to represent the season right.
With spring waking up all around us, now feels like the perfect time to make paper peonies! Feel free to follow along with my video tutorial at the bottom as you read through the step-by-step process on the blog!
So let’s start teaching you how to make paper peonies!
Supplies Needed to Make Large Paper Peonies
- 65-pound cardstock
- Glue gun
- Templates or find other free options in the craft resource library via the pink button below!
- Wood dowel to roll the petals
- Scissors or Cricut cutting machine
- Get my full paper flower supply list here!
- Giant peony templates (download below)
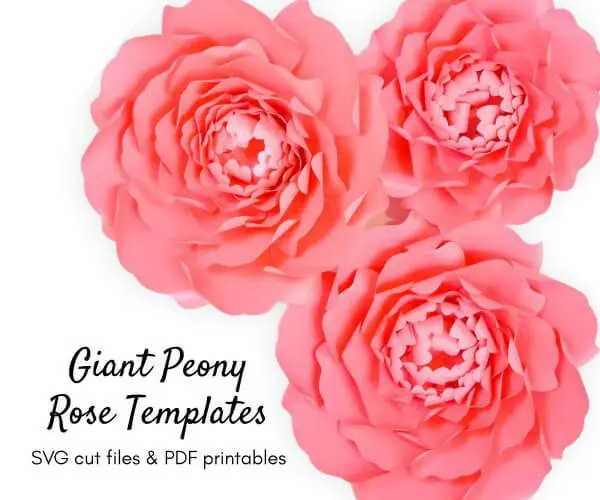
Download The Large Peony Rose Templates
These paper peony flower templates and leaves come with both SVG cut files to use with cutting machines like Cricut and Silhouette, as well as PDF printables for cutting with scissors by hand.
Grab the complete giant peony flower template set in the shop or if you are a premium member of AKC, then find the template in the Craft Vault as a part of your membership!

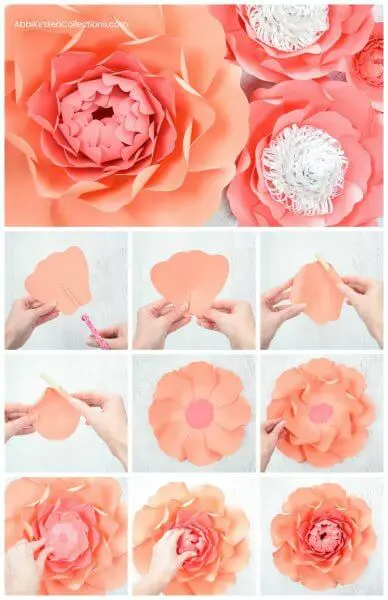
How to Make Paper Peonies Step-by-Step
Cut the following number of petals:
-XL petal – 8 cuts
– Large petal – 8 cuts
– Medium petal – 8 cuts
– Small petal – 8 cuts
– Extra Small petal- 8 cuts
– Center petals – 2-3 cuts
– One 8-sided base
Helpful Hint: If you’d like to downside the overall size of your flower, just exclude the largest petal size from your assembly & you’ll end up with a smaller completed peony.
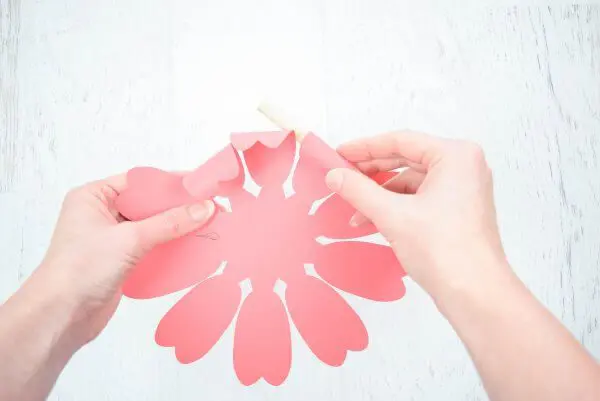
Step 1
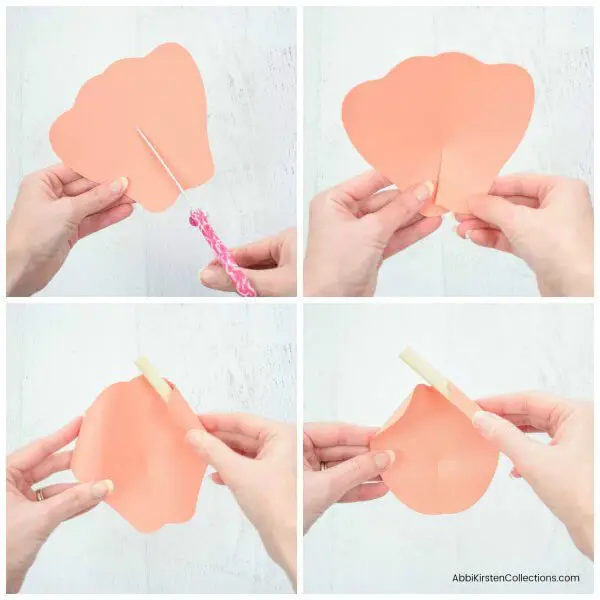
After getting all your petals cut out, whether by hand or with a cutting machine, start with XL petal. Cut about a 1.5-inch to 2-inch slit in the bottom center edge of the petal, vertically.
Add a touch of glue on one edge and slightly overlap the two pieces. This will create a slight bowl shape to the petal.
Step 2
Use your dowel or marker to roll the one side inwards, and the opposite side backward. You can do so by placing the dowel on the underside of the paper at the edges and pressing the paper around the shape like a mold. Do this with all of your extra-large and large petals. It doesn’t matter which side you do in or out, just as long as they stay uniform within the same size of the petal.
Step 3
With your medium size petals, cut your slit and glue the same as previous sizes. With your dowel, this time curl BOTH sides inward, towards you. Do this for all the medium, small, and extra small petals.
Helpful Hint: As you begin curling smaller petals, you may need an object smaller than your dowel, I use a spare glue stick in a pinch!
Step 4
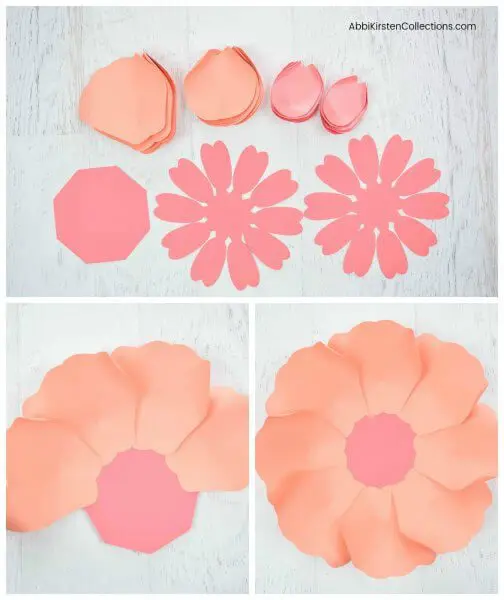
With your 8-sided base, begin placing your extra-large petals, one petal for each side of the base. Add just a small amount of glue along the bottom back side of the petal then placed on each side. Repeat for all 8 petals.
Helpful Hint: When you get to the last petal it can be helpful to tuck the side under the edge of the starting petal. So your petals have a more uniform, fanned out look.
Step 5
Continue with the same process for the large petals, but glue them in-between where two extra large petals meet, or it’s “seam”. So that they alternate and aren’t right in line with the previous size.
Do this for the medium size, then small size petals as well. At this point, it may be helpful to start bending your petals in so it gives the look your flower is evenly blooming. Tuck the last petal in-between the starting petal as you did previously.
Repeat the same process with extra small petals, making sure to bend and tuck them in as you go, ensuring they aren’t laying too flat in the flower.
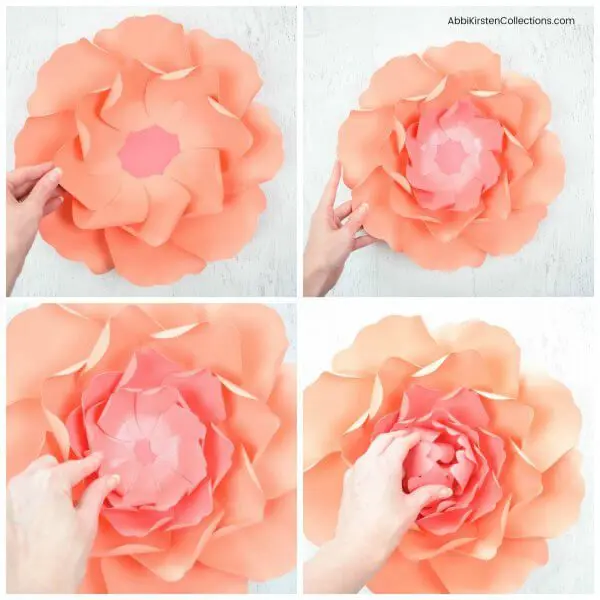
Step 6
Now, taking your center cuts begin curling each petal point inwards. Once this is done, continue “reinforcing” the curl by rolling them inwards with your fingers, getting it to fall inwards, this will be your final center.
Turn the center cut over and give the bottom a little squeeze, so the petals want to naturally fold inwards better. Do this with both center cuts. While gently squeezing it shut, apply a generous amount of glue to the bottom, and add to the center of the flower. Repeat the process with your second center cut.
*If you feel you need another center cut to fill it up more, you certainly can. Continue curling the petal points inward to help them hold their shape.
Be sure to scroll down to the bottom to see the full video on how to make paper peonies for yourself!
Latest Posts to Love
- The Best Materials for Cricut Explore and Maker
- Penelope Paper Rose DIY Tutorial
- How to Make Giant Poppy Paper Flowers
Be sure to watch the full video tutorial below for more in depth visuals. Ready to make this peony? Head over right here to download the templates! Or shop with me on Etsy!
Giant Peony Rose Video Tutorial

How To Make Large Paper Peonies | Paper Flower Tutorial
Peonies are beautiful flowers found everywhere - and now you can make them for yourself! These bright blooms will spread happiness throughout your home, so why not make large peonies for even bigger smiles? This easy picture and video tutorial will walk you through the steps needed to make large paper peonies you are sure to love.
Instructions
Step 1: Cut the Petals
Using your scissors or a cutting machine, cut out the following petals:
- 8 XL petals
- 8 Large petals
- 8 Medium petals
- 8 Small petals
- 8 Extra Small petals
- 2 Center petals
- 1 Eight-sided base
Step 2: Bowl The Petals
- Starting with the XL petals, cut about a 1.5” to 2” vertical slit from the bottom of the petal.
- Add glue to one side of the slit and slightly overlap the other side of the slit. This creates a bowl shape for the petal.
- Do this with the large and medium petals as well, reducing the slit length accordingly.
Step 3: Curl the Petals
- Curl the XL and large petal tops with the wooden dowel. Roll the right side slightly inward and the left side slightly backward.
- Curl the tops of the medium, small, and extra small petals inward only.
Step 4: Add the Petals to the Base
- Begin placing the XL petals around the edges of the 8-sided base (one per each base side). Use a small amount of glue along the bottom of the petal.
- Add the large petal layer inside the XL layer. Be sure to place the large petals over the area where the XL petals meet.
- Do the same with the medium, small, and extra-small petals.
Step 5: Add the Two Center Pieces
- Curl the two center pieces inwards, then reinforce the curl by rolling the curl inwards with your fingers.
- Add the 2 inner pieces to the center of the peony with glue while squeezing the petals inward gently.
You’ve done it! Make bouquets of these flowers in all your favorite colors and remember, peonies symbolize good luck!
Don’t forget to download the peony templates in my shop or join the membership for unlimited access.
And if you haven’t yet be sure to join my community and get access to my freebie vault with templates, svg cut files, printable and more!
More Craft-spiration!
I believe the more creativity you use, the more you have! My designs are created with simplicity, color and crafty fun in mind. If you haven’t yet, be sure to join the subscriber community to gain access to all my freebies!
Want to join my Facebook community to share your crafts and learn from the best? Click here to request access to my group, Crafters and Cricut Lovers.
For further color crafts and inspiration, join me on Instagram & Facebook.


Can you make these with card stock?
Yes, that is what I used. Materials listed under the supply section. 🙂
These are amazing! I love all your tutorials. 🙂
Where is the templates?
Here is the link! https://www.etsy.com/listing/679239515/giant-flower-template-svg-cut-files-pdf?click_key=5309bd93b31605b571de40461c5dca2a46ef02a0%3A679239515&click_sum=129a1897&ga_search_query=peony&ref=shop_items_search_14&pro=1&sts=1