Paper Dress Template: Paper Dress DIY Tutorial
This post may contain affiliate links that won’t change your price but will share some commission.
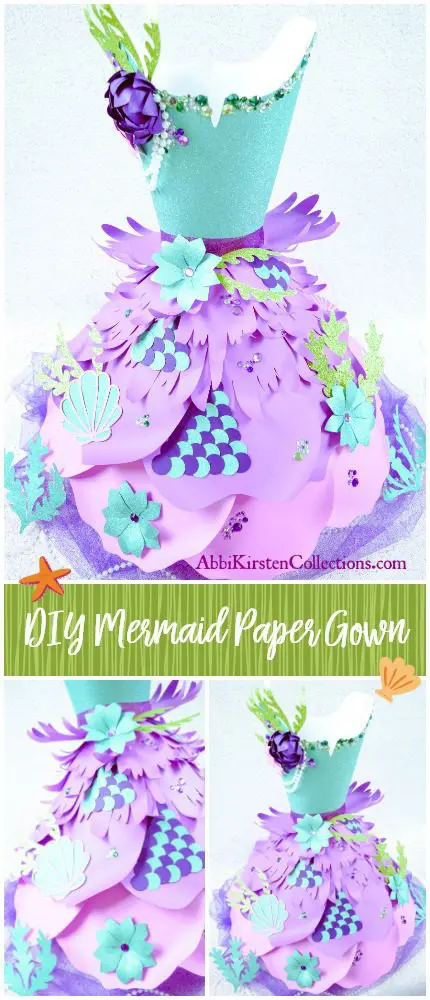
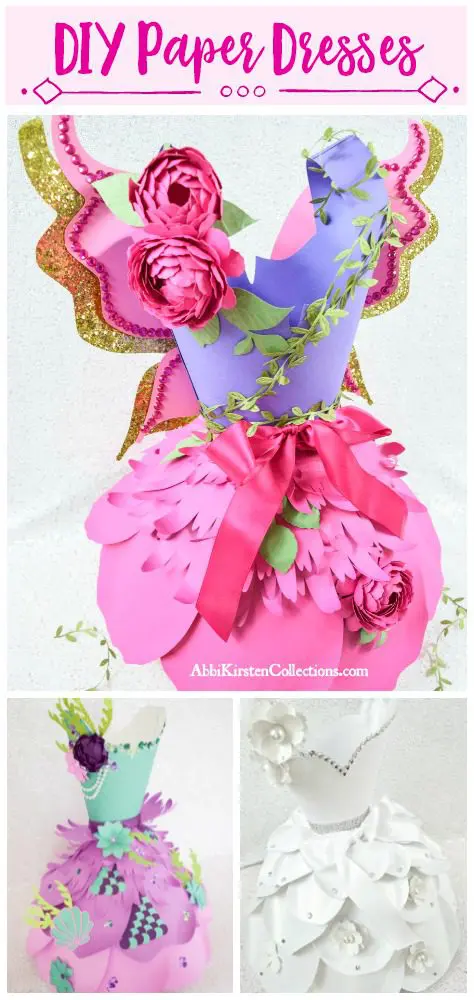
Mermaid Themed Paper Dress Template & Tutorial
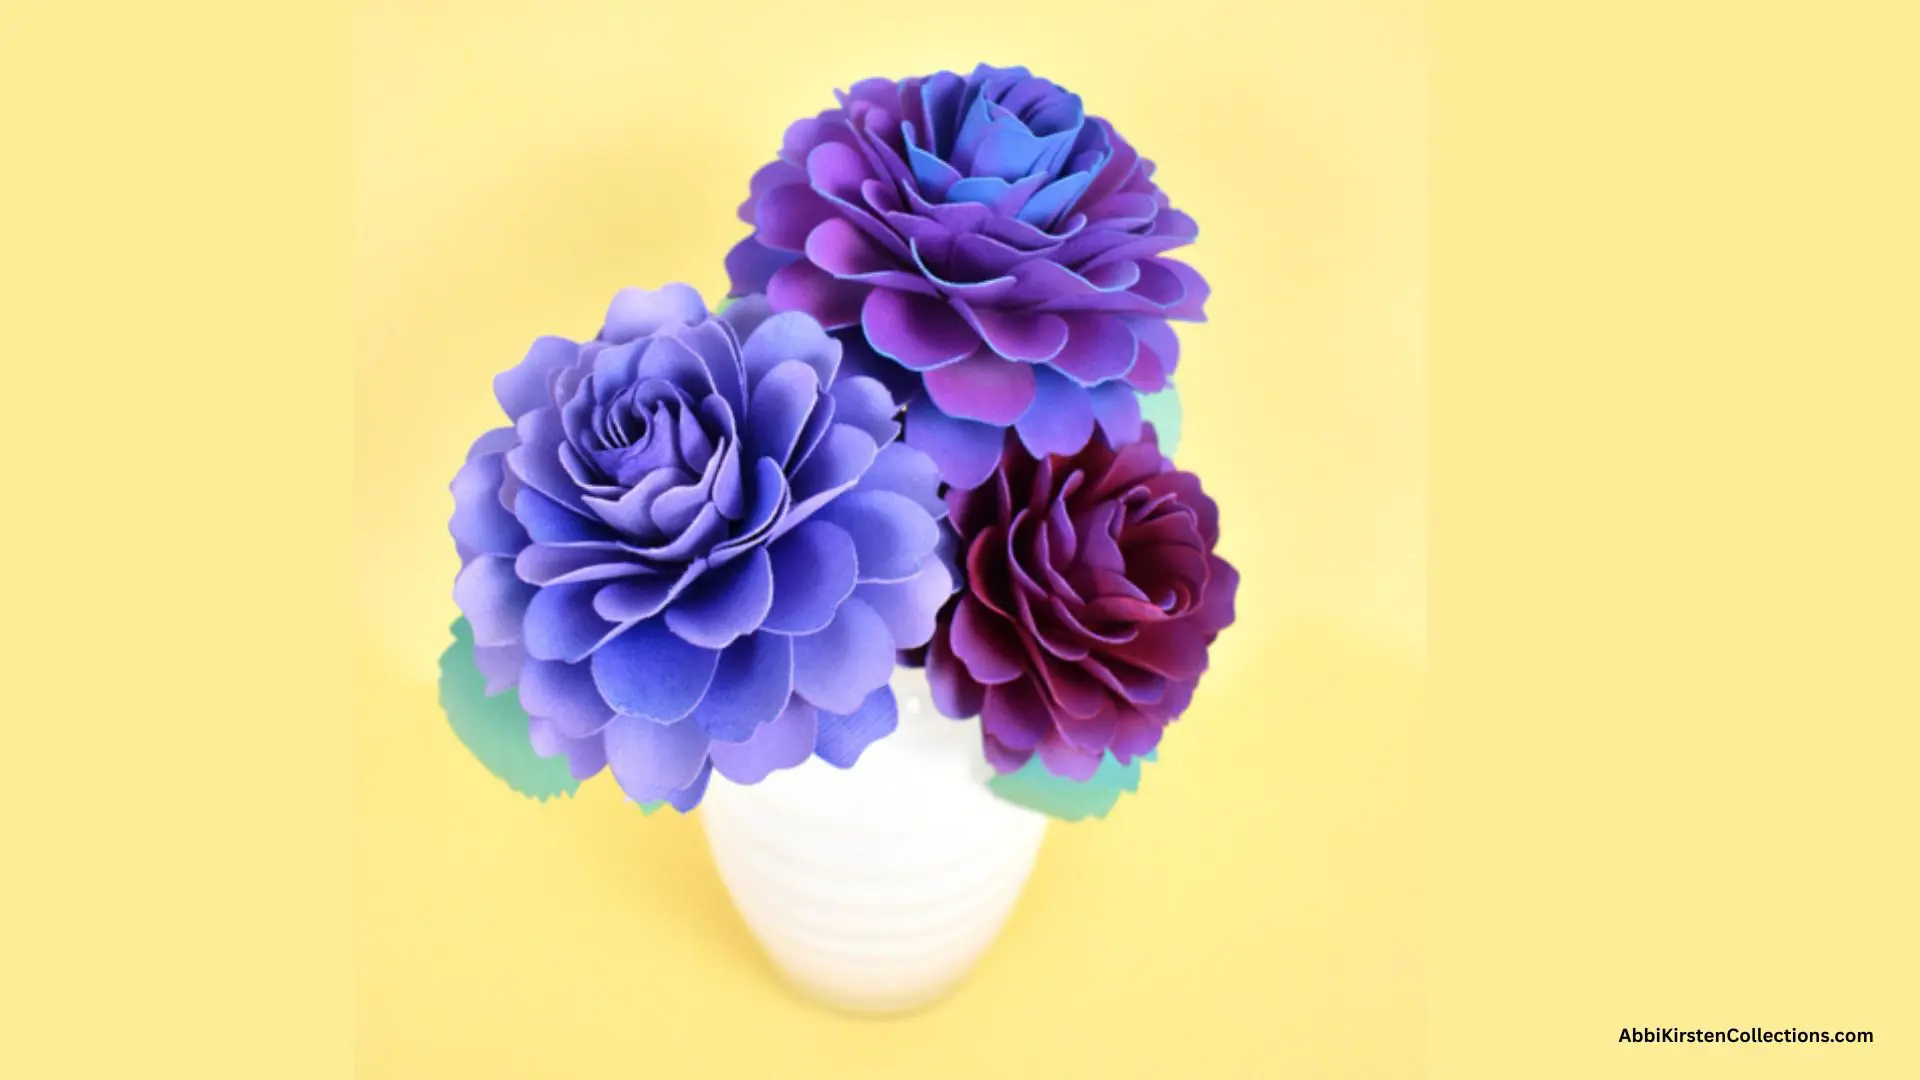
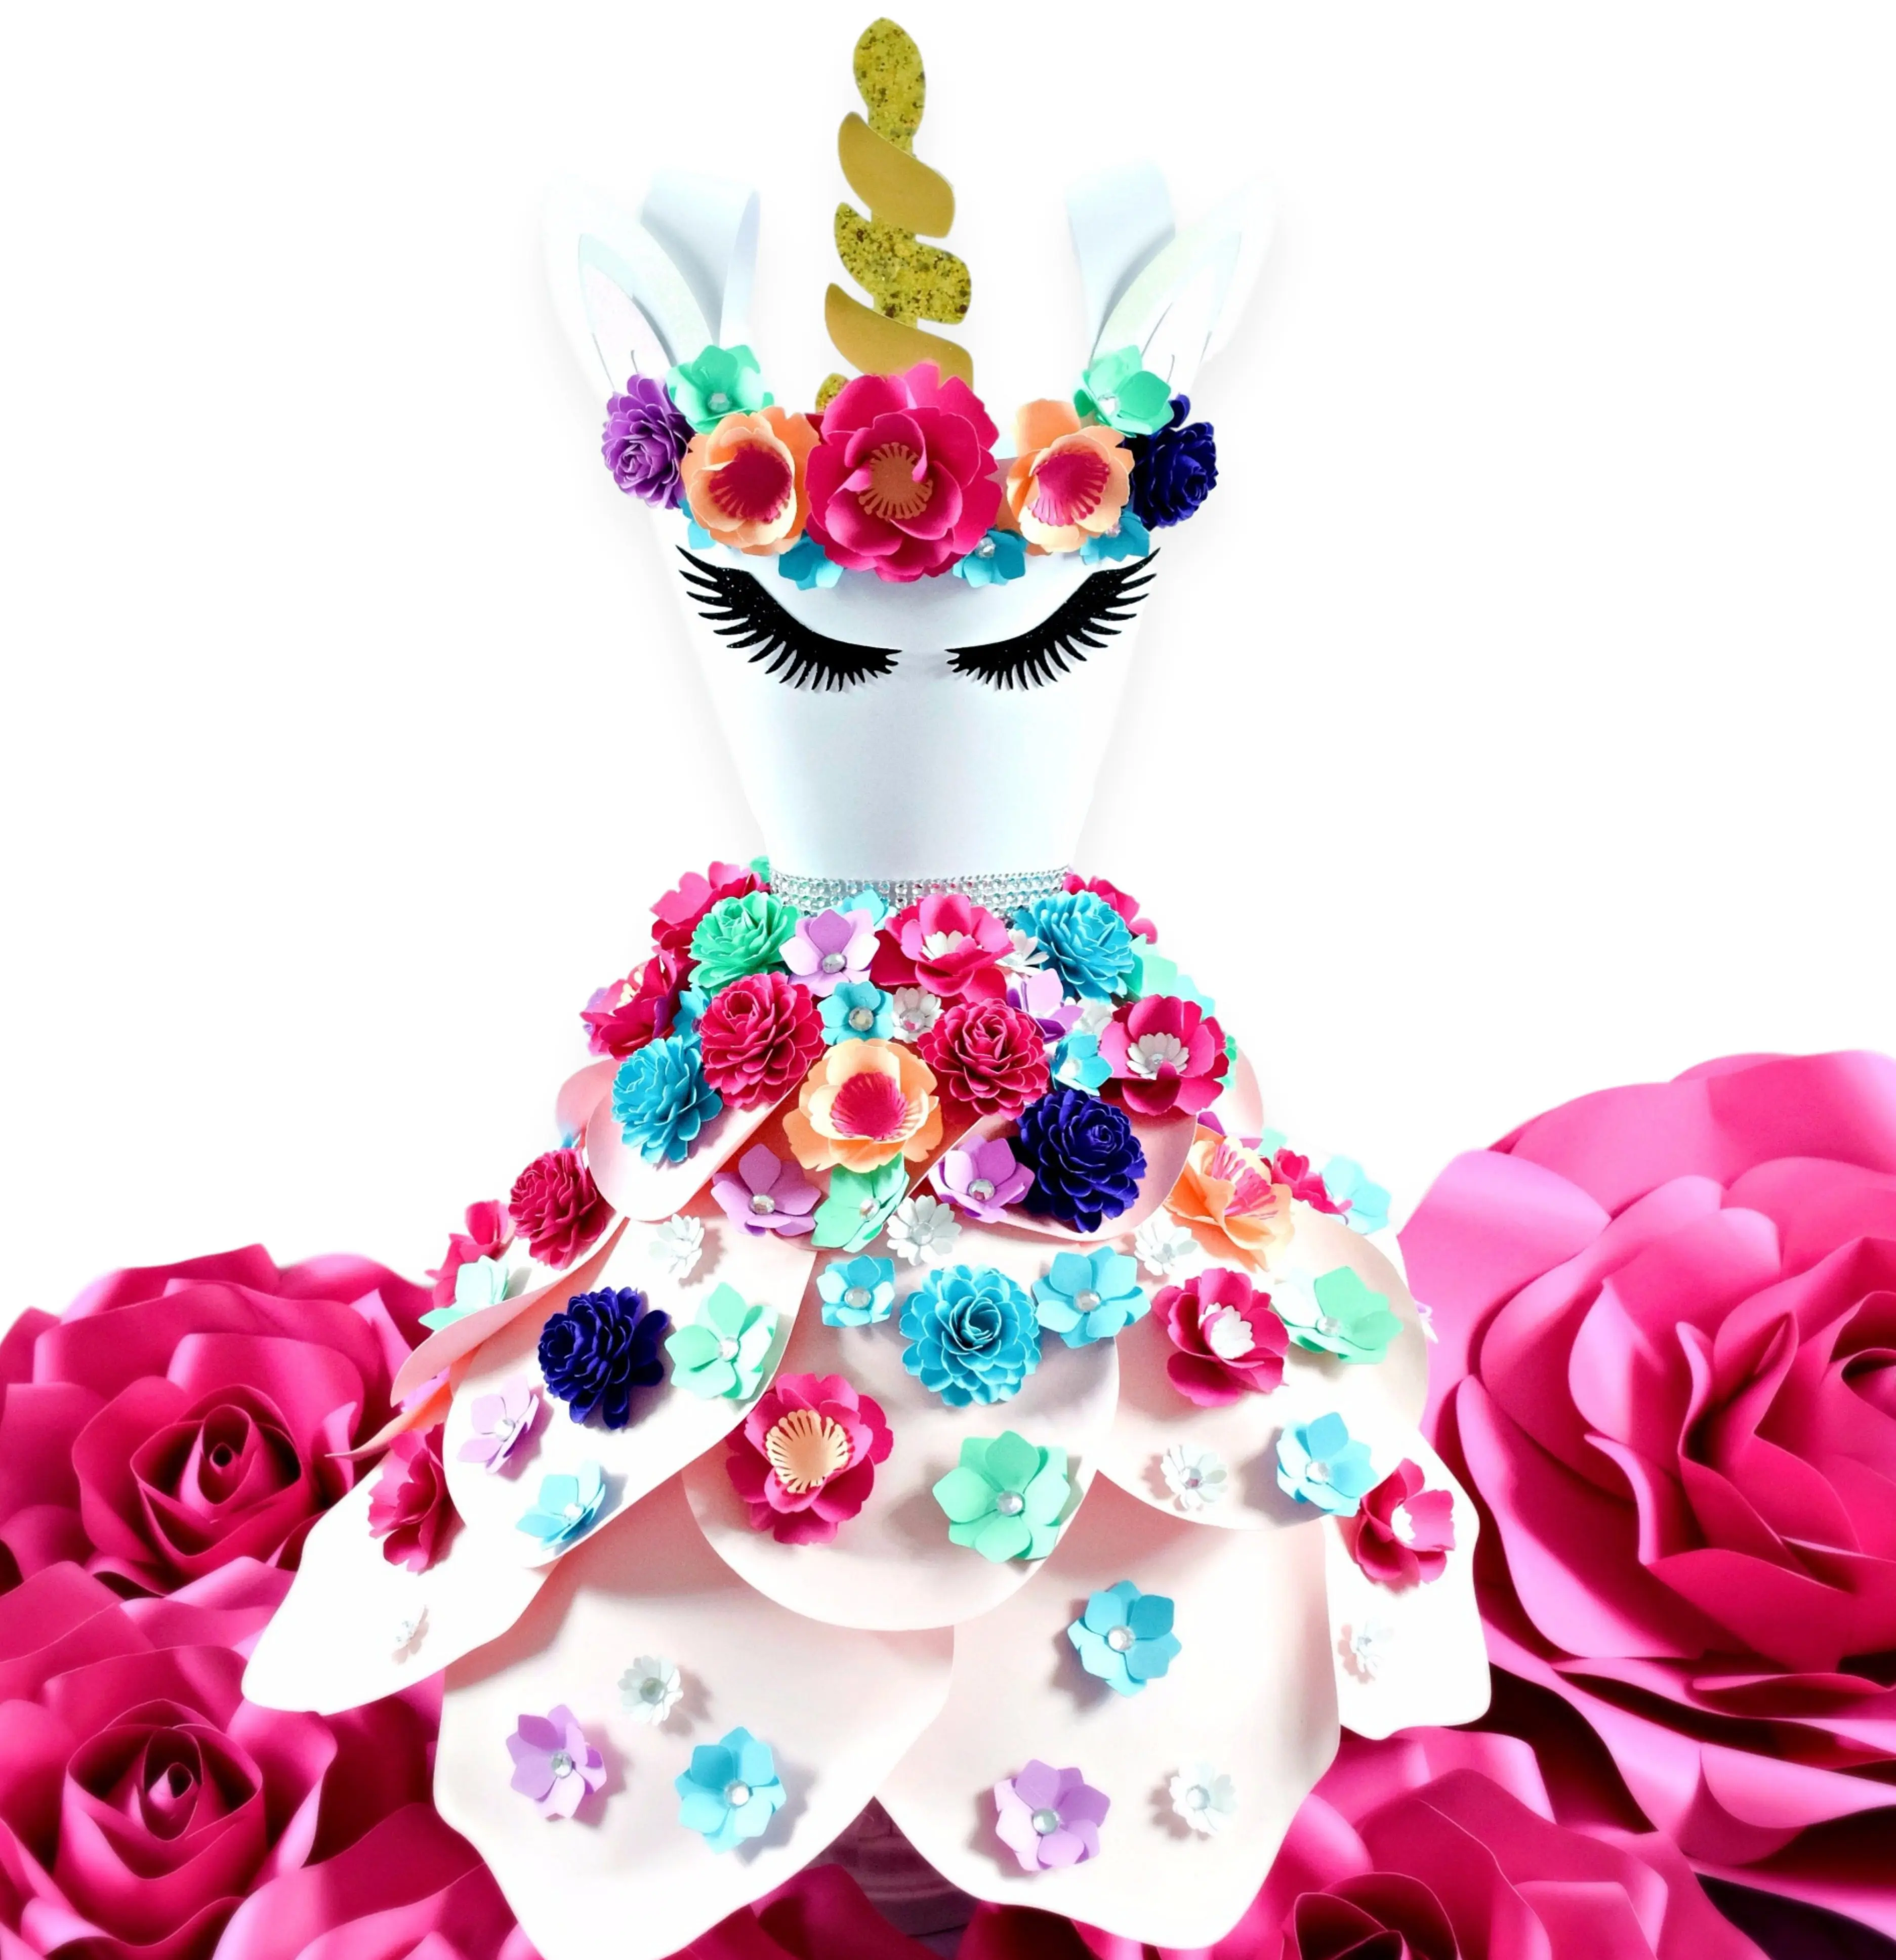
I decided to come up with a new, fun paper design this week! Paper dresses! These Paper Dress Templates are a lot of fun to put together. They can be made in so many different ways and customized to fit any theme you can possibly imagine! So far, I’ve already made a fairy dress, wedding gown, this mermaid gown, and I am currently working on a unicorn-inspired paper gown.
Some folks ask, what do you use these for? Well, they make great dessert table-themed decor, nursery decor, or even a table centerpiece for a girl’s party!
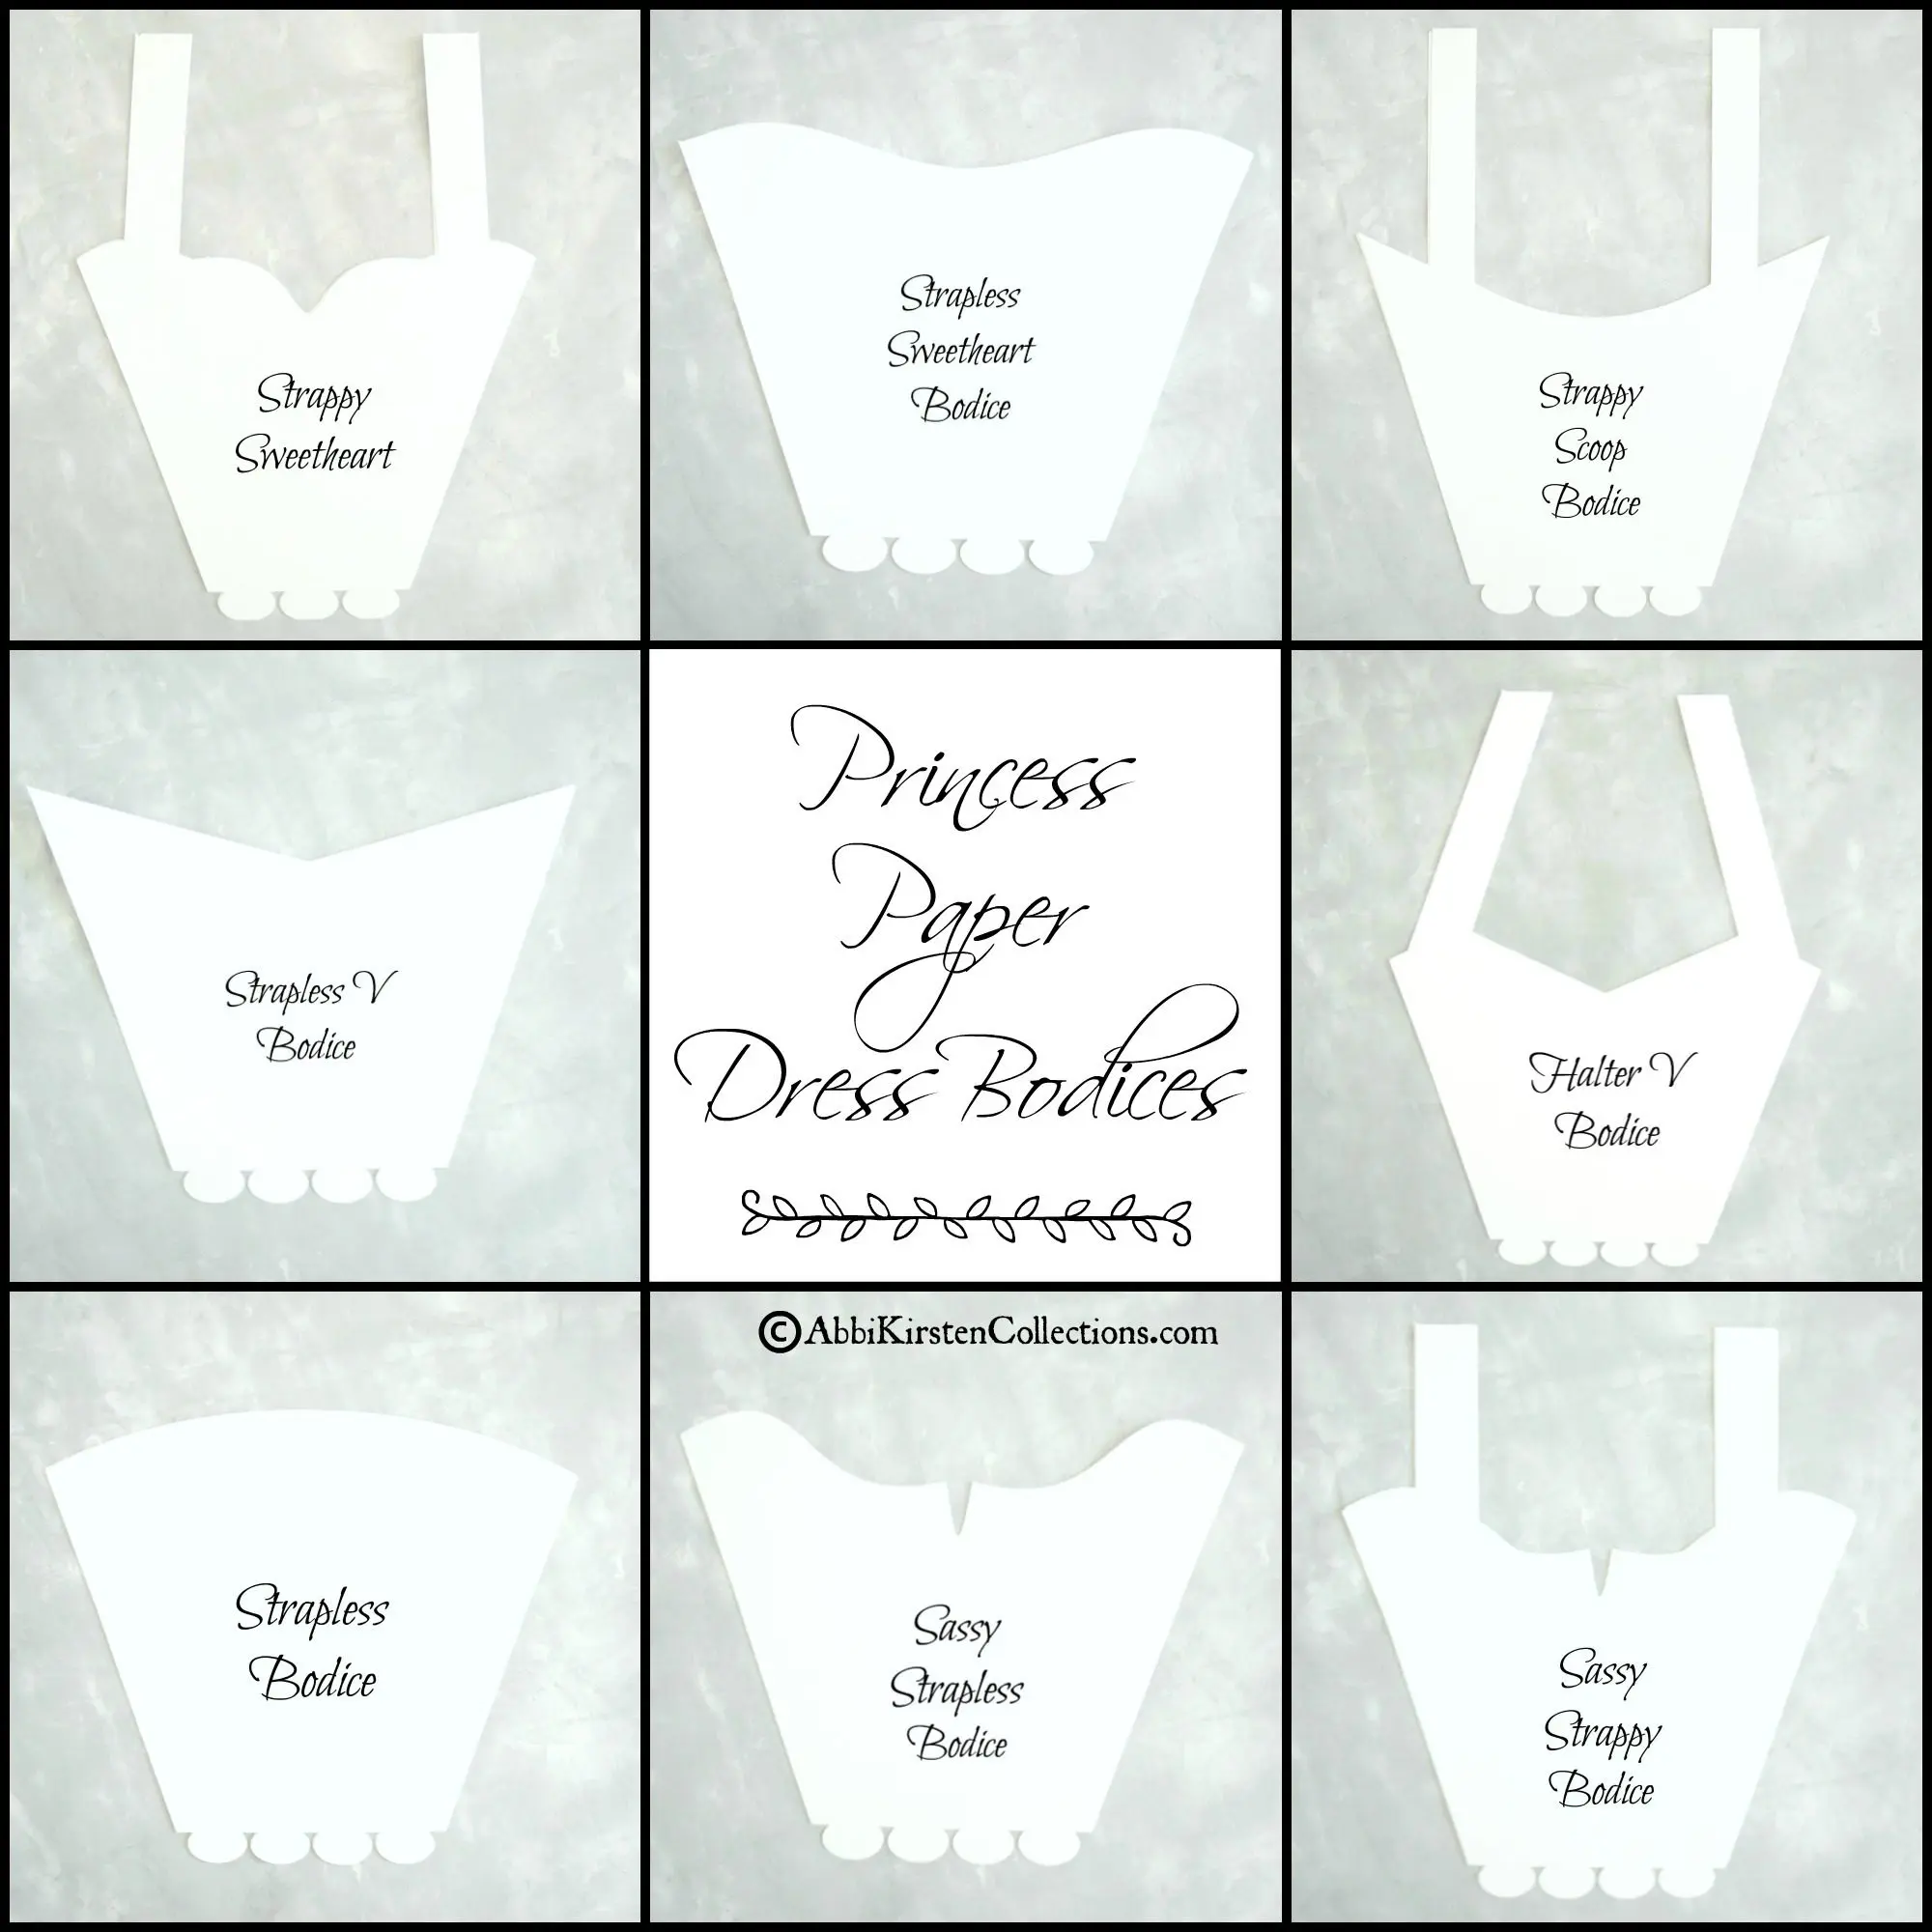
They are really very simple to make. I spent the last couple of weeks coming up with eight, yes, eight different bodice designs. Four of the bodices come with straps (one is a halter!), and four that are strapless.
I have a two-part video tutorial on how to make these beautiful paper dresses. I’m going to walk you through a picture tutorial for the mermaid dress and you can find the videos for more details at the bottom.
Let’s go over supplies first. You will need to decide how many tiers you want your paper dress to be. In this tutorial, I am making a 3 tiered gown. You can make a two-tiered gown or even one if you like.
Supplies Needed to Make a Mermaid-Themed Paper Dress
- Dress templates (click here for the set of 8)
- Giant flower templates for the dress’ skirt (view all templates or check out the paper dress starter kit)
- Scissors and/or cutting machine (Cricut Maker or Cricut Explore Air 2 Machine)
- Embellishments that fit your theme (sticker rhinestones, ribbon, tulle, small paper flowers, etc.)
- Glue Gun
- 65-pound cardstock
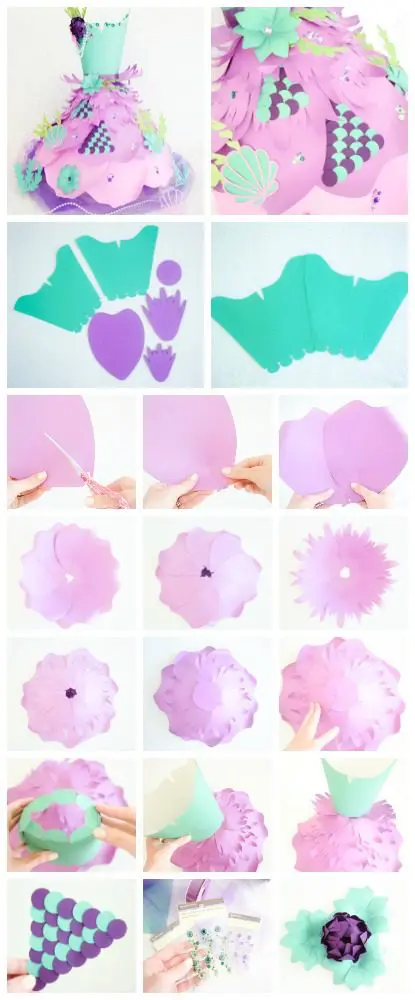
How to Make the Paper Dress Bodice
Cut out 2 dress bodice patterns. If you are cutting your templates by hand, you can use 8.5 x 11 cardstock or you can use our enlarged ledger PDF included to print at a local printer so that you can use the template with 12 x 12 cardstock, which is the size I use when I lay them out on my machine.
(Please note cutting machine users: Cutting machines sometimes like to enlarge the templates bigger than what I save them as. The goal is for the dress bodice to be within a 12 x 12 margin)
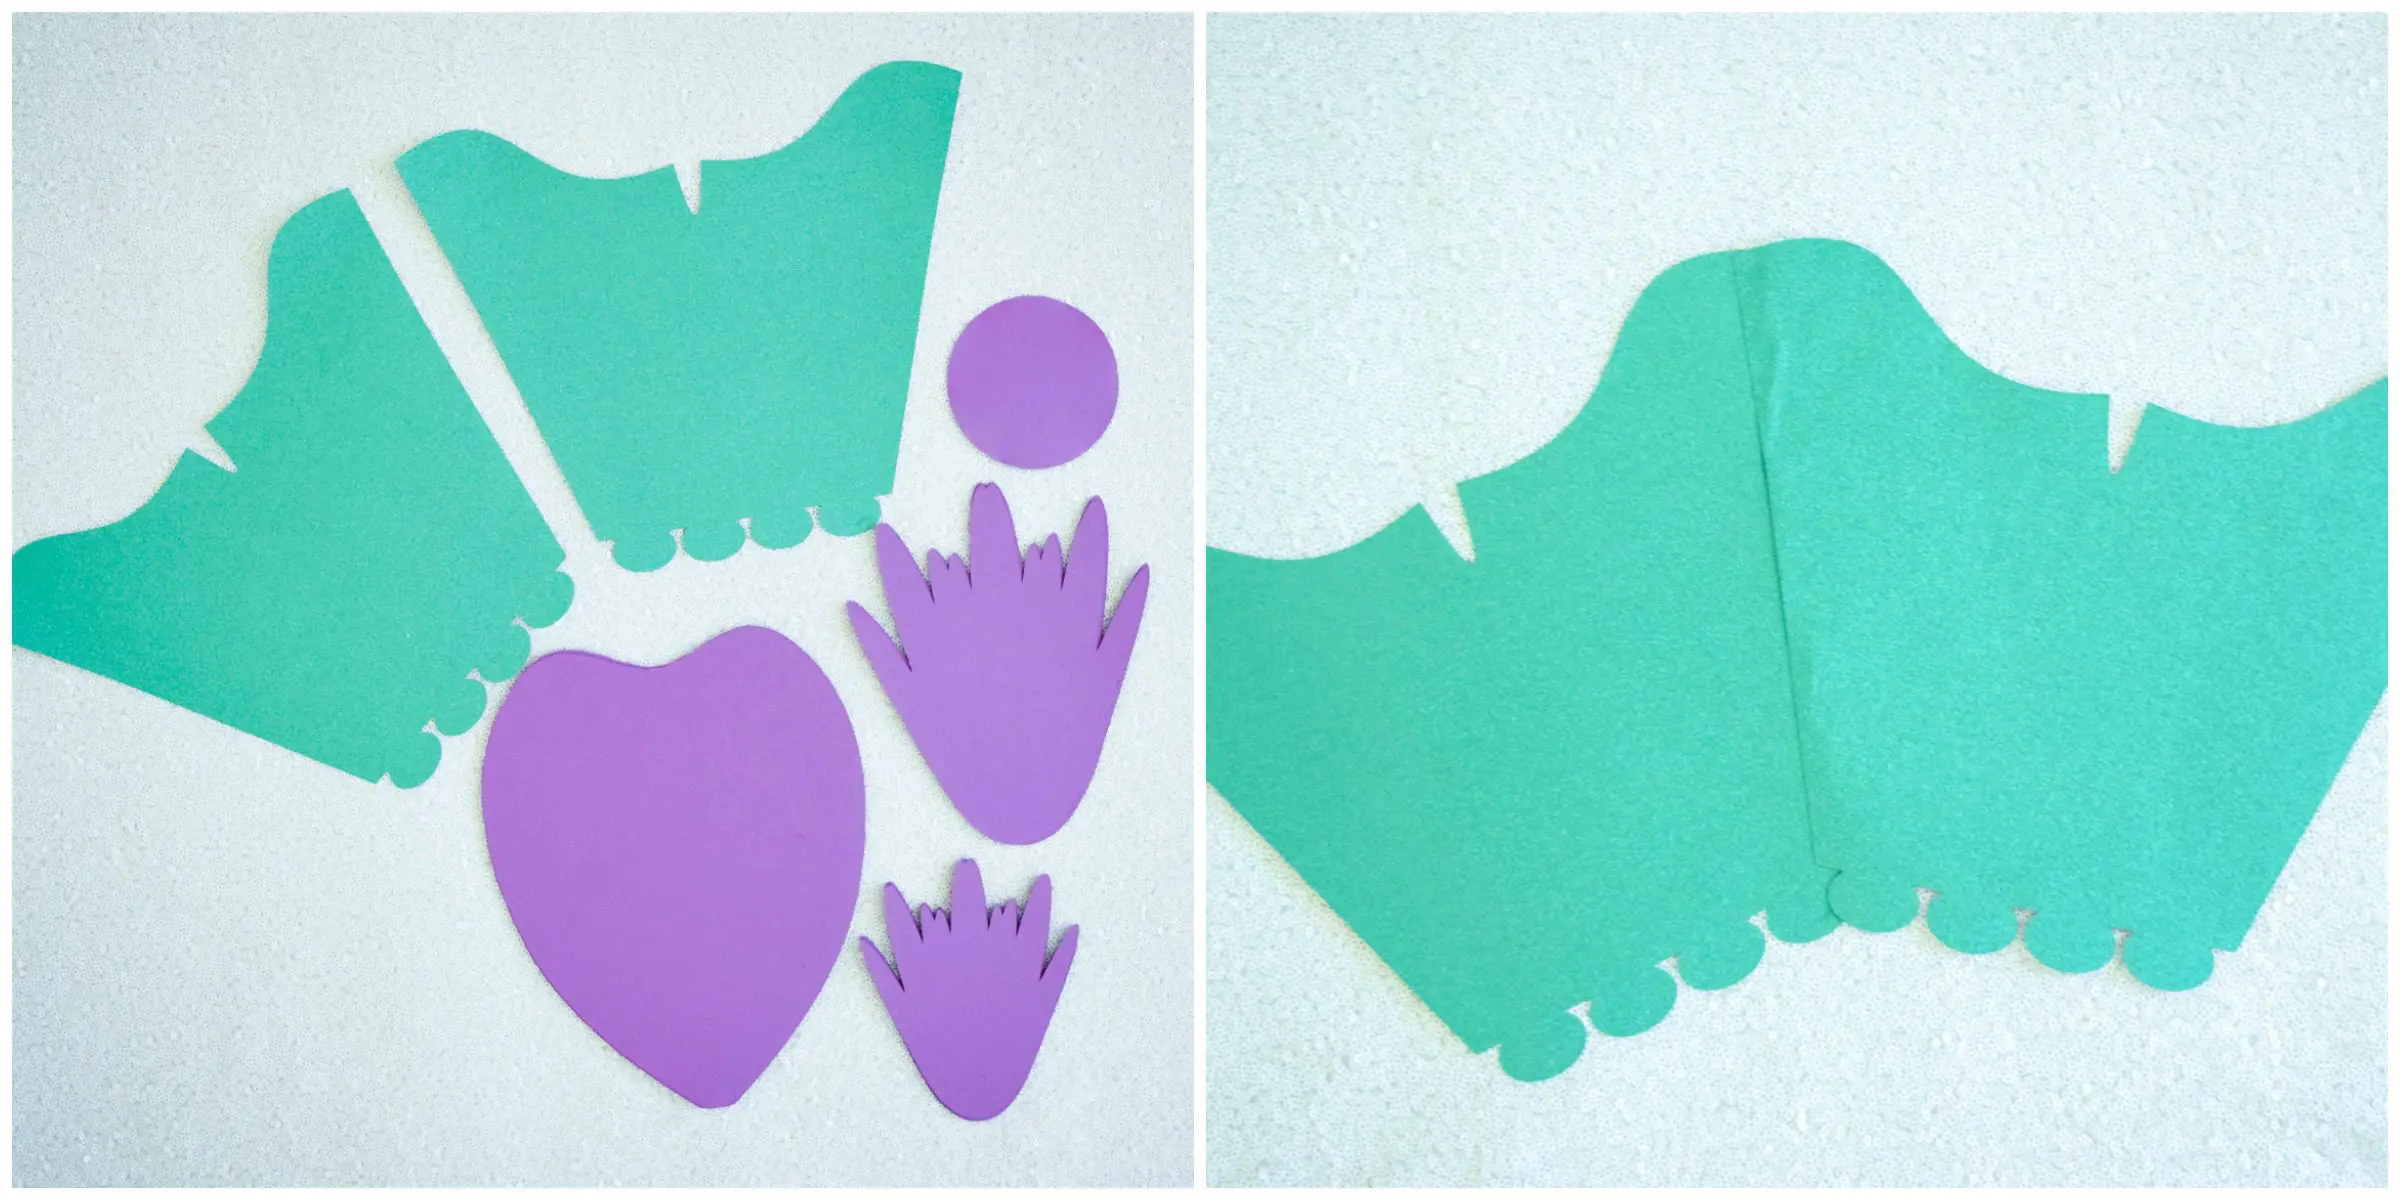
Glue your 2 dress bodices together, one side over the other and then the opposite side, as shown above. Tip: try to make your seams go the same direction for a cleaner look.
How to Make The Paper Dress Skirt
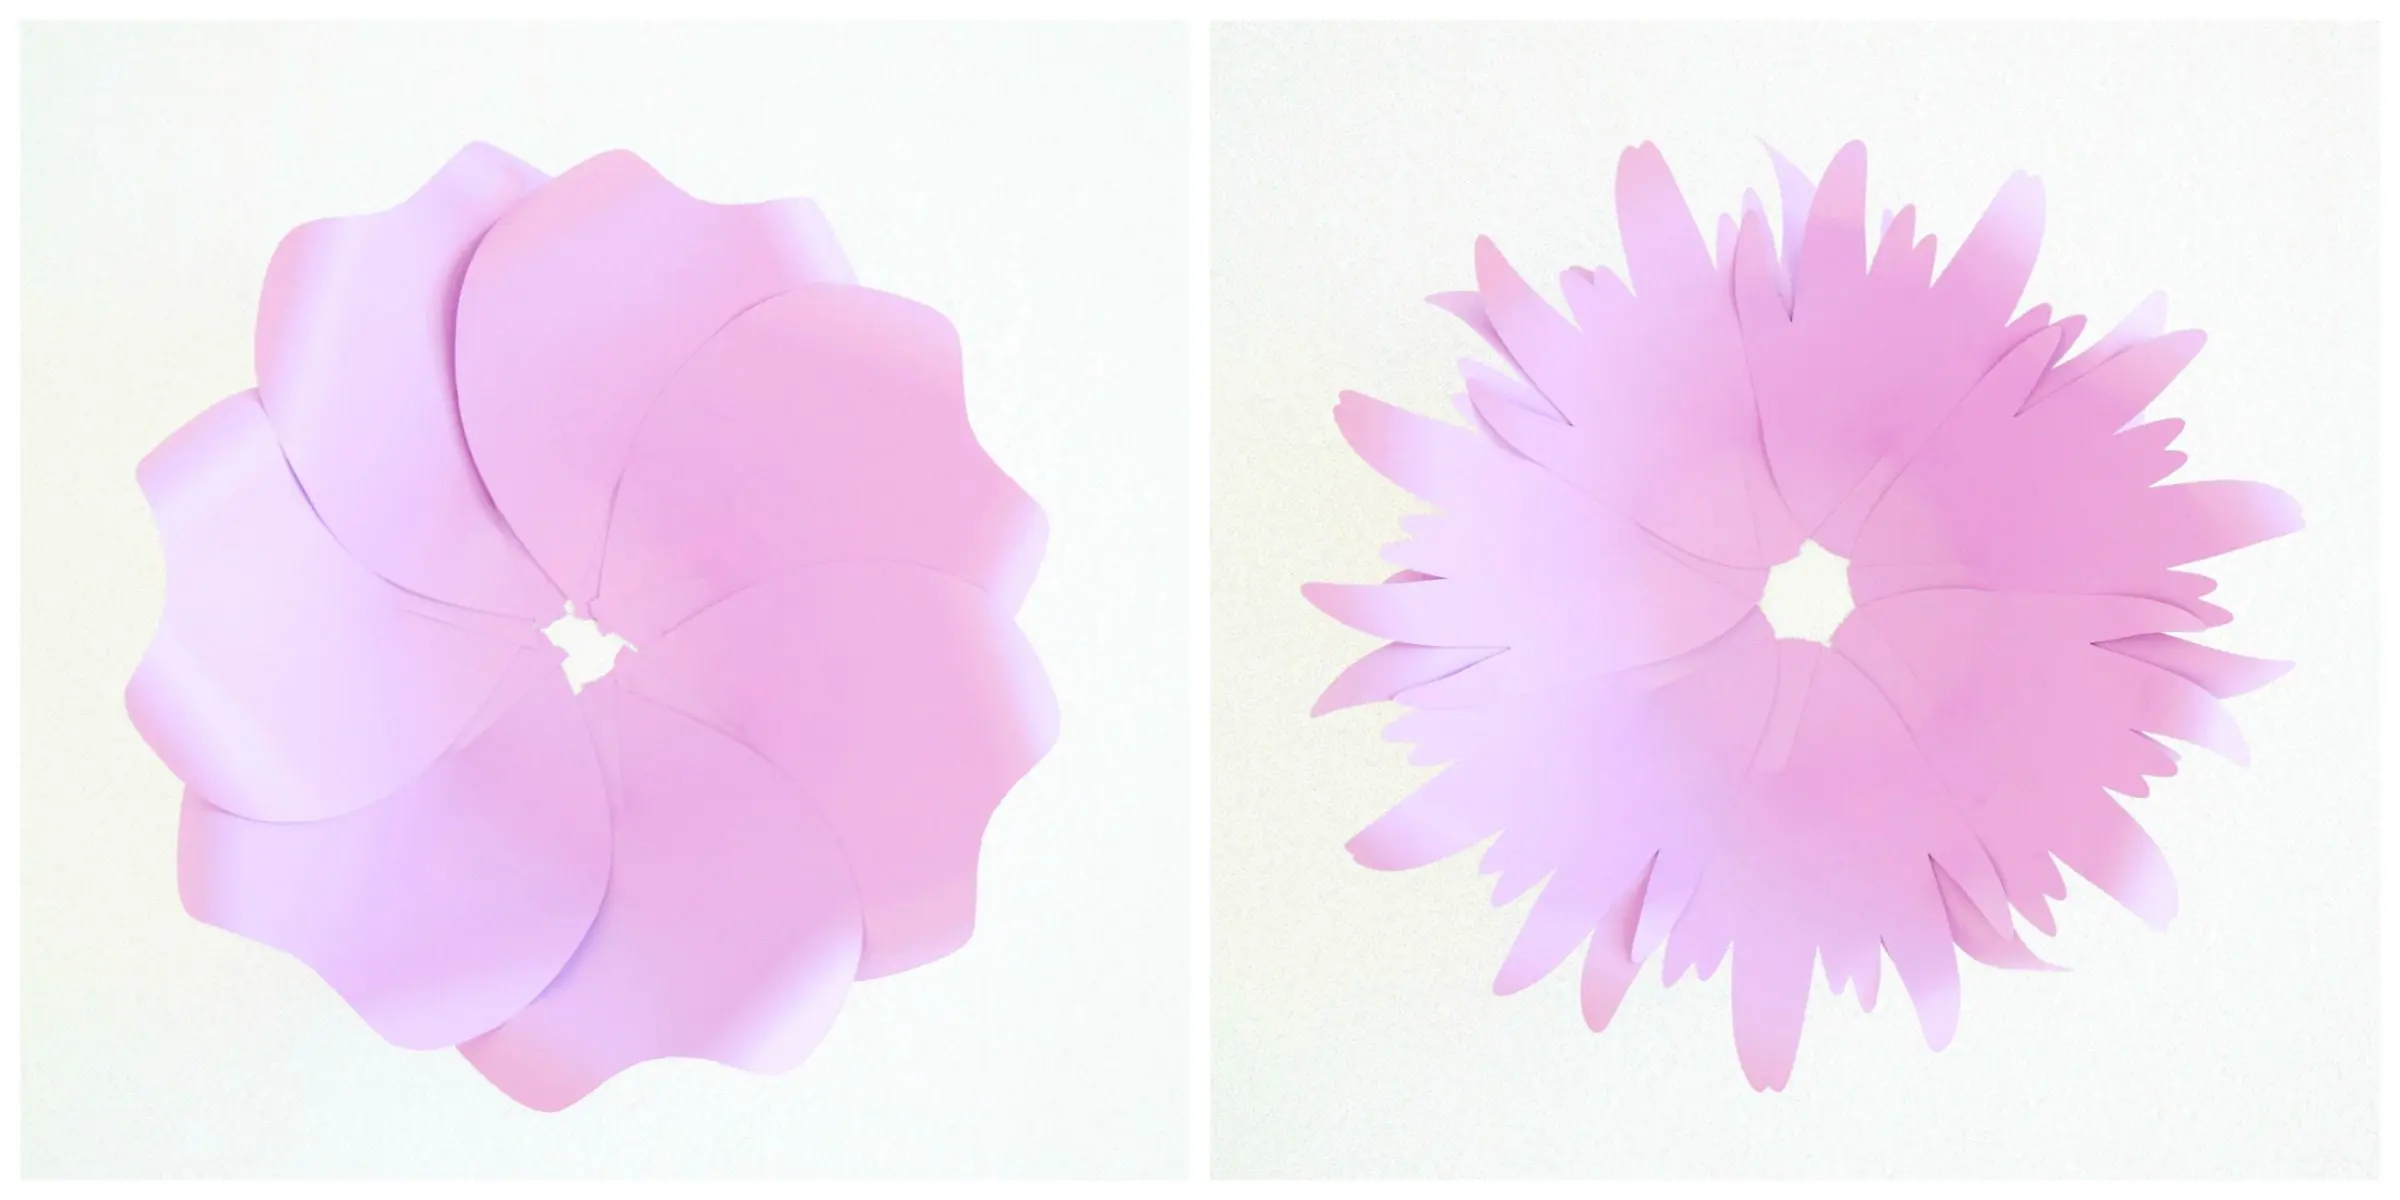
For the dress skirt, you will be using giant flower templates. In this tutorial, I am using Lacey style’s extra-large petals for the first tier, Bella style’s large petals for the second tier, and Whimsy style’s medium and small petals for the third tier.
We are going to make the skirt the same way we build my giant flower designs. I’m using 8 XL Lacey petals, 7 large Bella petals, and 7 medium Whimsy petals.
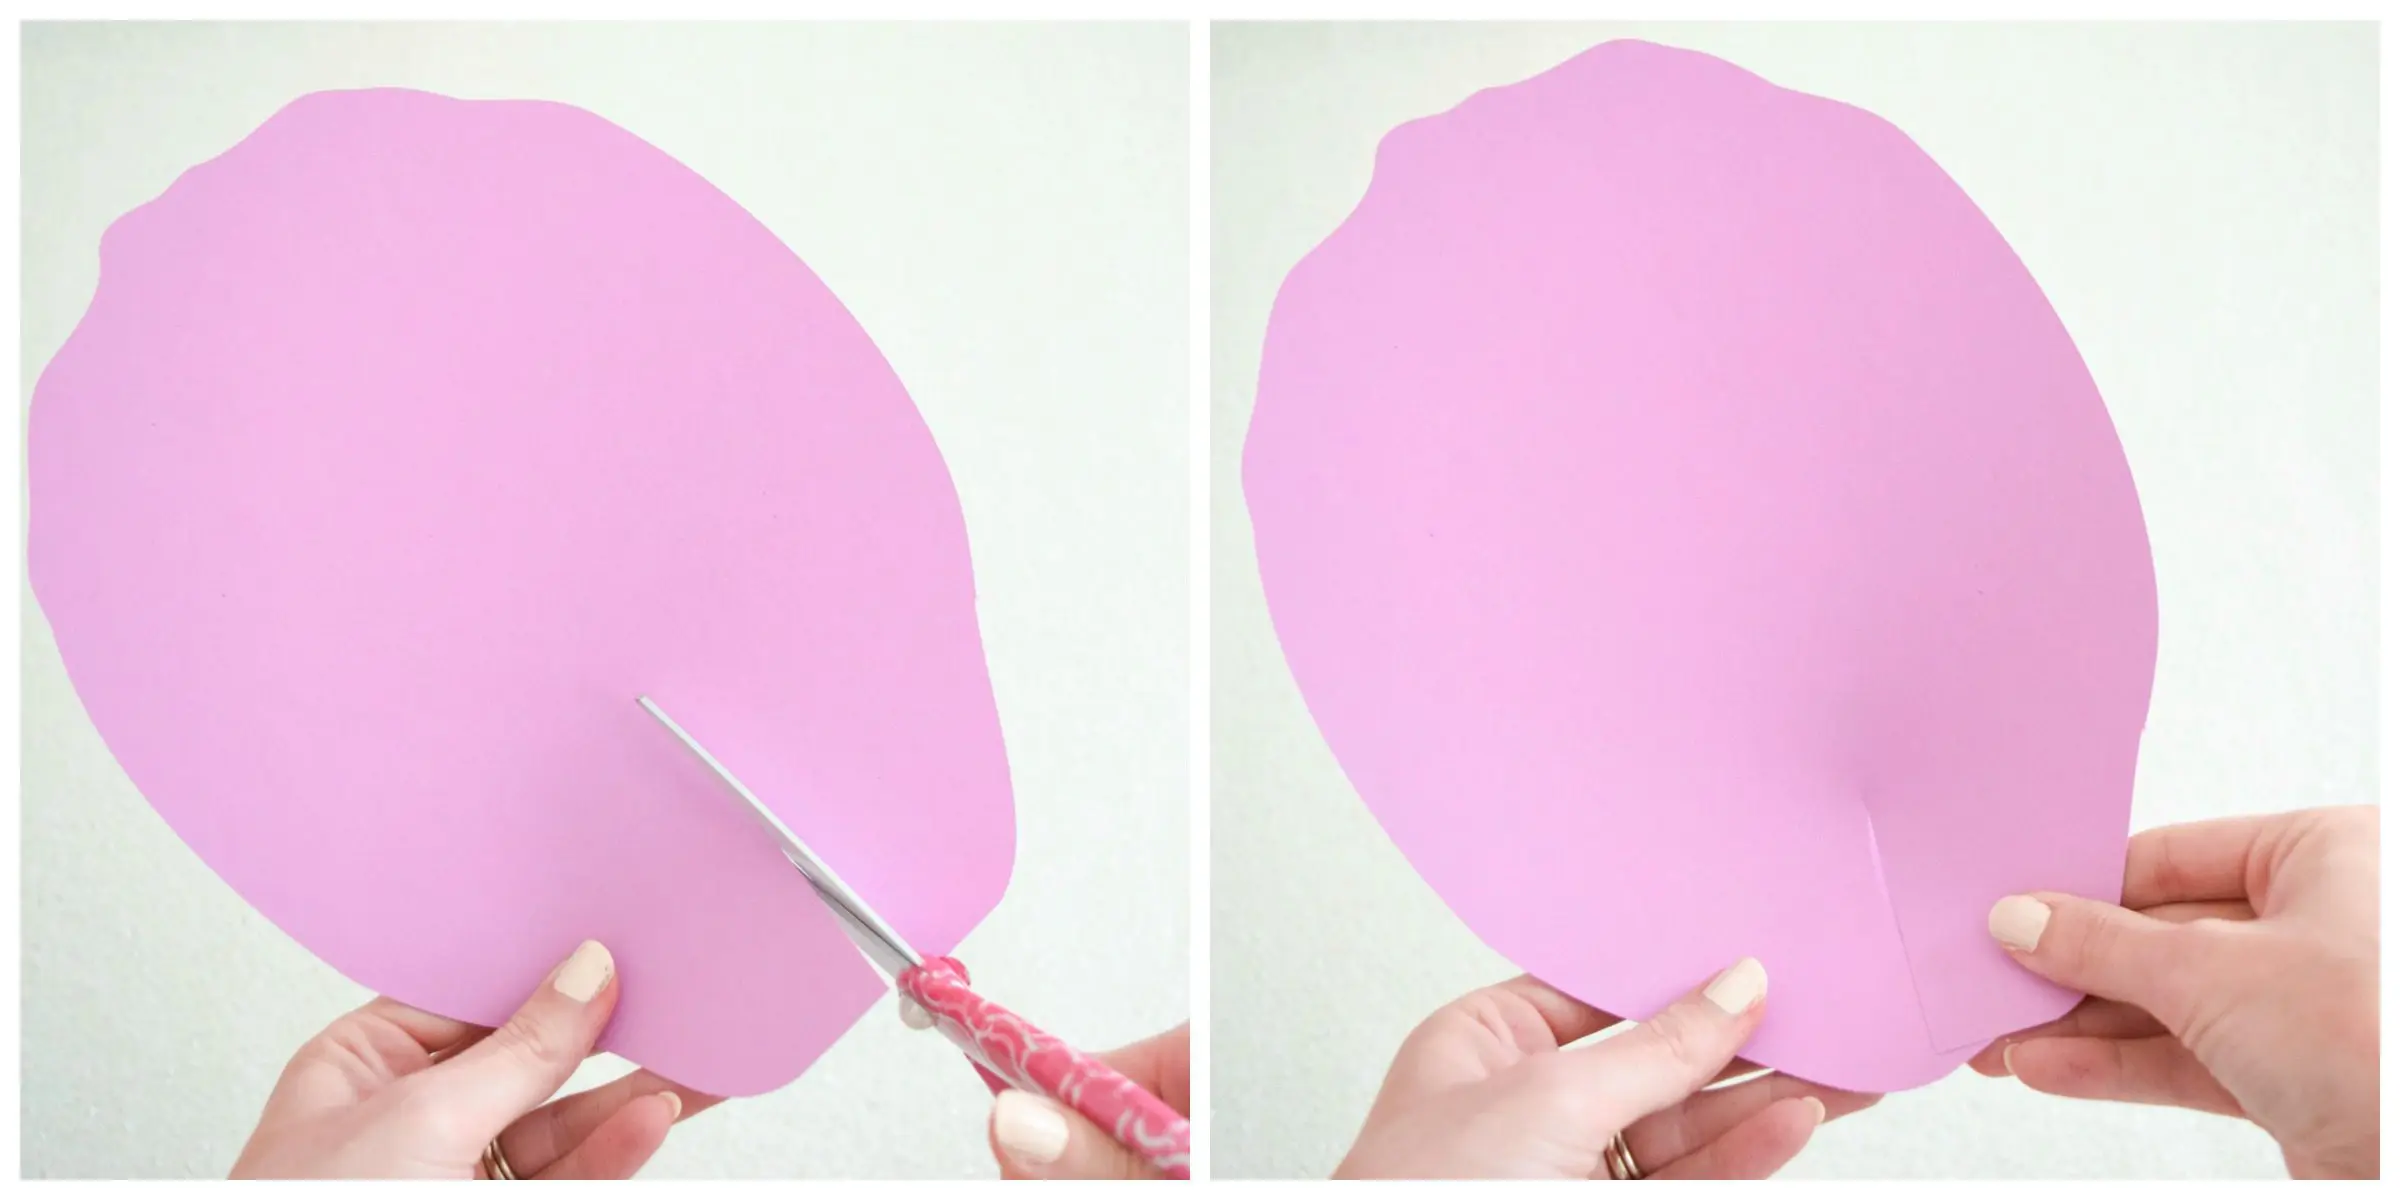
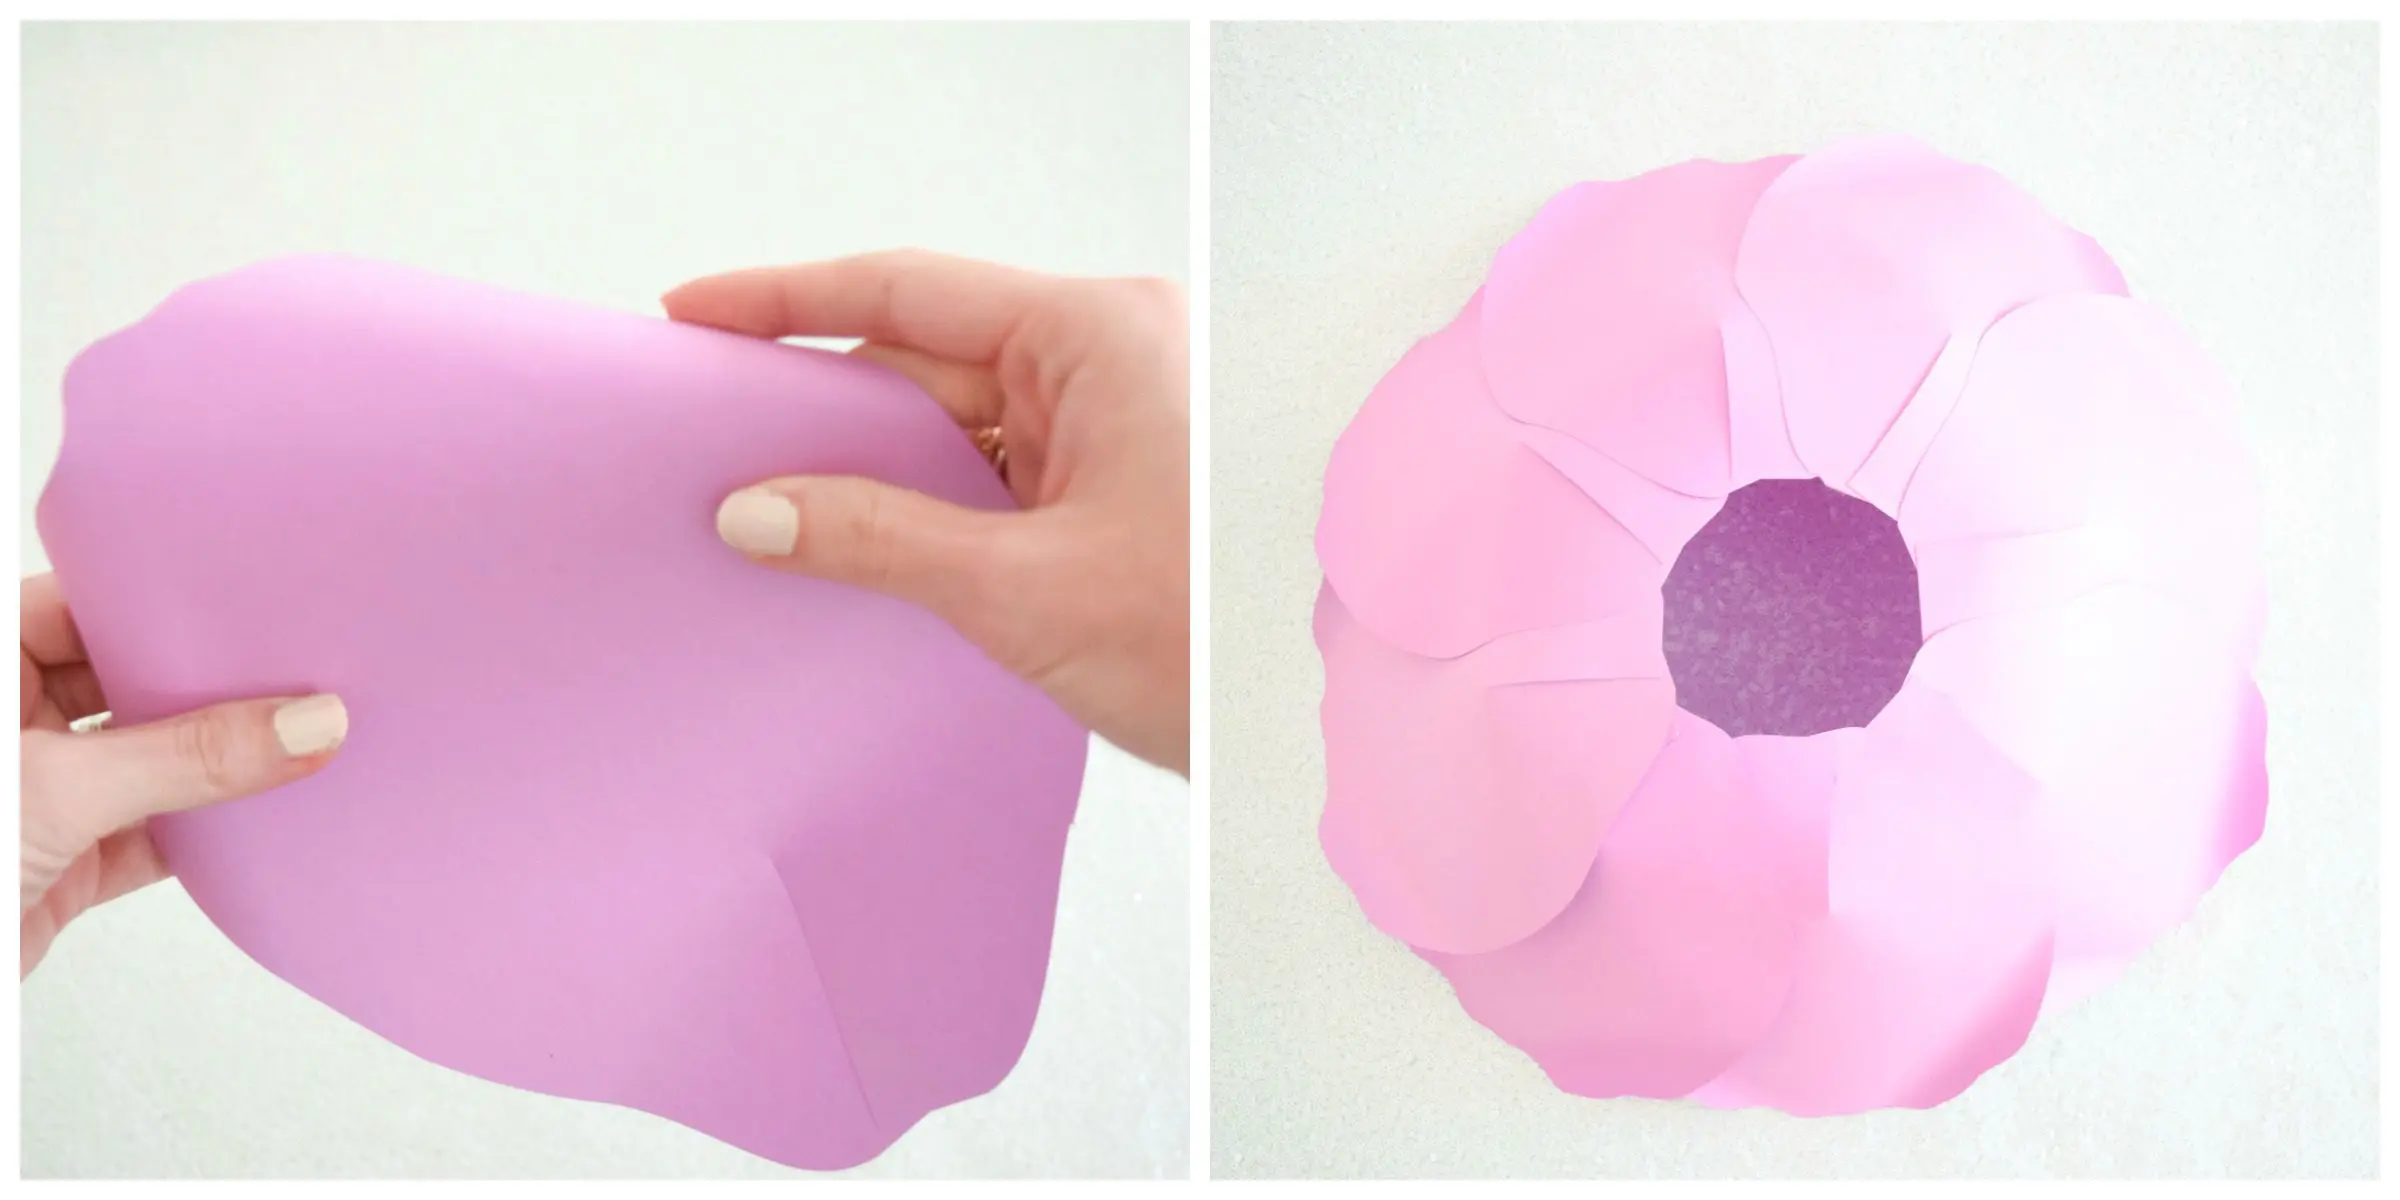
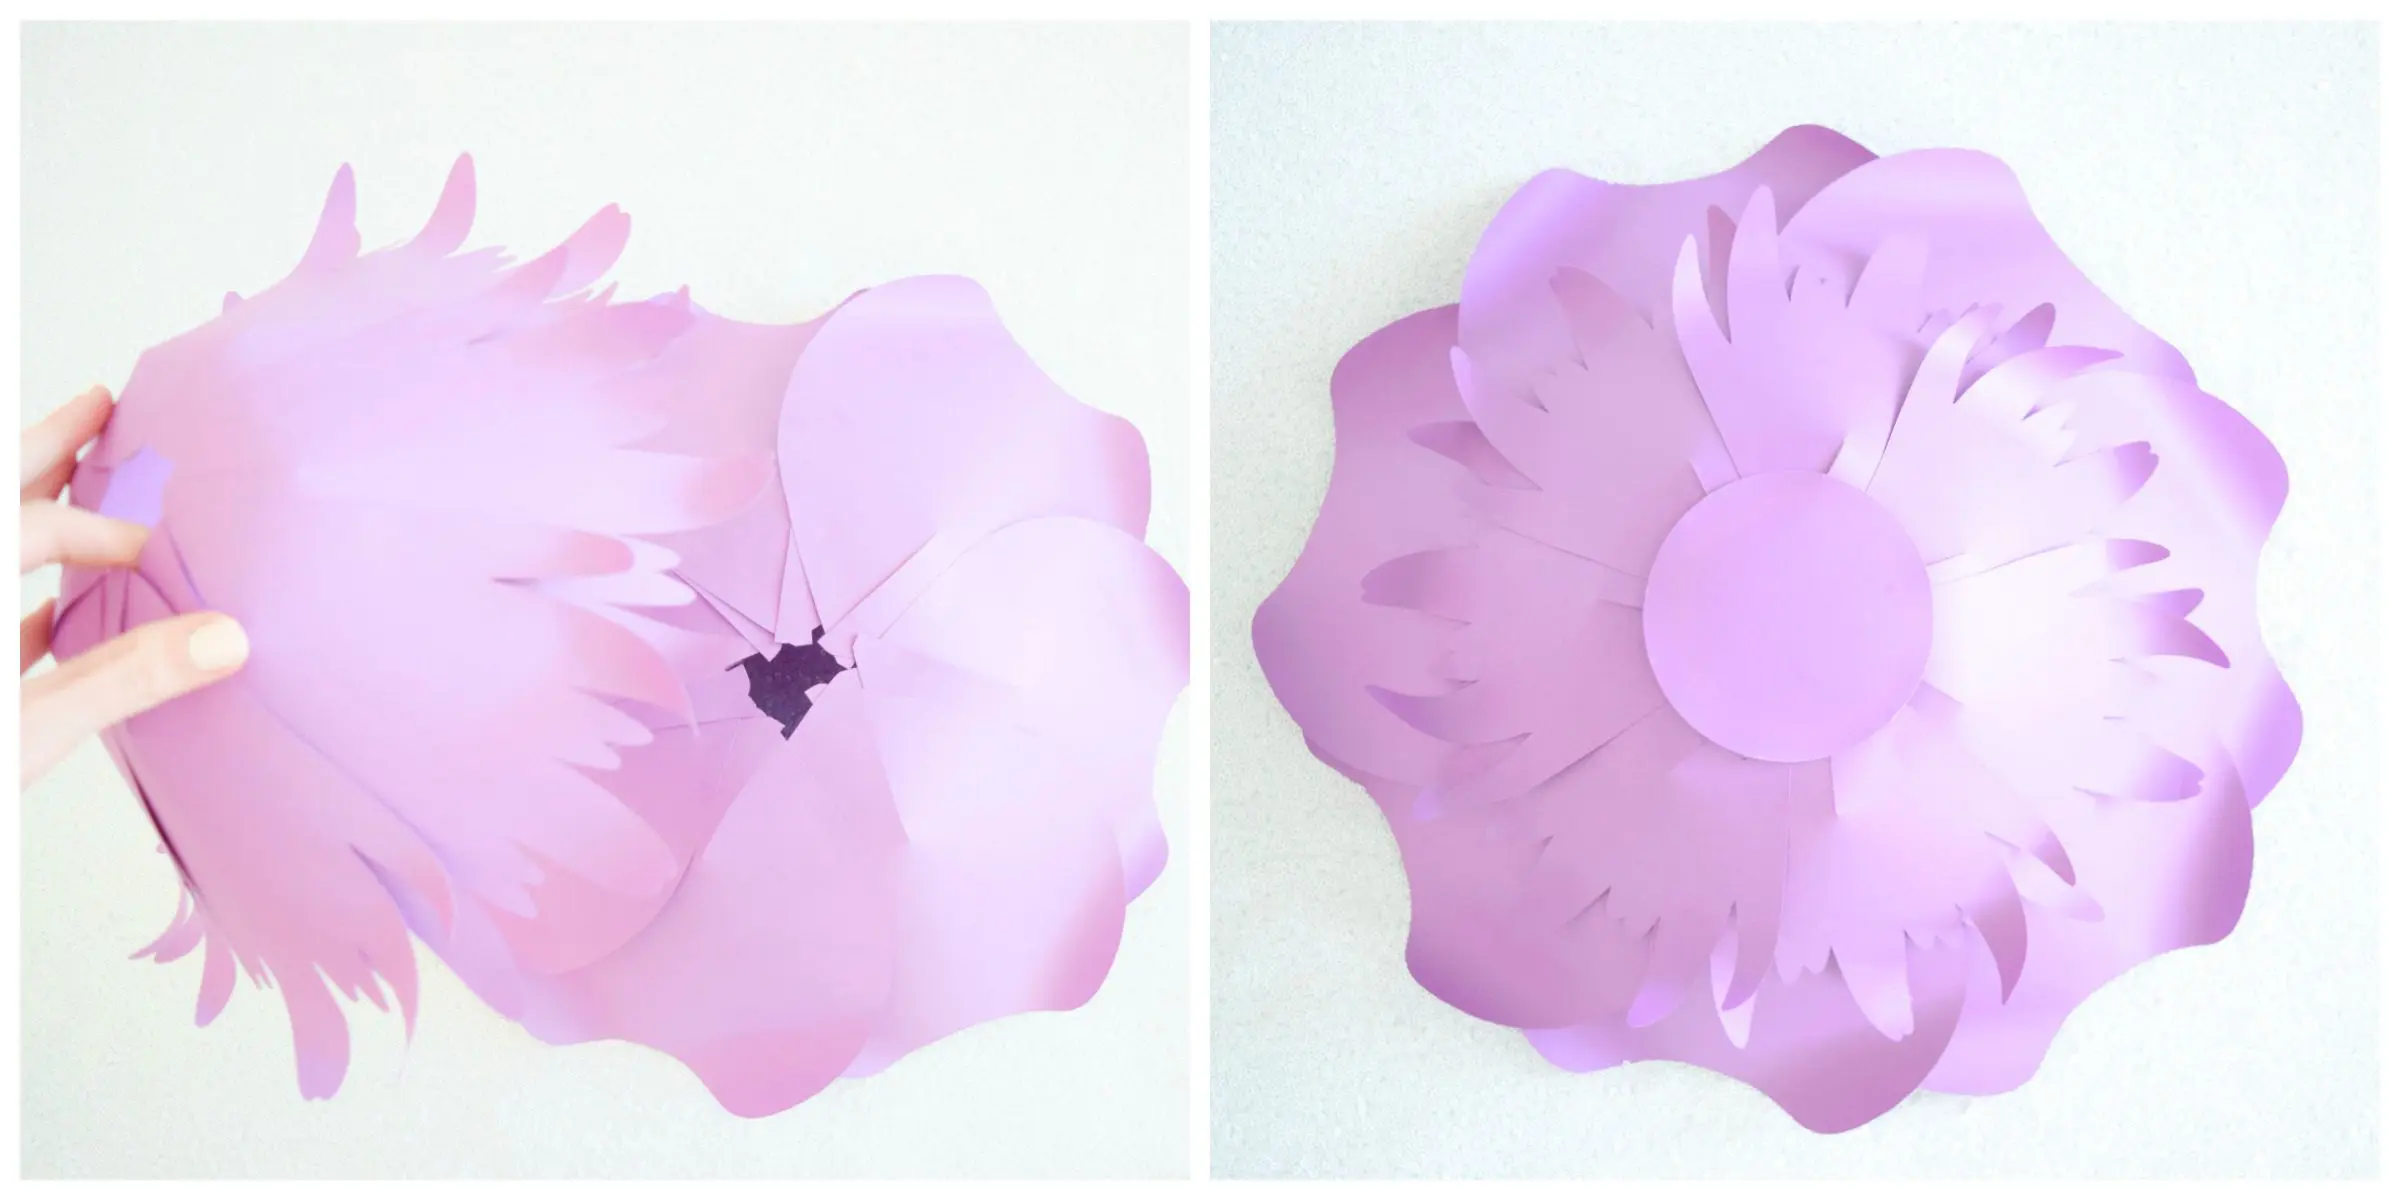
Cut a slit at the bottom of each flower petal and overlap slightly. Curl the edges back. Glue your petals together in a circle.
Full video tutorial on the dresses at the bottom of this post for more details.
Follow the same process as above with Bella’s large petals and Whimsy’s medium petals.
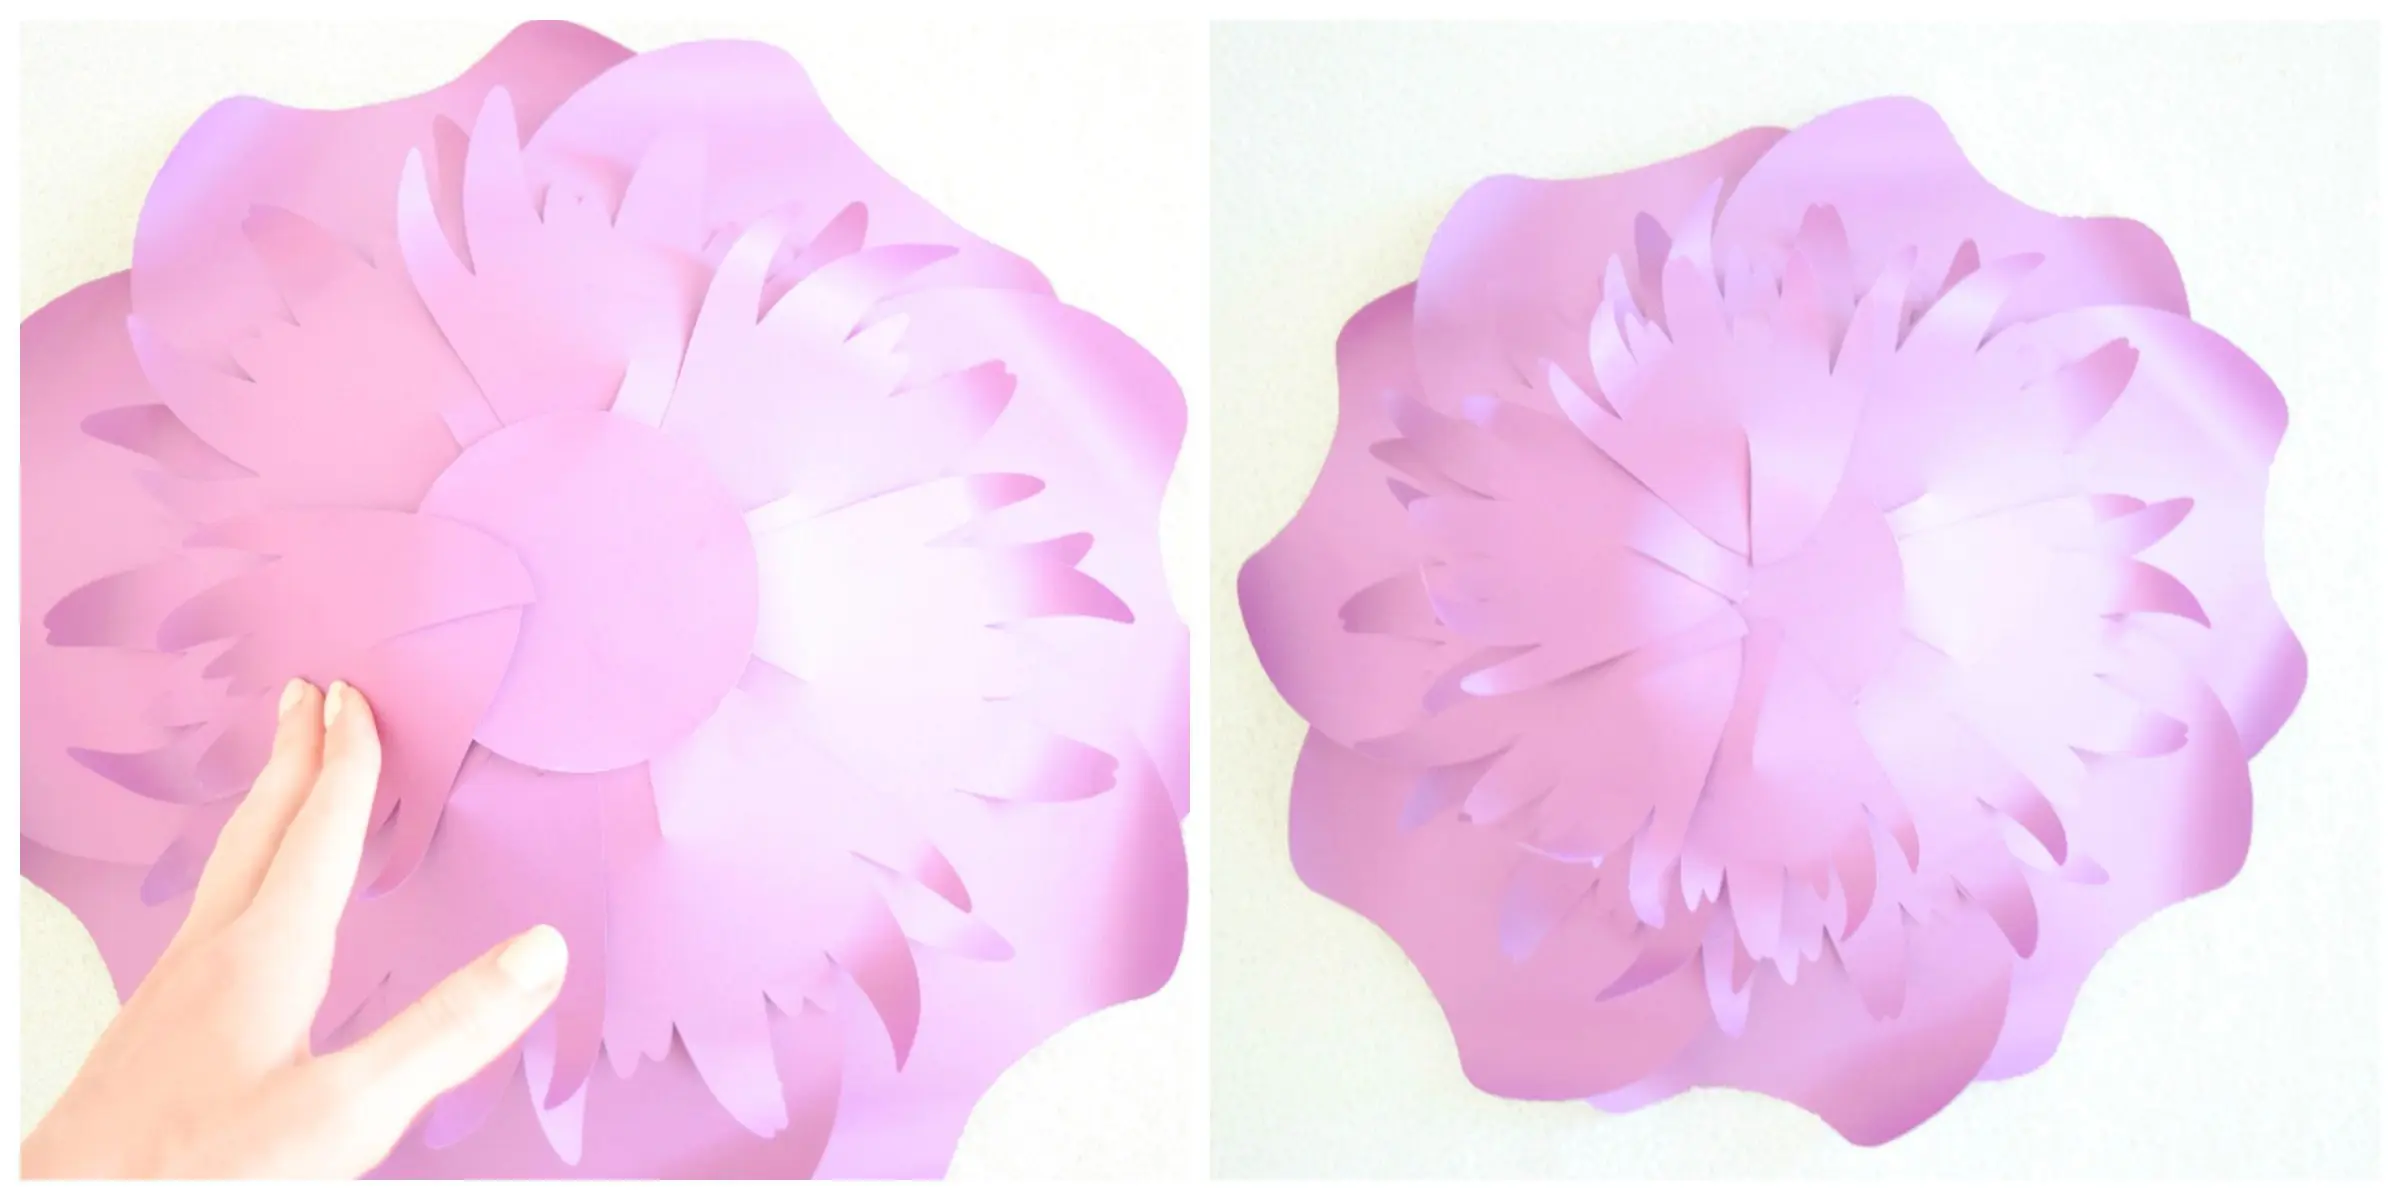
Once you have your 3 tiers complete (or however many you choose to use), you will want to stack your top 2 tiers together.
The petals will naturally meet together when stacked. Add dots of glue to the underside to secure the tiers together.
Next, cut a small square or use a small circle punch to glue over the open hole.
This part can be optional; I like to add some small petals around the top for a more complete look. Here I added 7 small Whimsy petals.
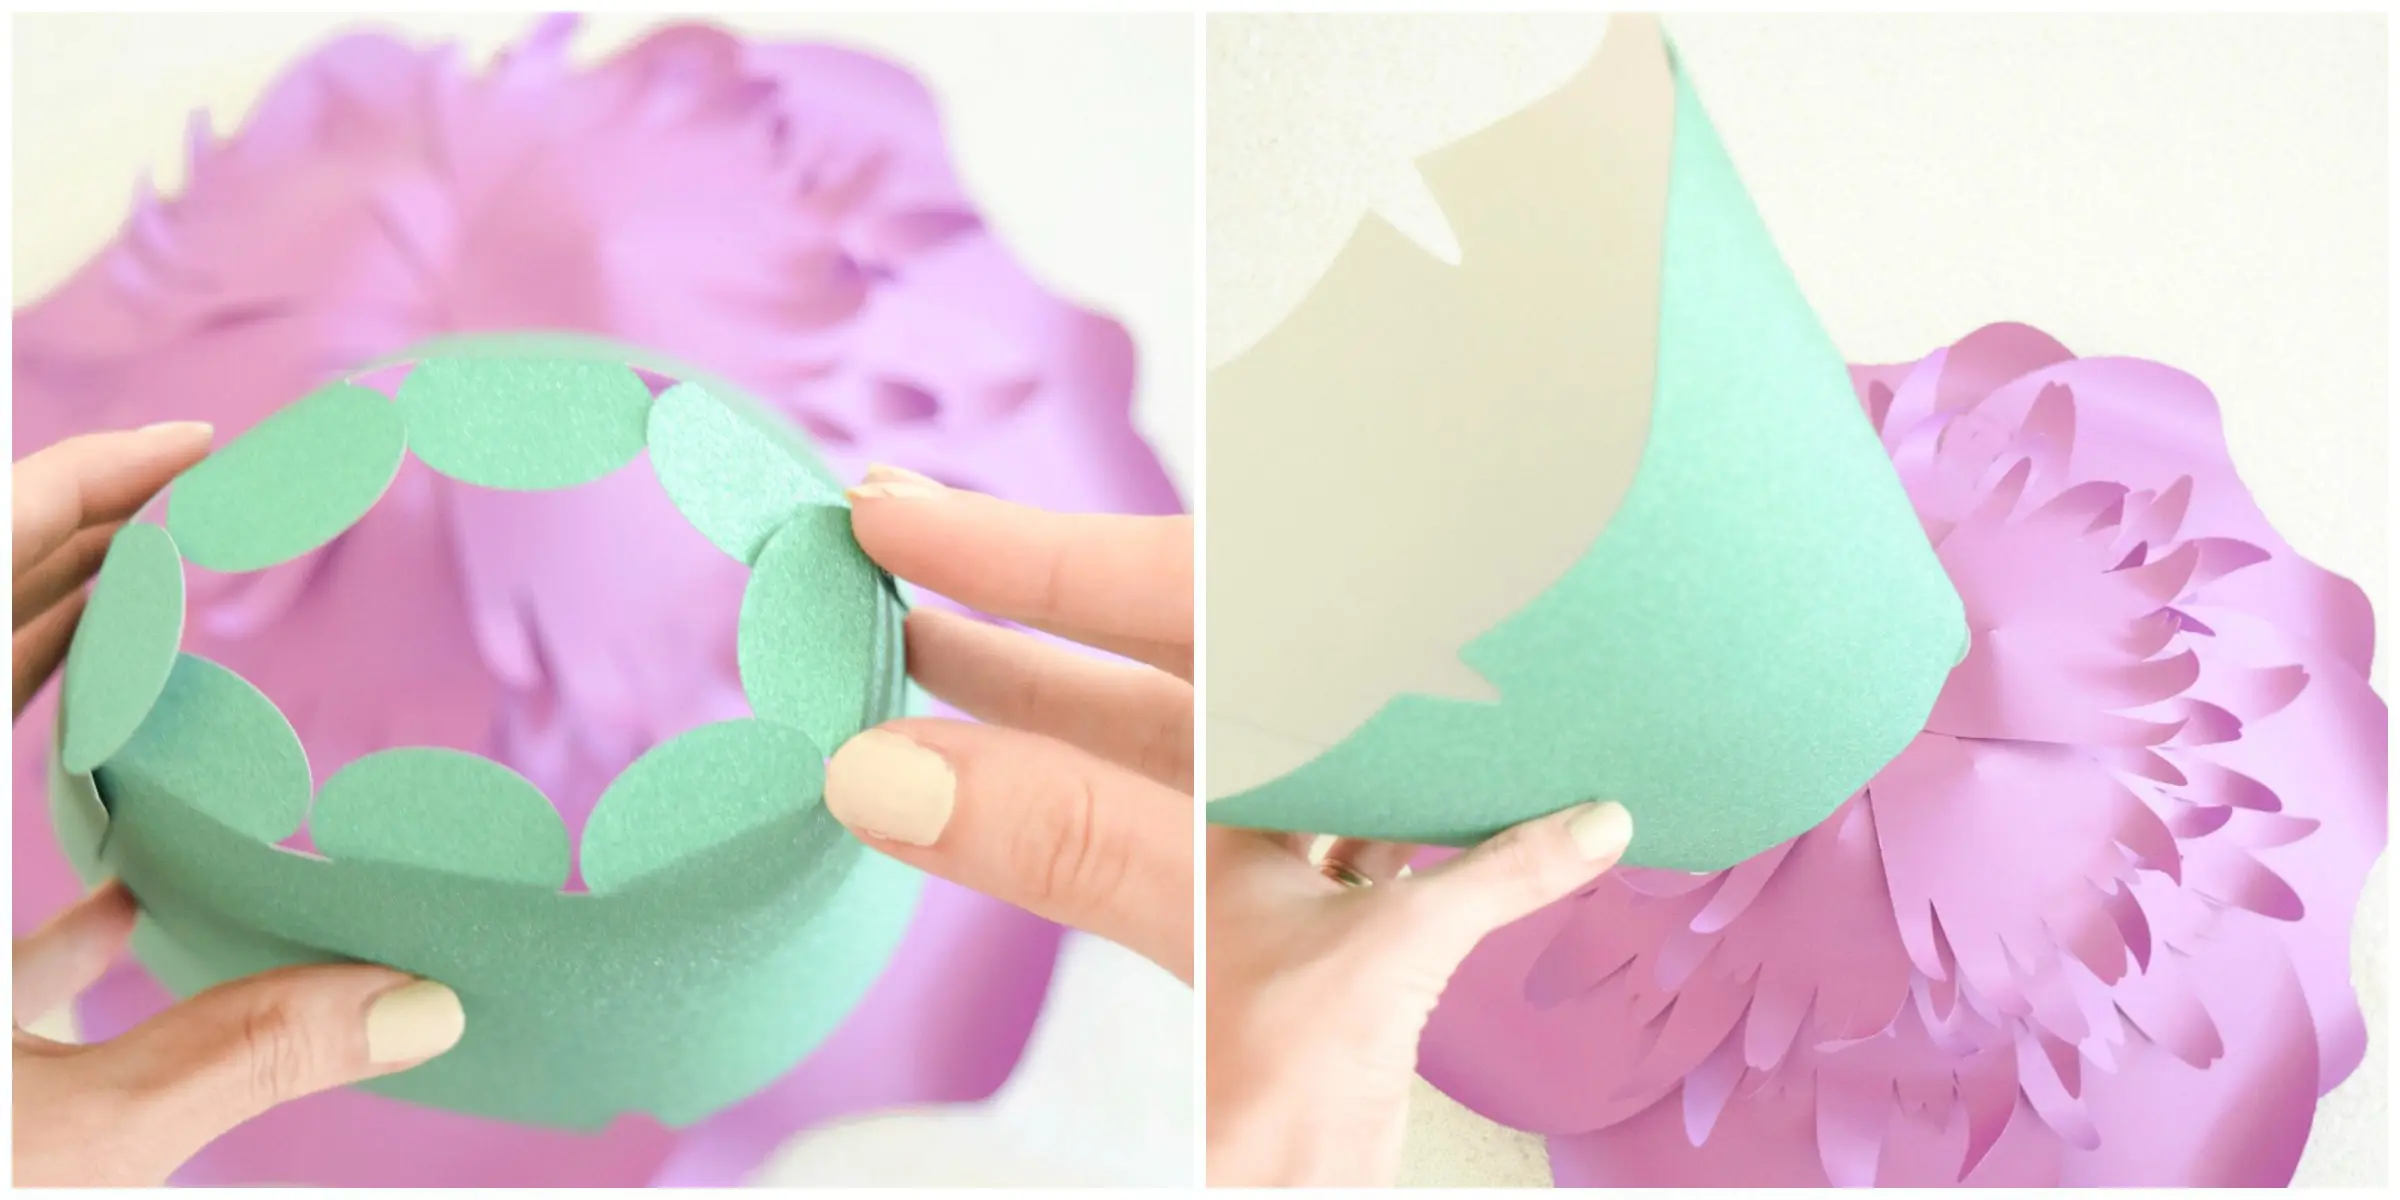
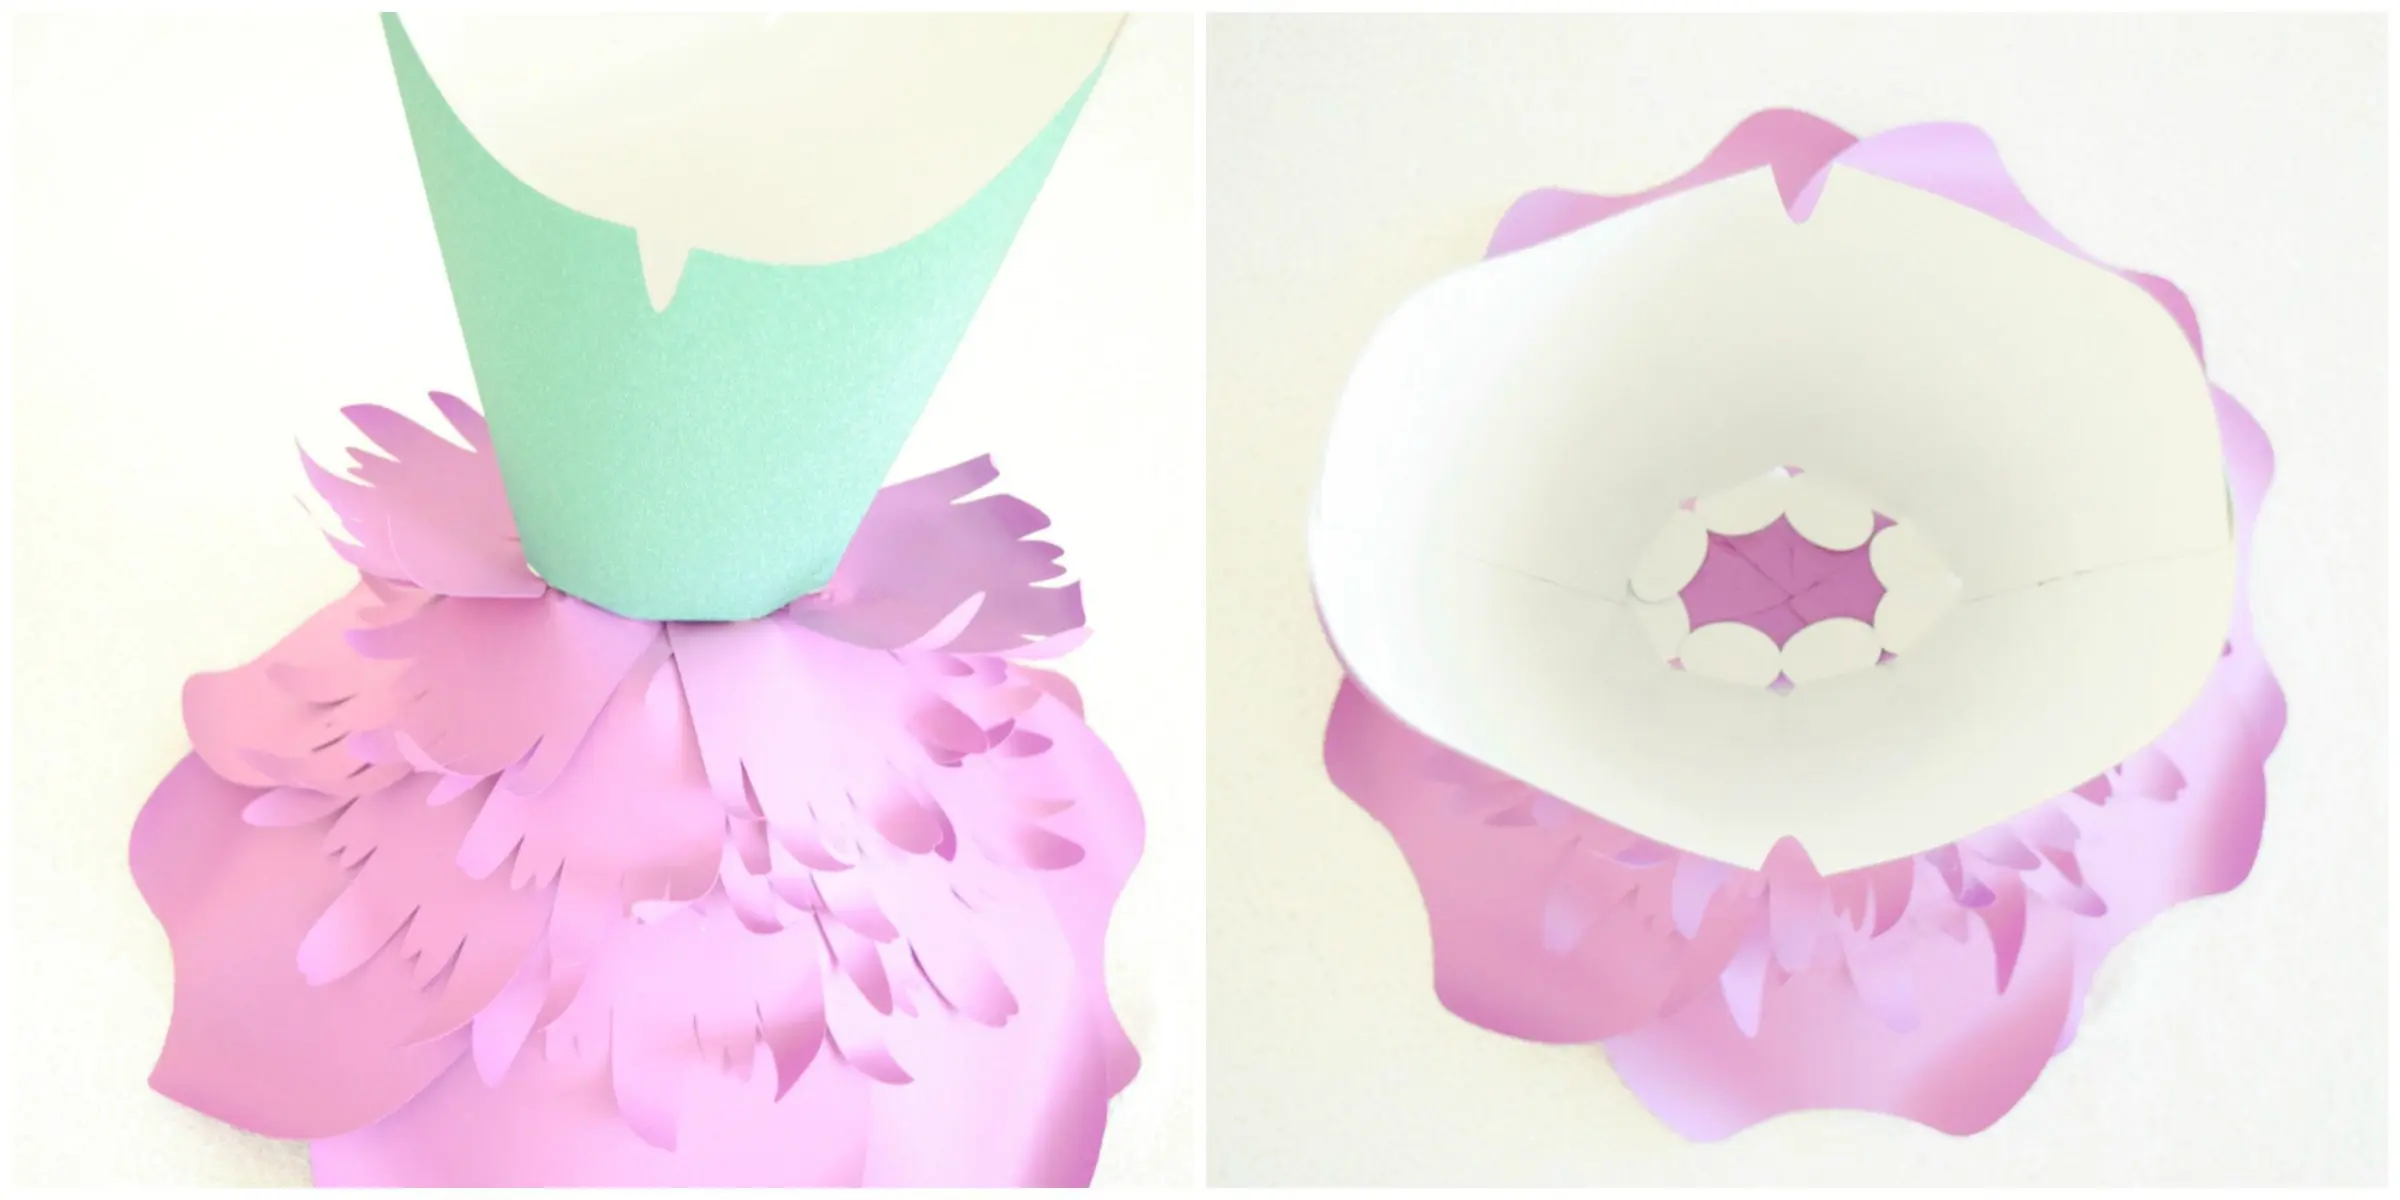
Your dress template will have small circle tabs at the bottom which you will fold inwards; add glue to these and attach them to the top of the dress’ skirt.
Stack the whole thing on top of the XL Lacey petals (shown in the very last photos below).
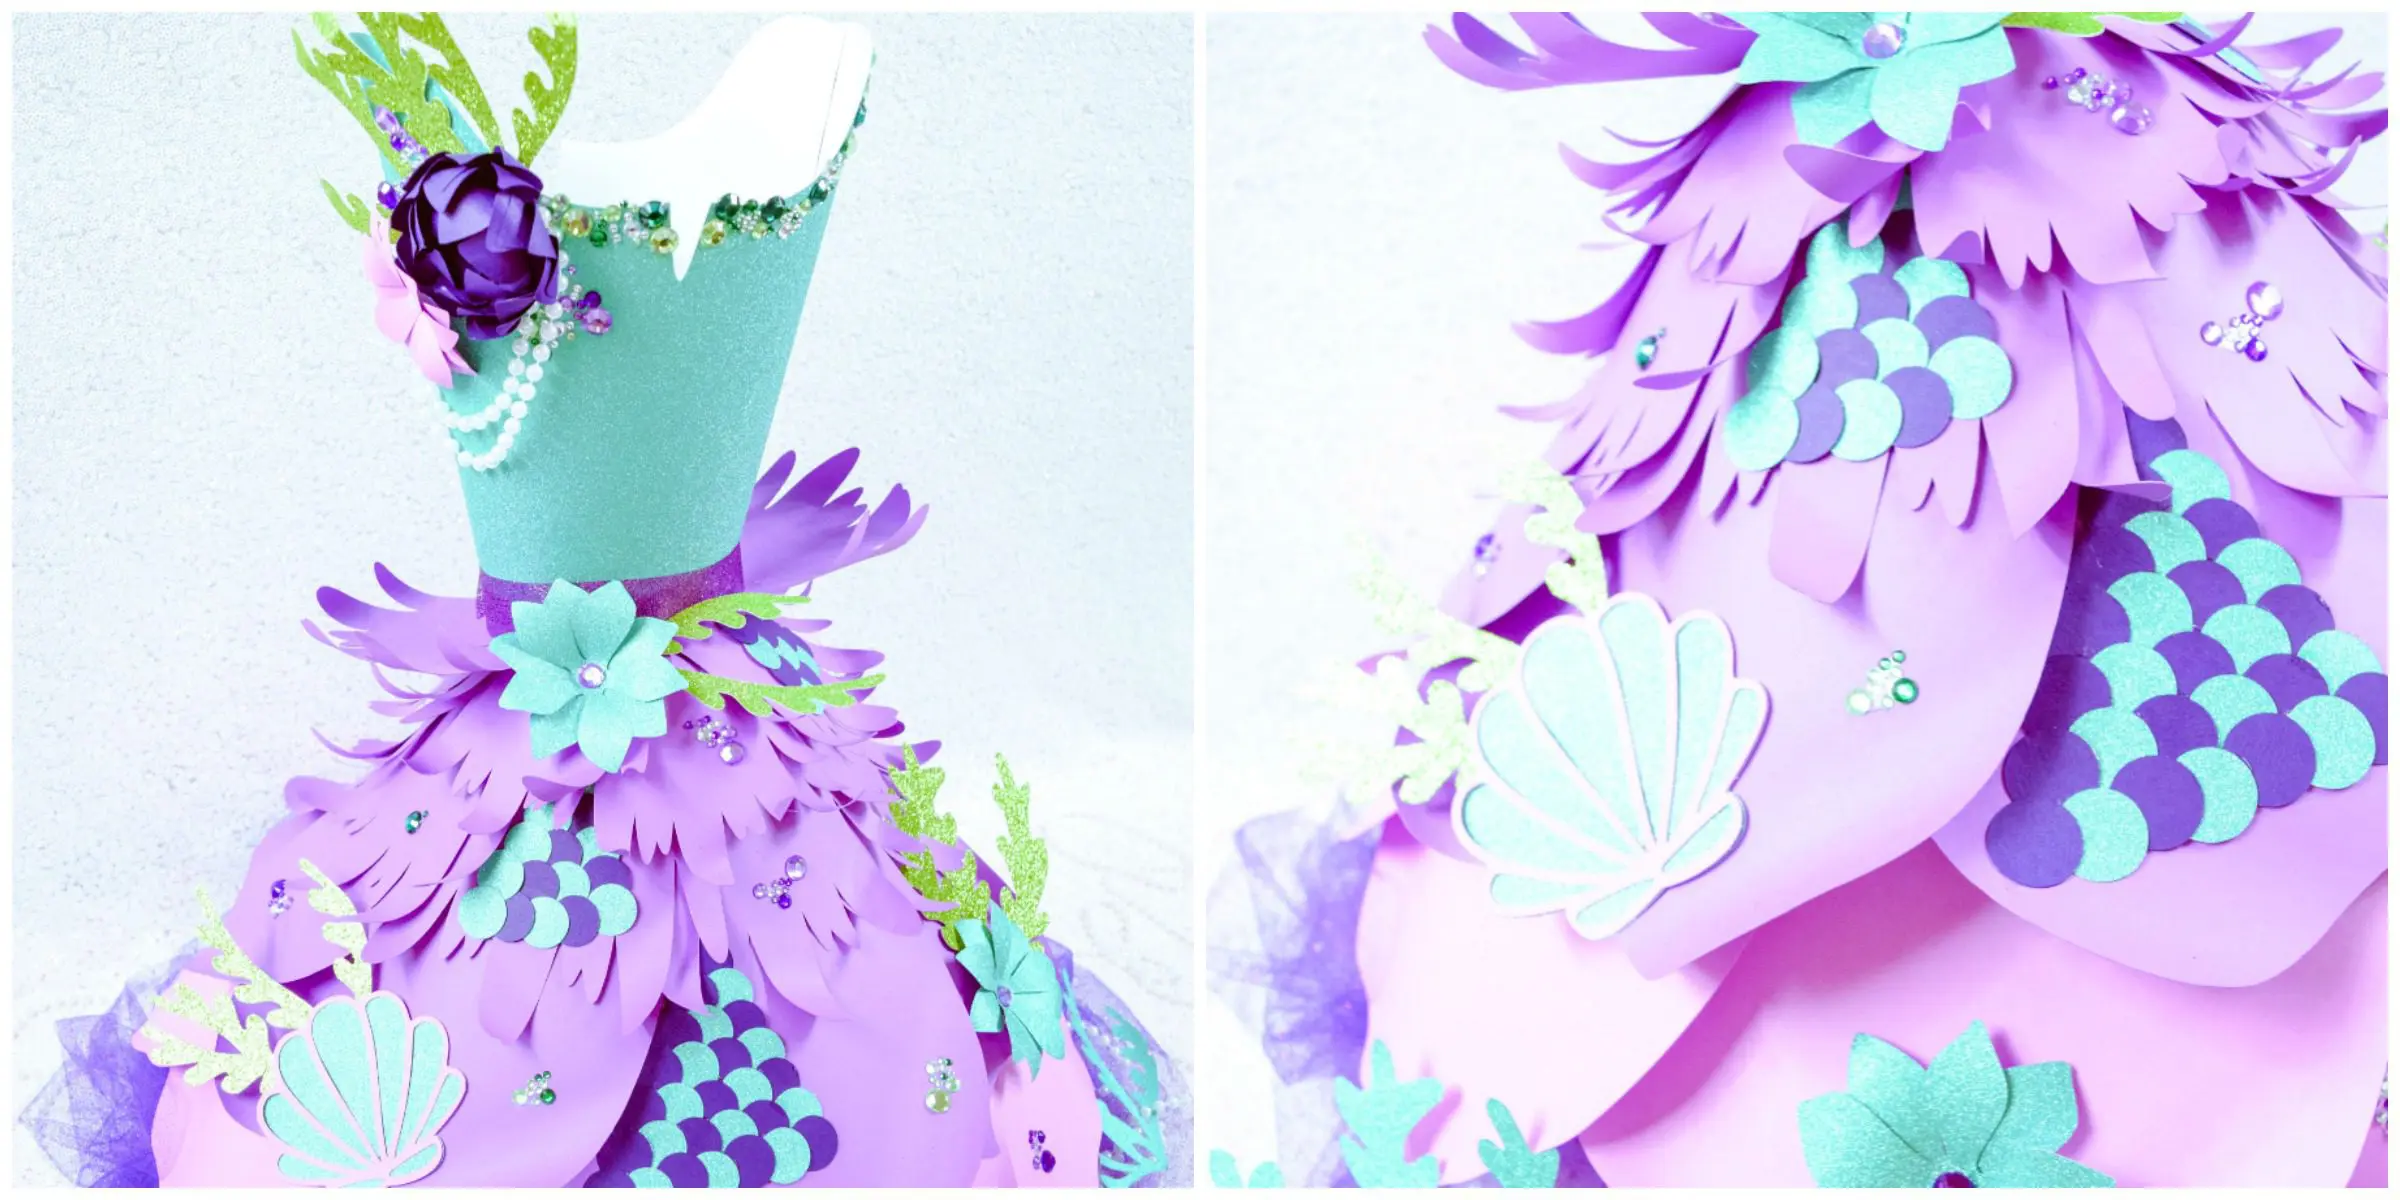
How to Decorate the Mermaid Paper Dress
The final step is to decorate! There is a lot of creative freedom with these dresses, so there really is no right or wrong way to do it.
For this mermaid paper gown, I use small circles arranged to look like mermaid scales, small mum flowers, my seaweed templates, shell template, ribbon, green and purple rhinestones.

Out of the ones I have made so far, this mermaid one is my favorite! You can see in these photos the Lacey tier has been stacked with the others. Check out the video tutorials below, where I make a wedding-style paper dress, plus photos of our very popular fairy paper dress!
Check out our free Under the Sea cake topper tutorial for a complete mermaid party paradise!
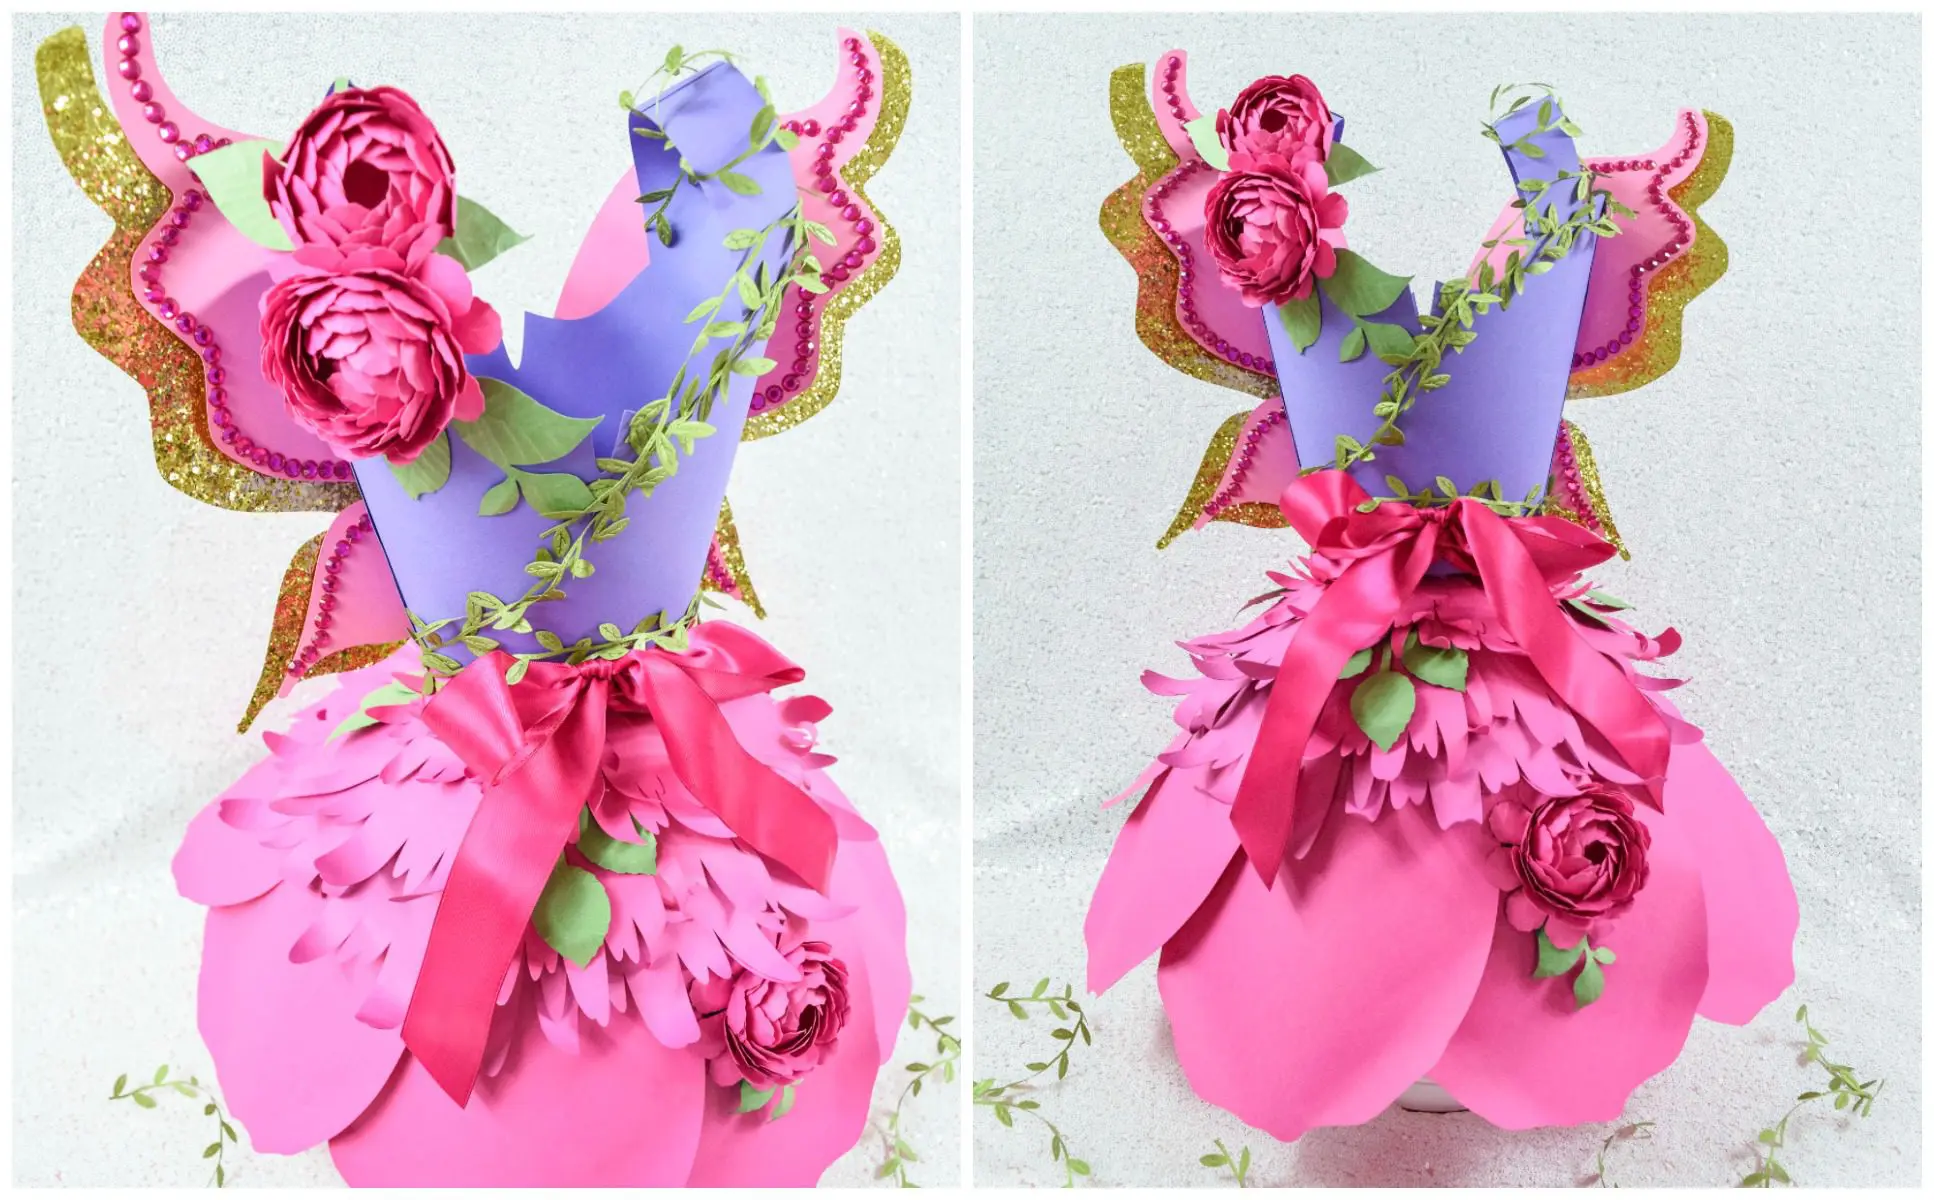
This fairy gown was made using my Lacey style template for the extra-large bottom tier and Whimsy for the second tier plus a few additional small Whimsy petals for the top of the skirt.
How to Make a Paper Dress: Video Tutorials
Paper Dresses Part 1
Paper Dresses Part 2

Mermaid Paper Dress
These adorable paper dresses are perfect for party decor! Create fun, whimsical, colorful themed paper dresses for birthday parties, baby and wedding showers, and so much more!
Materials
- Dress templates
- Giant flower templates for the dress’ skirt
- Scissors
- Cutting machine (Cricut Maker or Cricut Explore Air 2 Machine)
- Embellishments that fit your theme (sticker rhinestones, ribbon, tulle, small paper flowers, etc.)
- Glue Gun
- 65-pound cardstock
Instructions
How To Make The Paper Dress Bodice:
- Cut out two dress bodice templates either by hand using scissors, or with a cutting machine.
- Glue the two dress bodices together, one side over the other and then the opposite side.
How To Make The Paper Dress Skirt:
- Cut out the following paper flower templates for the paper dress skirt: 8 XL Lacey flower petals (first tier of the skirt), 7 Large Bella flower petals (second tier of the skirt), 7 Medium Whimsy style flower petals (third tier of the skirt)
- Cut a slit at the bottom of each flower petal and overlap slightly. Curl the edges back. Glue your petals together in a circle. Do this for all tiers of the skirt.
- Once you have your 3 tiers complete (or however many you choose to use), stack your top 2 tiers together. Add dots of glue to the underside to secure the tiers together.
- Next, cut a small square or use a small circle punch to glue over the open hole.
- Your dress template will have small circle tabs at the bottom which you will fold inwards; add glue to these and attach them to the top of the dress’ skirt.
- Stack the whole thing on top of the XL Lacey petals.
How To Decorate The Mermaid Paper Dress
- You have total creative freedom to decorate your own paper dress in whatever way fits your theme.
- For a mermaid-themed paper dress, I recommend using: small circles of glittery paper arranged to look like mermaid scales, small paper flowers of various shapes and sizes, ribbon, rhinestones, etc.
Discover More
Share what you’ve been up to by using #DIYwithAbbi. I would love to see your creativity in the works so flaunt your flower power magic! You are a huge source of my inspiration!
My mission is to inspire you to nurture the creative magic inside your soul – bringing you fun, easy-to-learn DIY projects, and quality template designs. I share a variety of projects but specifically love paper crafting and paper flowers. Interested in more flower tutorials?! I’ve created dozens of signature designs for you to enjoy – starting with my bestseller, The Art of Giant Paper Flowers, the Giant Flower Library, and my shop of endless paper designs and flower templates.