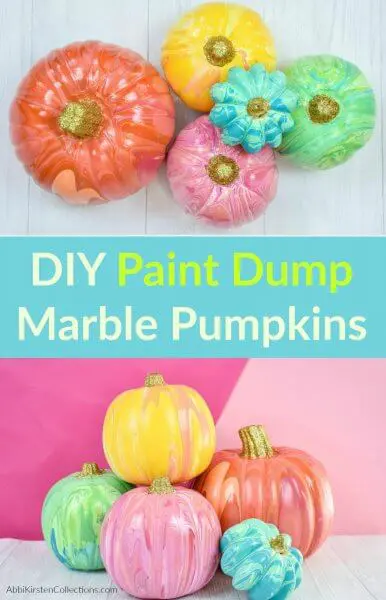
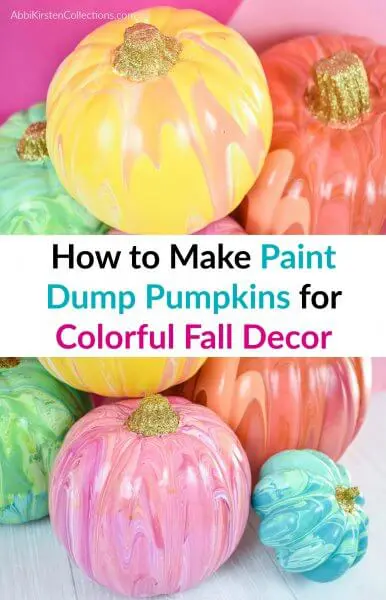
DIY Paint Dump Pumpkins: Easy Painted Pumpkins for Fall and Halloween
This post may contain affiliate links that won’t change your price but will share some commission.
A Fun Painted Pumpkin Project For Any Age!
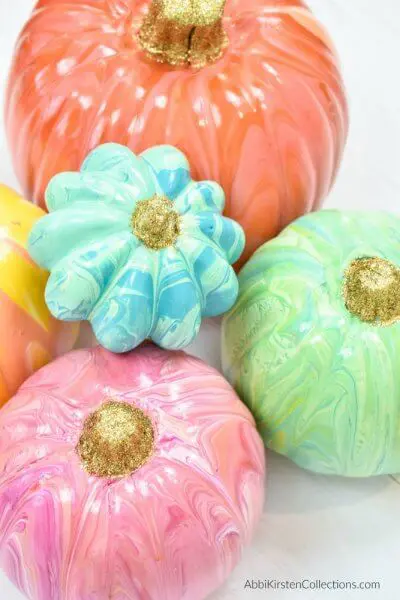
If you’re looking for pumpkin painting ideas that are colorful, creative, and completely unique, this quick DIY project is for you! These painted pumpkins use a fun “paint dump” method that creates an elegant marbled look. And best of all, no carving, no complicated techniques—just layers of acrylic paint, glittery stems, and a little bit of messy fun. Whether you’re decorating for fall, Halloween, or wanting to create a colorful Thanksgiving tablescape, these easy painted pumpkins will brighten up your décor. Not to mention, painting pumpkins is a great fall craft to do with the kids.
How to Paint Pumpkins With Unique Colorful Designs
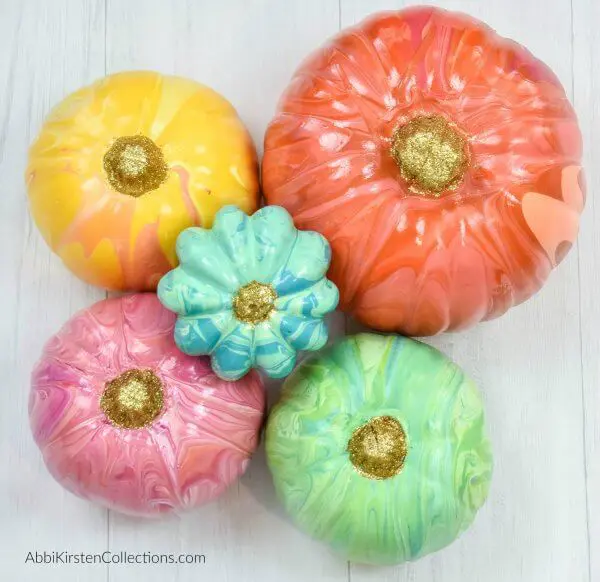
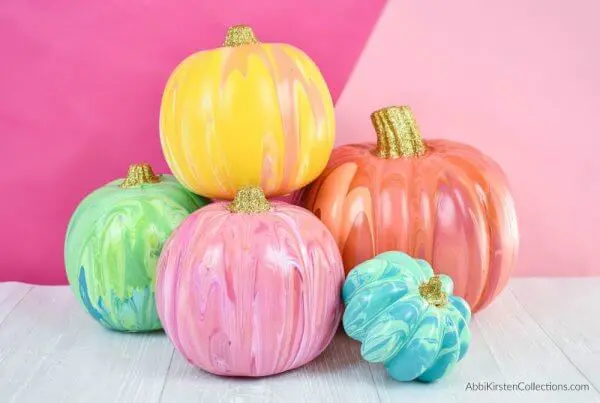
Paint dump projects are definitely not a new idea, but to my knowledge, I haven’t seen anyone else try this method of painting pumpkins yet. Turns out it worked amazingly well! As a unique change, I chose to break away from the classic colors of autumn and instead selected a variety of pastel sorbet colors. As the paint began to spread and mix on its own, I love how it created beautiful marbled patterns with an abstract and blended finish.
More No-carve Pumpkin Ideas
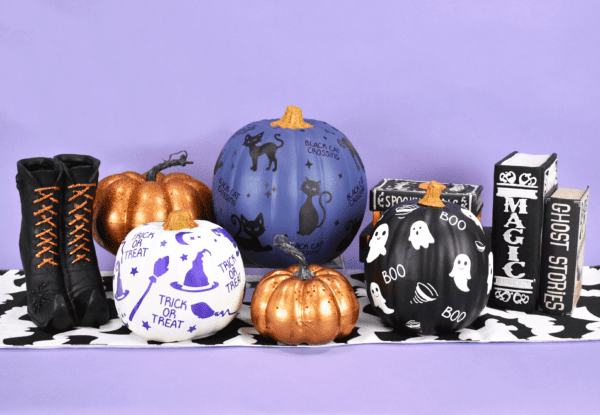
Looking for more no-carve pumpkin ideas for your fall home decor or autumn event? Check out these cute paper pumpkins, easy no-sew DIY velvet pumpkins, DIY metallic leaf pumpkins, and pumpkins using Cricut vinyl.
How to Make Marble Painted Pumpkins with Paint Dumping
Creating all these painted pumpkins only took me a day and a half to do and they look like a million bucks – and one full day was attributed to the paint drying.
Below I’m sharing my full list of supplies as well as a detailed video and accompanying steps for creating these beautiful painted pumpkins.
Let’s visit the supply list first, then go through some important tips to make sure your marble painted pumpkins are truly a success!
Supplies for Making Painted Pumpkins
Gather your crafting essentials before starting:
- Acrylic paint – and lots of it! Choose any 3-6 colors you like, preferably varying shades within the same color range.
- Faux pumpkins (find them at a crafts store or online)
- Paint brush
- Cake spatula
- Fine gold glitter (for the stems)
- Gloves
- Mod podge
- Clear gloss spray (optional)
- Plastic cups (one per pumpkin dump. I use the Solo cup size)
- 3 paper plates per pumpkin
Key Tips Before Starting Your Paint Dump Pumpkins
Here are some valuable good-to-know tips you’ll want to be aware of before starting this project.
- Definitely wear gloves! You probably will have to change them several times throughout the process.
- DO NOT underestimate the paint. It’s far better to be overly generous with paint here than under-compensating. For a medium pumpkin, I filled my red solo cup almost 2/3 of the way up. For a larger pumpkin fill the cup up to the top.
- Don’t stir the paint! The paint will naturally mix, yes, but purposefully stirring the paint takes away the magic of the marbling effect.
- Choose between 3-6 colors to paint dump your pumpkins. I do not recommend more than 6 because it may get too mixed and messy.
- Try to choose complementary shades of colors. Notice that my pumpkins all have different shades but of the same colors. As an example, I tried mixing pink and teal together. However, the result was a brown undertone, so I recommend staying on one end of the color spectrum.
- Pumpkins need AT LEAST 24 hours to dry. The amount of paint going on is excessive, and it needs plenty of time to dry before continuing the final steps.
- Once your pumpkin has had 12-24 hours to dry, spray the whole pumpkin with clear acrylic sealer to keep your pumpkin pretty and give it a nice luster finish.
- When using paper plates, the pumpkins may stick a bit once dried. If any of the plate comes up on the bottom of your pumpkin, you can just add a quick dab of paint to cover it. Otherwise, in hindsight, I think letting the pumpkins dry on a silicone mat would be best. Your pumpkin should come off very easily once dried.
If you’re ready to see how it’s done, click the video below and I’ll walk you through everything. You can also follow the steps below the video. I’d love to see how yours turn out! Also, please come over to my Facebook group and post your project.
Video Tutorial: Easy Painted Pumpkins for Halloween and Fall Decor
Steps for Making Painted Pumpkins
Here’s the complete process for creating this pumpkin craft, from prepping, applying the paint, covering the stems, and adding a glossy finish.

Prep Your Pumpkin for Painting
- Cover your workspace with a towel or craft mat.
- Put on gloves to protect your hands. (Trust me, it gets messy!)
- Wrap painter’s tape around the pumpkin stem (optional).
- Shake each paint color well before pouring.
- Layer 3–6 paint colors into your cup. Don’t stir! This keeps the marble effect. For a medium pumpkin, fill the cup just over halfway.
Dump (Pour) the Paint Over the Pumpkin
- Place a paper plate under your cup.
- Set the pumpkin upside down on top of the cup.
- In one swift motion, flip both the pumpkin and cup over, setting them on the plate.
- Slowly lift the cup and let the paint flow out naturally in waves.
- Use a spatula to scrape extra paint from the cup onto the pumpkin.
- Holding by the stem, tilt and spin the pumpkin slightly to help the paint drip evenly.
Cover Pumpkin Fully and Let Dry
- Check for bare spots at the base of the pumpkin.
- Scoop extra paint from the plate with a spatula and drizzle it over uncovered areas.
- Tilt and rotate the pumpkin so gravity helps spread the paint.
- Move the pumpkin to a second clean plate so it won’t sit in paint.
- Once the marbling looks good, transfer to a third clean plate for drying.
- Allow to dry for at least 24 hours before decorating further.
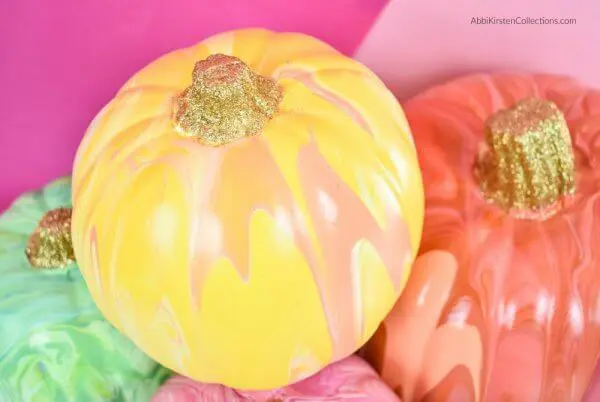
Add Glitter to Pumpkin Stems
- Remove painter’s tape (if used).
- Brush Mod Podge onto the stem generously.
- Sprinkle gold glitter over the stem using a spoon.
- Rotate the pumpkin to coat all sides evenly.
- Shake off excess glitter.
- Wipe away stray glitter with a damp cloth or baby wipe.
Spray Glossy Finish for Painted Pumpkins (Optional).
- Take your dry pumpkin to a well-ventilated area.
- Spray a clear gloss spray paint over the pumpkin in short bursts.
- Rotate as you spray to cover the top, sides, and bottom.
- Let dry for at least 30 minutes.
- The gloss adds shine and also seals in the glitter evenly at all sides.
Enjoy Your DIY Painted Pumpkins!
These painted pumpkins are such a fun, no-carve option for fall decorating. Each one turns out completely unique thanks to the marbling technique and your choice of colors and pumpkin sizes. Plus, kids and adults alike will love the messy, creative process. Whether you’re searching for pumpkin painting ideas for beginners or a unique fall craft project, this DIY method will give you one-of-a-kind pumpkins you’ll be proud to display.
Join Thousands of Crafty Besties
Love freebies?! Me too! I have a gorgeous freebie vault you will love playing in. Create a free account by signing up via the form below to access hundreds of crafts!
About Abbi Kirsten
My mission is to inspire you to nurture the creative magic inside your soul – bringing you fun, easy-to-learn DIY projects with quality template designs. I share a variety of projects and holiday decor – and you will definitely notice my love for paper crafting and paper flowers – all tied up in a sweep of cheerful color.
Interested in paper flowers?! I’ve created dozens of signature designs for you to enjoy – starting with my best seller, The Art of Giant Paper Flowers, the Giant Flower Library and my shop of endless paper designs and flower templates.
Want to join my Facebook community to share your crafts and learn from the best? Click here to request access to my group, Crafters and Cricut Lovers.
More Crafty Posts to Love


do you think you can set the pumpkin to dry on foil or waxed paper? Maybe would not stick like a paper plate might?
Yes, absolutely! Or a silicone mat!
My very first (1st) paint dump project. So much fun and so impressed with myself:
/Users/nancy/Desktop/IMG_4646.jpg