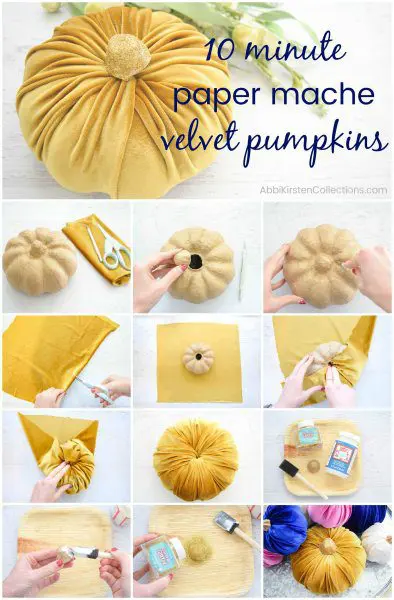
No-Sew Fabric Pumpkins Tutorial
This post may contain affiliate links that won’t change your price but will share some commission.
No-Sew Fabric Pumpkins Tutorial
I personally feel that Fall can be one of the most “crafty” seasons of the whole year. So if you are looking for a project to get crafty AND decorate your home this week, I have the perfect one for you – No-Sew Fabric Pumpkins!
I have been wanting to make these for a long time and searched other tutorials online but couldn’t find one with the exact simplistic approach I wanted. Making a velvet pumpkin, for me, meant that I wouldn’t need to pick up a needle at all, and if it weren’t for the pumpkin stem, you wouldn’t even need glue for this tutorial! In other words, these are the easiest fabric pumpkins ever and they look like you picked them up at a Pottery Barn (but for half the cost!).
Supplies for No-Sew Fabric Pumpkins
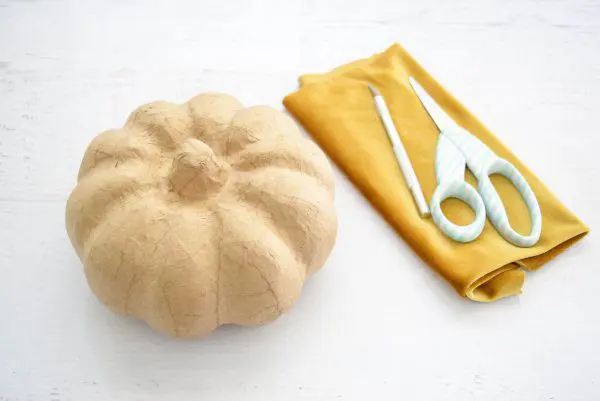
- Paper mache pumpkins. You can find these at craft stores year-round and definitely in the fall months.
- Stretch velvet fabric
- Scissors
- Exacto knife
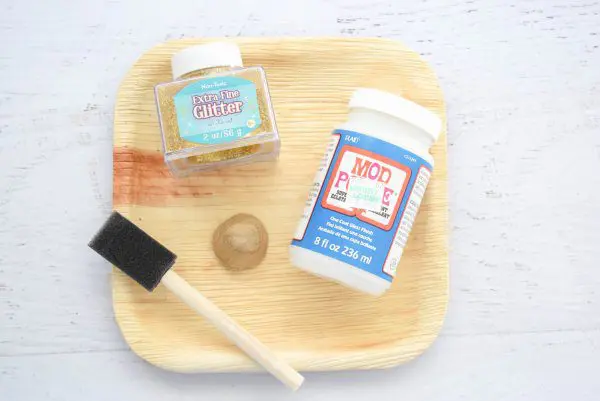
- Mod Podge
- Extra fine glitter
- A paper plate to catch the glitter
- Glue gun
No-Sew Fabric Pumpkins: Video Tutorial
No-Sew Fabric Pumpkins: Step-By-Step Tutorial
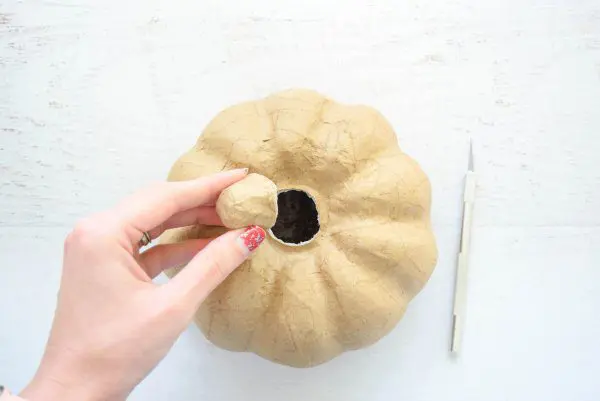
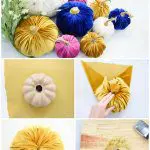
Step 1: Prep Your Craft Pumpkin
To start making your DIY velvet pumpkins, you will need to prep the pumpkin for adding the fabric. Begin cutting the stem away from the pumpkin.
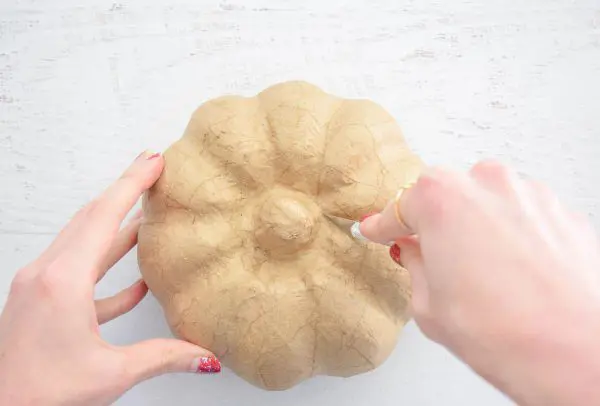
When removing the stem, make sure to try cutting as close to the base as possible for a clean look. Also, be sure to hold the stem so it doesn’t fall into the hollow pumpkin and get stuck. True story, guys! 🙂
Unless you decide to buy dried pumpkin stems, make sure to save the paper mache stem. We are going to use it!
Step 2: Cut Your Velvet Fabric
Next, you will cut out a large square of the velvet stretch fabric to cover the pumpkin. The amount of fabric you will need will vary based on your pumpkin’s size. Before cutting, place the pumpkin onto your fabric and check to make sure you are being generous enough to cover the pumpkin. Hint: go for more, not less.
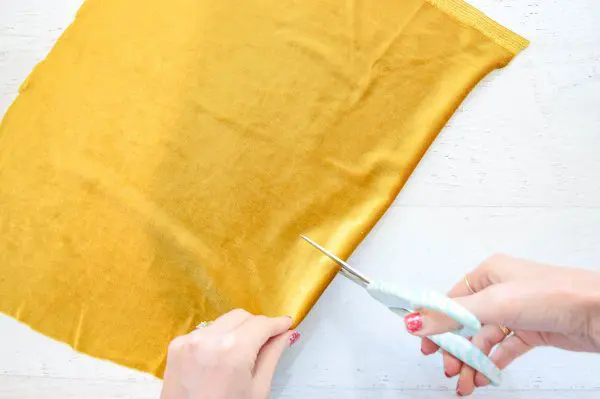
Once you have cut out your square of fabric, lay it out and place the pumpkin back into the center.
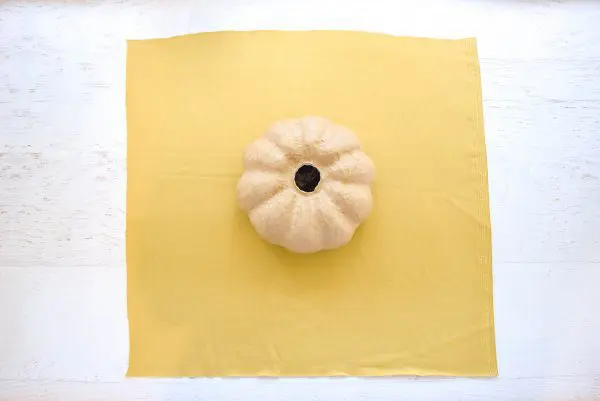
Step 3: Cover The Pumpkin In Velvet
Start with one corner of the fabric and begin stuffing the velvet into the paper mache pumpkin.

Continue this until all the fabric has been stuffed into the center. Your fabric should be tight enough that you are seeing the contour of your pumpkin coming through. I use the back end of my Exacto knife to pull it nice and tight into the center.

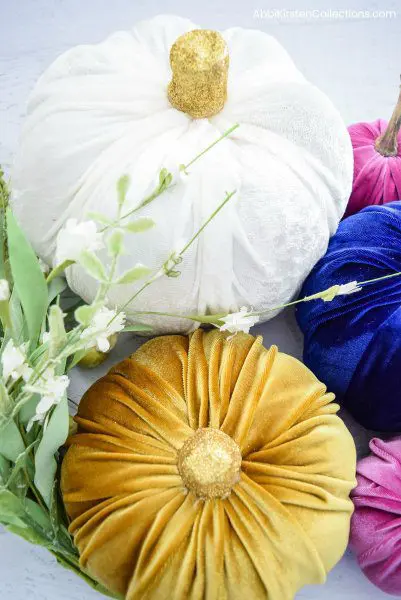
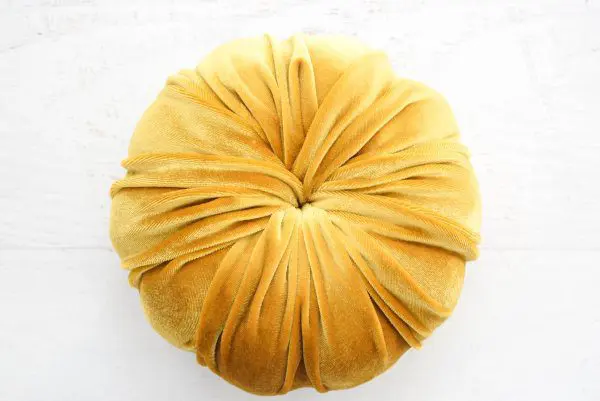
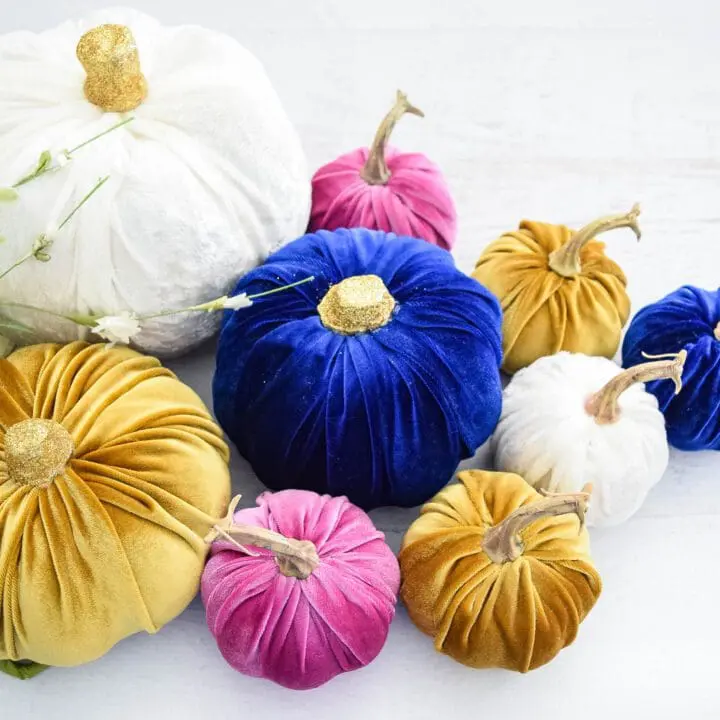
Your no-sew fabric pumpkin should resemble mine above. Keep reading to learn how I add my stem!
Step 4: Decorate The Pumpkin Stem
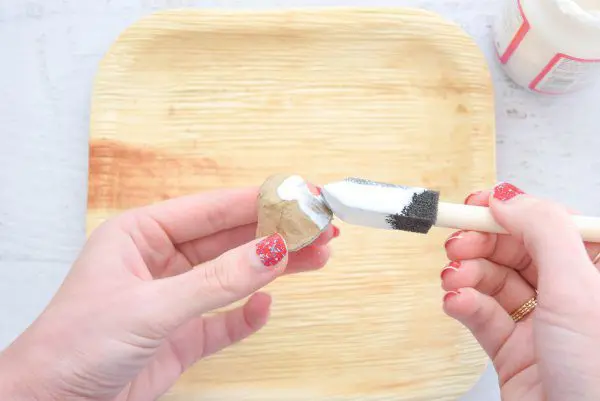
Using the stem you saved from step 1, paint a generous amount of mod podge on, covering it well.
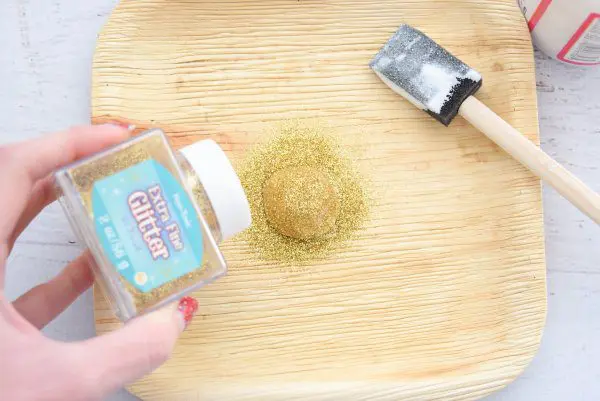
To finish the stem, you will sprinkle your glitter over the mod podge till covered. I recommend using extra fine glitter here because it really holds to the mod podge better than regular or chunky glitter.
Once you have let your stem dry for a few minutes, then glue it down with hot glue! See how I do it in my full Velvet Fabric Pumpkins Tutorial video tutorial below!

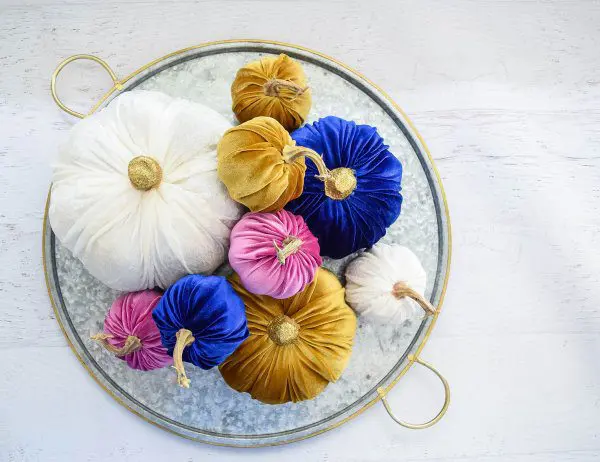
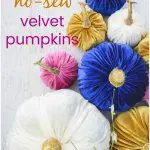
Don’t you just love how simple this was??! It took me an hour for all these pumpkins you see here and less than $40 in cost, plus I have enough material left over for more pumpkins and projects! If you want to add some stem variation, you can also buy those fall pick pumpkins you see in arrangements at your craft store or even the Dollar Store and pull off the stems to use on your smaller no-sew fabric pumpkins.
I decided to display mine on a large metal tray on my dining table. How would you use yours? Tell me below!
No-Sew Velvet Pumpkins
Learn how to make these adorable and EAST no-sew velvet pumpkins in just a few minutes! These velvet pumpkins are perfect for chic and colorful DIY fall decor.
Materials
- Paper mache pumpkins
- Stretch velvet fabric
- Scissors
- Exacto knife
- Mod Podge
- Extra fine glitter
- A paper plate to catch the glitter
- Glue gun
Instructions
- Prep Your Craft Pumpkin: use an exacto knife to carefully cut around the edge of the pumpkin stem, then remove the stem.
- Cut Your Velvet Fabric: You want a square large enough to cover the whole pumpkin. HINT: go for more, not less!
- Cover The Pumpkin In Velvet: start at one end and fold the velvet fabric up around the pumpkin, tucking the ends into the top hole where the stem was.
- Decorate The Pumpkin Stem: First, cover the paper mache stem in mod podge, then generously sprinkle gold craft glitter onto the stem. Let dry, then reattach to the pumpkin for a completed no-sew velvet pumpkin!
About Abbi Kirsten
Welcome to my colorful corner of the internet, where we play with vibrant crafts and unlock your creative magic! Hang out with me and get lost in a fun array of projects, tutorials, and products, from stunning papercraft ideas to flower templates, Cricut help for beginners, and endless crafter’s hacks.
Join A-Star Crafters and participate in monthly Craft-Alongs in our community Facebook group!

More Fall Inspiration
Day of the Dead Sugar Skull Craft
Pumpkin Spice Season Printable


These are adorable DIY project!
Where do you buy your paper pumpkins
Amazon or Joann’s craft store!
I love velvet pumpkins, but never splurged on buying one for myself. I am definitely going to make these! Tomorrow! I will probably place them on my mantle. Thank you so much for these directions!
My pleasure! 🙂
I used your “process” but I wanted to try to make them cheaper than buying paper mache pumpkins. I bought the cheapest pumpkins (Dollar Tree) and started. I took off the stem and then made the opening just a bit bigger. Then I followed your instructions. I “dry painted” the original plastic stems with brown matte acrylic paint and then “highlighted” them with a cream acrylic paint. They actually looked pretty good. When the stems were dry I hot glued them back on top. They are absolutely gorgeous. The only “problem” is that they are a bit messy. When you cut into that styrofoam you’ll have little pieces of styrofoam everywhere. Thanks for the idea!!
Do you ever have a problem with the fabric coming out of the middle since you don’t glue the fabric to the pumpkin?
I’ve never had that problem since the stem is glued on and keeps it tucked. 🙂