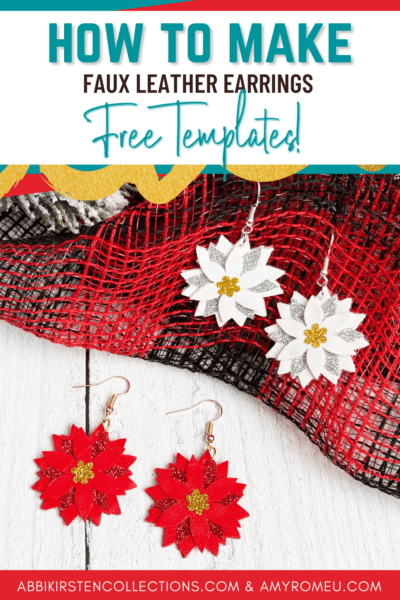
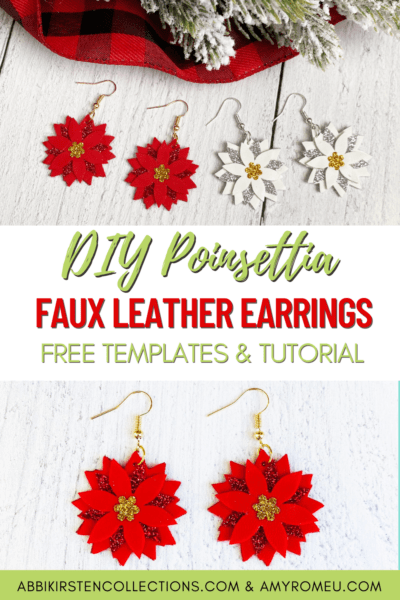
DIY Christmas Poinsettia Faux Leather Earrings
This post may contain affiliate links that won’t change your price but will share some commission.
I’m so proud and honored to feature a fellow craft blogger and friend today, Amy Romeu! Amy is super talented at faux leather crafts – especially earrings so I just knew I needed to introduce my community to her!
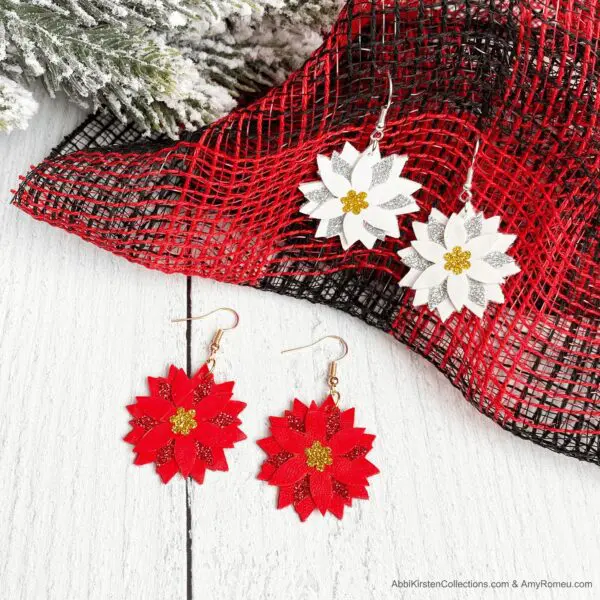
Enjoy this fabulous Christmas Poinsettia Faux Leather Earrings project below!
Hi, I’m Amy, and I’m the owner of the craft blog AmyRomeu.com. I’m so excited Abbi asked me to share a special holiday earring project with you! I love to make jewelry with my Cricut, and making faux leather earrings has become my specialty. I’ve designed so many holiday earrings this season – from snowmen and penguins to Santas and snowflakes! But when Abbi asked me to design a poinsettia flower earring just for her audience, I knew this design had to be extra special!
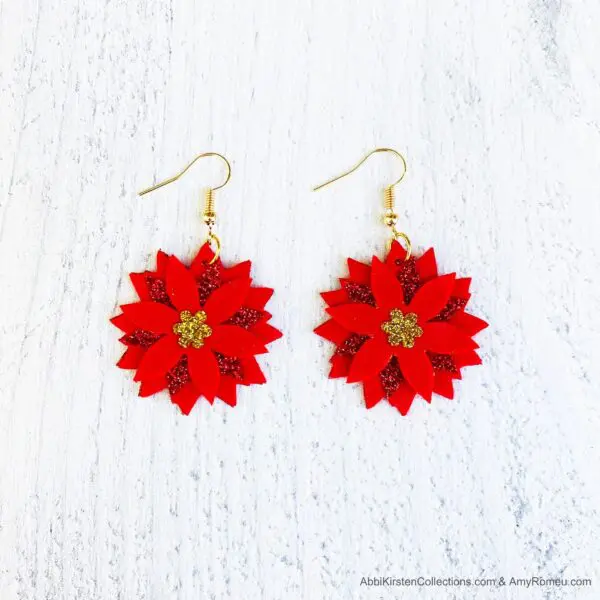
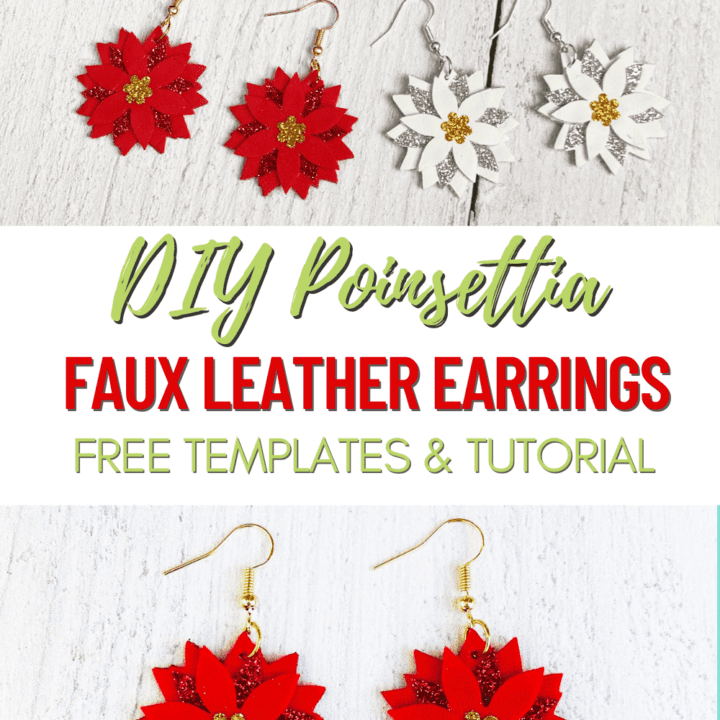
Layered Poinsettia Faux Leather Earrings
These layered poinsettia earrings are made using faux leather and heat transfer vinyl. Making earrings with your Cricut may sound complex, but these earrings are actually very simple to put together!
If you haven’t cut faux leather before with your Cricut, don’t worry, I’ll walk you through this project step by step. The great news is you can cut faux leather with a Cricut Maker, or a Cricut Explore Air 2, or even the Cricut Joy! I’ll share tips specific to the different machines along the way.
So if you’re ready to try making these poinsettia earrings for the holidays, let’s get started!
Materials Needed to Make Poinsettia Faux Leather Earrings
- A Cricut Maker, Cricut Explore Air 2 or a Cricut Joy
- Faux Leather in the color and texture of your choice – I used smooth Red faux leather from Amazon. Pebbled Red faux leather or pebbled Maroon faux leather from Amazon would work well, too. The white poinsettia earrings are made from smooth White faux leather from Amazon, but pebbled White faux leather will have great results also.
- Glitter HTV in your choice of colors. I used Siser Glitter HTV in Gold and Silver.
- Purple Strong Grip Cutting Mat
- Green Standard Grip Cutting Mat
- Blue Painter’s Tape
- Weeding Tool
- Cricut EasyPress Mini or Cricut EasyPress
- Cricut EasyPress Pad (I used the 8×10 inch size)
- Teflon Cover Sheet or Parchment Paper
- Red Sharpie marker (for Red earrings, optional)
- 1/16″ Hole Punch
- Art Glitter Glue with Ultra-Fine Precision Tip or other fabric glue
- Flat Nose Pliers
- Earring Hooks or Ball Ear Wire Hooks
- Jump Rings (6mm size or 5mm size)
- Design #162 from Amy’s Resource Library (join below!)
STEP 1 – Get the Free Poinsettia Earring Template
Download the free poinsettia earring template (Design #162) from Amy’s free resource library.
STEP 2 – Upload The Poinsettia Earring Template to Cricut Design Space
If you’re not sure how to upload an SVG cut file to Cricut Design Space, see Abbi’s helpful post.
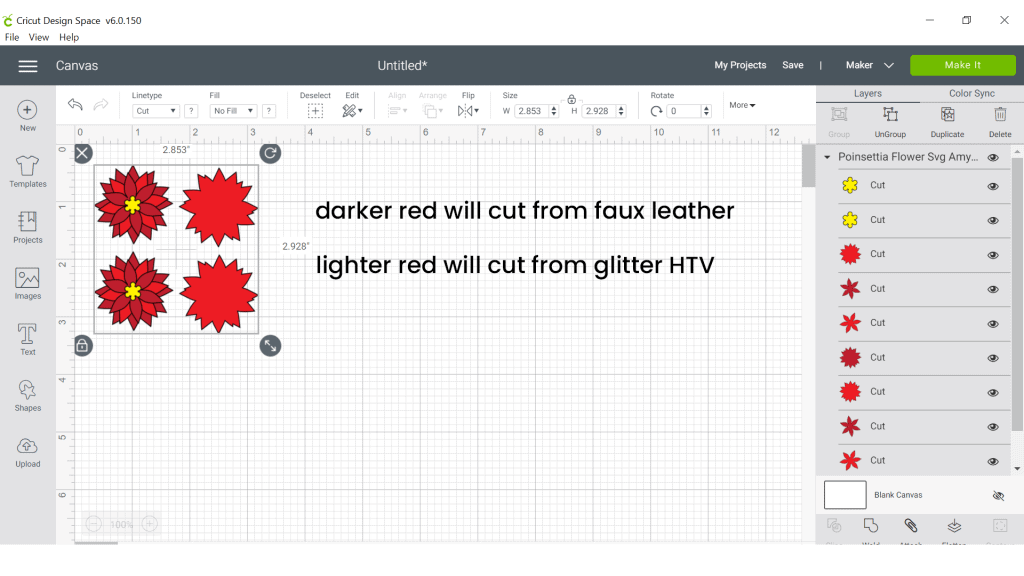
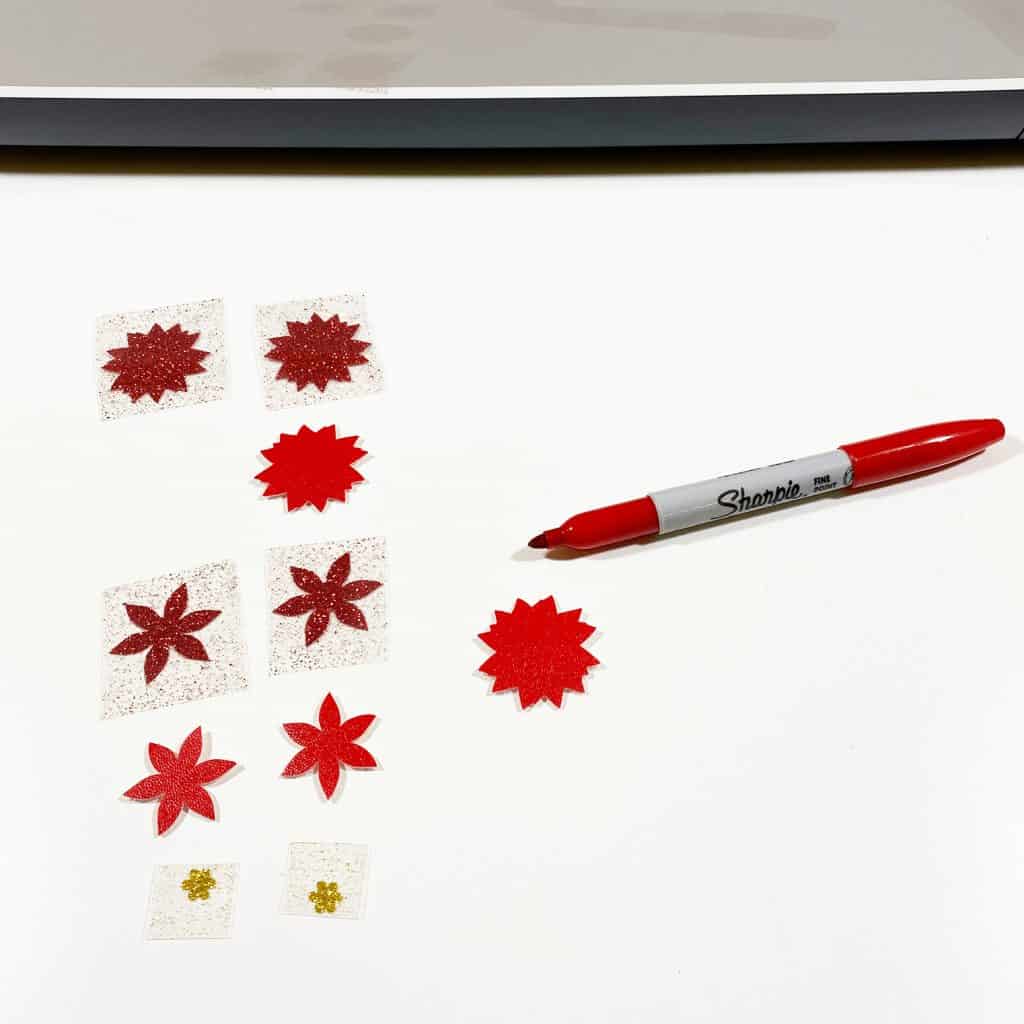
After you’ve uploaded the poinsettia earrings SVG file onto the canvas, you will see in the Layers panel that this design has three layers. One will cut from faux leather (the darker red layer) and the other two will cut from glitter heat transfer vinyl (red glitter and gold glitter).
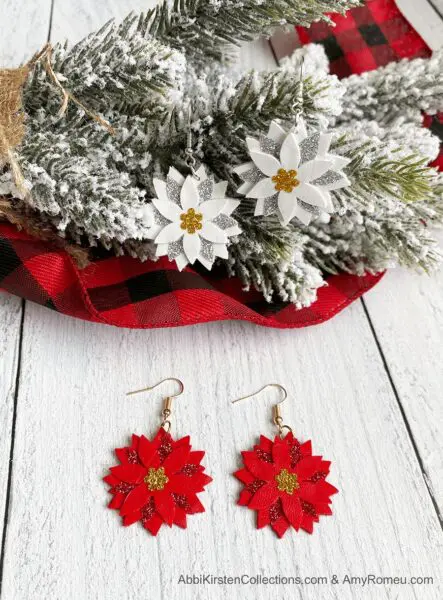
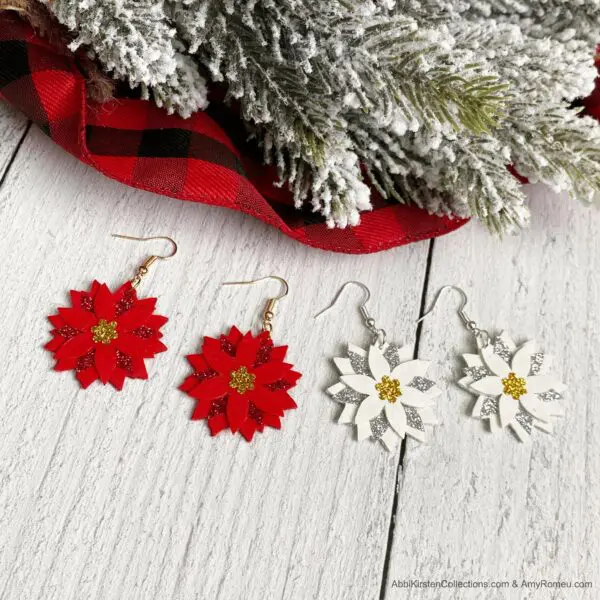
The layers are already colored to make red and gold earrings, but you can recolor the layers to make a white poinsettia, too. For the white and silver poinsettia earrings, I recolored the dark red layer to white and the light red layer to grey (to cut from silver glitter heat transfer vinyl).
These earrings are already sized appropriately for earrings, so all you need to do click on the green “Make It” button.
STEP 3 – Cut Earring Shapes
The mat preview screen will show all the cutting mats separated by color on the left hand side. Click on each mat and toggle the green MIRROR button to on for each one.
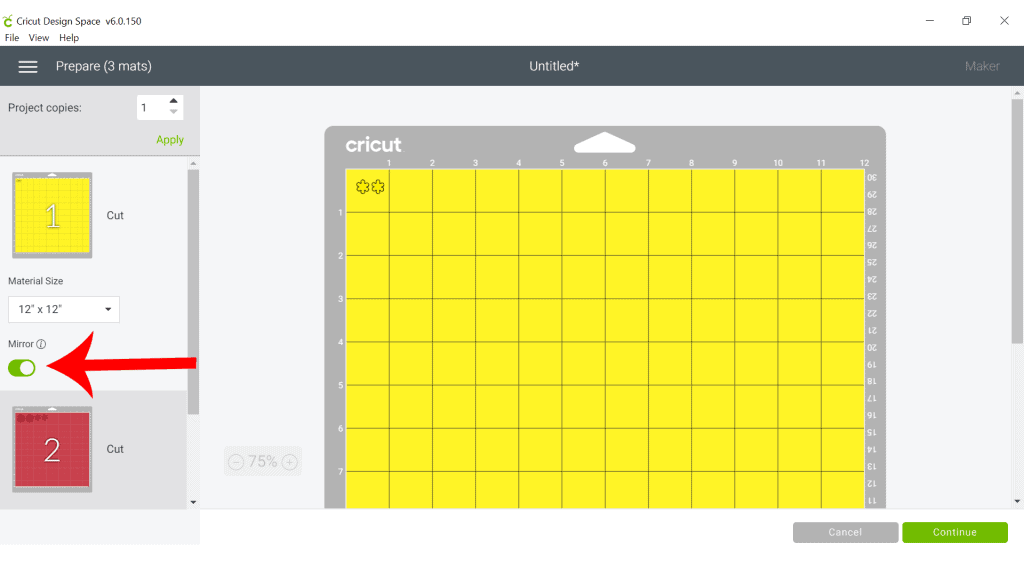
Once all the mats are mirrored, scroll down and click on the dark red mat. This is the faux leather mat and the mat we will cut first. Make a note of the size material the shapes will need to cut from (in this case, about 5.5 inches wide and about 2 inches high).

Click the “Continue” button.
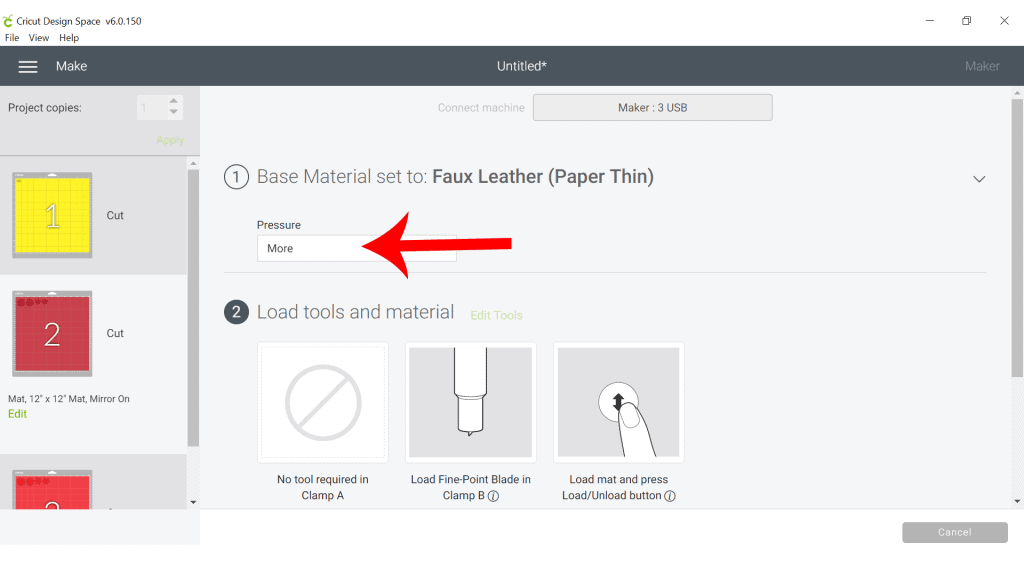
Note: Cricut Explore Air 2 users will need to turn the dial to “Custom” before choosing Faux Leather (Paper Thin). Cricut Joy users can also cut faux leather! I have a tutorial on How to Make Earrings with the Cricut Joy with more specific instructions for Joy users.
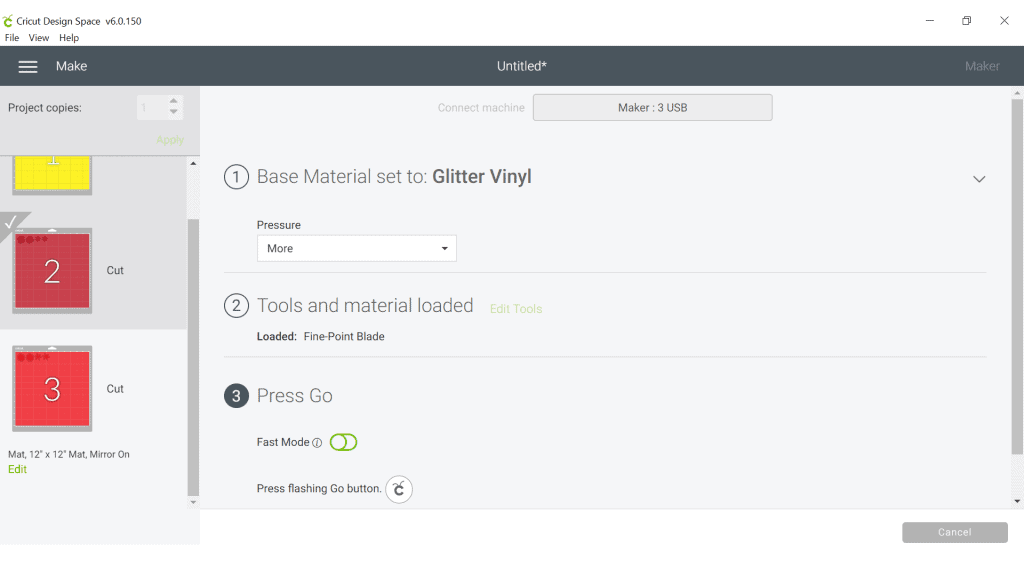
On the Material Selection screen, choose Faux Leather (Paper Thin) as the material setting. If you don’t have this material setting as a favorite, click “Browse All Materials” to search for it and select it. Then select “More” from the Pressure dropdown menu.
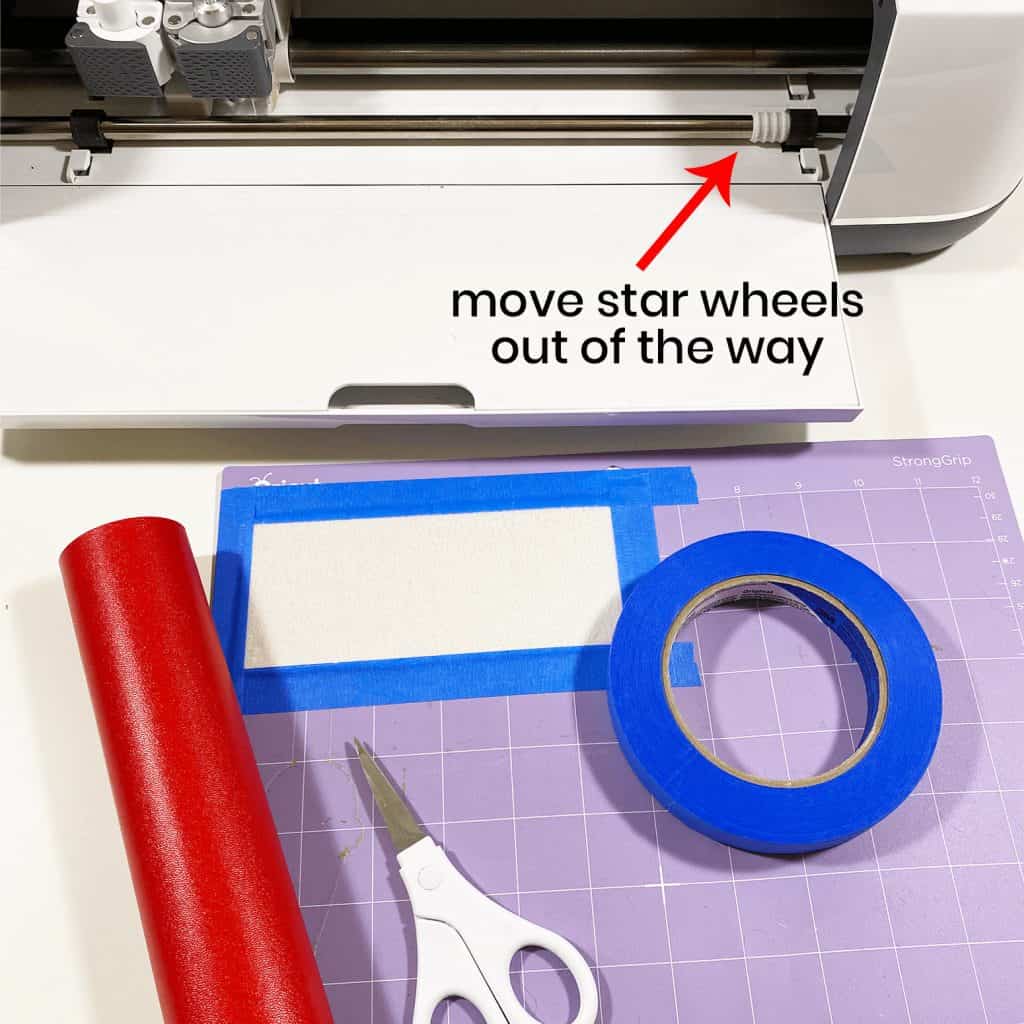
Cut a piece of faux leather just slightly bigger than the size you noted in the mat preview screen. Cutting the faux leather down to size helps you get a better cut because it stays in place better on the cutting mat.
Place the trimmed piece of red faux leather “pretty side” down on a purple mat and press it down all over with your fingers. Then tape the faux leather down on all sides with blue painter’s tape.
Make sure the Cricut’s star wheels are off to the side before starting the cut so they don’t leave indentations in the faux leather.
Load the mat into the Cricut by pressing the double arrows button. Press the C button to begin the cut. After the cut is complete and before unloading the mat, use a weeding tool to carefully lift the edge of the faux leather shape to see if the cut was complete. If not, press the C button again to repeat the cut.
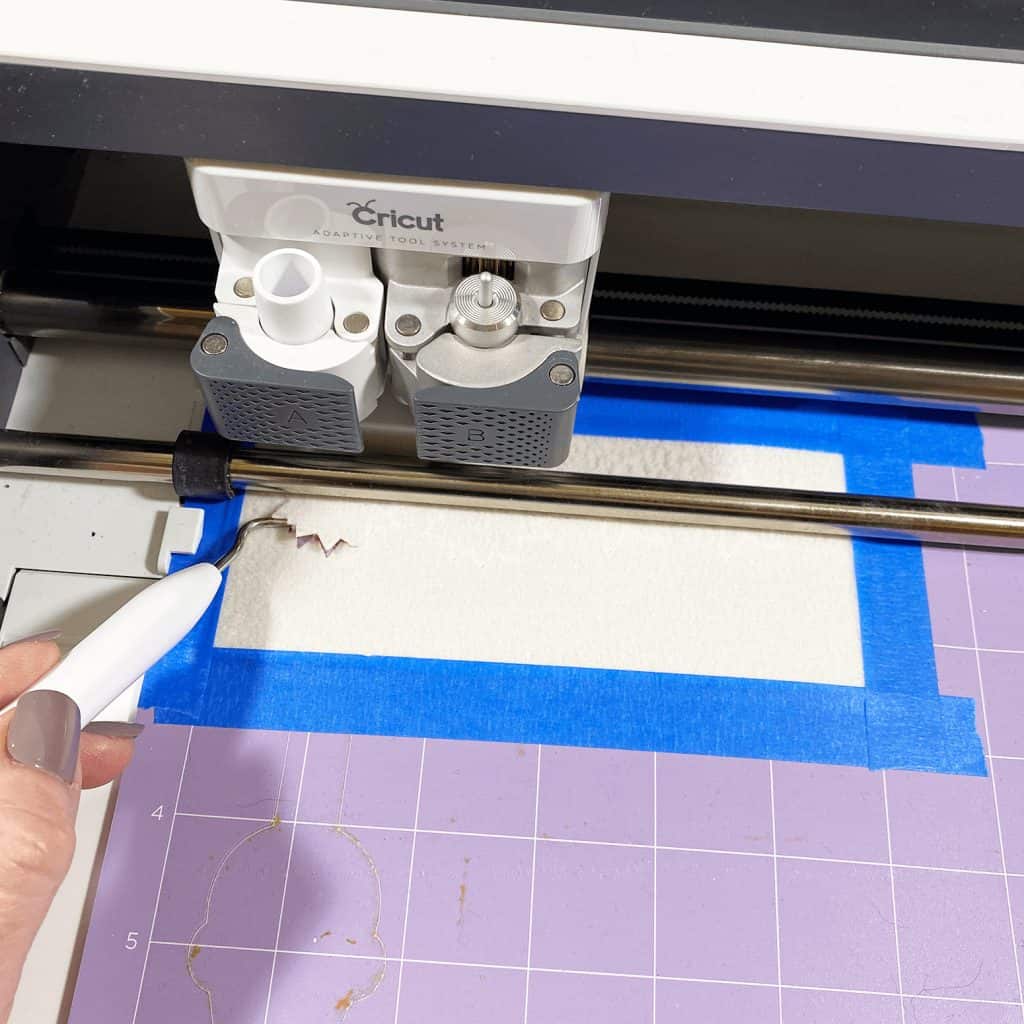
Unload the mat and remove the faux leather poinsettia earring shapes. You can trim any stray fuzz from the faux leather backing with small curved scissors.
Return to Cricut Design Space to cut the two glitter heat transfer vinyl mats.
I like to use the Glitter Vinyl setting with “More” pressure.
Place the glitter heat transfer vinyl shiny side down on a green standard grip cutting mat.

Load the first mat into the Cricut and press the C button to begin the cut. When the cut is complete, unload the mat again and remove the vinyl piece.
After the cut is complete, repeat with the second glitter heat transfer vinyl mat.
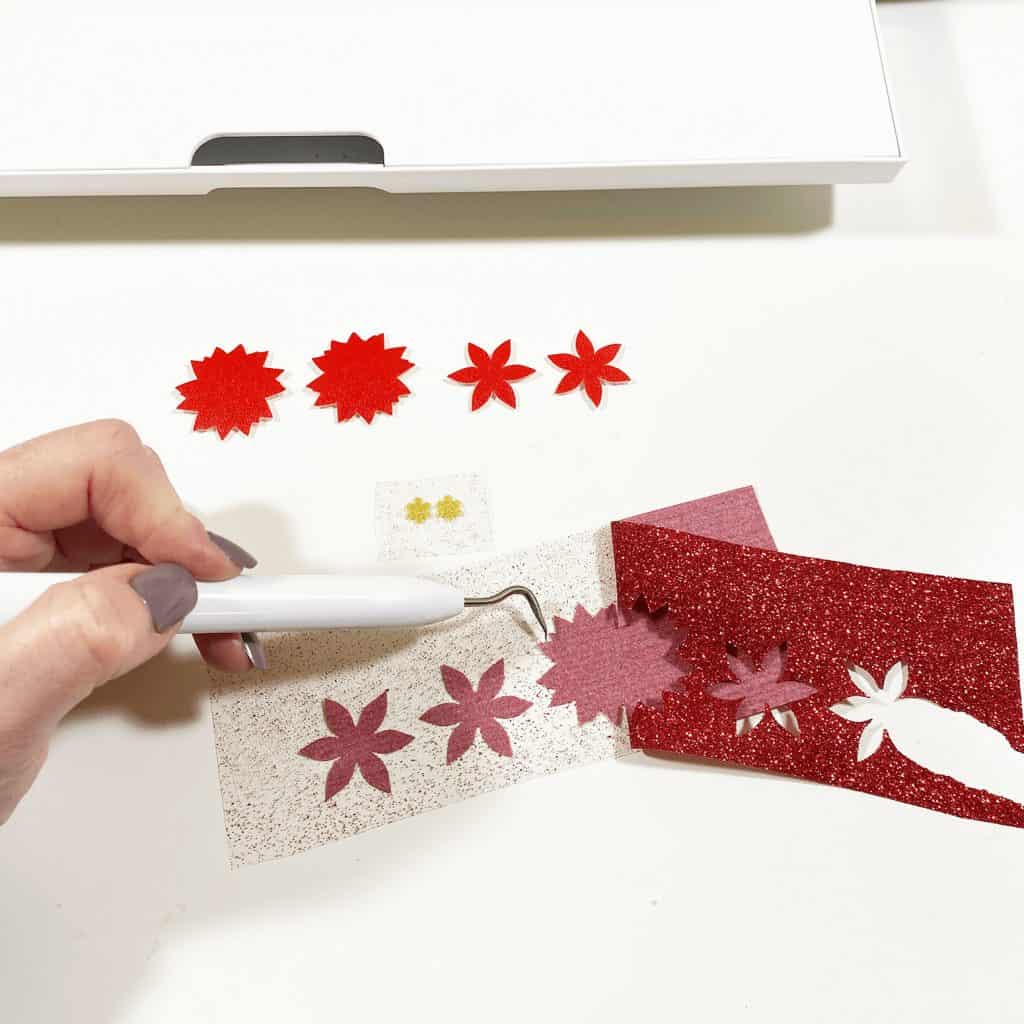
Weed away the excess heat transfer vinyl shapes and cut them all apart.
STEP 4 – Press The Earring Layers Together
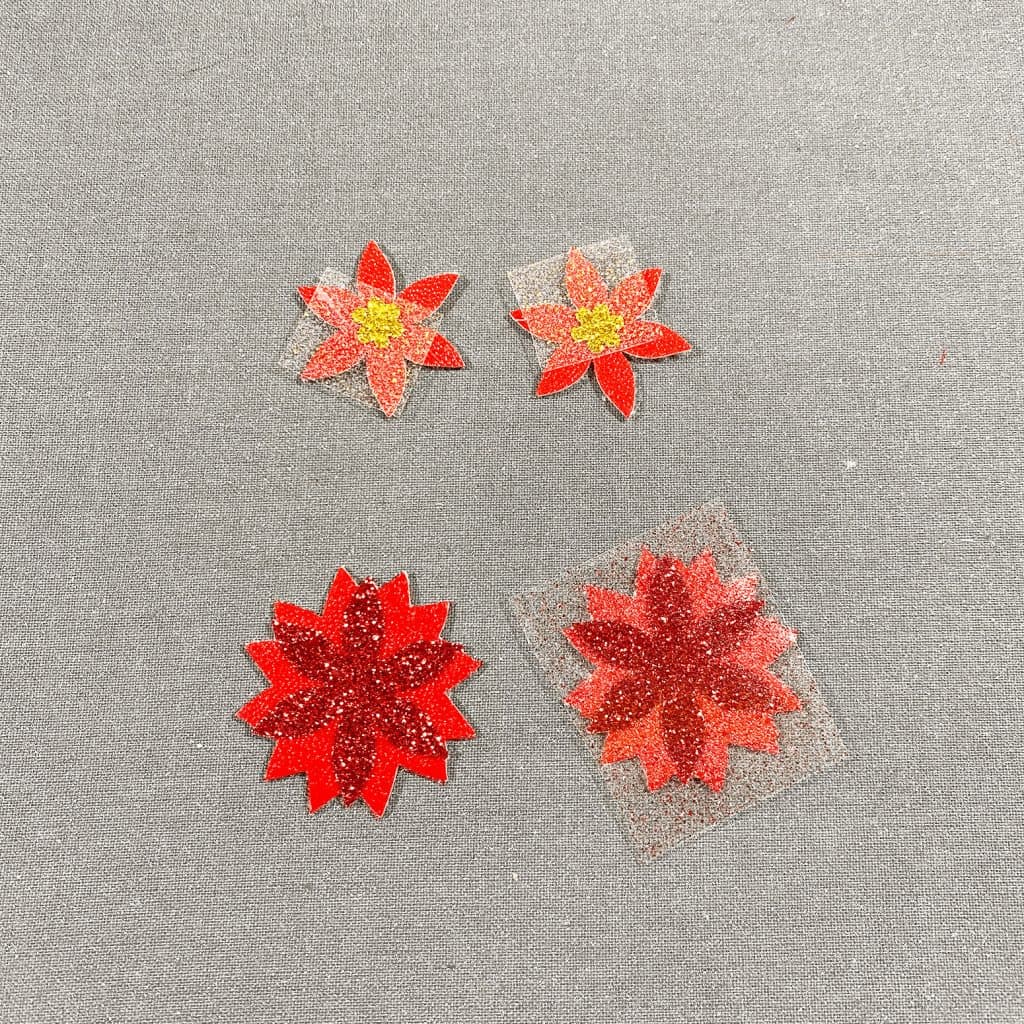
Once all of the vinyl layers and the faux leather earring backings are cut and weeded, it’s time to press the earring layers together.
First, if you’d like to color the edges of the red faux leather so the white backing doesn’t show, you can do that with a red Sharpie marker.
Gather an Easy Press Mini or Cricut Easy Press, a heat pressing pad, and a Teflon sheet or piece of parchment paper for the next step.
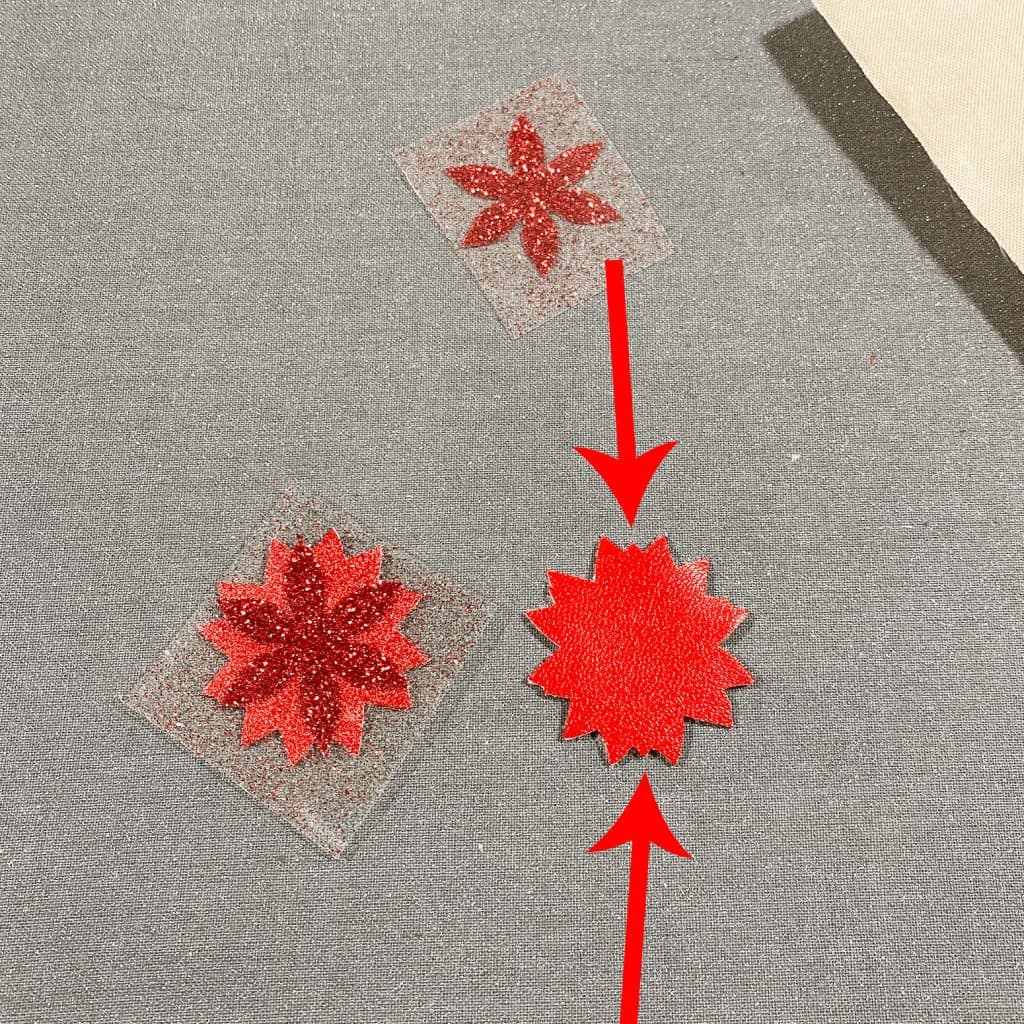
First, you’ll press the largest red glitter vinyl shape to the back of the largest red faux leather shape. Take a moment to carefully line up the shape outlines before pressing.
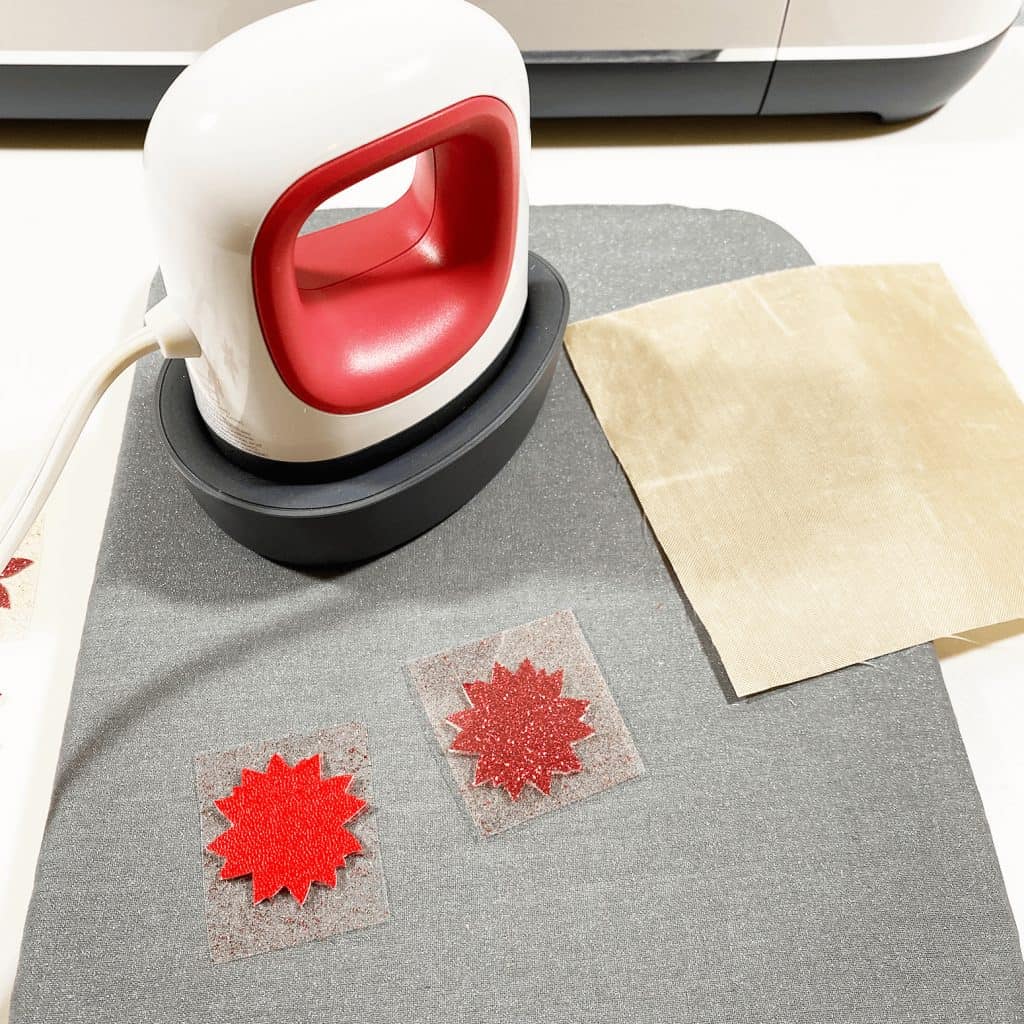
Once you’ve lined up the vinyl and faux leather layers and placed them on a pressing pad with the glitter side facing up, cover the shape with a teflon sheet or parchment paper.
I used the Easy Press Mini on the lowest heat setting. If you are using an Easy Press, I recommend setting it to 280 degrees.
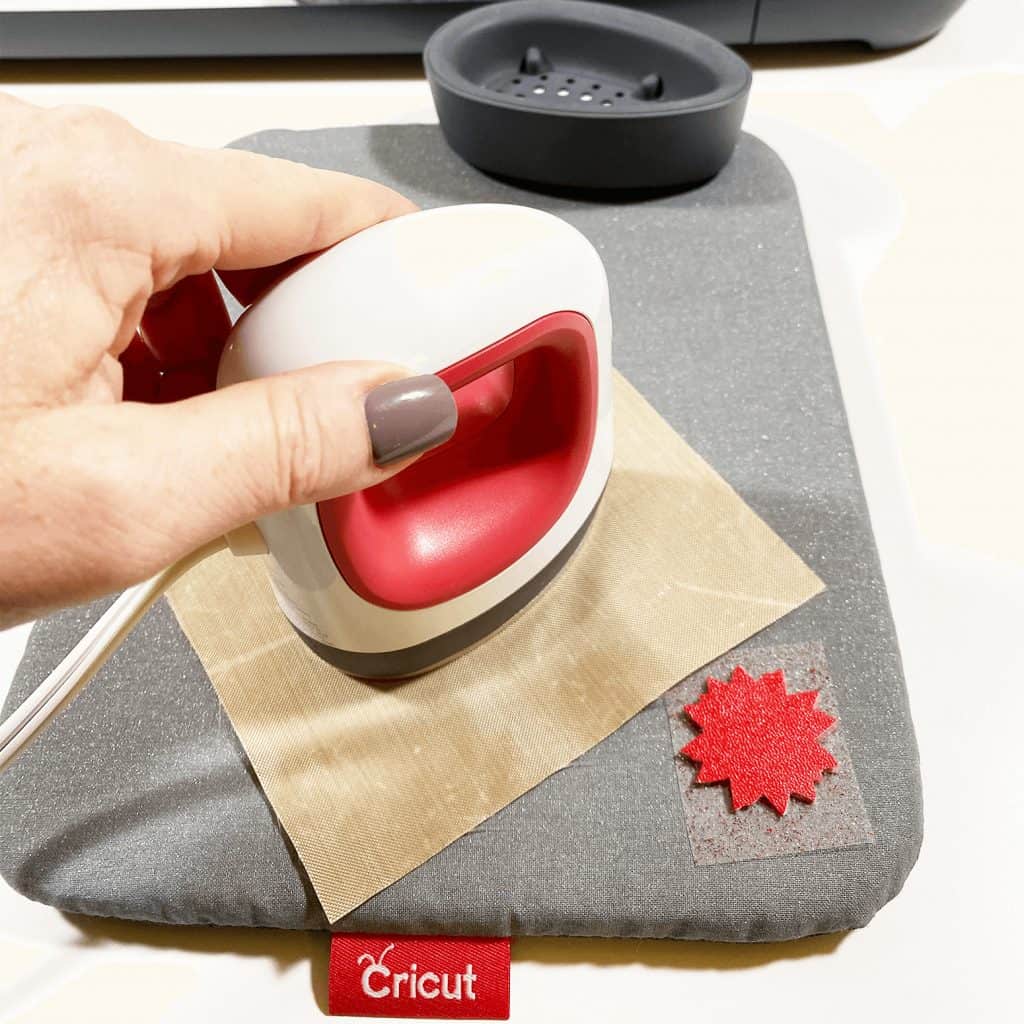
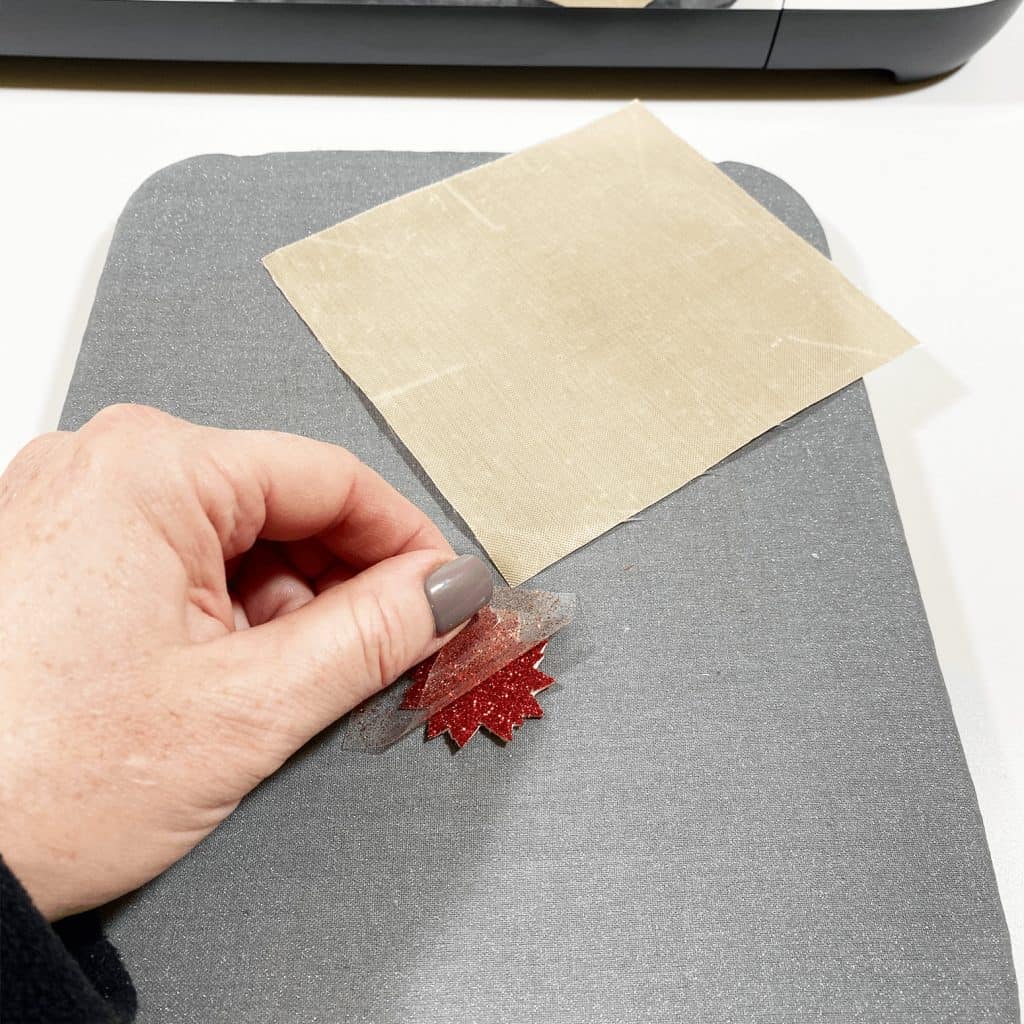
Press for 10-15 seconds, allowing the glitter HTV to adhere properly to the faux leather backing. Then carefully peel away the glitter vinyl cover sheet. Repeat with the second earring.
Then press the red glitter flower layer onto the bottom red faux leather layer. Use the tiny points shown in the photo below as registration marks to line up the flower layer points in the right position.
Cover with the cover sheet again and press. Remove the cover sheet. Repeat with the second earring.
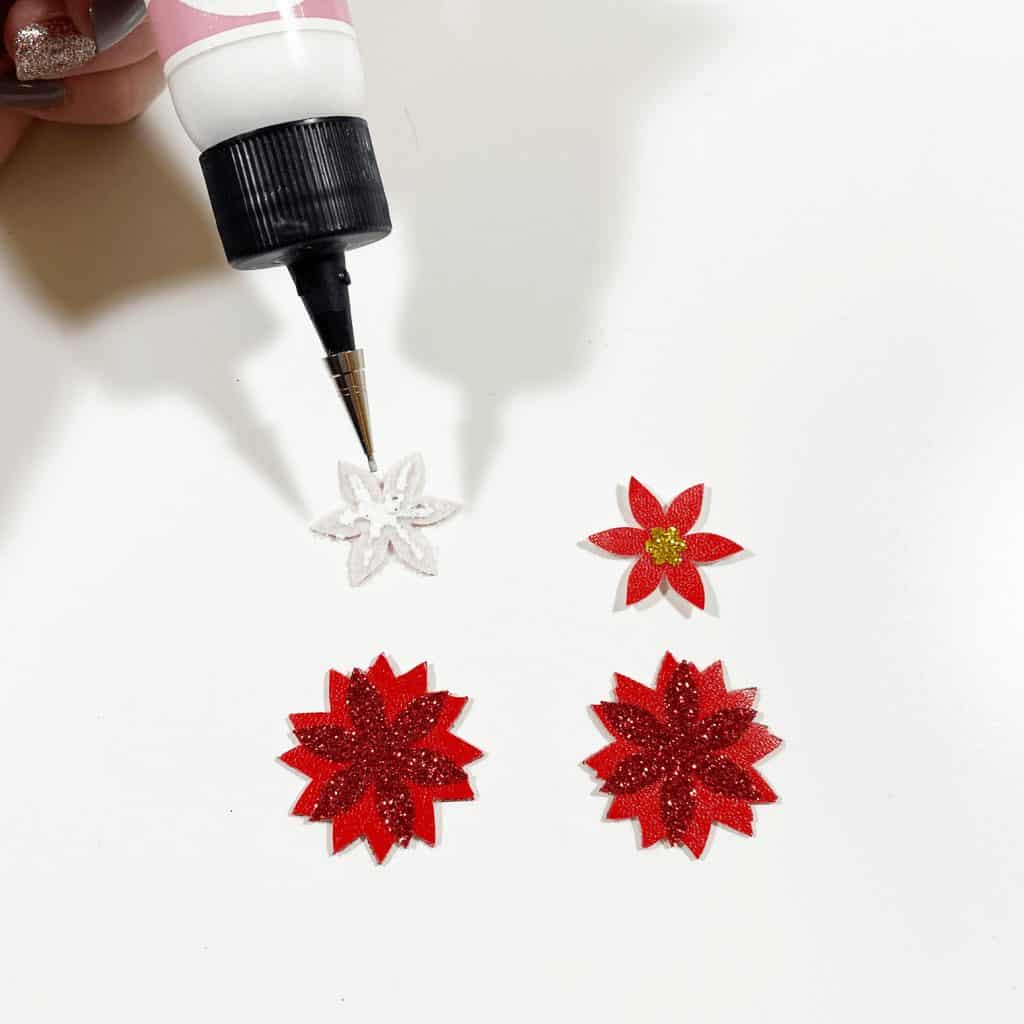
Press the gold glitter centers onto the smallest flower layer.
Using Art Glitter Glue or another fabric glue, spread glue on the back of the smallest flower and place it onto the bottom earring shape. Be sure to stagger the petal tips so they are spaced apart evenly.
After gluing both earrings, place the poinsettias under something heavy like a book to dry for a few hours.
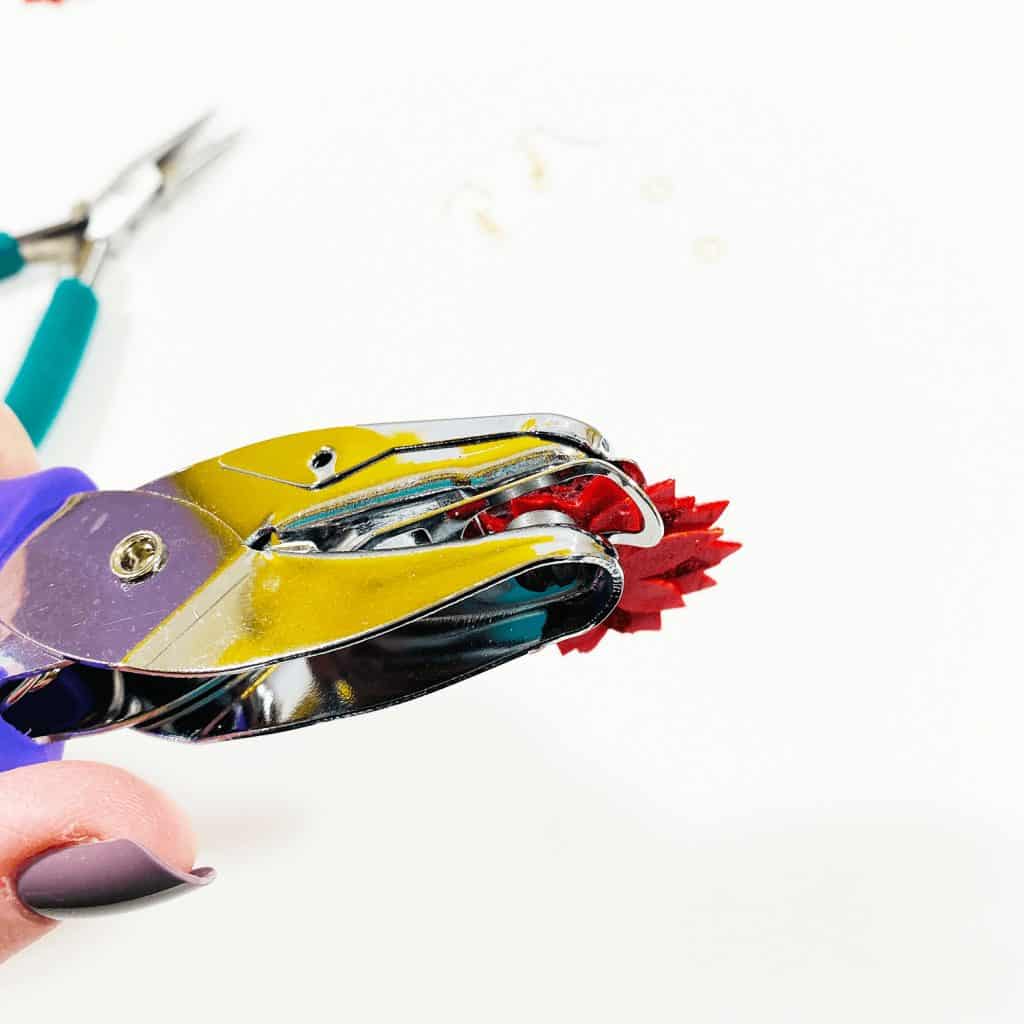
STEP 5 – Make The Earring Holes
I like to make the earring holes in faux leather earrings by punching a hole after the earrings are completely assembled. If you don’t have a hole punch, you can use a sharp pointed tool like your weeding tool to gently poke a hole.
Position the hole punch on one of the larger petals on the back earring layer. Be careful that your earring hole isn’t too close to the edge of the earring. Gently squeeze to punch the hole. Repeat on the other earring.
STEP 6 – Attach the Earring Hooks
Now it’s time to assemble your earrings!
You’ll need small jump rings, earring hooks, and two pairs of flat nose pliers.
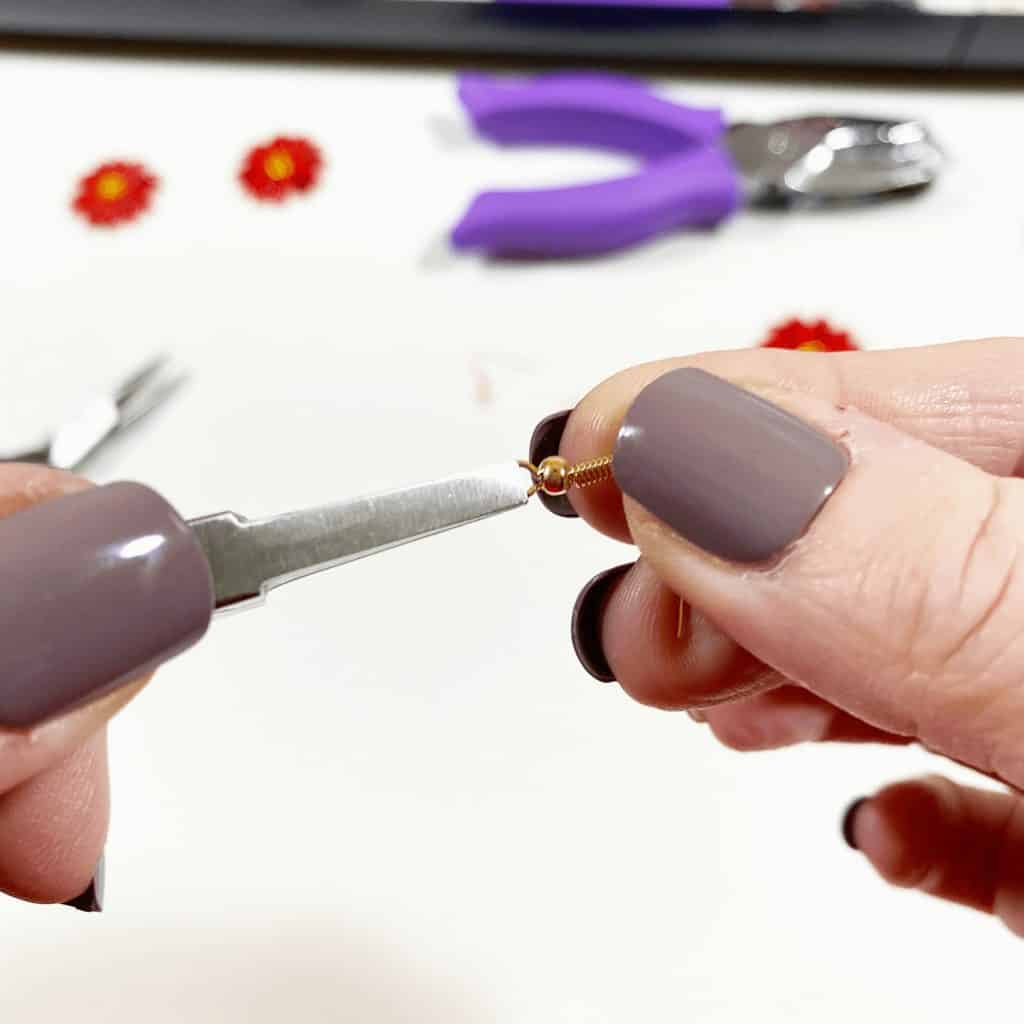
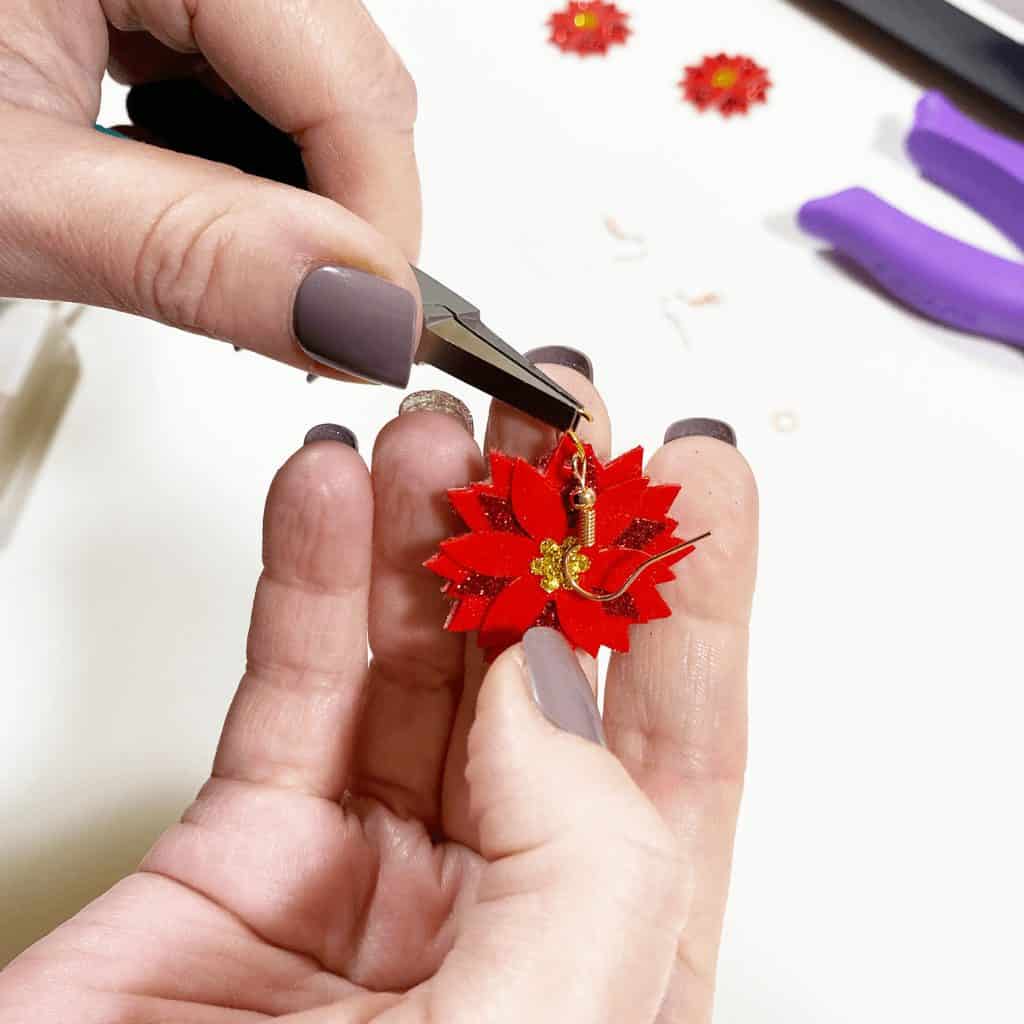
To connect the earring hooks to the poinsettia earrings, you’ll first need to turn the bottom loop on the fishhook sideways so your earrings will hang correctly. See the example image below to see how the orientation of the earring hook has to change so your earrings will hang straight.
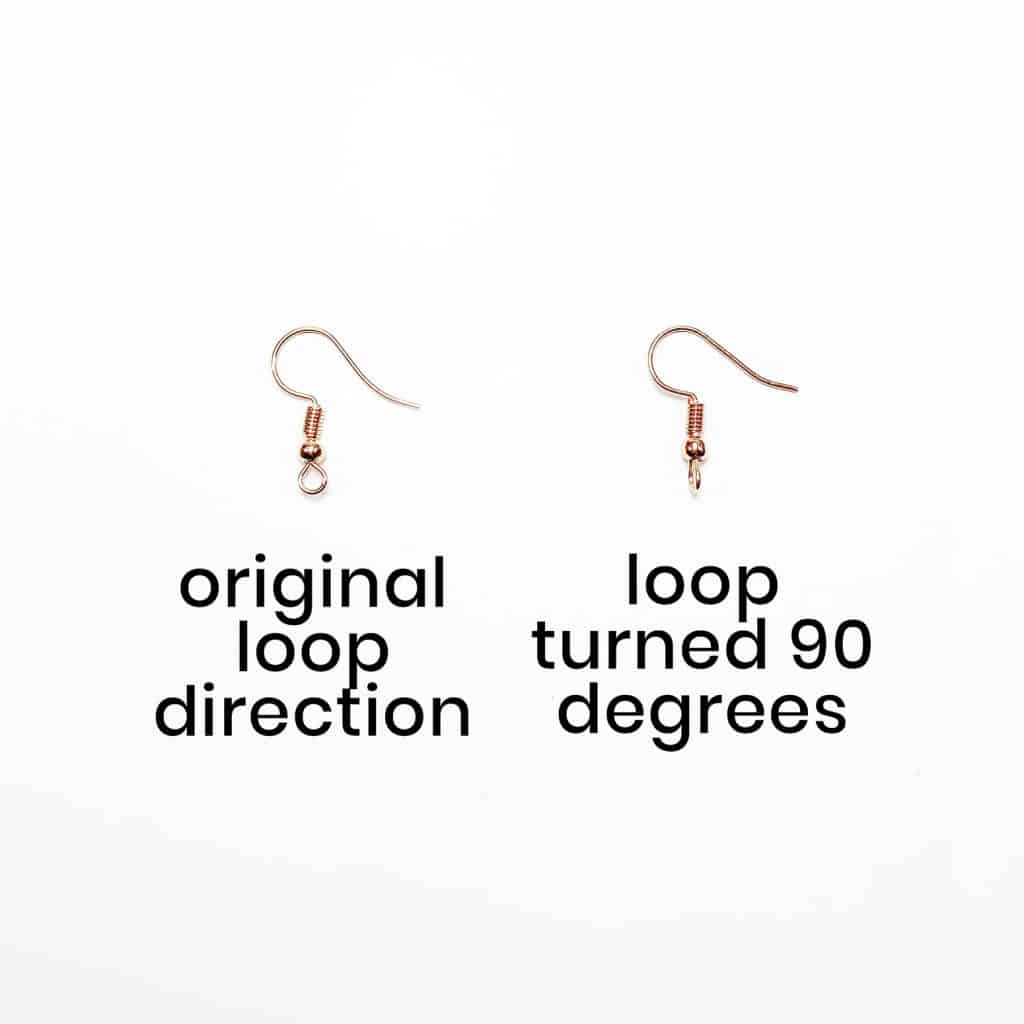
You’ll do this using one pair of flat nose pliers. While holding the hook firmly between two fingers, grip the entire earring loop between the pliers and twist your wrist 90 degrees. Repeat with the second earring hook.
Now use flat nose pliers to open the jump ring. I like to use two pliers, one in each hand. Grip each side of the jump ring with a pair of pliers, making sure the opening in the jump ring is facing up (the twelve o’clock position).
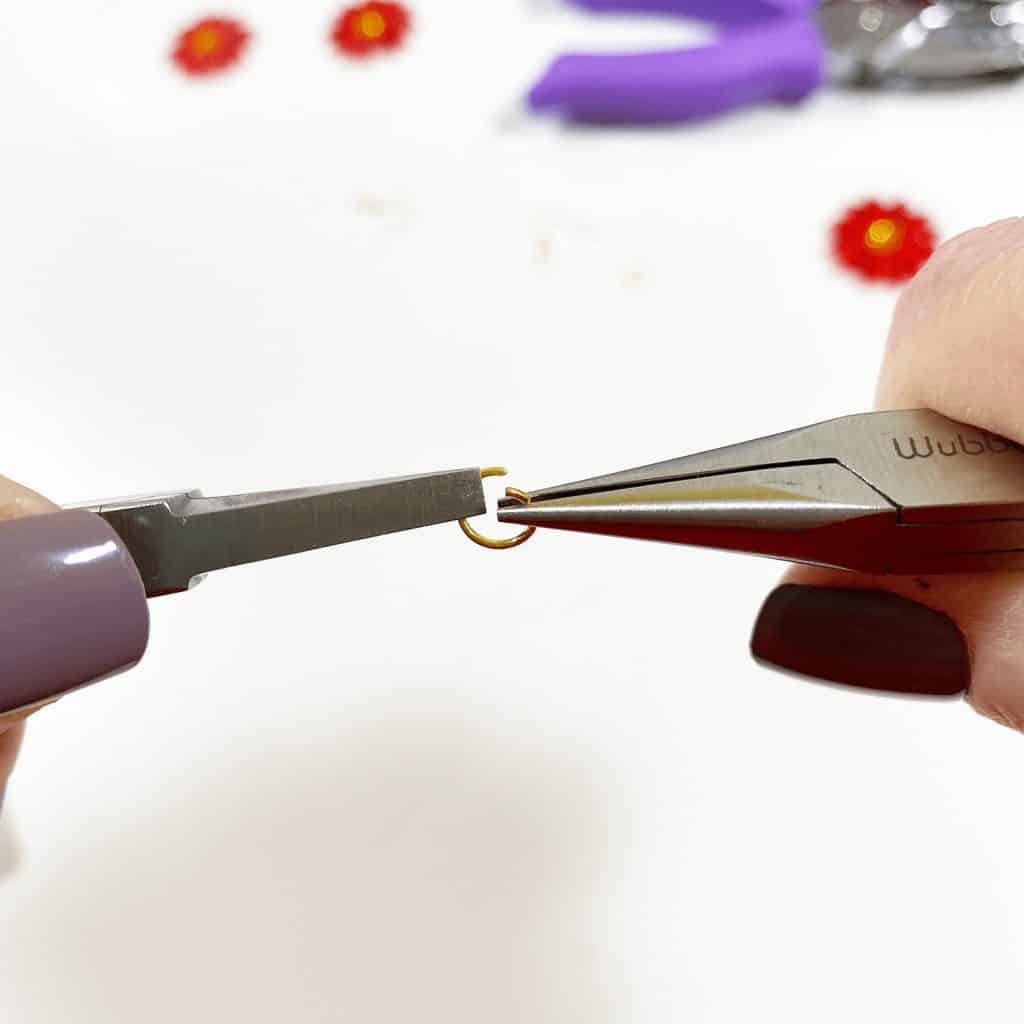
Rotate one wrist forwards or backward, so the jump ring creates an opening but doesn’t bend out of its circular shape.
When the jump ring is open, slide the poinsettia earring onto the jump ring. Then slide the earring hook onto the jump ring and close the jump ring again.
Pay attention to which side is the front of your earring as you do this to be sure your earring and hook are both facing the right direction.
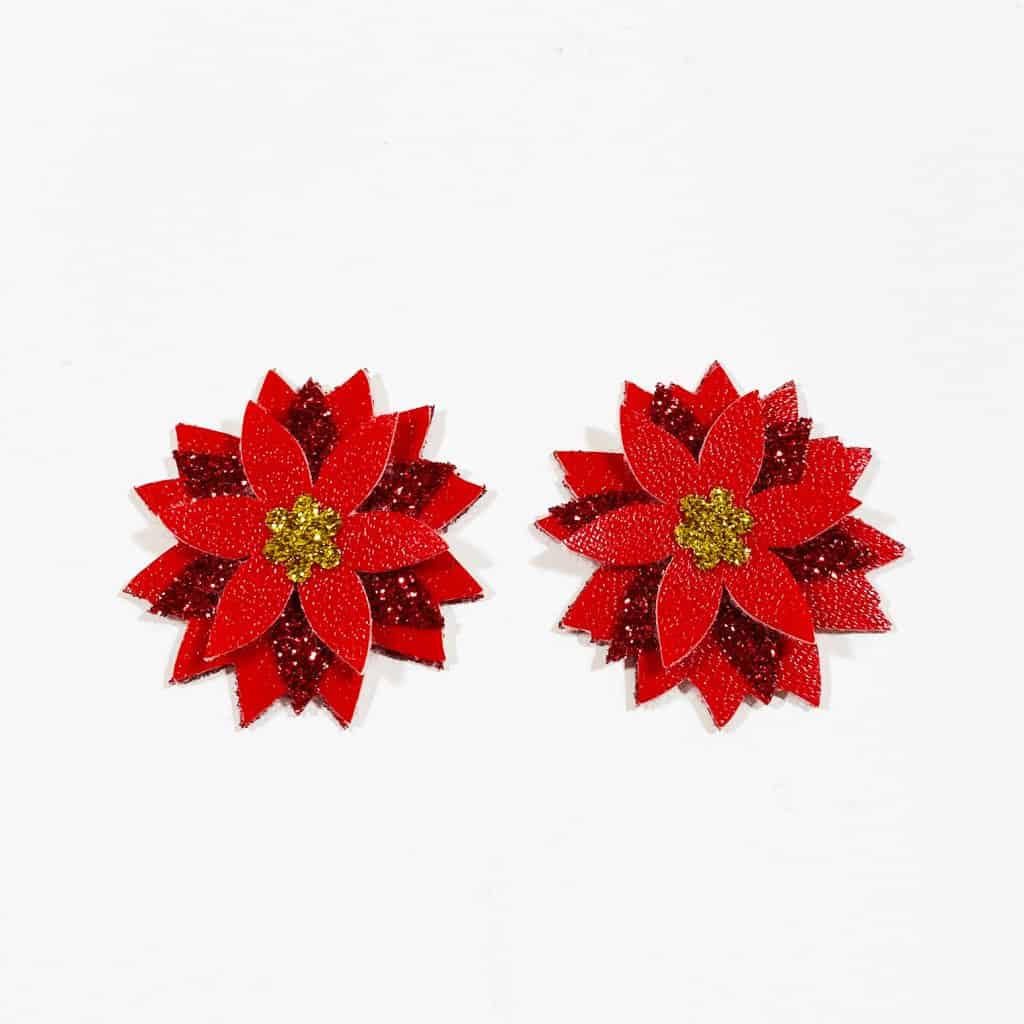
That’s it! The poinsettia earrings are finished!
Christmas Poinsettia Faux Leather Earrings
An easy-to-follow guide to create your own DIY Christmas Poinsettia Faux Leather Earrings!
Materials
- A Cricut Maker, Cricut Explore Air 2 or a Cricut Joy
- Faux Leather in the color and texture of your choice. I used this smooth Red faux leather from Amazon. This pebbled Red faux leather or pebbled Maroon faux leather from Amazon would work well, too. The white poinsettia earrings are made from this smooth White faux leather from Amazon, but this pebbled White faux leather will have great results also.
- Glitter HTV in your choice of colors. I used Siser Glitter HTV in Gold and Silver.
- Purple Strong Grip Cutting Mat
- Green Standard Grip Cutting Mat
- Blue Painter's Tape
- Weeding Tool
- Cricut EasyPress Mini or Cricut EasyPress
- Cricut EasyPress Pad (I used the 8x10 inch size)
- Teflon Cover Sheet or Parchment Paper
- Red Sharpie marker (for Red earrings, optional)
- 1/16" Hole Punch
- Art Glitter Glue with Ultra-Fine Precision Tip or other fabric glue
- Flat Nose Pliers
- Earring Hooks or Ball Ear Wire Hooks
- Jump Rings (6mm size or 5mm size)
- Design #162 from Amy's Resource Library
Tools
- A Cricut Maker, Cricut Explore Air 2 or a Cricut Joy
Instructions
How to Make Christmas Poinsettia Faux Leather Earrings:
- Download the free poinsettia earring template (Design #162) from Amy's free resource library.
- Upload The Poinsettia Earring Template to Cricut Design Space. After you've uploaded the poinsettia earrings SVG file onto the canvas, you will see in the Layers panel that this design has three layers. One will cut from faux leather (the darker red layer) and the other two will cut from glitter heat transfer vinyl (red glitter and gold glitter). The layers are already colored to make red and gold earrings, but you can recolor the layers to make a white poinsettia, too. For the white and silver poinsettia earrings, I recolored the dark red layer to white and the light red layer to grey (to cut from silver glitter heat transfer vinyl). These earrings are already sized appropriately for earrings, so all you need to do click on the green "Make It" button.
- Cut Earring Shapes. The mat preview screen will show all the cutting mats separated by color on the left hand side. Click on each mat and toggle the green MIRROR button to on for each one. Once all the mats are mirrored, scroll down and click on the dark red mat. This is the faux leather mat and the mat we will cut first. Make a note of the size material the shapes will need to cut from (in this case, about 5.5 inches wide and about 2 inches high). Click the "Continue" button. Note: Cricut Explore Air 2 users will need to turn the dial to "Custom" before choosing Faux Leather (Paper Thin). Cricut Joy users can also cut faux leather! I have a tutorial on How to Make Earrings with the Cricut Joy with more specific instructions for Joy users. On the Material Selection screen, choose Faux Leather (Paper Thin) as the material setting. If you don't have this material setting as a favorite, click "Browse All Materials" to search for it and select it. Then select "More" from the Pressure dropdown menu. Cut a piece of faux leather just slightly bigger than the size you noted in the mat preview screen. Cutting the faux leather down to size helps you get a better cut because it stays in place better on the cutting mat. Place the trimmed piece of red faux leather "pretty side" down on a purple mat and press it down all over with your fingers. Then tape the faux leather down on all sides with blue painter's tape. Make sure the Cricut's star wheels are off to the side before starting the cut so they don't leave indentations in the faux leather. Load the mat into the Cricut by pressing the double arrows button. Press the C button to begin the cut. After the cut is complete and before unloading the mat, use a weeding tool to carefully lift the edge of the faux leather shape to see if the cut was complete. If not, press the C button again to repeat the cut. Unload the mat and remove the faux leather poinsettia earring shapes. You can trim any stray fuzz from the faux leather backing with small curved scissors. Return to Cricut Design Space to cut the two glitter heat transfer vinyl mats. I like to use the Glitter Vinyl setting with "More" pressure. Place the glitter heat transfer vinyl shiny side down on a green standard grip cutting mat. Load the first mat into the Cricut and press the C button to begin the cut. When the cut is complete, unload the mat again and remove the vinyl piece. After the cut is complete, repeat with the second glitter heat transfer vinyl mat. Weed away the excess heat transfer vinyl shapes and cut them all apart.
- Press The Earring Layers Together. Once all of the vinyl layers and the faux leather earring backings are cut and weeded, it's time to press the earring layers together. First, if you'd like to color the edges of the red faux leather so the white backing doesn't show, you can do that with a red Sharpie marker. Gather an Easy Press Mini or Cricut Easy Press, a heat pressing pad, and a Teflon sheet or piece of parchment paper for the next step. First, you'll press the largest red glitter vinyl shape to the back of the largest red faux leather shape. Take a moment to carefully line up the shape outlines before pressing. Once you've lined up the vinyl and faux leather layers and placed them on a pressing pad with the glitter side facing up, cover the shape with a teflon sheet or parchment paper.
I used the Easy Press Mini on the lowest heat setting. If you are using an Easy Press, I recommend setting it to 280 degrees. Press for 10-15 seconds, allowing the glitter HTV to adhere properly to the faux leather backing. Then carefully peel away the glitter vinyl cover sheet. Repeat with the second earring. Then press the red glitter flower layer onto the bottom red faux leather layer. Use the tiny points shown in the photo below as registration marks to line up the flower layer points in the right position. Cover with the cover sheet again and press. Remove the cover sheet. Repeat with the second earring. Press the gold glitter centers onto the smallest flower layer. Using Art Glitter Glue or another fabric glue, spread glue on the back of the smallest flower and place it onto the bottom earring shape. Be sure to stagger the petal tips so they are spaced apart evenly. After gluing both earrings, place the poinsettias under something heavy like a book to dry for a few hours. - Make The Earring Holes. I like to make the earring holes in faux leather earrings by punching a hole after the earrings are completely assembled. If you don't have a hole punch, you can use a sharp pointed tool like your weeding tool to gently poke a hole. Position the hole punch on one of the larger petals on the back earring layer. Be careful that your earring hole isn't too close to the edge of the earring. Gently squeeze to punch the hole. Repeat on the other earring.
- Attach the Earring Hooks. Now it's time to assemble your earrings! You'll need small jump rings, earring hooks, and two pairs of flat nose pliers. To connect the earring hooks to the poinsettia earrings, you’ll first need to turn the bottom loop on the fishhook sideways so your earrings will hang correctly. See the example image below to see how the orientation of the earring hook has to change so your earrings will hang straight. You’ll do this using one pair of flat nose pliers. While holding the hook firmly between two fingers, grip the entire earring loop between the pliers and twist your wrist 90 degrees. Repeat with the second earring hook. Now use flat nose pliers to open the jump ring. I like to use two pliers, one in each hand. Grip each side of the jump ring with a pair of pliers, making sure the opening in the jump ring is facing up (the twelve o’clock position). Rotate one wrist forwards or backward, so the jump ring creates an opening but doesn’t bend out of its circular shape. When the jump ring is open, slide the poinsettia earring onto the jump ring. Then slide the earring hook onto the jump ring and close the jump ring again. Pay attention to which side is the front of your earring as you do this to be sure your earring and hook are both facing the right direction.
CRICUT EARRINGS MADE EASY EBOOK BY AMY ROMEU
If you loved this tutorial by Amy then you definitely need her ebook, Cricut Earrings Made Easy!
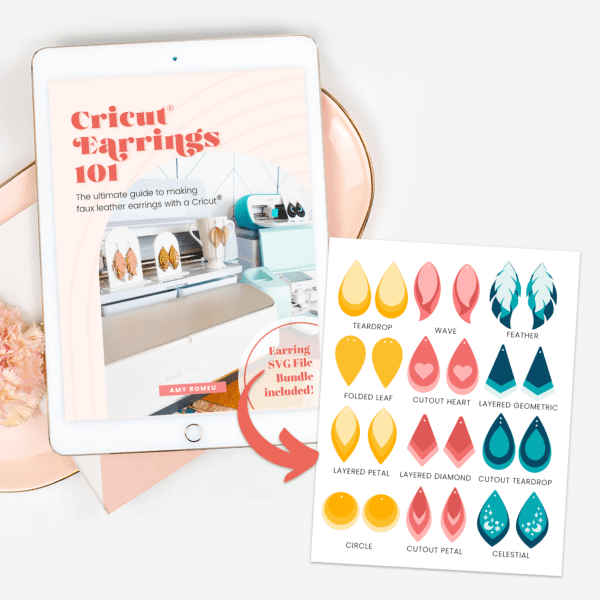
The Cricut Earrings 101 Workbook and Template Bundle is an instant download digital workbook with everything you need to start making earrings with your Cricut. This 86-page workbook features step-by-step tutorials that teach beginner and advanced earring-making techniques using both faux leather and genuine leather. It also includes a bundle of 12 best-selling earring templates so you can start creating earrings immediately with your Cricut Maker, Explore Air 2, or even the Cricut Joy models.
ABOUT AMY
Amy Romeu is a lifelong jewelry maker and crafter. She loves creating fun and fashionable jewelry designs that can be made with a Cricut cutting machine. She enjoys sharing her passion for jewelry making and crafting on her blog, amyromeu.com. Amy has been featured on Jennifer Maker’s craft blog, and she recently presented a holiday earrings workshop at Jennifer Maker’s Holiday MakerFest. Amy lives in north Florida with her husband, four children, their dog Sasha, a black Labrador, and Gunther, an orange tabby cat.


Thank you so much for the beautiful poinsettia earrings. I can’t wait to make me a pair.
Debbie
I LOVE YOUR WORK.