3D Shadow Box With Cricut: Landscape Scene Designs
This post may contain affiliate links that won’t change your price but will share some commission.

Making 3D paper craft shadow boxes is so much fun and very easy for a beginner to do with their Cricut machine. In this tutorial, I will show you how to make a 3D shadow box made entirely from cardstock paper – including the box frame!
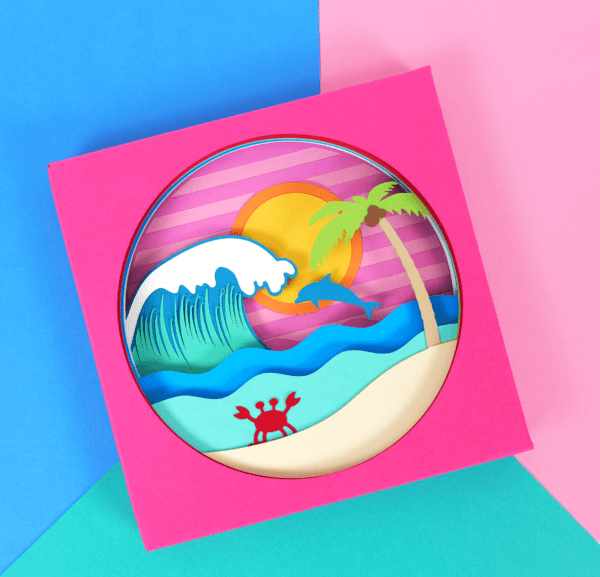
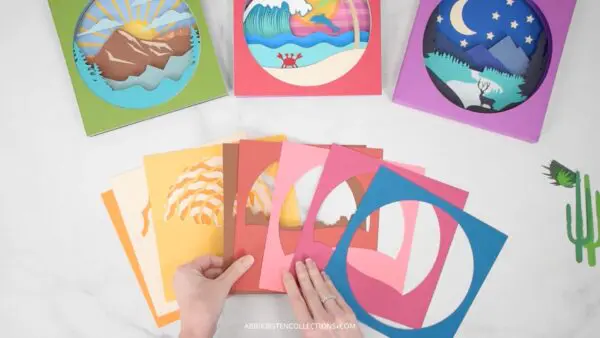
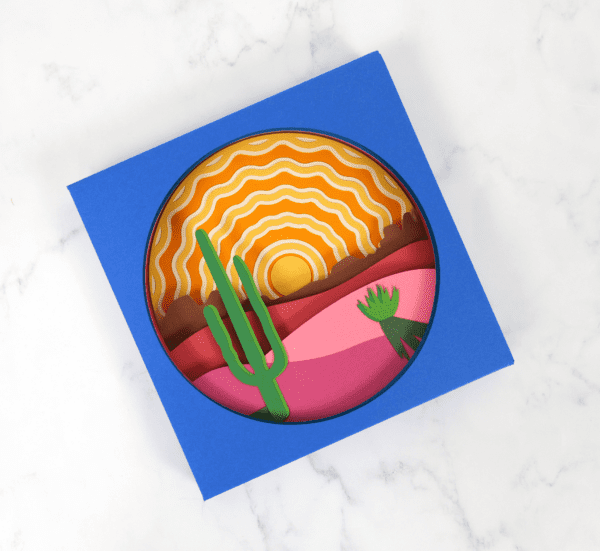
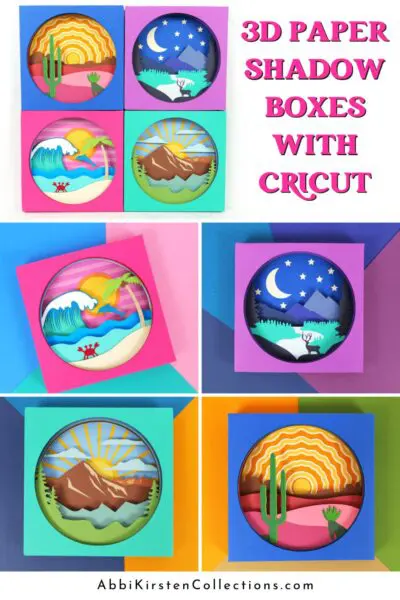
The shadow box SVG files for this tutorial include a Rocky Mountain range design, a beach sunset design, a nighttime forest and deer design, and finally, a sunrise desert design.
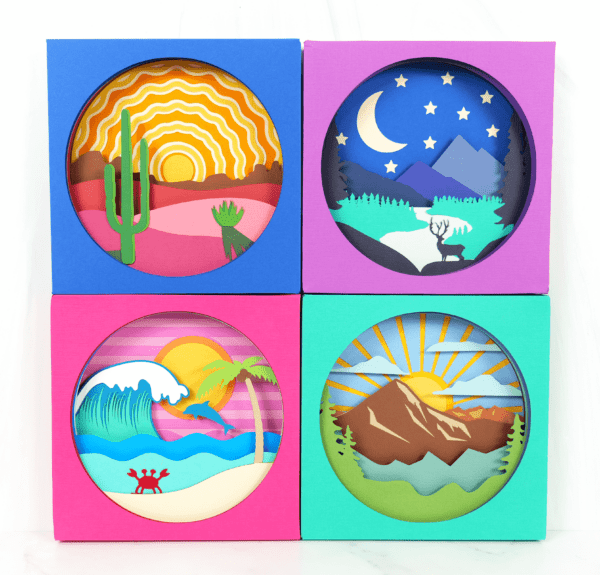
These nature shadow box themes can be created in any colors you prefer. The shadow box SVG files are available in the Abbi Kirsten Craft Vault!
The first thing we need to do is cover supplies!
Supply List For A 3D Shadow Box With Cricut
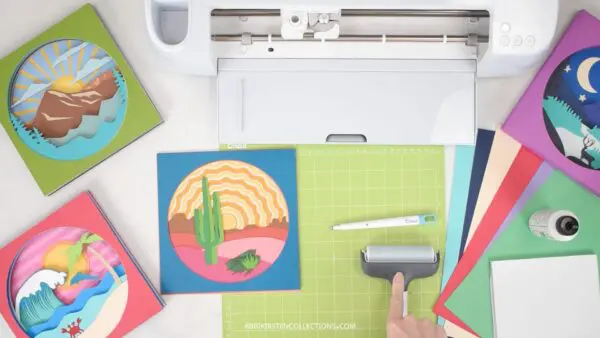
- Cardstock paper. My favorite resource is the 12×12 Cardstock Shop – their paper does very well with cardstock for intricate cuts.
- Foam adhesive or 3D foam squares. Bearly Art makes the best foam sticky square, in my opinion.
- A cutting machine. Any of the full-size Cricut machines will work. I am using my Cricut Maker 3. I would not recommend the original Cricut Joy for this project due to the size limitations.
- Craft glue. I used the Bearly Art glue, which dries clear and works well with any papercraft projects.
- Scoring wheel or scoring stylus to use with your Cricut machine. You can also opt for a scoring board.

Download the Shadow Box SVG Files
Find the complete collection of these 3D shadow box SVG designs in the Abbi Kirsten Craft Vault! This member-only collection is perfect for beginners, easy to download, and includes a step-by-step video tutorial.
✂️ By joining the membership, you unlock access to hundreds of craft designs you can’t find anywhere else!
✂️ Each craft project is taught step by step for crafters of all skill levels to follow along easily.
✂️ With the membership, you can level up your creativity, transform yourself into a confident Cricut pro, and have hundreds of projects at your fingertips for any occasion!
Already have an account? Log in and start browsing the outdoor scene shadow box collection!
Here is a list of the shadow box designs:
- Rocky Mountain range design
- Beach sunset design
- Nighttime forest and deer design
- Sunrise dessert design
Not a member yet? Join here!
Landscape Scene Layered Shadow Box Video Tutorial
Click play to watch the step-by-step tutorial for the assembly of these shadow boxes! This is a super easy beginner craft, and all these shadow boxes can be made in a very similar way – by easily following the order of the layers!
You can also keep reading for a written tutorial!
Cut Out The Layered SVG
- Join or log into the Abbi Kirsten Craft Vault to download these shadow box SVG files.
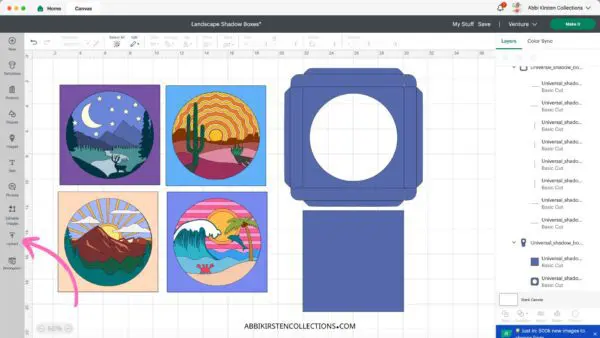
- Import the shadow box design into Cricut Design Space. Read a full step-by-step tutorial on how to upload your own SVG files to Cricut.
- Scale the shadow box or leave it at the default size, which is 8×8 inches.
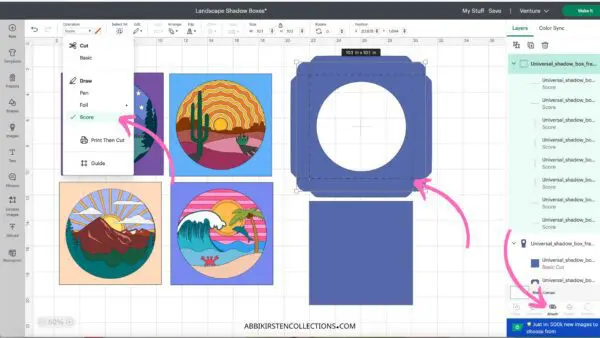
- If you are using the 3D shadow box cover, import that and change the lines to score operation in Design Space. Note: If you made size adjustments to the shadow box, you will need to do the same for the cover. Use the square back to gauge the box frame size adjustments, but always scale as a group so you do not risk changing proportions.
- Select both the base and scorelines for the box and use the Attach tool at the bottom of the Layers Panel to hold the scorelines in place.
- Click on the Make It button and select the material, which, for me, is medium-weight cardstock.
- Load your cardstock onto the cutting mat and get each layer cut out. If you are using the shadow box frame, Cricut will prompt you to insert the scoring stylus or wheel when you get to that mat.
Assembling Your Layers
- Return to the Design Space canvas and take a look at the order of the layers for the shadow box template.
You want to make sure all the different layers are in the correct order before adding glue or tape. Use the image in Design Space to guide you and stack your layers in order.
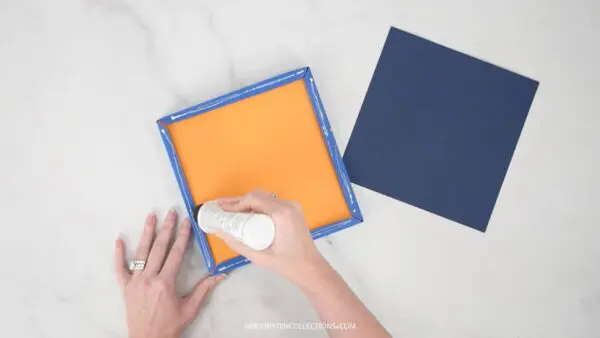
- To assemble the shadowbox layers, start with the base piece or first layer and add 3D foam tape cubbies or glue to place the next layer on.
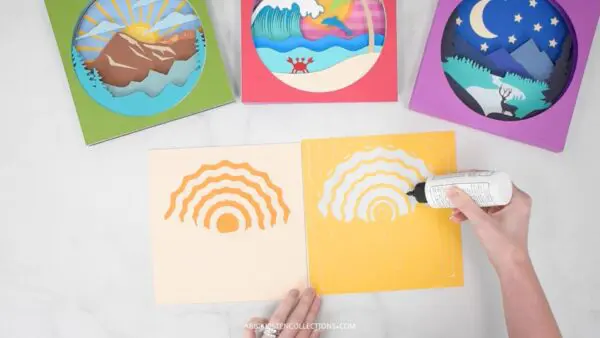
Note: Each layer will look different, and therefore, some layers will look better with glue and a flush finish, while others will look nicer with the 3D foam craft tape to create space between layers.
I do not recommend placing the thick foam tape between all layers. Rather, assess each layer and determine if it will look good with space underneath. One easy way to do this is to focus on adding the tape to the layers of things you would see as a focus point.
For example, the sunrise part in the desert scene looks best layered with glue, while the hills look nice with some space using the foam adhesive.
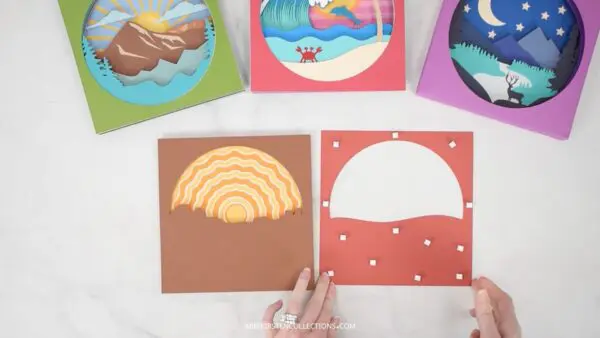
- Continue on to the second layer, then repeat until you have layered all the pieces together. Some of the more delicate items, like the crab or cactus, can be added in separately.
- Once you have added all the layers, your shadow box is complete! You can opt to add this inside a wood shadow box frame and cover it with glass. Alternatively, you can also use the 3D shadow box made from cardstock to place the design into.

Assemble the 3D Box Frame Made From Cardstock
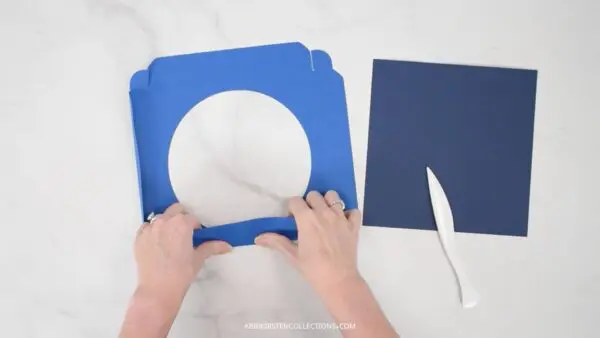
You can absolutely place these designs right into a traditional shadow box frame from a craft store, but if you want to save some money and opt to use a pretty color of cardstock, you can also use the 3D box frame SVG.
- Follow the steps for Design Space outlined above.
- To create the paper shadowbox frame, fold along the scoreline lines.
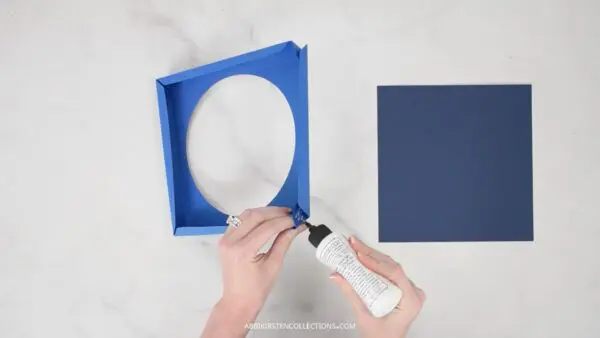
- Add some glue to the tabs on either side and press them up until you have formed a box frame.
- Add a bit of glue to the inside of the cardstock shadow box frame. If your scene already fits snuggly, you may not need extra glue on the inside.
- Gently place in your layered shadow box scene and press into the glue. Let this sit for 3-5 minutes.
- Once dried, use your glue to cover the back of the shadow box with the remaining square to finish it off.
- Display your shadow box made from 100% cardstock!
Creating a 3D shadow box from cardstock with your Cricut is a fantastic beginner craft to make, as well as a fun piece of home decor or a great gift to give to a loved one.
Don’t forget to download these shadow box cut files in the Craft Vault! I would love to see your shadow box creations, so please pop over to our Facebook group and show off what you are creating!
More Paper Projects
There are lots more paper crafting projects on Abbi Kirsten Collections. Check out our readers favorites below!
- 3D paper flowers
- Candy holders
- Layered paper crafts like this hummingbird design, and 3D layered rainbow design.

What do you think of these four landscape shadow box scenes? Which is your favorite? Tell me below in the comments!
About Abbi Kirsten
Welcome to my colorful corner of the internet, where we play with vibrant crafts and unlock your creative magic! Hang out with me and get lost in a fun array of projects, tutorials, and products, from stunning papercraft ideas to flower templates, Cricut help for beginners, and endless crafter’s hacks.
Join A-Star Crafters and participate in monthly Craft-Alongs in our community Facebook group!