How To Make Floating Photo Ornaments With Cricut: Free Floating Ornament Templates
This post may contain affiliate links that won’t change your price but will share some commission.

Enjoy making these personalized DIY photo ornaments with free templates using your Cricut machine and capture special moments by including your own photos! They make fantastic last-minute gifts and are a wonderful way to display cherished memories.
All the details for making this craft are below, including supplies, free ornament base templates that you’ll cut out in acetate, a video tutorial, and step-by-step instructions.
What are Floating Ornaments?
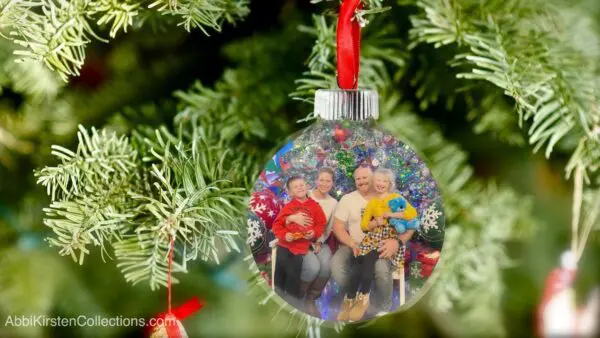
A floating ornament contains a design or photo that looks like it’s suspended inside a clear ornament, giving it a magical Christmas-y look! The key to this photo ornament craft is that we’re using clear acetate and vinyl sticker paper for the photos. The acetate is then rolled up with the photos, applied on sticker paper. and placed into the open top of the fillable plastic ornament. The result is a double-sided ornament that looks like the photo is floating inside!
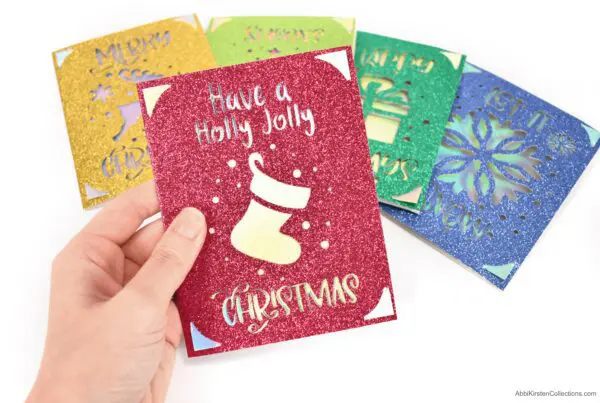
For extra sparkle, check out floating ornaments using holographic and textured vinyl and find more holly-jolly inspiration for last-minute handmade Christmas gifts and other festive Christmas craft ideas!

Supply List for Photo Christmas Ornaments
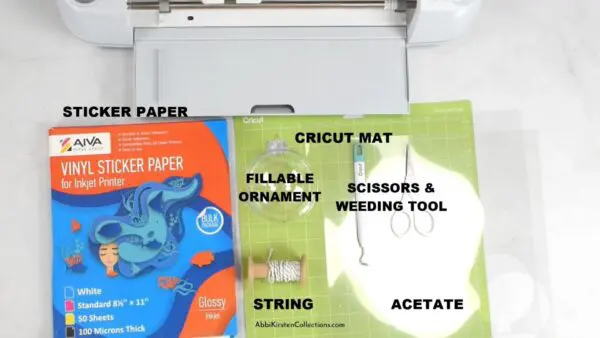
Before you start, gather these materials:
- 4ml acetate (the acetate makes the design look like it’s floating!)
- Printer
- Vinyl sticker paper. I like this sticker paper brand as well as Cricut’s printable vinyl.
- Weeding tool
- Cricut machine (You’ll need a full-size machine that works with Print Then Cut, such as the Maker or Explore models; I’m using the Maker 3.)
- Clear plastic ornament balls
- Ribbon or baker’s twine
- Brayer tool
Download the Free Photo Ornament Templates
To get access to the free ornament templates, find them in the Abbi Kirsten Craft Vault with the keyword “floating ornaments” in the top search bar.
If you’re new here, just plug in your name and email below, and I’ll send you an email to set up a password so you can start downloading freebies. Once inside the Craft Vault, type “floating ornament” at the top search bar to find these free floating ornament templates for cutting machines.
Floating Ornament Template Sizes
Clear fillable plastic ornaments for crafts come in various sizes, and measurements are usually in millimeters. Below are the most popular ornament sizes in millimeters and their equivalent sizes in inches. (A printable with these measurements is also provided when you download the free-floating ornament template.)
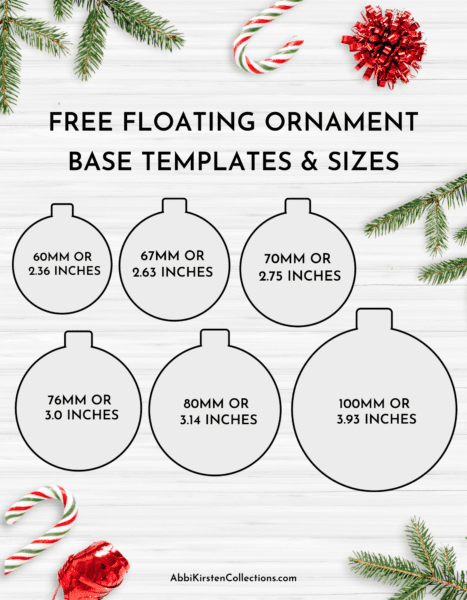
These measurements are an exact conversion, but you may need to slightly scale them down by maybe .05 of an inch just to give a little wiggle room. (However, I have cut these exact sizes and had them fit well as is.) So, if you need to size down a bit after you’ve already cut the design, I’ve included helpful tips at the end of this post.
- 60 mm (popular) = 2.36 inches
- 67 mm = 2.63 inches
- 70 mm = 2.75 inches
- 76 mm = 3.0 inches
- 80 mm (most popular) = 3.14 inches
- 95 mm = 3.75 inches
- 100 mm = 3.93 inches
Also, if you don’t see the measurement listed above, you can use an online converter to calculate the size in inches for your floating ornaments.

How To Make Photo Christmas Ornaments: Video Tutorial
Watch the step-by-step video tutorial below, where I’ll show you how to:
- Upload your photo as a pattern-fill in Cricut Design Space
- Clip it into the ornament shape
- Print them on vinyl sticker paper
- Apply the photos to the acetate and
- Insert the finished photo into the fillable ornament.
Steps for Making Photo Christmas Ornaments
Here’s your step-by-step guide for making the photo ornaments.
1. Upload the Free Templates into Cricut Design Space.
After downloading the free templates, upload the SVG file into Cricut Design Space. If you need help uploading, see how to upload an SVG into Cricut Design Space or watch the process on my YouTube channel.
2. Upload Your Photos Into Cricut Design Space.
Next, upload your photos into Design Space.
- To upload photos, click the Upload button on the left panel.
- Instead of clicking “Image,” select the Pattern fill option, then click the Upload Pattern button.
- Browse your computer to select your photo (JPEG or PNG format works best).
- Click the green Upload button. Note: This may take 20-30 seconds to load.
- Once uploaded, click Cancel at the bottom to return to the canvas. The pattern will not appear in “Recent Uploads.”
3. Size The Ornament Template and Insert Photo.
Now, you’ll size the template to the size of the clear ornament you’re using.
- Now, size the imported template to match the diameter of your fillable ornament. For example, if you have a 4-inch ornament, scale the template’s width to 4 inches. It’s important to size this correctly before adding your photo.
- Select the ornament template shape. In the top edit bar, click Operation > Print Then Cut.
- Click the color swatch square that sits to the right of Operation. Click the dropdown and change the option from “Color” to Pattern. Many Design Space patterns will display.
- Scroll through the patterns to find your recently uploaded photo. Click on the photo to “clip” it into the shape of the ornament.
4. Edit and Center the Photo.
Here you’ll want to edit the photo so that it appears centered and at its best.
- With the shape still selected, click Edit Pattern under the “Pattern” option.
- Adjust the Scale slider or input box to make the photo larger until it fills the ornament shape nicely.
- Use the Horizontal and Vertical options to perfectly center the focal point of your photo within the ornament outline. Click X to close the Edit Pattern box.
5. Make the Photo Ornament Double-Sided.
To make the ornament double-sided, duplicate the ornament (template with photo) you just created. This duplicate will be the back side. At this point, you can insert a different photo for this side if you wish.
6. Create the Acetate Cutout.
Now, create the clear acetate piece onto which you’ll apply the photos. To do this, duplicate one of the ornament shapes again. Go back to Operation and change it to Basic. Be sure to save your project so you don’t have to redo the setup.
7. Print the Photos.
Next, print the photos for the ornament.
- Click Make It to begin cutting. Design Space will separate the photo prints (Print Then Cut) from the acetate cutout (Basic Cut).
- To print your photos, click Continue > Send to Printer.
- In the Print setup screen, leave Add Bleed on to prevent white edges around your design.
- Toggle on the System Dialog option, then click Print.
- The printer dialog box often appears behind Design Space, so minimize Design Space to access it. In your printer’s dialog box, select Best in the Quality area.
- Now, click Print again to print the photos onto the vinyl sticker paper.
8. Cut the Materials.
You’ll use the Print Then Cut process for the photos and the regular Cut process for the acetate.
- Set material settings: Once printed, you’ll see a pop-up to set your base material in Design Space.
- For the Acetate mat, click Browse All Materials and select Acetate.
- For the Photo Print mat, click Browse All Materials and select Printable Vinyl (or a sticker paper setting, if preferred).
- Cut the acetate: Load your acetate onto the mat, select the Acetate setting, and load the mat into the machine. Once cut, flip the mat over and peel the mat away from the acetate to prevent curling.
- Cut the photos: Load your printed sticker paper onto your mat. Use a brayer to press it firmly to the mat to prevent bubbles. Select your material setting and load the mat. The machine will first scan the black registration box and then precisely cut the photo shapes.
9. Finish Assembling the Photo Ornament.
This is where your floating ornament comes to life as you combine all elements together into one lovely personalized ornament!
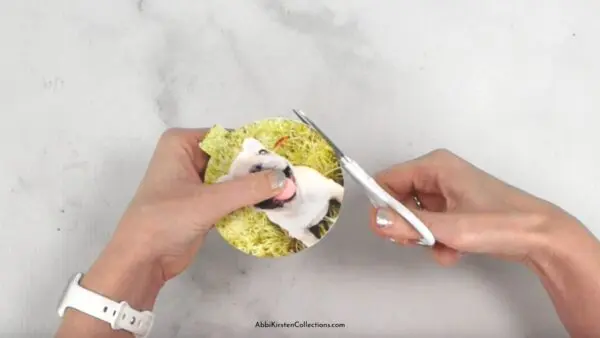
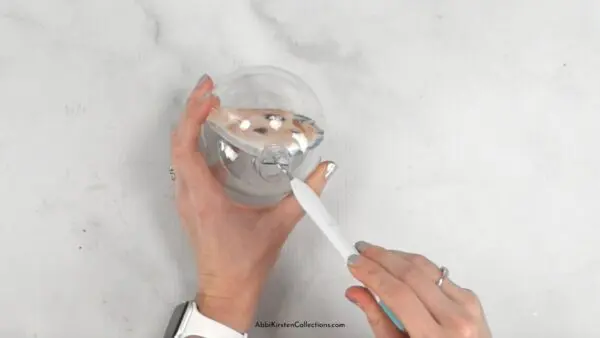
- Remove the top from your fillable ornament. Carefully roll the plain acetate piece into a cone, inserting it inside the ornament. It should stand up straight in the center. If it is bowed or doesn’t sit right, remove it and gently trim a very small amount from the curved edges with detail scissors. It’s critical to ensure a perfect fit before applying the stickers.
- Take out the acetate piece. Peel one of your printed vinyl stickers off its backing and carefully line up the top edge with the top of the acetate piece. Let the rest of the sticker fall into place.
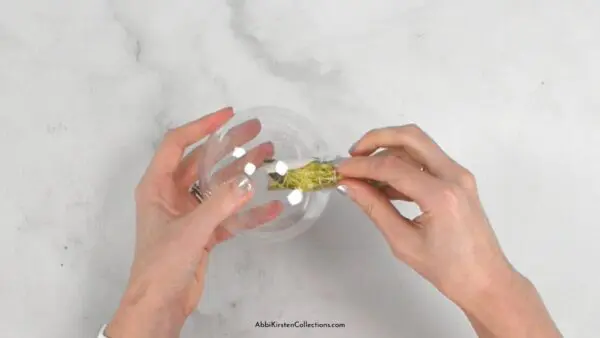
- Firmly roll the double-sided photo piece into a cone shape, then gently feed it through the mouth of the ornament and allow it to spring open inside.
- Use your weeding tool to nudge and adjust the photo piece until it’s standing straight and centered. Once you’re happy with the position, replace the ornament top.
- As your final touch, thread a piece of twine or ribbon through the top loop, tie a knot, and hang or gift your beautiful floating photo ornament!
Tips for Checking Your Ornament Insert Size
Before you apply the sticker photos to the acetate ornament cutout, it’s important to check that the acetate cutout fits correctly in your ornament. This is because once we add the acetate with the sticker photo applied, it will not be easy (or recommended) to remove it. So first, roll up the acetate and place it inside the ornament. If it fits correctly without scrunching up, then you’re good to apply the photos.
Trim the Acetate
However, if it needs a little help, carefully pull the acetate cutout back out of the ornament and use a pair of detail scissors to go around the circumference of its base, trimming it down slightly. Now, when you slide it back in, it should no longer scrunch up.
Trim Any Overhang
Once you’ve confirmed the proper fit, then you can apply the vinyl sticker paper to the acetate. If your alignment is off a little, then I recommend trimming any overhang from your sticker paper before rolling and inserting the double-sided photo into the ornament.
Adjust With Weeding Tool
Finally, use your weeding tool to shift the photo acetate piece around until it is centered and straight. That’s it! Your DIY floating photo ornaments are all finished! This craft is super quick to make as a last-minute DIY Christmas gift.
What do you think of this craft? Would you make these? Tell me in the comments below.
More Christmas Crafts To Love!
Be sure to check out these seasonal favorites below and find more inspiration in our Christmas craft section of the blog. Better yet, become an A-Star Crafter to get unlimited crafts and enjoy creative fun within your own crafting community!


About Abbi Kirsten
Welcome to my colorful corner of the internet, where we play with vibrant crafts and unlock your creative magic! Hang out with me and get lost in a fun array of projects, tutorials, and products, from stunning papercraft ideas to flower templates, Cricut help for beginners, and endless crafter’s hacks.
Join A-Star Crafters and participate in monthly Craft-Alongs in our community Facebook group!