Giant Noel Paper Poinsettia Tutorial
This post may contain affiliate links that won’t change your price but will share some commission.

Has anybody else started their Christmas decorating before Thanksgiving is even here?
Just me? That’s okay. My excuse is that, as a blogger, I have to be proactive in sharing with you all! Last year, I made more than 12 new Christmas crafts on the blog – most of them with totally FREE templates!
That holiday cheer is so contagious & if you are ready to fill your home with it, then I’ve got the perfect paper craft to spice up your decor. This easy DIY Noel Paper Poinsettia Tutorial is an easy-to-tackle craft perfect for your home or Christmas party! I’m always looking for new ways to decorate for Christmas – a couple of years ago, I did a giant Christmas flower display with a 3D paper reindeer and loved it!
If you are more in the mood for smaller poinsettias, be sure to view that tutorial here!
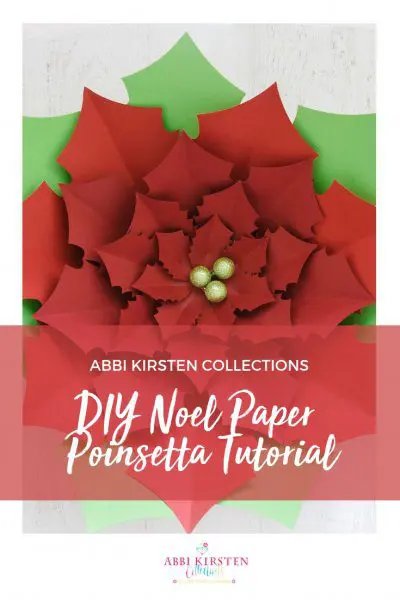
DIY Noel Paper Poinsettia Tutorial
Supplies for Paper Poinsettias:
- Glue Gun
- 65-pound cardstock
- Small 1″ foam ball
- Gold spray paint & glitter
- You can always view my full tried and true supply list here!
- Scissors and/or cutting machine (Cricut Explore or the Maker)
- Poinsettia Templates (download below)
How to Make Noel Poinsettia Flowers
Download The Giant Poinsettia Templates
You can get these giant paper poinsettia templates when you join Abbi’s membership!
Already a member? Log into the Craft Vault and find the Noel Poinsettia templates for download.
OR
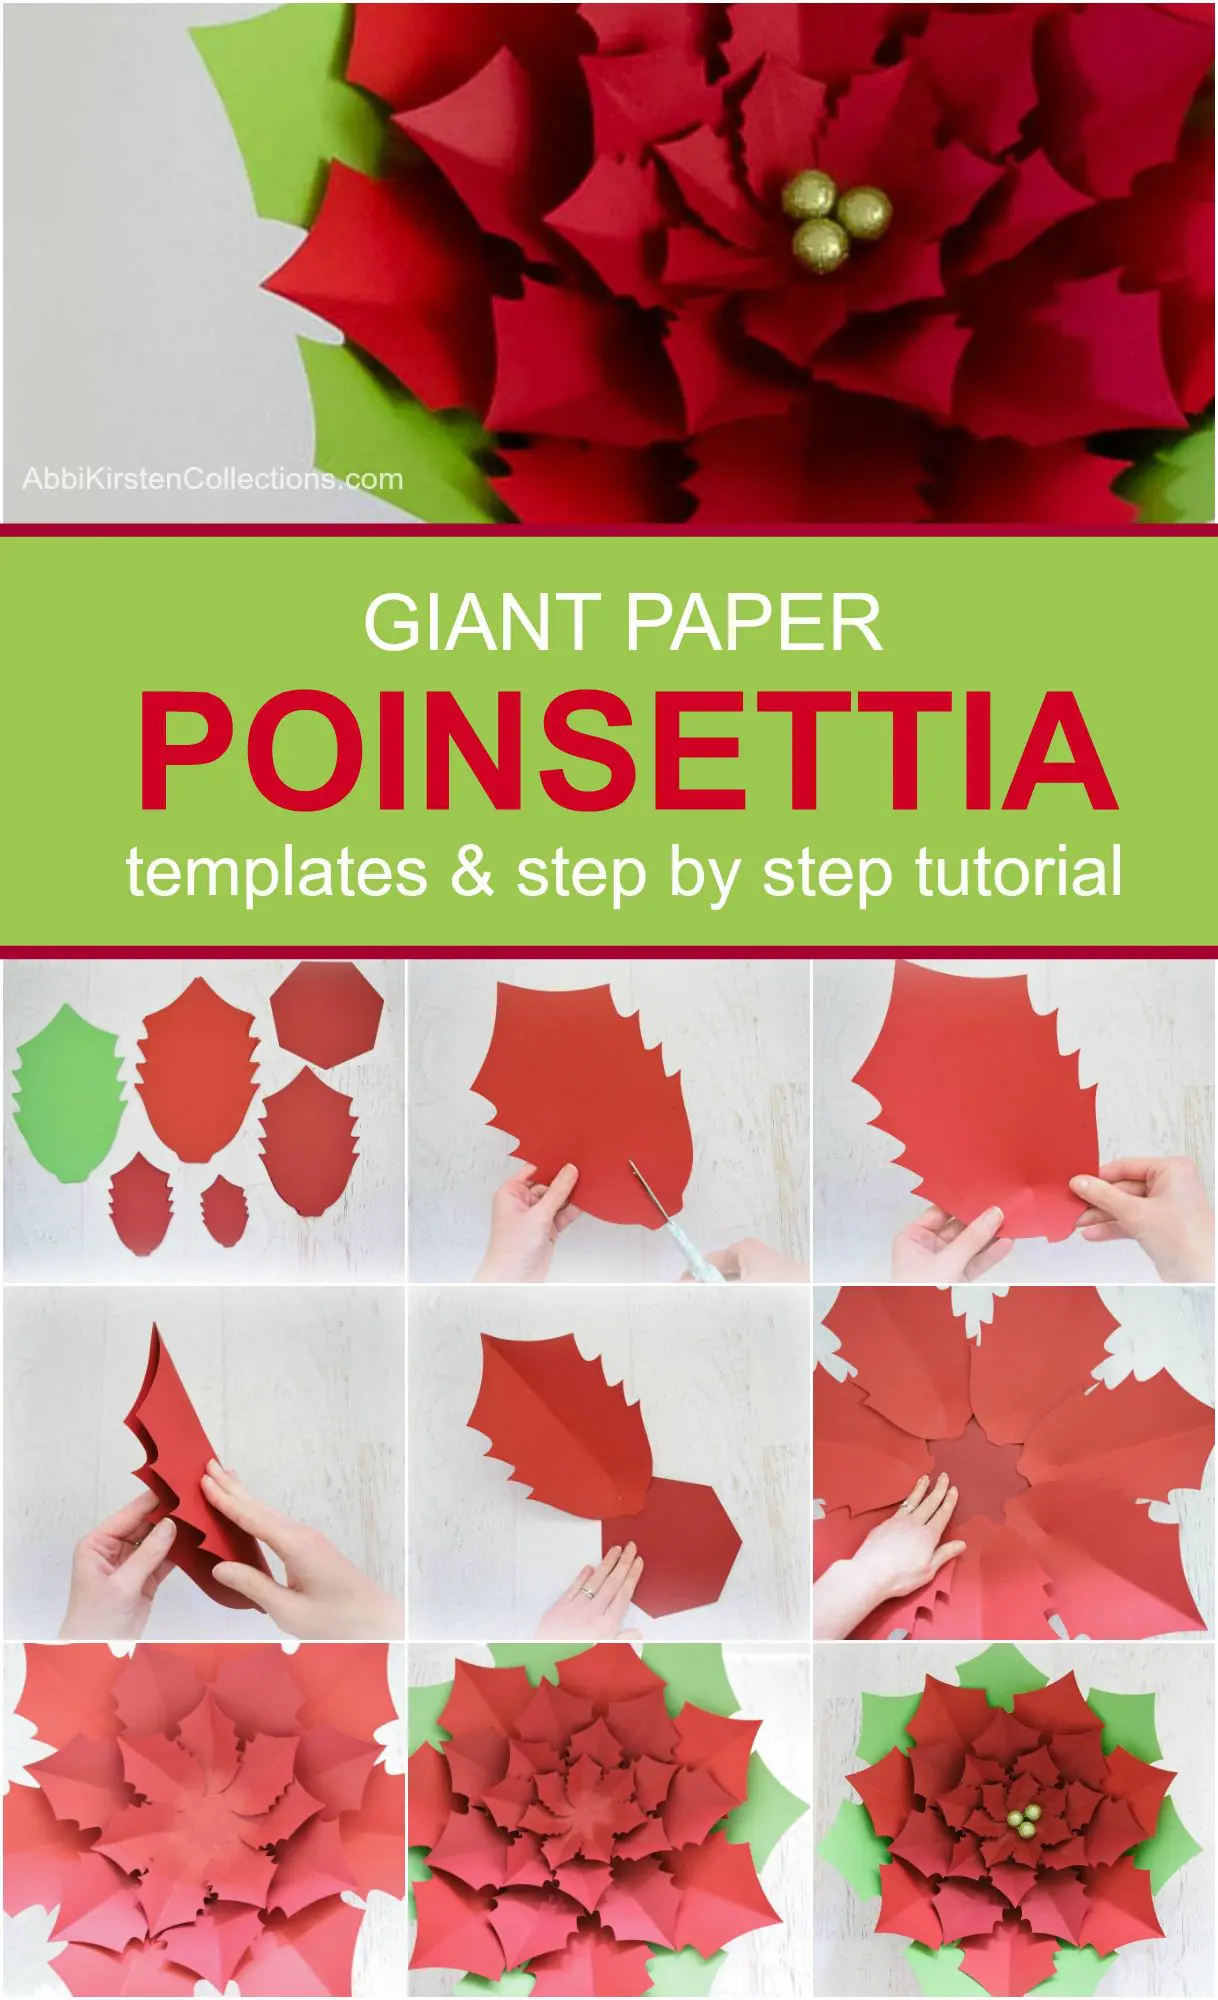
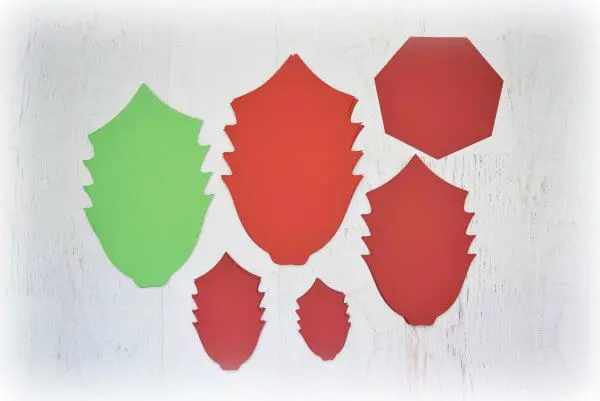
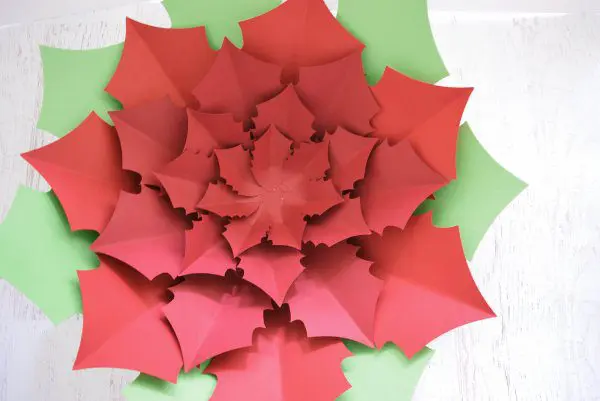
Cut the following number of petals:
You will have four different shaped petals to cut out. To get started on your paper poinsettia tutorial cut the following number of petal pieces out. You will also need one 7-sided base piece for your center to mount all of your petals on.
- 7 XL Petals (First layer)
- 7 Large Petals (Second layer)
- 7 Medium Petals (Third layer)
- 7 Small Petals (Fourth layer)
- 1 7-sided base
Step 1: Fold the Poinsettia Petals
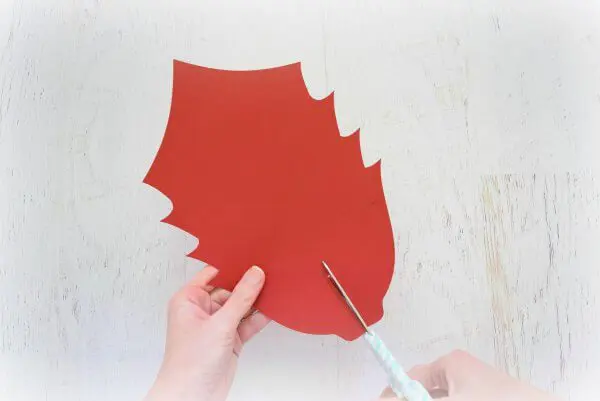
After you have cut all your petals out, start by folding the petals in half lengthwise. Cut about a 2-inch slit down the middle and overlap slightly with glue.
Repeat with all of your petals.

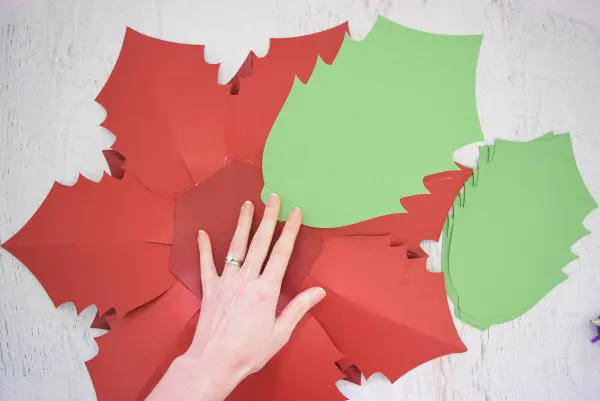
Step 2: Glue the Large Petals to the Base
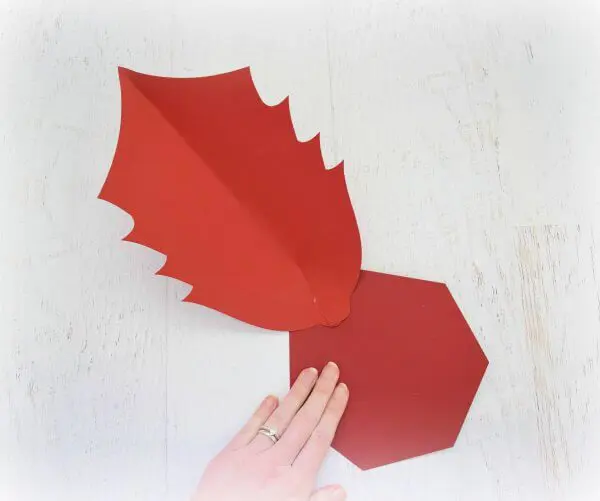
Using your 7-sided base, glue an XL petal on each side of the heptagon. This helps your flowers come together more evenly.
Keep going until you have completed your first layer of extra-large petals.
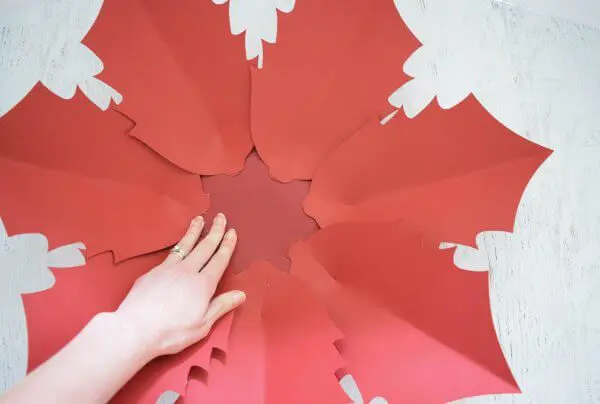
Step 4: Add the Second Layer of Poinsettia Petals
Once you have completed your first layer, move to adding your 7 large petals into a second layer above. Be sure to add the large petals in between the bottom XL petals so that they are alternating as you build.
Step 5: Add a Third Smaller Layer of Petals
With your 3rd layer of petals, continue that same pattern of placing the petals between the ones below so that they are alternating.
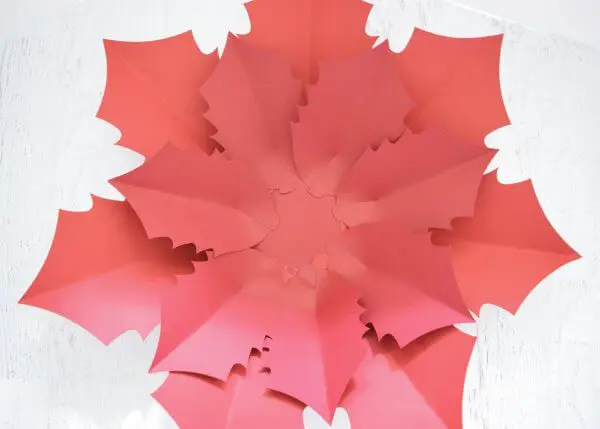
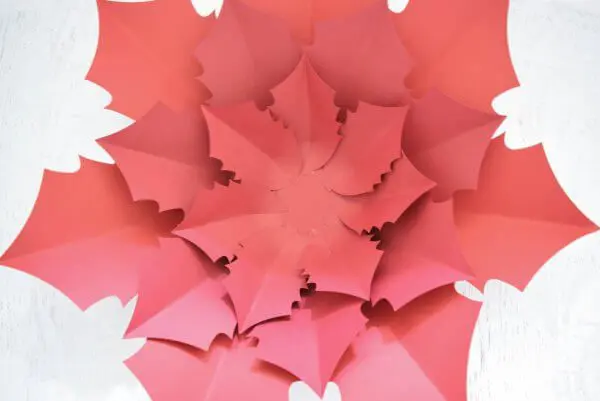
Step 6: Add the Final Center Layer of Petals
Finally, add in the 4th layer of small petals. You should still be alternating the petals between each other as you build to create a natural look.
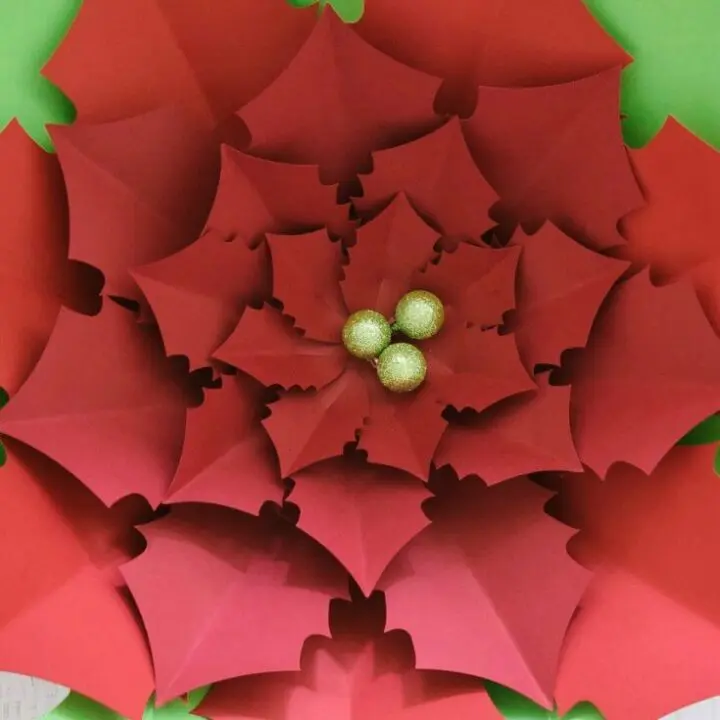
Step 7: Add the Center “Holly Berries” Using Foam Balls
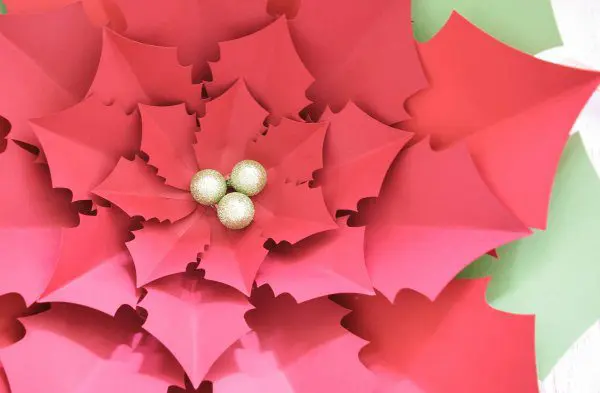
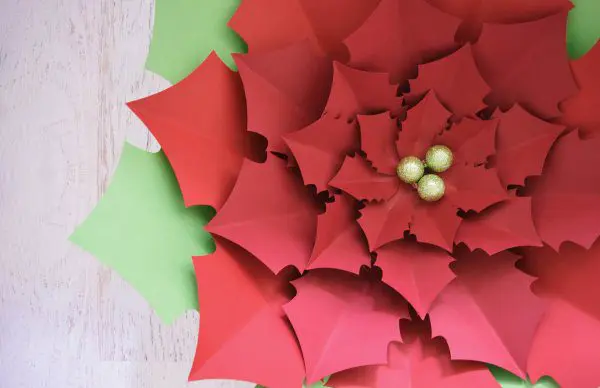
To complete our flower, we’ll work on the center. I used a 3 inch halved foam ball spray painted with gold paint and sprinkled with gold glitter. You can also search for pre-made items like gold pom poms at your local craft store. Or even use some small glitter ornaments in the center like the finished example below!
Feel free to add some leaves by cutting some of the XL petal out in green.
Now that you’ve added your final touches, your DIY Noel Paper Poinsettia is complete, and you are ready to deck the halls with your beautiful festive flowers!
ENJOY!
Prefer video? Watch below!
Giant Noel Poinsettia Flower Video Tutorial
If you prefer to follow along with the video for this DIY Noel paper poinsettia flower, check out the video tutorial below!
Giant Paper Poinsettia Flower
Learn how to make this Christmas classic - a giant paper Poinsettia flower! This beginner-friendly paper flower can be made with or without a cutting machine.
Materials
- Glue Gun
- 65-pound cardstock
- Small 1″ foam ball
- Gold spray paint & glitter
- Cutting machine (Cricut Explore or the Maker)
- Scissors (if you don't have a cutting machine)
- Poinsettia Templates
Instructions
Step 1: Cut the petals and base.
Cut the following number of petals:
- 7 XL Petals (First layer)
- 7 Large Petals (Second layer)
- 7 Medium Petals (Third layer)
- 7 Small Petals (Fourth layer)
- 1 7-sided base
Step 2: Fold the Poinsettia petals.
After you have cut all your petals out, start by folding the petals in half lengthwise. Cut about a 2-inch slit down the middle and overlap slightly with glue. Repeat with all of your petals.
Step 3: Apply the XL petals first.
Using your 7-sided base, glue the XL petals on each side of the heptagon. This helps your flowers come together more evenly.
Step 4: Apply the Large petals.
Moving inward, apply the 7 large petals as a second layer. Be sure to add the large petals staggered with the bottom XL petals so that they are alternating as you build.
Step 5: Apply the Medium petals.
Repeat step 4 with the medium-sized petals.
Step 6: Apply the Small petals
Repeat with the final layer or small petals.
Step 7: Create the gold center.
Complete the flower with a gold holly berry center by taking 3 halved foam balls spray painted with gold paint and sprinkled with gold glitter and gluing them to the center of the Poinsettia flower.
Do you love this holiday decor idea? Be sure to check out all these beautiful ideas here that can be used with the help of your Cricut!