How to Add Glitter or Paint to Acrylic Disk Ornaments – With Free SVG Templates
This post may contain affiliate links that won’t change your price but will share some commission.
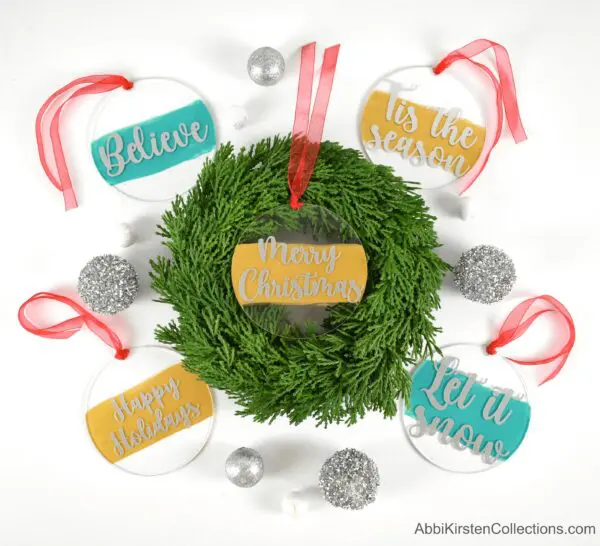
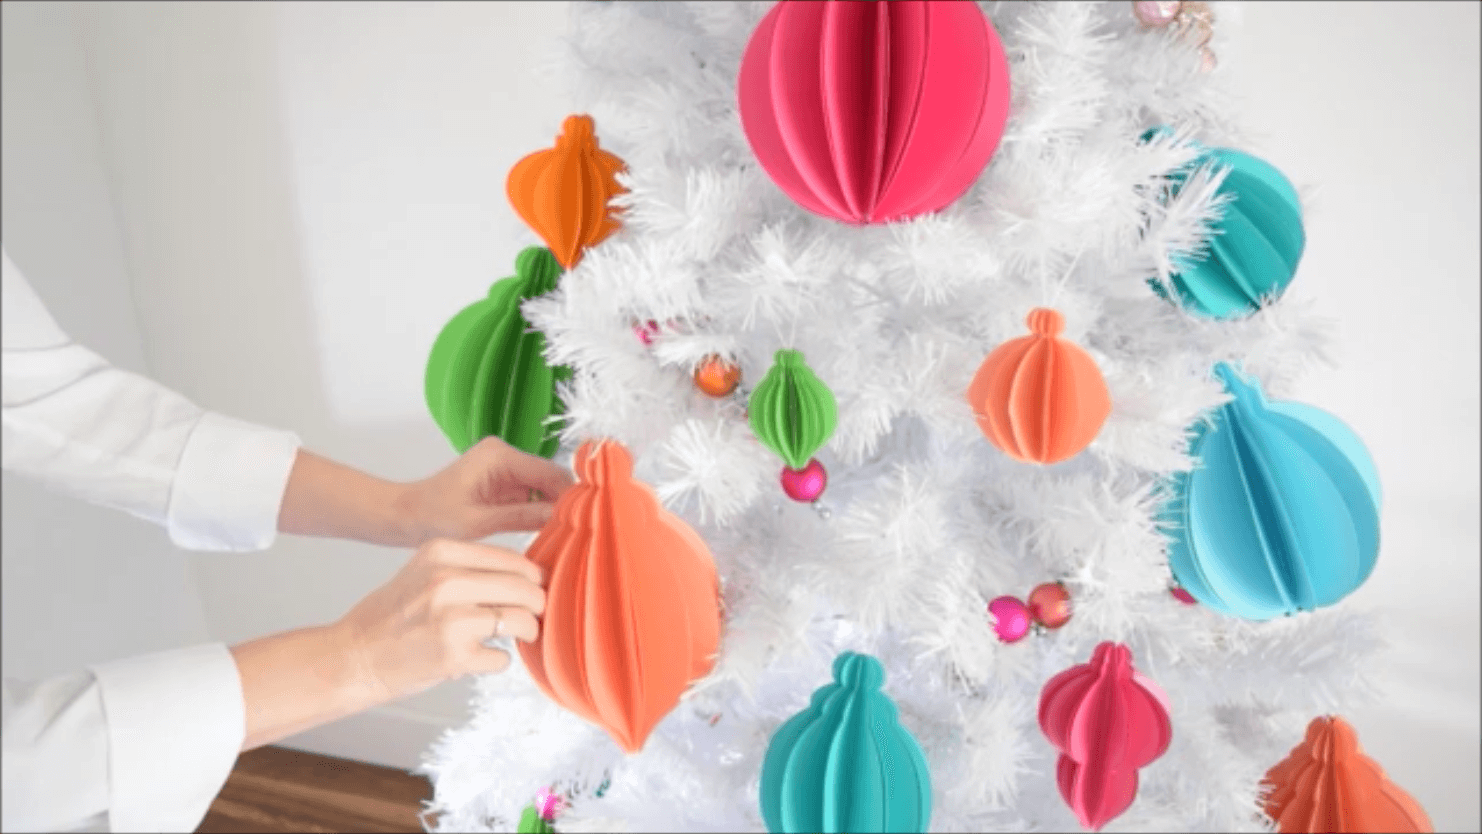
With the help of a Cricut machine, there are endless ways to craft personalized handmade ornaments for a special tree bauble. Today in my continuing series of acrylic ornaments, I am sharing how to make DIY glitter ornaments with vinyl and DIY painted ornaments with vinyl.
I will be featuring the clear acrylic disks just as I did with my gold leaf gilding ornaments. If you are looking to make round glitter ornaments, I have an entire step-by-step tutorial here, along with more free templates for you to enjoy!
While I would not suggest this glitter ornament craft for young kids, the DIY painted ornaments are definitely a great fit for a child who loves to handle a paintbrush. I will share more about the painted ornaments below!
Let’s review the supplies you will need for both the DIY glitter and painted acrylic disk ornaments.
Supplies For Making Acrylic Ornaments
- Clear acrylic ornament disks. I have used both these 4-inch disks and also these smaller clear ornaments with success.
- Permanent vinyl. I’m using Smart Vinyl. Make sure it is permanent so that your vinyl does not come off once placed on.
- Cricut machine. You can use the Cricut Maker, Cricut Explore or Cricut Joy models.
- Weeding tools
- Fine glitter in choice colors or acrylic paint if you prefer to skip the glitter
- Mod podge spray Spray works best because it will not leave streaks.
- Ribbon or twine to hang the ornaments

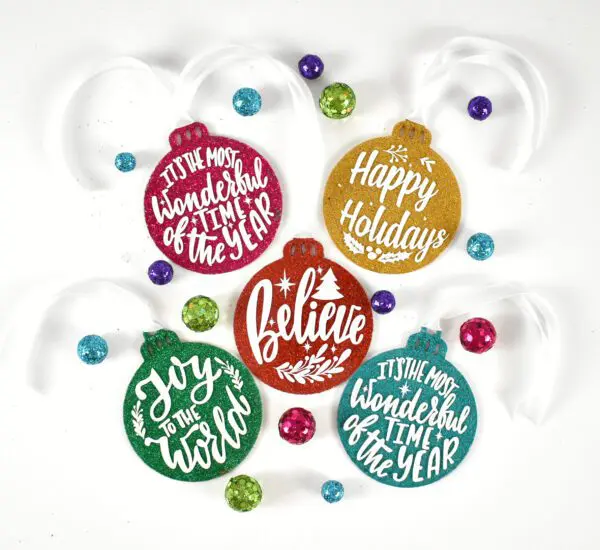
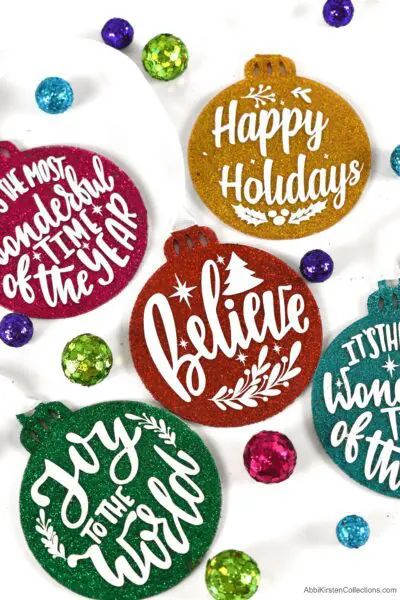
Download the Free Christmas Ornament SVGs
Download these free Christmas SVG phrases by signing up via the form below. Once you set your password via the email sent to you, enter the vault, and search at the top with the keyword ‘ornament’ or design #405 and #406.
If you are already a member, log in right here and search designs #405 and #406. Need help entering the vault? Read this helpful post here.
Acrylic Disks Ornaments with Glitter Video Tutorial
Watch my full video tutorial for making these DIY glitter acrylic disk ornaments with vinyl, or keep reading for picture instructions below!
How to Make DIY Glitter Ornaments with Acrylic Disks
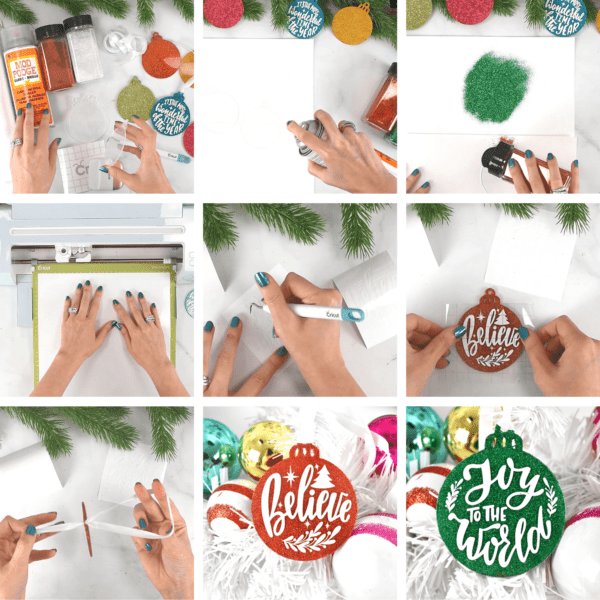
- Collect the supplies (listed above) and download the free templates by logging in here!
- Remove the film from ONE side of your ornament. Spray with mod podge. Only give it a couple of sprtizs about 8-10 inches away from the surface. Do not soak the ornament with mod podge.
- With the ornaments on a piece of cardstock, generously sprinkle your glitter over the ornament surface. Shake the remaining glitter back into the container once dried (usually 20-30 minutes).
- Spray the top of the glitter with mod podge to seal the glitter on and eliminate excessive shedding.
- While your DIY glitter ornament dries, bring the SVG ornament designs into Cricut Design Space (here is how to upload an SVG file). Scale them to the approperiate size of your ornament. If you have a 4 inch ornamnet then scale to 3.5 inches.
- Load your vinyl onto your Cricut mat or if you are using Smart Vinyl this is not required. Cut the designs.
- Weed your Christmas pharses and cut down some squares of transfer tape.
- Burnish (rub) the design onto the transfer tape and peel the liner away from the tape.
- Place the design centered onto the circle ornament disk and rub it on with yoru Cricut scraper tool. You should be placing the vinyl onto the non-glitter side after removing the film.
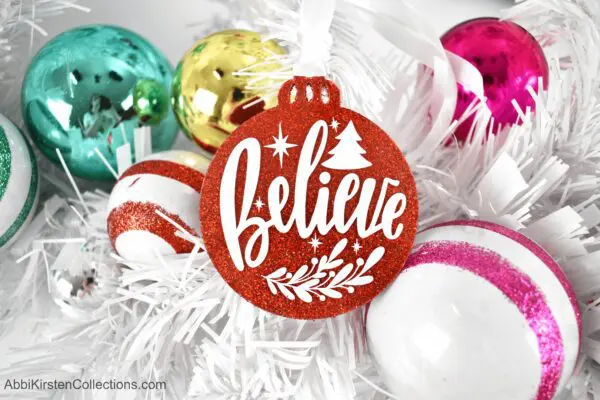
- Remove the transfer tape and string with ribbon to complete the ornament!
If you plan to give these glitter ornaments as a gift, you may like the ornament display cards I created perfectly for gift-giving. Check out the gift display ornament cards below.

You can grab these ornament display cards in the Freebie Vault. Just search the keyword “display cards.” Log in to the Vault or sign up above to start downloading the templates!

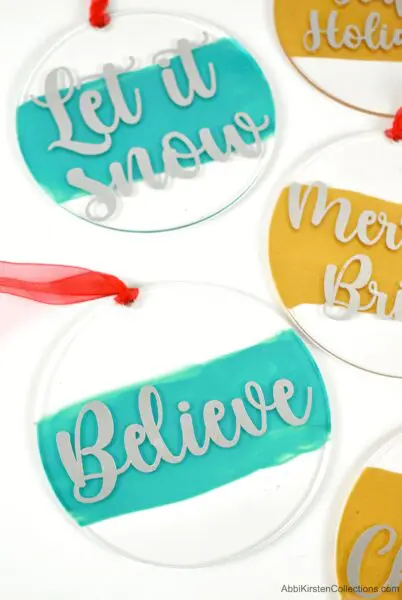
DIY Painted Ornaments with Acrylic Disks
Painting the back of your acrylic disks and adding vinyl is much like the glitter approach, only less messy. I’ve made a separate video for you below for DIY-painted acrylic ornaments.
If you are searching for an easy handmade ornament that kids could help with, then the painted ornament approach is best. My kids enjoyed painting the acrylic disks while I cut the vinyl!
Acrylic Painted Ornament Video Tutorial
Supplies will be precisely the same; you will just switch out your glitter or acrylic paints.
Watch the video above for my painted acrylic ornaments, or keep reading for a picture tutorial! Don’t forget to scroll up to download the free templates for both my glitter and painted ornaments, or log into your account here to access them!
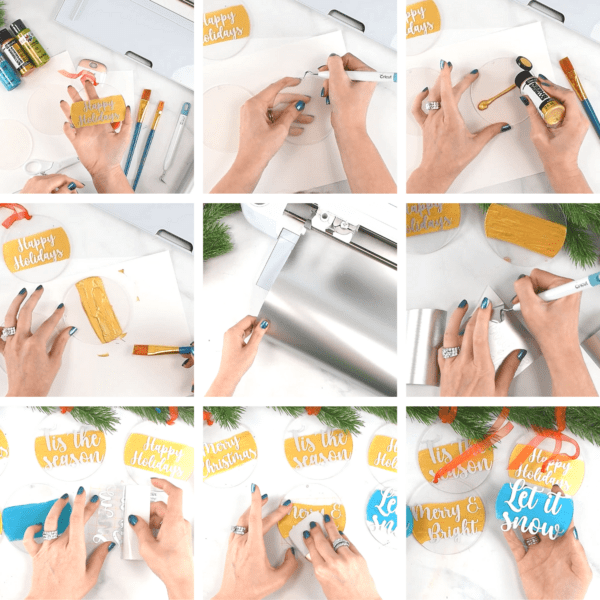
- Remove the film from ONE side of you ornament.
- Add a line of paint across the working side.
- Using your brush gently spread the paint. This can be a line across or you can choose to cover more of the ornament.
- Repeat step 3 until happy with the tranlunancy.
- Let your ornament completely dry for a couple of hours at least.
- Seal the painted side by spraying mod podge. Let dry for 20 minutes.
- Load the free design in Cricut Design Space (find them above). And scale them to the size of your ornament. My acrylic disks were 4 inches so I scale mine to 3.5 inches.
- Transfer the vinyl to your ornament with transfer tape. You should be placing the vinyl onto the non-painted side after removing the film.
- Add a ribbon to hang your DIY painted ornament!
Which DIY ornament is your favorite? These handmade ornaments make wonderful personalized gifts or just a fun holiday craft to do with the family!
If you want to learn how to design your own SVG files and typography design, then join my exclusive course, Free the SVG, for in-depth self-paced tutorials on making SVG designs like a pro!
Hey, Crafty bestie! I’m Abbi!

I’m thrilled you are here! I have spent the last 10+ years making messes and magic in my home studio to make the world a more colorful place, one craft at a time! I’m on a mission to nurture the creative magic inside your soul and bring that bursting imagination inside you to life with easy-to-learn tutorials. If you haven’t yet, be sure to join the subscriber community to gain access to all my freebies or visit my signature design shop, Catching Colorflies!

So lovely glittery and perfect for the Christmas tree!
First of all, I love your videos. Thank you.
I have made the acrylic round ornaments and they came out well. But I noticed if I stacked them on top of each other they stick together. How do you store them?
Great question! I would put parchment paper between them to avoid sticking. 🙂
I am making these for my students! Did you use the glitter side to put the Vinyl on? or the non glitter side?
Can I put anything on the glitter side to make it smooth?
I use the non-glitter side! You can seal the glitter with mod podge. 🙂