DIY Valentine Cards With Cricut: Loads of Love Card SVG
This post may contain affiliate links that won’t change your price but will share some commission.
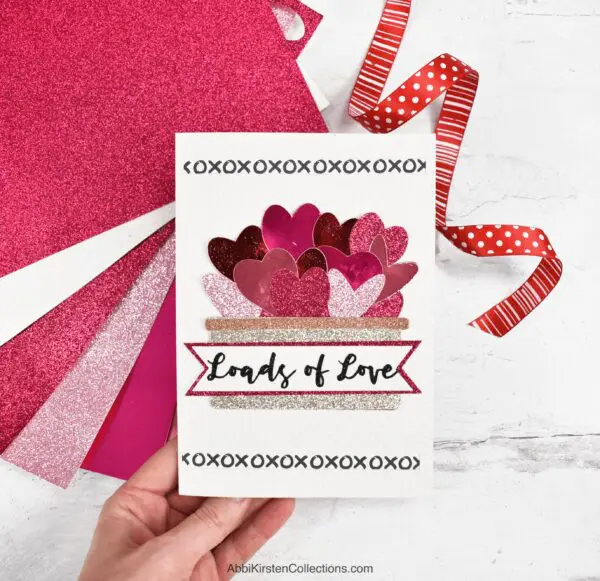
Valentine’s Day brings with it loads of love, hugs, and kisses, making it one of the best holidays to create handmade cards! In this tutorial, I will share with you how to make DIY Valentine’s Day cards with Cricut. My favorite aspect of this Cricut card tutorial is using heat transfer vinyl, also known as iron-on vinyl, on cardstock!
If you need a gift box to go with your handmade card, check out my heart mandala box craft.
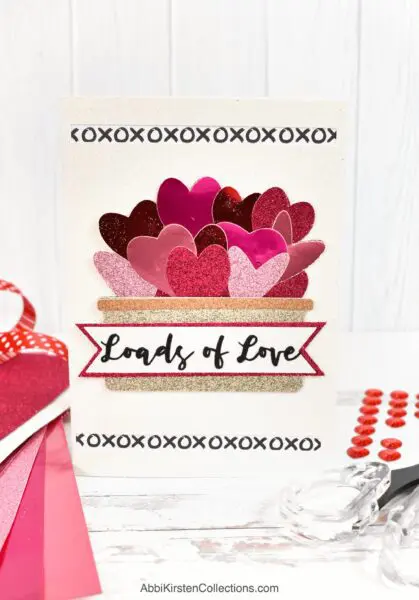
Using HTV on cardstock is perfect for adding things of an intricate nature to cards because iron-on comes on a liner, and you don’t have to worry about picking it up or delicate pieces tearing due to using paper. For this Valentine’s card, I will use HTV to apply the words “loads of love” to the front of the card. This is optional, of course, but I think you will see the magic of it!
Let’s cover the supplies first.

Supply List For “Loads of Love” Valentine’s Day Card
- Cricut machine – Any of the current models will work, such as the Maker, Explore, or Joy models.
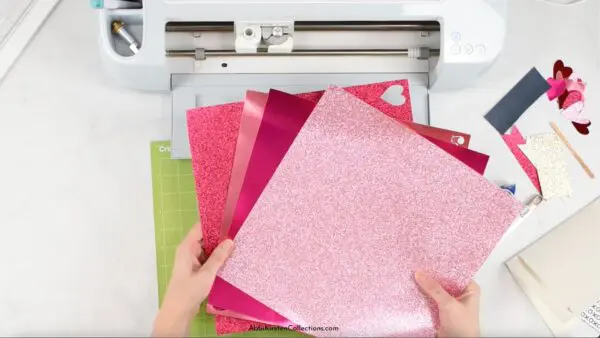
- Glitter cardstock or 65-pound cardstock – I recommend reds and pinks for the hearts and trims, silver and bronze colors for the basket, white or off-white cardstock for the card’s base, and a love-themed patterned cardstock (like “xoxoxo”) for the insert.
- Bearly Art Glue or Scrapbooking tape
- Iron-on vinyl
- Easypress mini
- Easypress mat
- Weeding tool (optional)
- Template for “Loads of Love” Valentine’s Day card – download below
Download The Valentine Card SVG Template
Find this Cricut Valentine card SVG template inside the Abbi Kirsten Craft Vault. These SVG files are included for premium members. Log in or sign up below! Once logged in, search the keywords “valentine card” or design #720 to download this Loads of Love card design.
OR
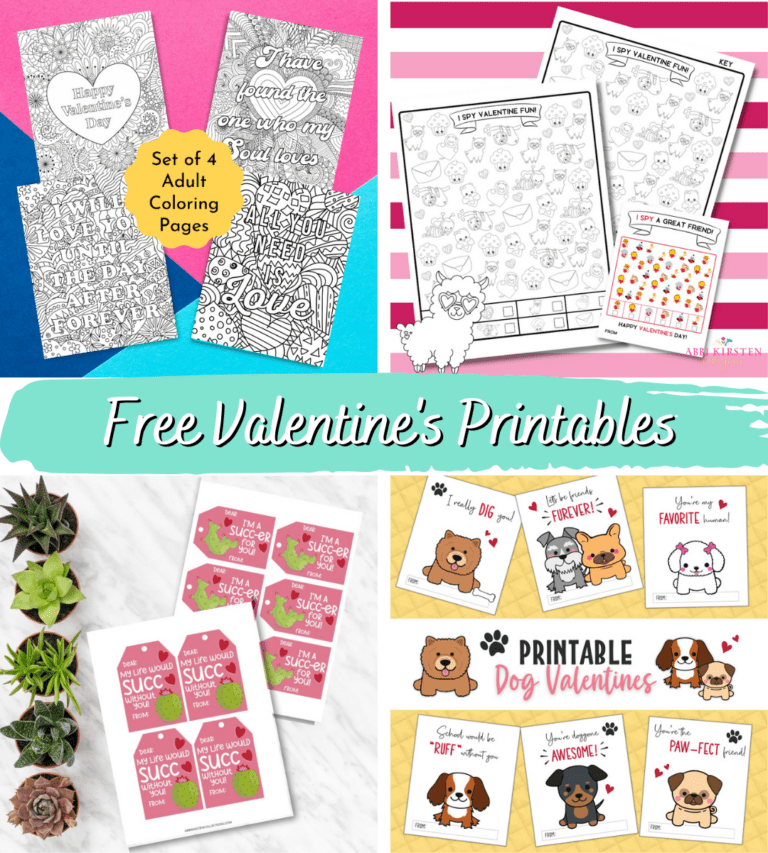
Looking for freebies? Find kid-friendly and FREE Valentine’s Day cards in my 12 FREE Valentine’s Printables post.
Loads Of Love Valentine’s Day Card Video Tutorial
Watch the full video below to make this Valentine’s Day card, or keep reading for a step-by-step picture tutorial.
Setting Up Your Valentine’s Day Card In Design Space

To get started, import the Valentine’s card SVG into Cricut Design Space. Learn how to upload an SVG to Cricut here. These designs are available for premium members in the Abbi Kirsten Craft Vault (more details above).
Check the scale of your card. I have mine set to be 5×7 inches once folded, so the card should measure 5 x 10 inches. You can adjust the scale at the top edit bar by typing in your dimensions.
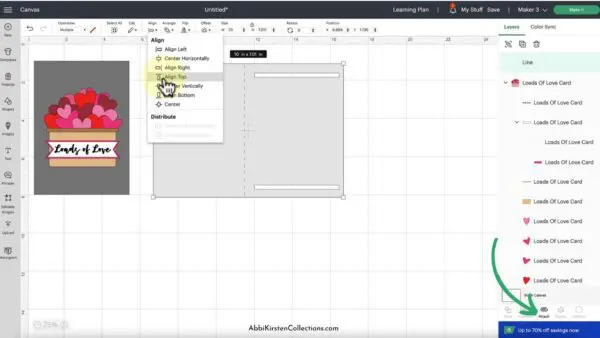
Next, we want to add a scoreline to the card. Grab a scoreline from the Shape’s Panel to the left and scale it to match the 5-inch height of the card. Place it over the card and use your align tool to center it. Select the card base and scoreline, then click Align > Center.
With the scoreline and card base still selected, click the Attach tool at the bottom of the layer’s panel to the right. This will ensure the scoreline remains where we want it when it cuts out.
How To Make A Valentine Card With Cricut
Next, get your cardstock and heat transfer vinyl cut out for your DIY Valentine’s card. I am using glitter cardstock, so I selected that setting in Design Space. For my heat transfer vinyl, I used glitter iron-on. Don’t forget to mirror when using HTV!
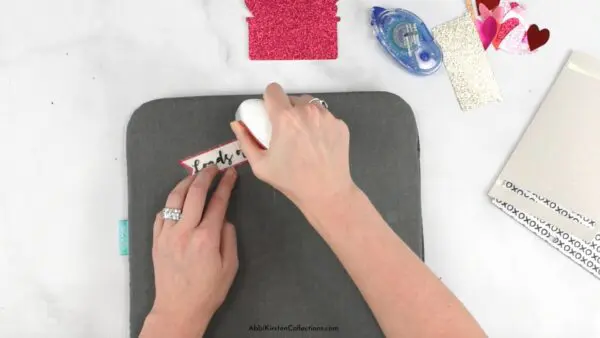
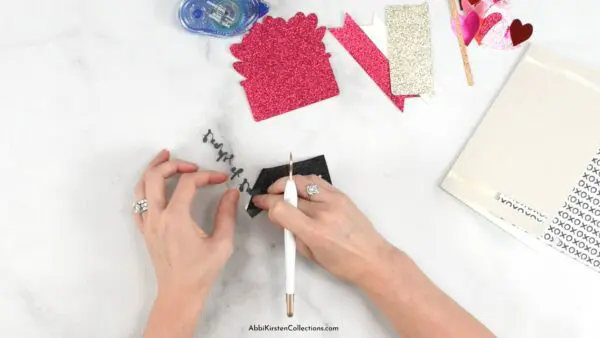
After I weed my HTV, I place it onto the card’s banner piece and use my Easypress Mini, set to Medium, to iron on the heat transfer vinyl. It only takes about 15-20 seconds to press. Be sure to let the iron-on cool completely before removing the liner. I’ve also layered the two banner pieces together with my Bearly art glue.
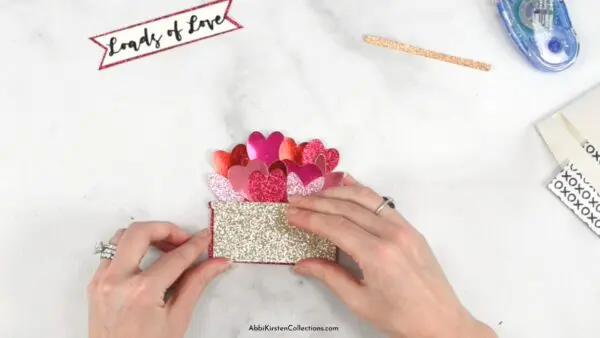
Continue to layer the hearts and basket with your glue or scrapbooking tape of your choice. It can be helpful to position everything before you start to glue down the pieces.
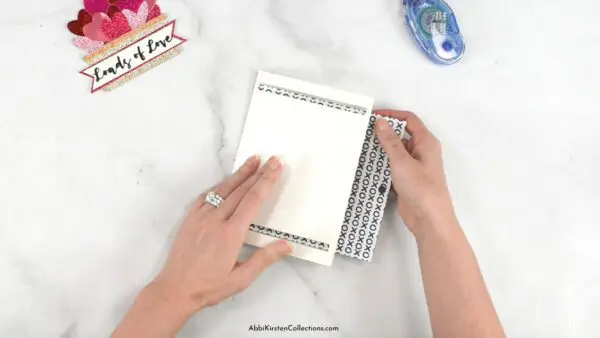
Choose a patterned scrapbooking paper for the card insert that will be peeking through the front slots. Secure this with scrapbooking tape or glue.
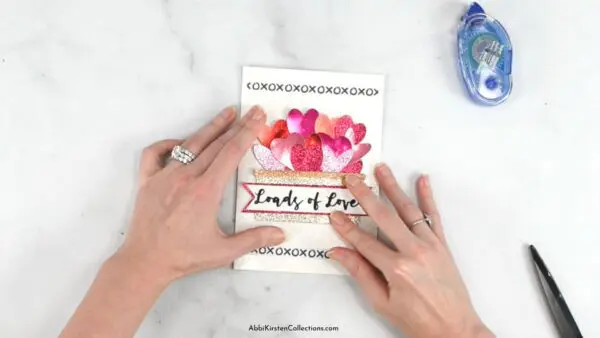
Finally, add the loads of love basket to the front of the card with glue. And that’s it! You have completed your DIY Valentine’s Day card with your Cricut!
What do you think about making Valentine’s Day cards with your Cricut? Have you ever tried heat transfer vinyl on cardstock like this? Share your thoughts in the comments below!

DIY Cricut Valentine Cards: Loads Of Love SVG
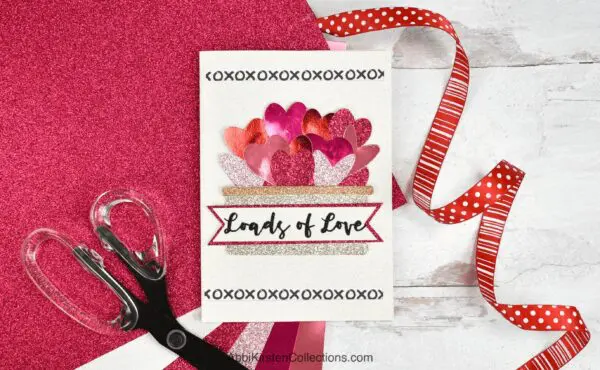
Who doesn’t want a lot of love this Valentine’s Day? You can deliver tons of adoration or romance to the most important people in your life with this handmade “Loads of Love” card! It’s an easy layered papercraft when you use a Cricut machine, and it takes very little time to make. The glitter cardstock really makes the heart-filled basket design pop!
Materials
- Cricut machine
- Glitter cardstock (reds and pinks for the hearts and trims, silver and bronze colors for the basket)
- 65-pound cardstock (white or off-white cardstock for the card's base, and a love-themed patterned cardstock (like "xoxo") for the insert.
- Bearly Art Glue
- Scrapbooking tape (if you don’t want to use glue)
- Iron-on vinyl
- Easypress mini
- Easypress mat
- Weeding tool (optional)
- Template for "Loads of Love" Valentine's Day card
Instructions
Step 1: Gather all your supplies.
Step 2: Import the “Loads of Love” template into Cricut Design Space and open it.
Step 3: Ensure your scale is set for card size 5x7 when folded or rescale to the desired size.
Step 4: Add score lines to your card using the Shape’s panel and scale it to the 5-inch height of the card.
Step 5: Select the card and the scoreline and select “Align - Center.”
Step 6: Keep the scoreline and the card base selected, and click the “Attach” tool.
With the scoreline and card base still selected, click the “Attach” tool at the bottom of the layer's panel to the right. This will ensure the scoreline remains where we want it when it cuts out.
Step 7: Cut out your cardstock and heat-transfer vinyl designs. Don’t forget to mirror the image for the heat-transfer vinyl cut-out!
Step 8: Weed all the cut pieces.
Step 9: Use the Easypress Mini, set to medium, to place the heat-transfer vinyl onto the banner of the card.
Step 10: Adhere the heart and basket layers together with glue or scrapbooking tape.
Continue to layer the hearts and basket with the glue or scrapbooking tape of your choice.
Step 11: Use a love-themed or patterned scrapbooking paper to use as a card insert. Secure this with glue or scrapbooking tape.
You’re finished, and now you have a lovely, handmade Valentine’s Day card to give to the person you love the most. Happy Valentine’s Day!
More Valentine’s Crafts You Will Love


About Abbi Kirsten
Welcome to my colorful corner of the internet, where we play with vibrant crafts and unlock your creative magic! Hang out with me and get lost in a fun array of projects, tutorials, and products, from stunning papercraft ideas to flower templates, Cricut help for beginners, and endless crafter’s hacks.
Join A-Star Crafters and participate in monthly Craft-Alongs in our community Facebook group!