How to Convert an Image to an SVG Cut File for Cricut Design Space Using Inkscape
This post may contain affiliate links that won’t change your price but will share some commission.

Learning to create your own SVG files is an amazing skill to have. Usually, around the time a Cricut user starts to feel confident using their machine they may ask, how can I convert an image to SVG? It’s easier than you think and soon you’ll be making SVG files on your own.
There are a few free programs out there that are one-click wonders for converting images to SVG files but they don’t offer you the ability to clean the image up in the way you may want.
In this post, I will show you two ways to convert images or clipart to SVG files. First I will show you an online converter, PNGtoSVG.com and then I will show you two images inside Inkscape which is my favorite software for creating layered SVG files.
Why? I want to offer you variety and also show you the contrast of working in Inkscape versus a one-click converter which is convenient but doesn’t offer a lot of control over the final outcome.
I will give a step-by-step explanation with photos and then at the very bottom there are TWO videos for Inkscape and I want you to start with the first one because I will ease you into the process before jumping into more advanced techniques like cleaning up your blended images.
What is the difference between a layered SVG and a PNG or Jpeg image?
How many of you think that the only way you can cut out a shape on Cricut is by having an SVG file WITH layers to upload? And how many of you have seen an image you would love to use in a layered file but have no idea how to make that happen?
Let’s talk about what an SVG is and how isn’t different from a PNG or Jpeg image. An SVG cut file is a graphic format that stands for scalable vector graphics.
In the most basic terms SVG means you can increase or decrease the size of the file without loss of resolution (it won’t look blurry or pixelated). SVG images are then cut out onto compatible materials that work with cutting machines to build your crafts!
PNG image stands for Portable Network Graphic. And Jpeg is basically a PNG image that has been compressed for smaller file size. PNG image types will eventually get pixelated (or blurry) when scaled. Just like an SVG file, cutting machine programs will open this PNG format, which is great for Print Then Cut type projects.
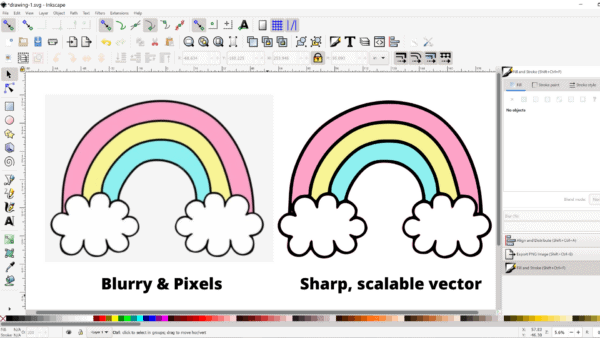
Unlike an SVG file, a PNG file DOES NOT have cut lines or layers inside the file. You will only get a flattened result with the outline of the image being cut. You can not ungroup or edit layers. Image files (PNG & Jpeg) are the type of format of photographs such as what you take on your phone or camera. They also are the primary format for most images on the internet.
Before I show you this trick I also want to mention that though this works well for those of us who just want a few images every once in a while it really isn’t suitable for complicated or long-term use. That being said, I have included an Inkscape tutorial below that will give you more freedom with designing your images.
How to Convert an Image to SVG with PNGtoSVG.com
I design many of my own SVG cut files and images, but to prove that you can do this with any image, I will pick one out on a free clip art site to demonstrate.
Side note: Using images offline is usually fine if it is for personal use (no monetary gain) but always be respectful of copyright images and terms.
Note: I am not a lawyer and each person is responsible for their own actions.
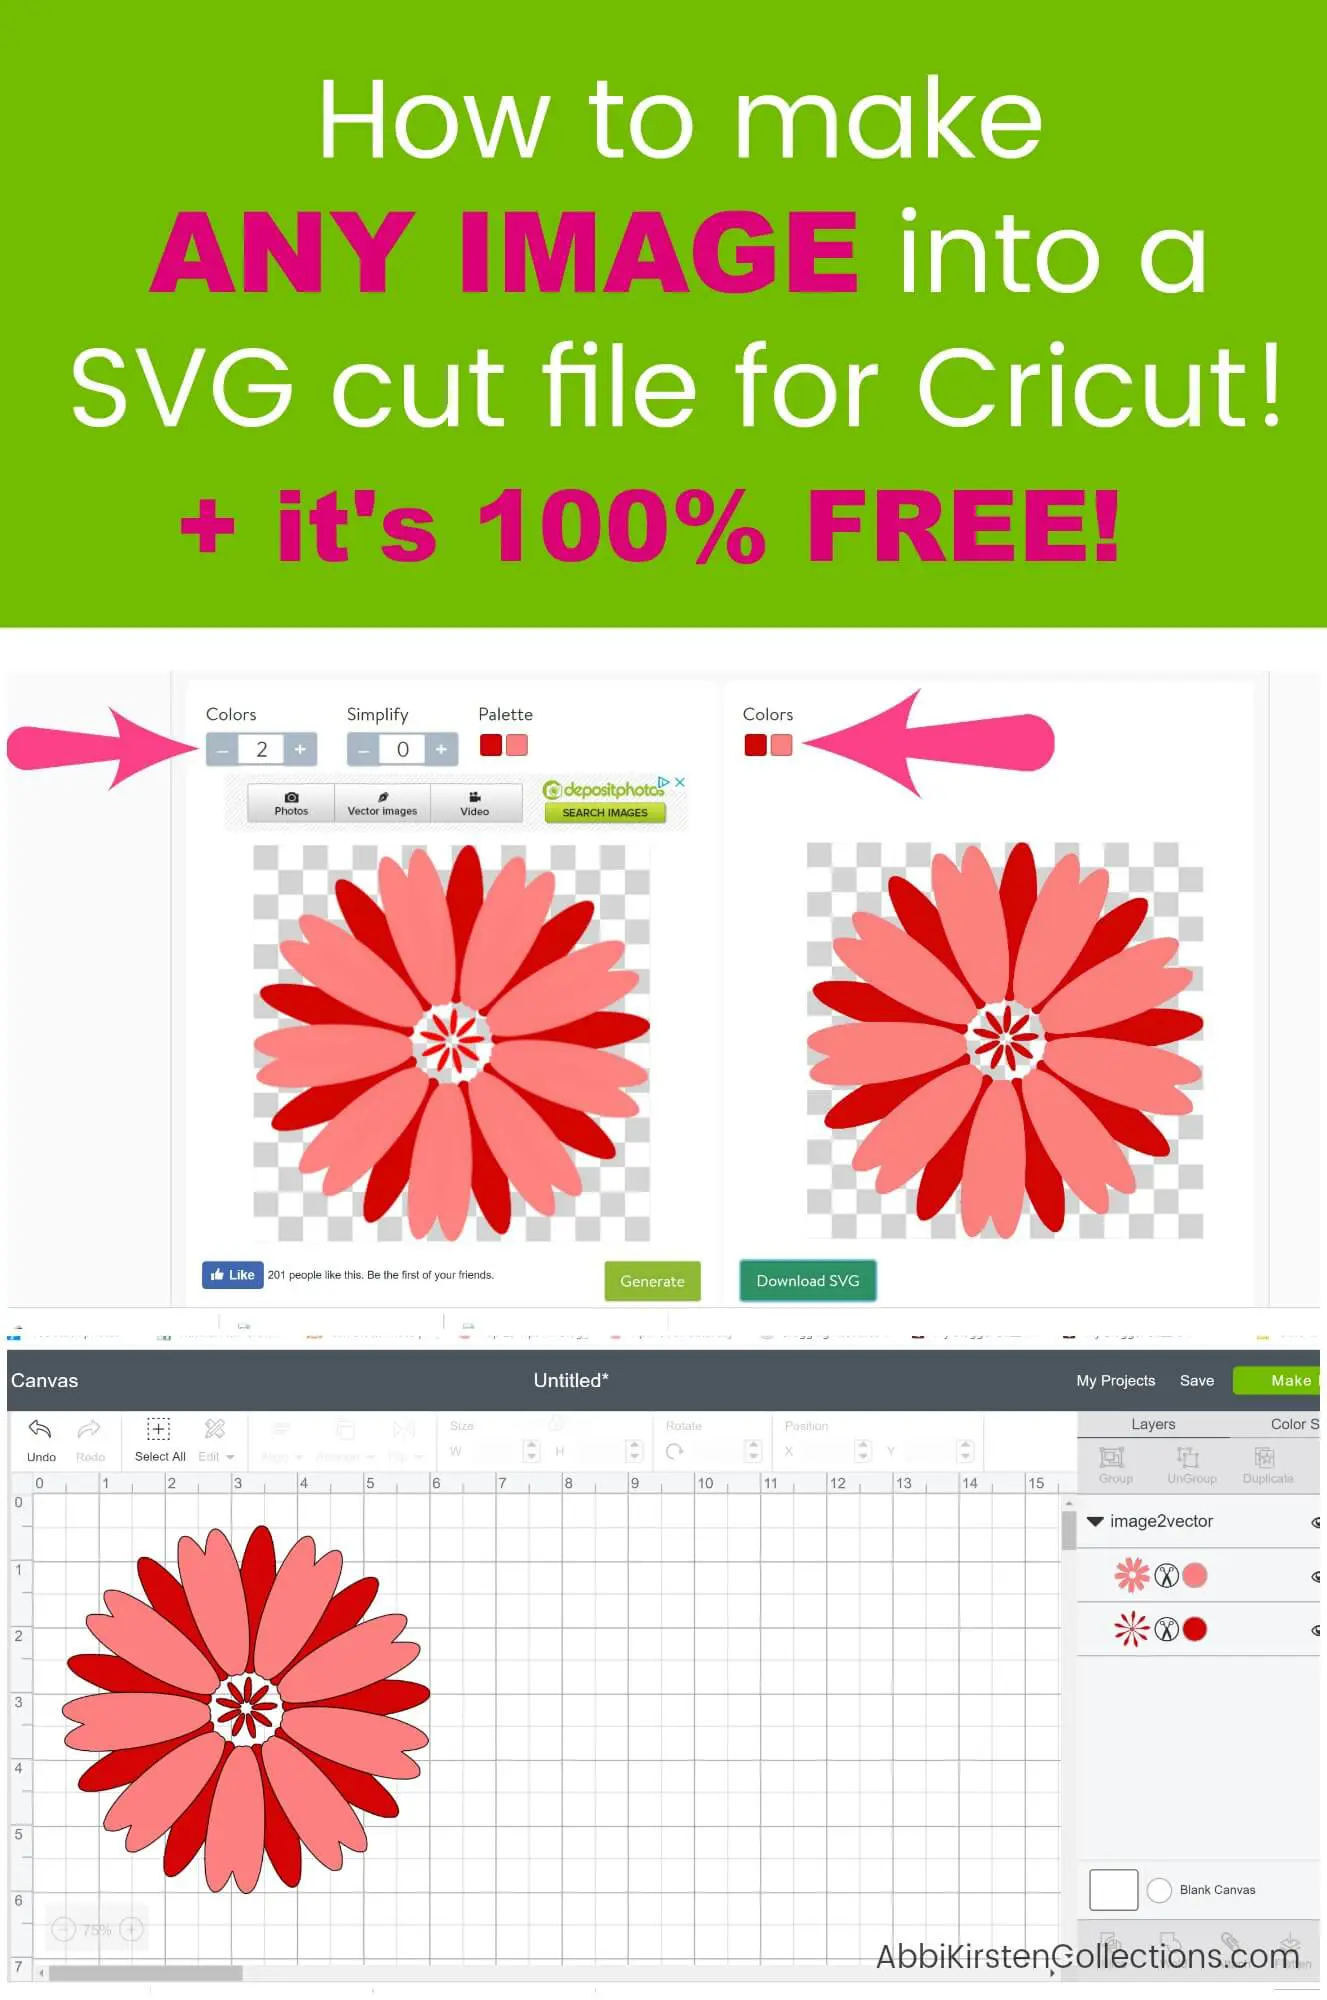
I chose just a simple flower clip art image from this site. After saving it to my computer I went to PNGtoSVG.com, which is totally FREE, and uploaded my image where it says Choose File. Try not to click on any of their ads – that won’t produce the same result.
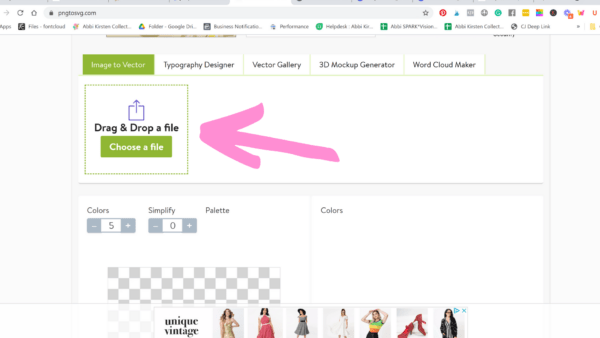
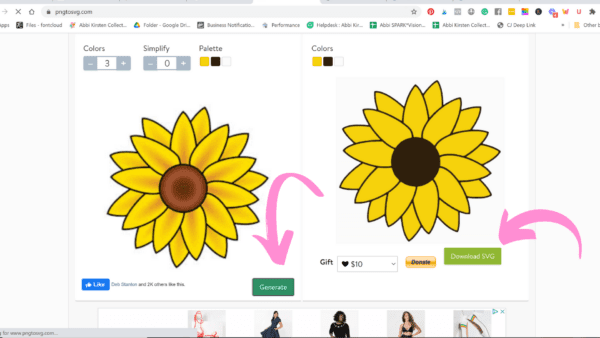
Once uploaded, scroll down to see your image appear. You will then use the plus or minus button to increase or decrease the color quantity count. Remember each color will represent a layer when uploaded to Cricut. My flower design here is very simple, so I am just telling it to give me 2 colors and therefore the SVG cut file will have 2 layers. I recommend not going much higher than 5 colors.
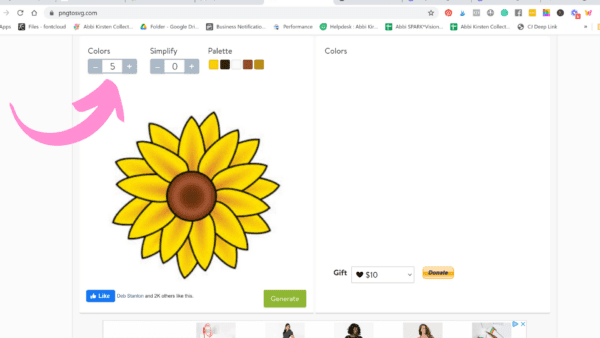
Next, click the Generate button to see a preview of your conversion. Make any adjusts based on the result. Once happy with the way it looks click the green Download SVG button under your picture to the right-hand side. The item will download to your computer. Note: this website can work on mobile too!
Upload your SVG to Cricut Design Space
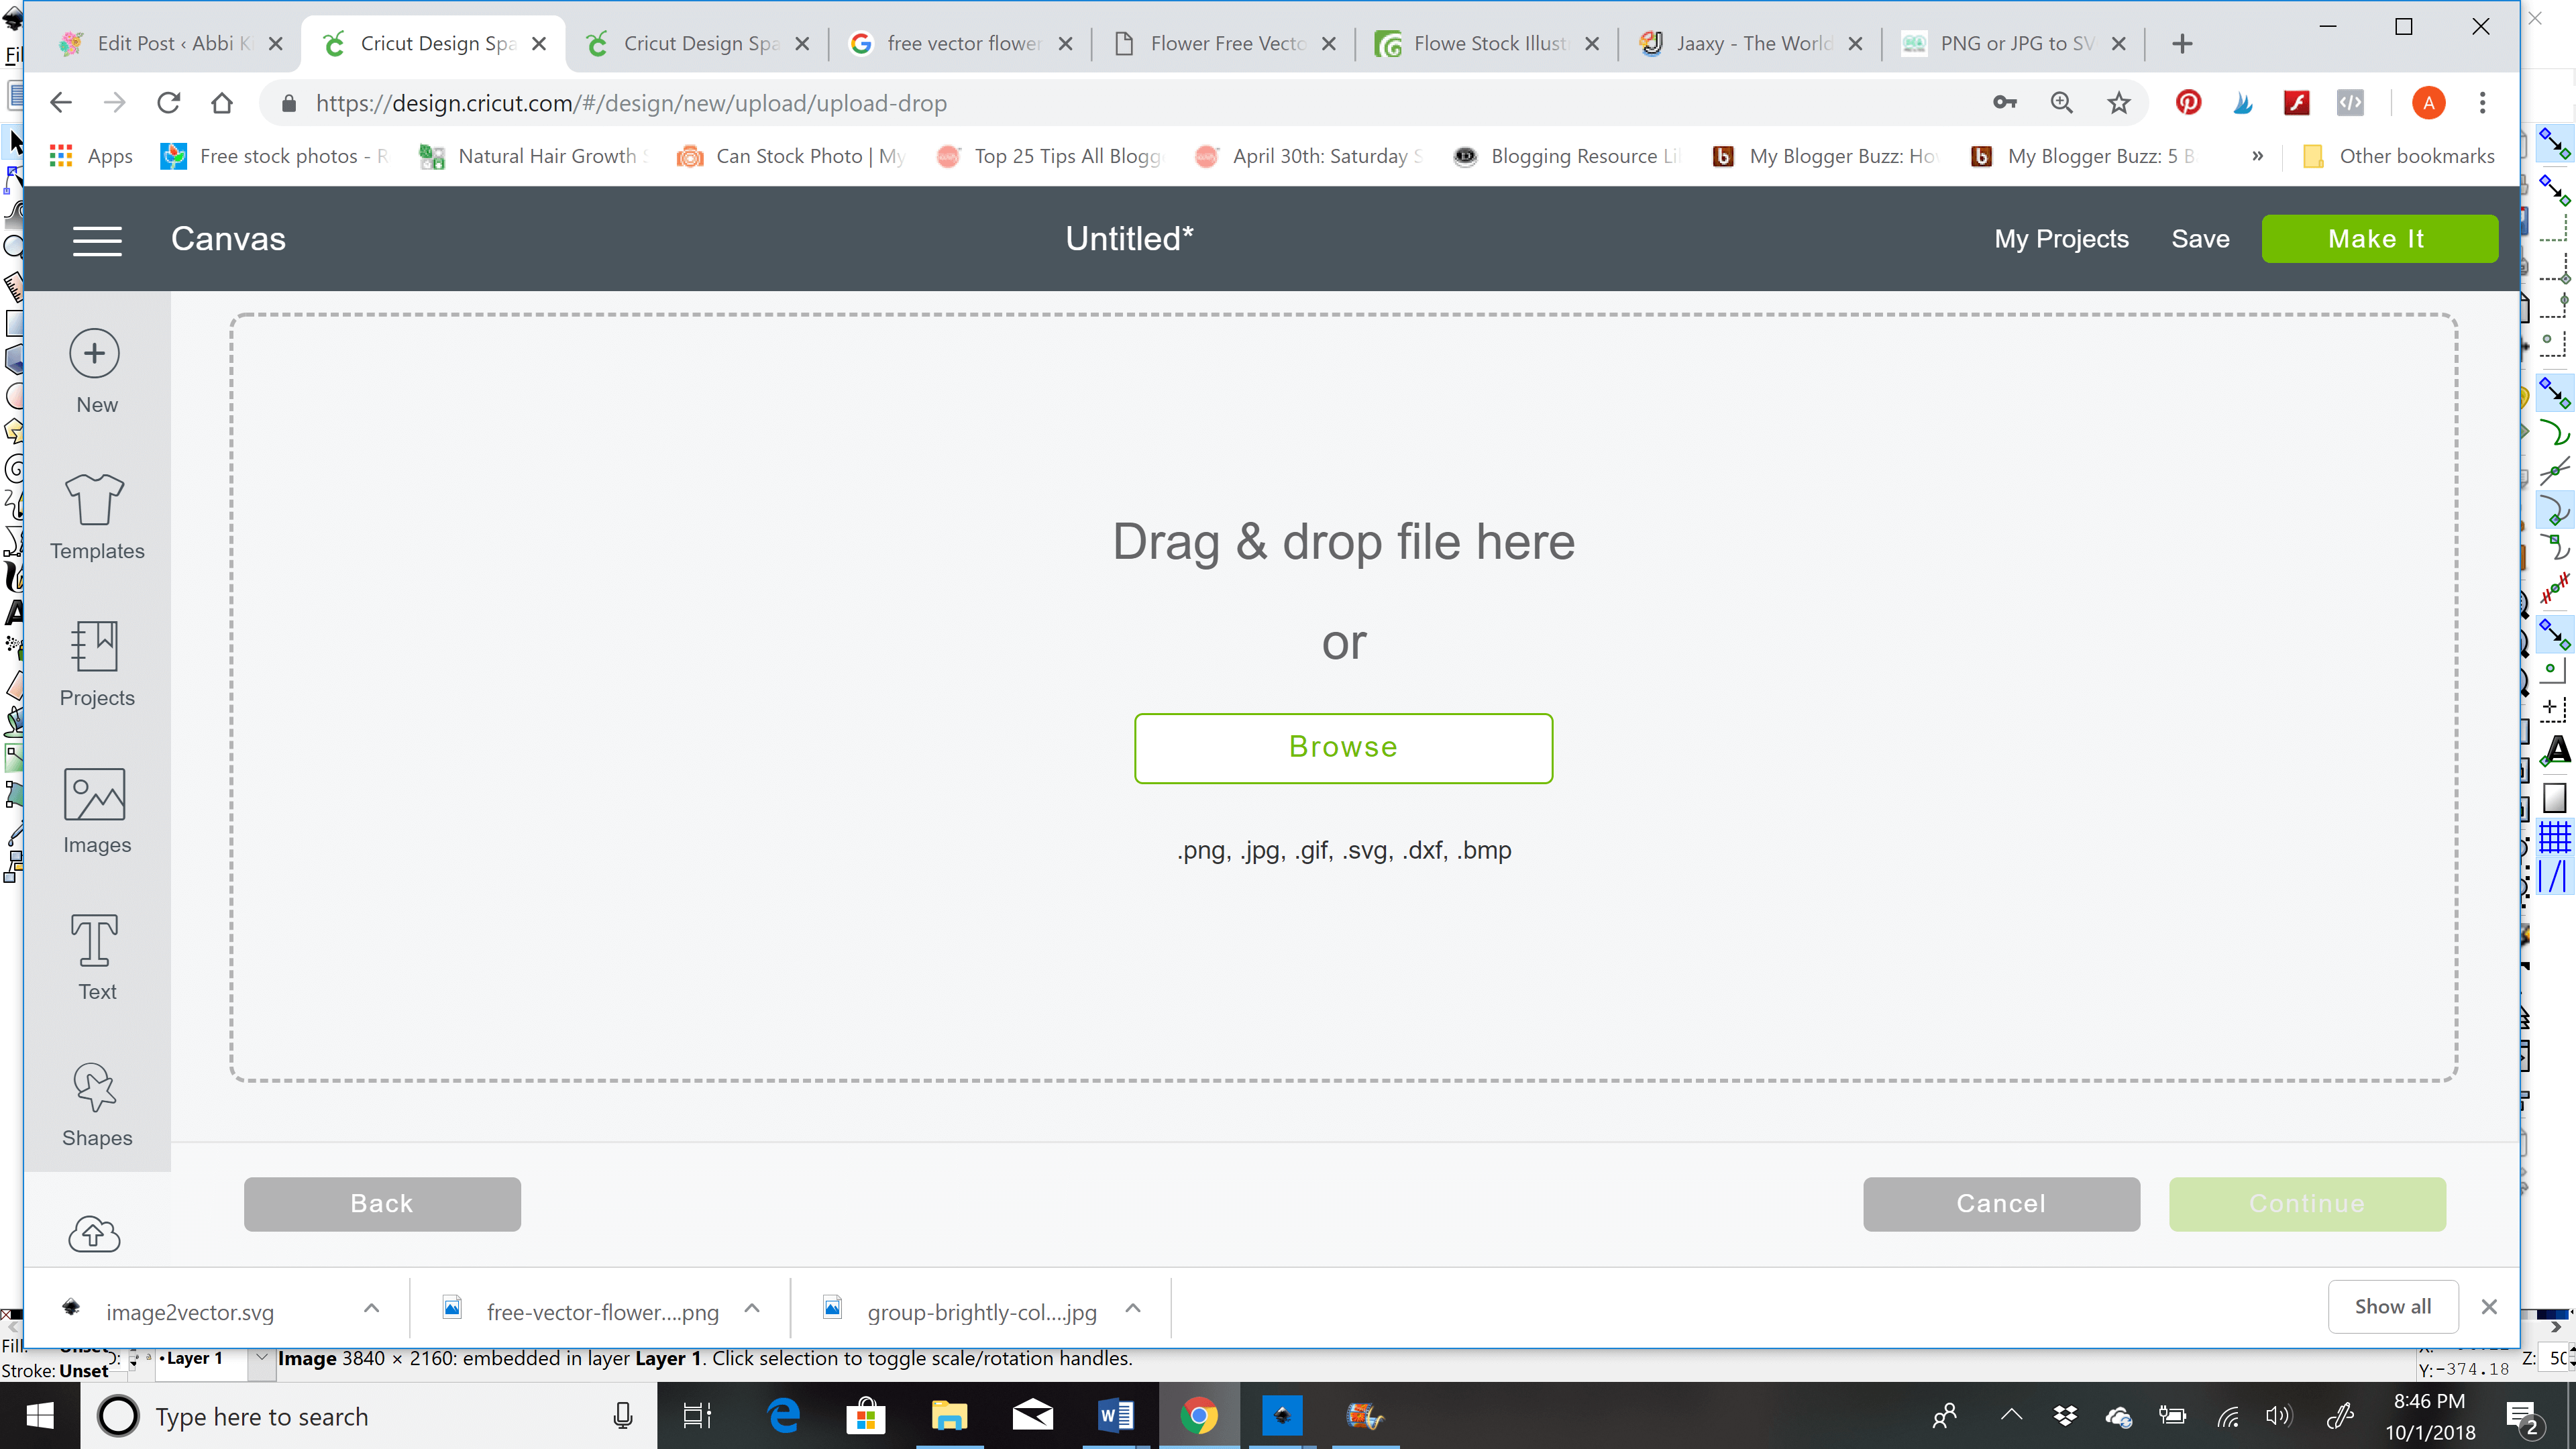
You will likely find the download in your computer’s downloads folder. Navigate to the download folder and upload the SVG to your Cricut Design Space. If you need to know how to upload your own SVG files to Cricut Design Space, click here.
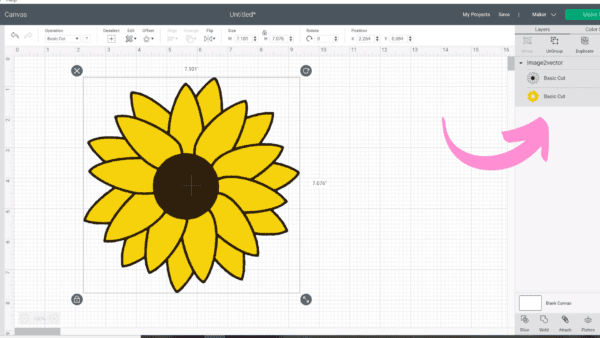
Voila! You now have converted a basic image into a 2 layer scalable vector graphic that can now be cut out in multiple layers. Wasn’t that as easy as eating pie? Plus, this opens up so many opportunities to expand your personal image library.
Alright, so everyone loves that quick online image to SVG converters but there is a reason why so many crafters have learned to use the free program Inkscape.
Want to see me convert a personal photo into an SVG? Watch my FREE Magic of SVGs Workshop!

Converting a PNG or JPEG image to a layered SVG in Inkscape
I’m going to walk you through the quick-notes steps below. Be sure to scroll down to watch both videos for full details.
Download Inkscape
Donate to keep Inkscape around!
Inkscape is a free open source program that allows anyone to create their own graphic design without paying monthly subscription fees. You can download the program here. Inkscape works only on laptops or desktop computers. Both Mac and PC computers can work.
Open Inkscape and Import an Image
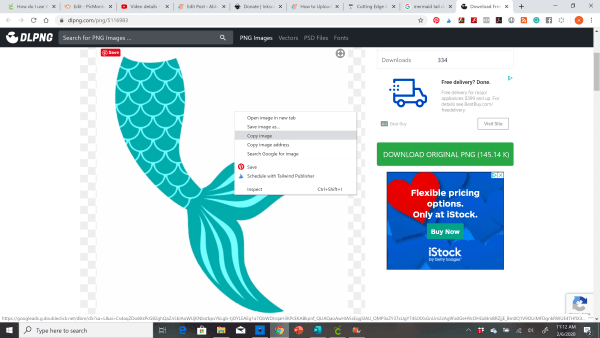
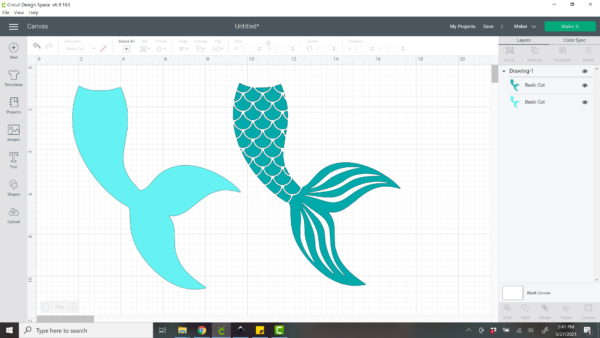
Once you have downloaded Inkscape, copy and paste an image onto a new doc. For my first video, I used this mermaid tail image here. In theory, you can do this with any clipart image or photo. Just be cautious with images that are trademarked and copyrighted.
Trace Your Image in Inkscape – Trace Bitmap
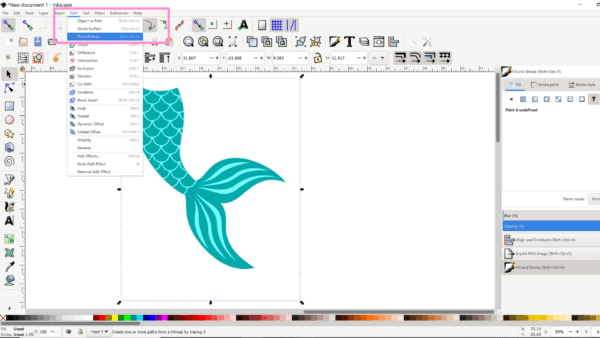
While your image is selected, hold Shift+ Ctrl+ B on your keyboard or to Path>Trace Bitmap in the top edit bar.
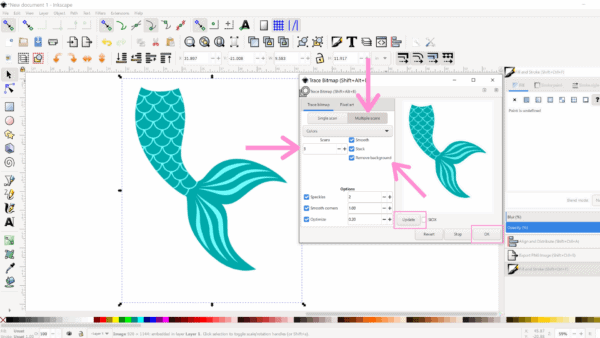
Execute the Trace
In the “trace bitmap” box that appears, you will need to select the number of scans (colors), tick Remove Background, tick Stack Scans, and tick Live Preview.
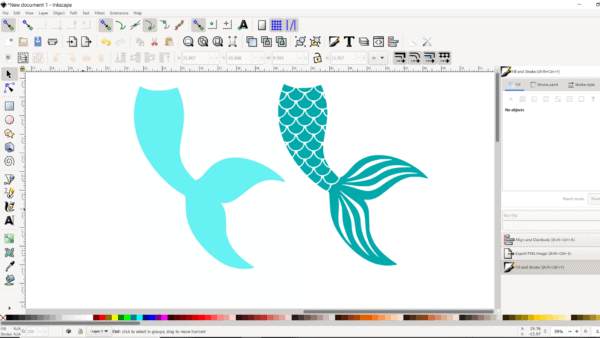
Remove the Traced Image & Ungroup Layers
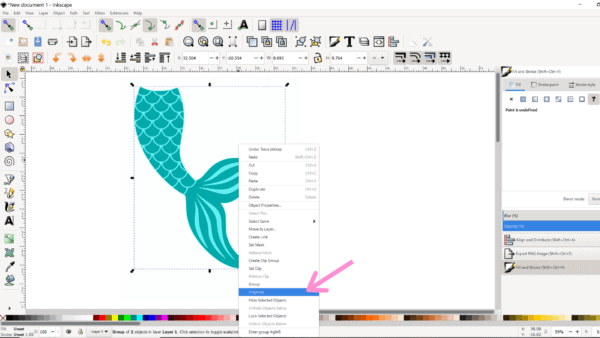
The last step is to remove the traced image off the top of the original. Go ahead and delete the original image. With the traced copy right click and Ungroup or Shift+Ctrl+G will also ungroup the layers.
Save Your SVG and Upload to Design Space
To save your project, perform the action, File > Save As, then name your file. Be sure to leave the format as Inkscape SVG, then click Save. This will save your file as an SVG file.
Navigate to Design Space and click the Upload button at the bottom of the Design Panel to the left to bring your SVG onto the Canvas.
Yay You! You just converted an image to an SVG cut file!
Make sure to watch the videos below for step by step details on how to convert an image to SVG. Plus in Part 2, I show you how to clean up a blended file.
If you want to download these steps as a PDF, pop your email below and I will send it to you!
Gain access to this free Inkscape guide and all my craft files inside the vault. Just pop in your email and I will send you access! Once inside the Craft Vault, search “Inkscape” or Design 144 to get your freebie.
Master Inkscape and Make Any SVG File You Can Imagine!
Does this sound familiar? Can anyone help me find this design?… Can someone convert this image to an SVG for me…?
Wouldn’t it be amazing if you could convert images and designs for yourself?!
Crafters who own cutting machines, such as a Cricut or Silhouette, often believe they have to rely on other creationists and memberships to provide design files for their crafting needs.
But what if you didn’t have to rely on others?! What if you could learn the freedom of designing for yourself? You have your OWN ideas and visions that you want to bring to life – take control!
Free the SVG is the proven skill-building program that guarantees to transform you into a confident SVG designer and unlock the creative freedom that 99% of other cutting machine owners lack.
Step by step video to convert an image to an SVG cut file in Inkscape for free
Beginner – Part 1
Cleaning Up Blended Images – Part 2

More Posts to Love
- Make Fruit Pop-Up Cards With Cricut
- Butterfly and Bug Shadow Boxes
- Make A Spring House Explosion Treat Box
- Easy Beginners Steps to Learning Cricut Design Space
- How To Use a Cricut Cutter: A Simple Guide to Getting Started with Cricut


Hello, Thank You for all of your useful and lovely information here. You have really allowed me to open up from a drought and start creating again.
I can’t thank you enough!!
I do have a question, UNFORTUNATELY, i don’t use Apple products. I have a Windows based PC operating system. I didn’t see, or maybe I missed it, the information for converting my own pictures to SVG and uploading on to design space. Is there a tutorial for that? I would love a link or any info you may have..
Thank so much! xoxo
Hi Dana! I use a PC too. You can follow the tutorial above for PC or MAC users. 🙂