3D Paper Christmas Ornaments With Cricut
This post may contain affiliate links that won’t change your price but will share some commission.
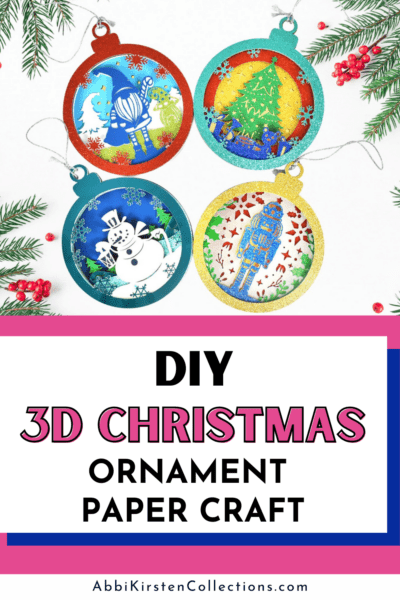
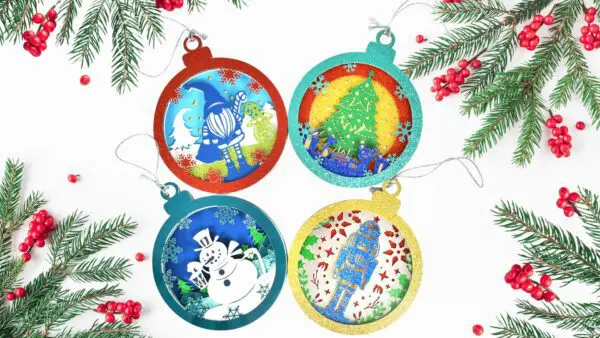
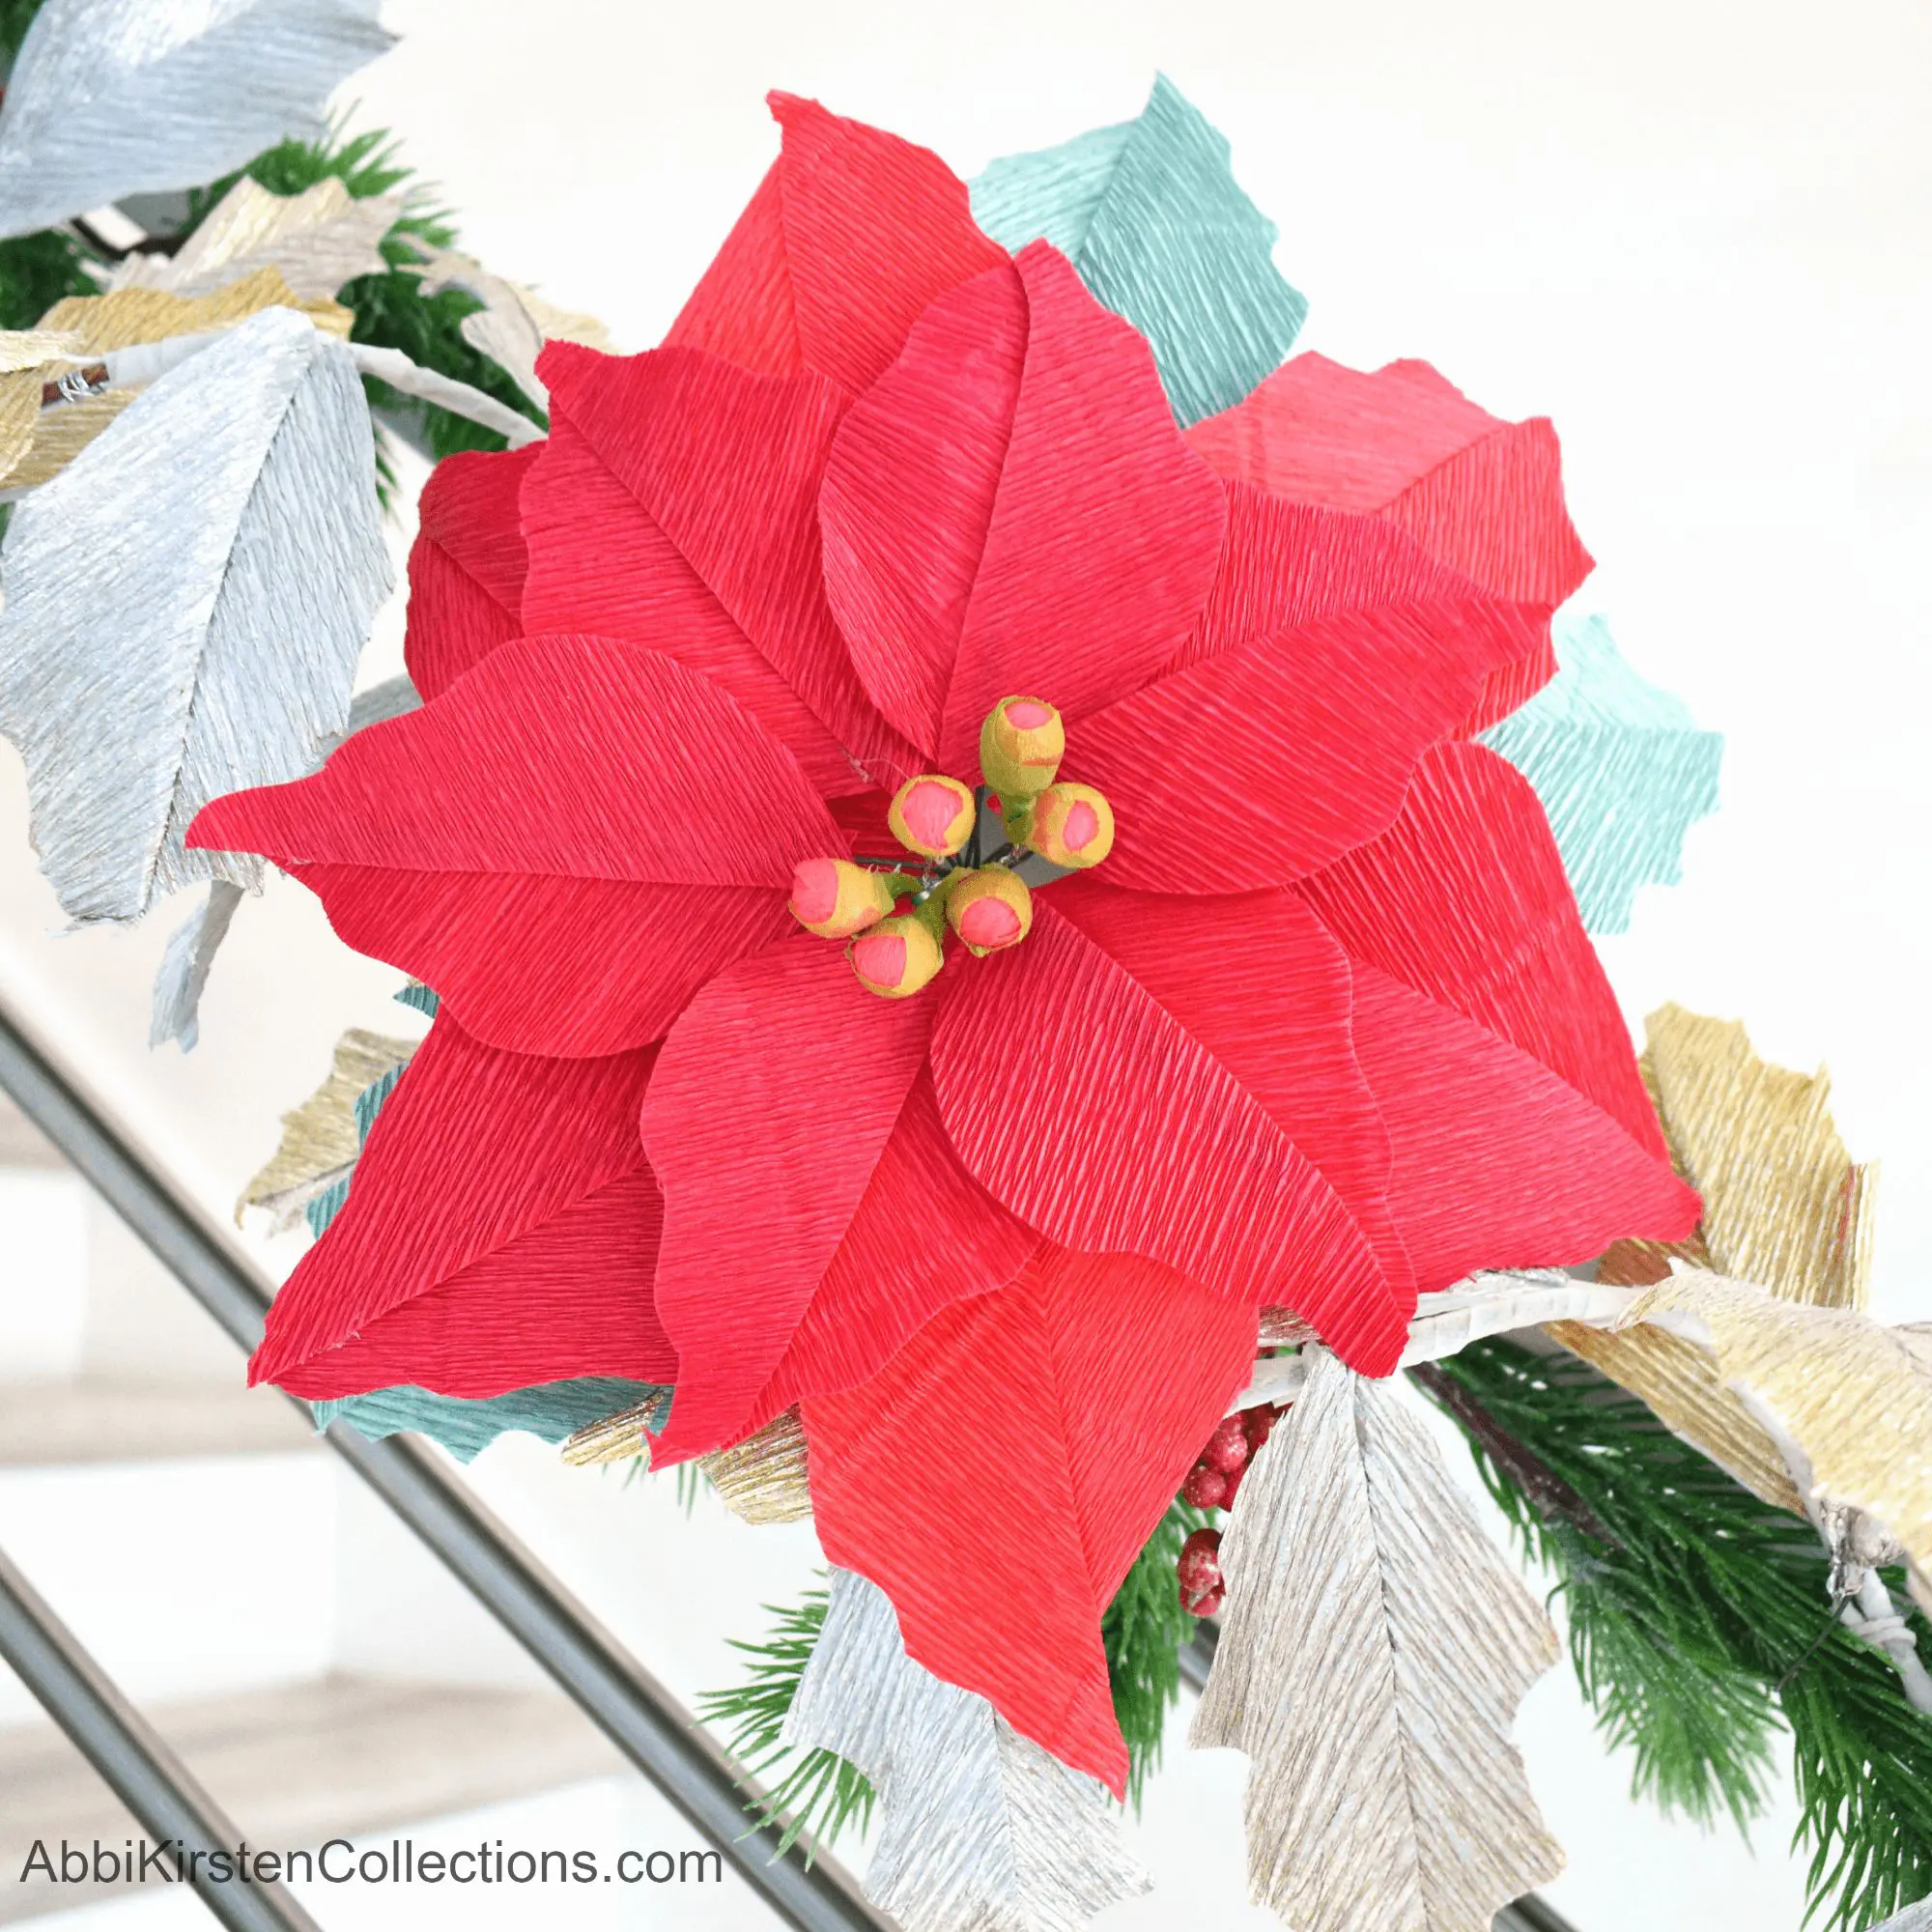
To celebrate all of the coming holidays, I wanted to do a simplistic step-by-step craft tutorial perfect for beginners. These showstopping Christmas tree paper ornaments can be placed on a tree, used as a standalone decoration, or even as a gift tag.
If you’re a beginner, you might be wondering how to make 3D ornaments out of just paper. It’s super easy when using a Christmas ornament SVG file, a Cricut machine, and some 3D foam tape! Paper crafts are the perfect way for beginners to embark on their crafting journey — this is one of the easiest DIY paper ornaments because your Cricut will do the heavy lifting!
If you are looking for more ornaments, you may also love:
Supply List For 3D Paper Ornaments With Cricut
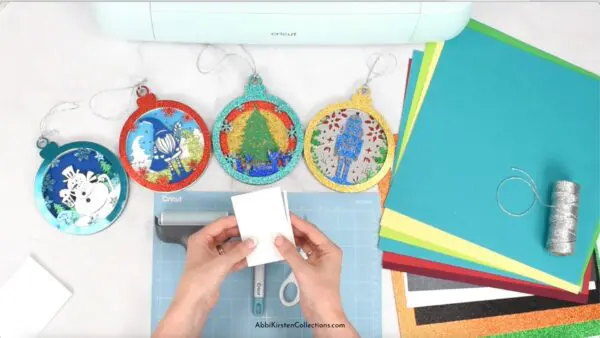
- Any full-size Cricut machine: I use the Explore 3 machine in this tutorial, but you can also use the Cricut Maker models. (I don’t suggest the Cricut Joy because the size limit is 4 inches — these ornaments should measure approximately 6 inches. If these DIY paper ornaments measure below 5 inches, they’ll tear pretty easily.)
- Cricut mat (standard green or light blue)
- Brayer tool
- Weeding tool
- Scissors
- 3D foam strip tape
- Baker’s twine: I opted for sparkly silver twine, but feel free to get creative with it! This twine creates the ornament’s loop.
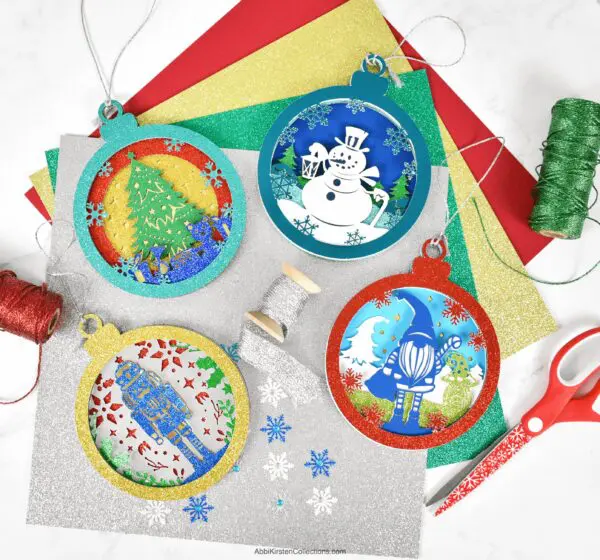
- Cardstock: you can choose cardstock in metallics, glitters, solids, smooths, or textures. It’s really fun to mix the metallics and glitters together — this combination looks great under Christmas tree lights! Play and have fun with it. One of my favorite resources for cardstock is 12×12 Cardstock Shop because their cardstock cuts really well for intricate designs like this one
- 3D paper ornaments SVG templates.
Download The Paper Christmas Ornament SVG Files
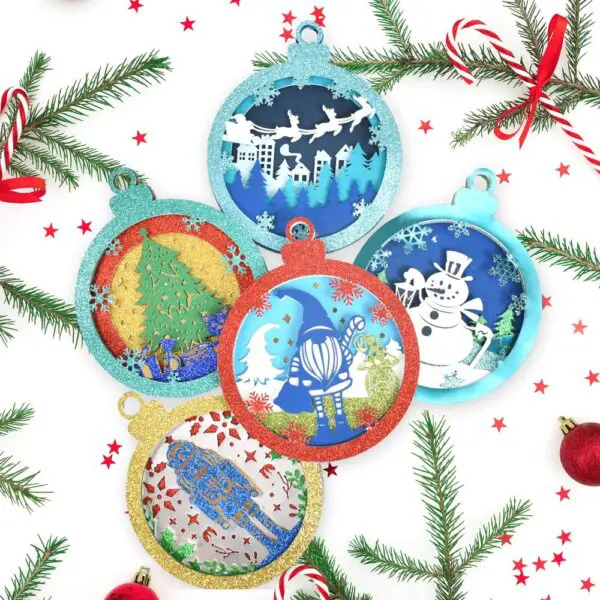
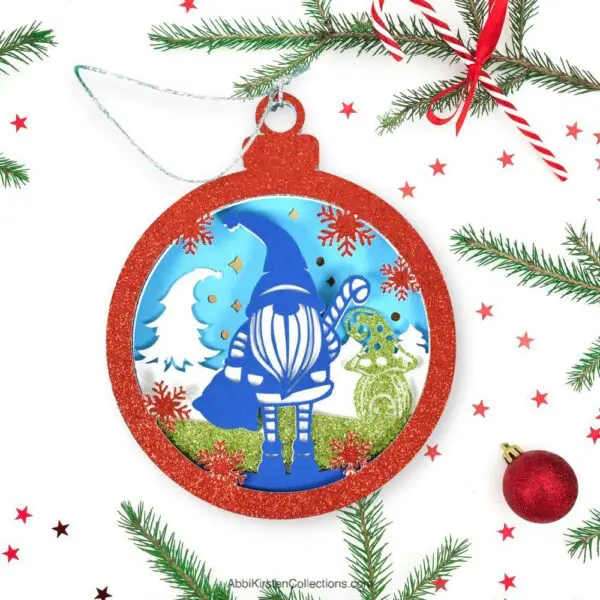
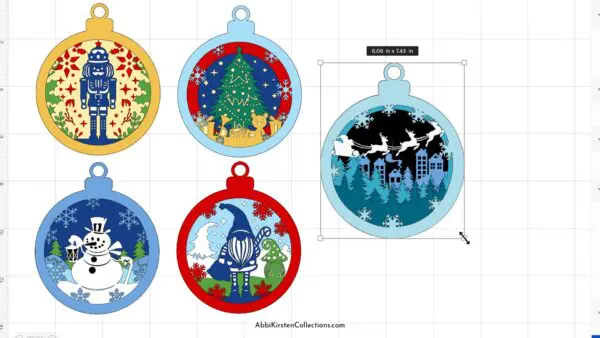
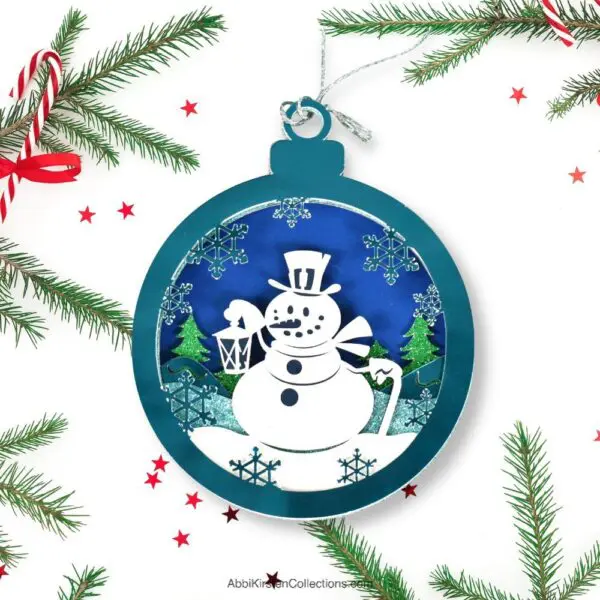
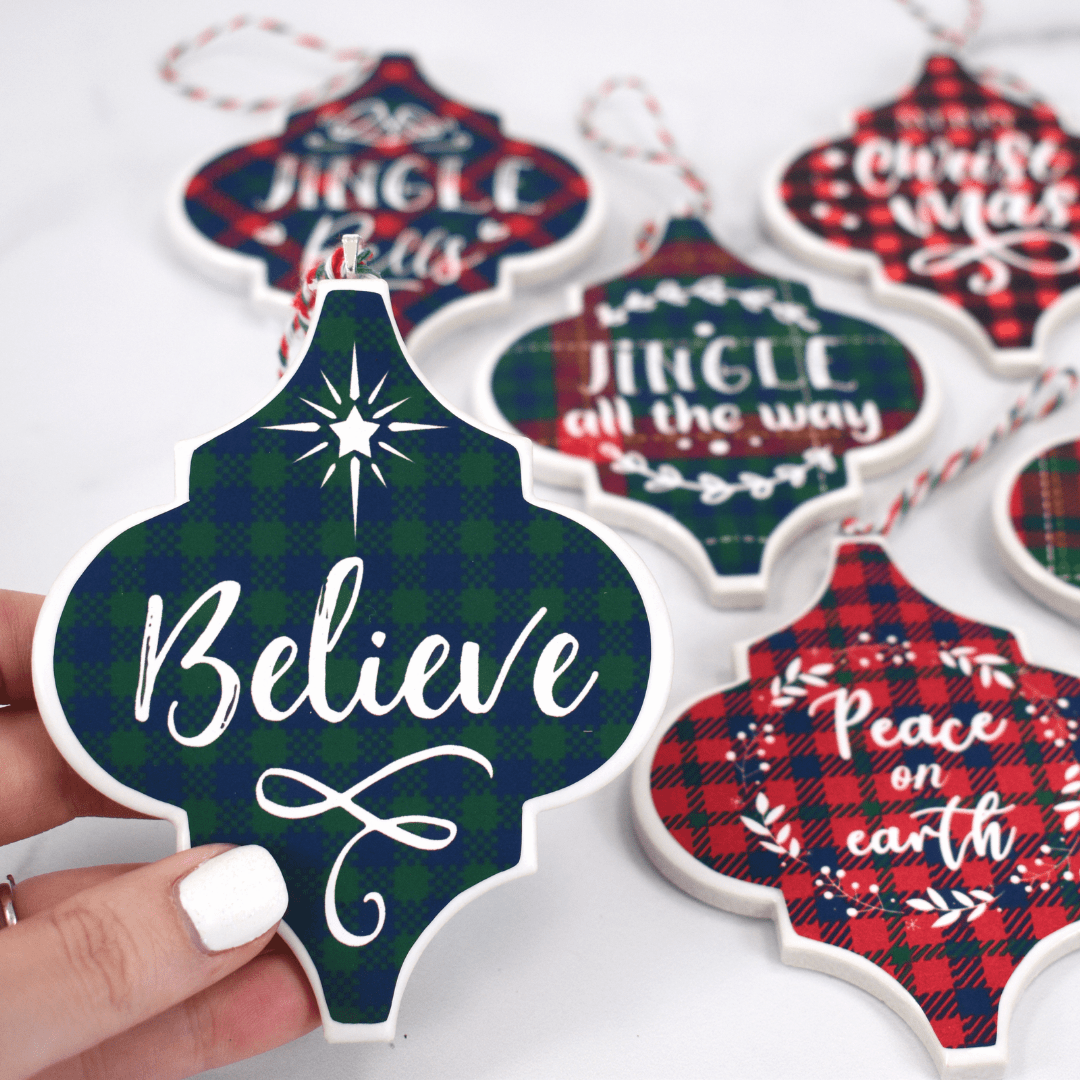
Five layered paper ornaments are available, including a gnome Santa, Nutcracker, Christmas Tree, Snowman, and Santa’s Sleigh design.
Abbi Kirsten Member Vault (Best Value)
Find all these designs inside the Abbi Kirsten Craft Vault! These paper ornament craft templates are included in the Premium Member Craft Vault. Once logged in, search the keyword “paper ornaments” to find all these designs. Here are the direct links as well!
If you aren’t a member yet, you will want to sign up to unlock all Abbi Kirsten’s crafts here. There are currently hundreds of designs, such as paper flower templates, SVG cut files, and printables, plus a dozen new ones added each month! You will also get access to all my other Christmas crafts as well!
If you want to pick these paper ornament templates up individually, you can get them in the shop.
Paper Chrismas Ornaments With Cricut Video Tutorial
Below is a full step-by-step video tutorial for this paper ornament craft. You can also keep reading for an in-depth written tutorial.
How to Upload the SVG File and Use Cricut Design Space
There’s not a lot of prep you’ll need to do in Design Space. As I mentioned earlier, this 3D paper ornament project is great for beginners! If you’re new to Design Space, here’s how to upload the SVG file provided to you, or you can follow this video on how to upload these ornament SVG files to Design Space.
- On the left-hand side, go to the Design Panel.
- Click the “Upload” button.
- Click the “Upload Image” button.
- You can click on “Browse” to bring the file in from wherever you saved it on your device. You can also drag and drop the file if that’s easier for you!
- Check the preview image to ensure you selected the right one.
- Click “Upload” at the bottom corner.
- You’ll see the image under “Recent Uploads.” Click “Add to Canvas” at the bottom corner, and you’re ready to customize!
Customizing Your Paper Ornaments in Design Space
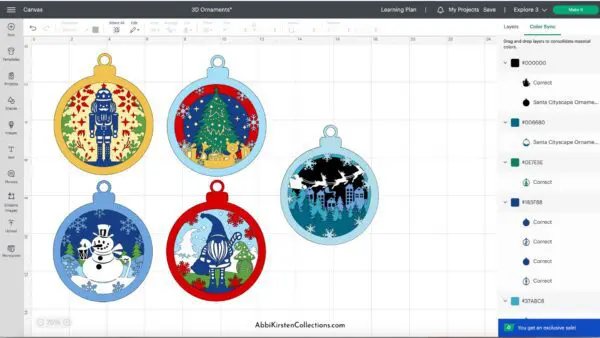
The first thing to think about is the ornament’s size. I made my ornaments between 5 – 6 ½ inches. They turn out best between these sizes and really stand out on a Christmas tree. I recommend staying away from sizes below 5 inches because your Cricut machine won’t be capable of providing a good quality cut with the intricate nature of the paper ornaments.
To scale the ornament larger or smaller in Design Space, you can hover over any of the square’s corners until you see a double arrow. After seeing this double arrow, you can scale larger or smaller by moving the mouse up or down. Please make sure the lock icon is open (this is really important, or it’ll mess with the proportions). If you don’t want to manually change the size with your mouse, you can change sizes at the top under “size.” Simply type in custom width and height dimensions, and you’re done!
(Pro tip: always scale the paper ornament templates as a group to make everything proportional and the correct size in each layer!)
Changing The Ornaments Colors In Design Space
If you want to play around with the designated colors, you can always choose different colors just to see what the ornament might look like. First, click “ungroup” in the top right-hand corner. You can now select the different layers individually. If you want to change the colors of a specific layer, click on the color swatch and then choose different colors.
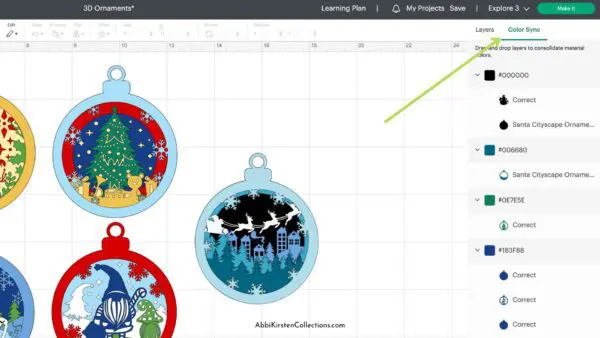
Please note: changing your color here won’t do anything when you go to cut things. You’ll need the right colored paper! This allows you to visualize your project before you put it together.
If you’ve pulled the layers apart and want to get it back to the way it was before, select everything, choose “align,” and then choose “center.” For the smaller additional pieces, you’ll need to manually adjust those in the layers panel — shift them until they’re in the right place!
Making the Christmas Tree Ornament in Design Space
Click on the “Make It” button. Preview all of your mats with the layers for the paper ornaments, click “Continue,” and connect to your Cricut machine through Bluetooth or your USB cable that comes with the machine. Once your machine is connected to your computer, you’ll see the material settings pop up.
Click “All Materials.” Search “Cardstock.” Choose “Cardstock (For Intricate Cuts).”

Why? This setting allows your Cricut to go over the paper twice, making it more delicate as it cuts the paper. Using a light or medium setting may result in some smaller, detailed cuts being torn by the blade. Click “Done.”
Tips For Cutting Cardstock For Intricate Cuts
Before beginning the process of cutting, let’s go over this small checklist that will help you get the best results for cardstock for intricate cuts.
Is your mat sticky or clean enough?
If it’s not sticky or clean enough, the paper isn’t going to stick in all the right places. It needs to stick nicely in those small spots where the intricate cuts will be made with your Cricut. If it lifts, it can cause tearing. It’s helpful to use a Brayer tool to ensure all of the areas are stuck to your mat — you don’t want any lifting or tearing!
Make sure your blade is sharp and clean
You can clean it with a ball of tin foil! Unfortunately, it’s a misconception that tin foil can also sharpen the blade. It’s always best practice to check the health of your blade before doing a project with cardstock that might be intricate. With that, we’re ready to begin the process of cutting!
Cutting Out The Paper Ornaments
Place the first piece of cardstock on the mat — line it up at the top corner!
It’s time to load it up. Press the mat under the rollers before clicking the double arrow flashing button.
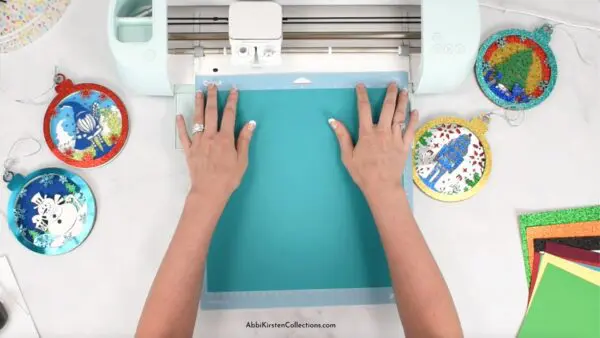
After the cut is done, click the double yellow flashing button to unload it. When peeling off your cardstock, it’s wise to flip the mat over and peel it away from the material. Gently roll it to keep the cardstock from curling on you!
You’ll repeat this process with all of your colors. You might decide you want to add the green, some glitter, or other fun colors. Go ahead and cut out the rest of the layers with whichever cardstock colors you choose.
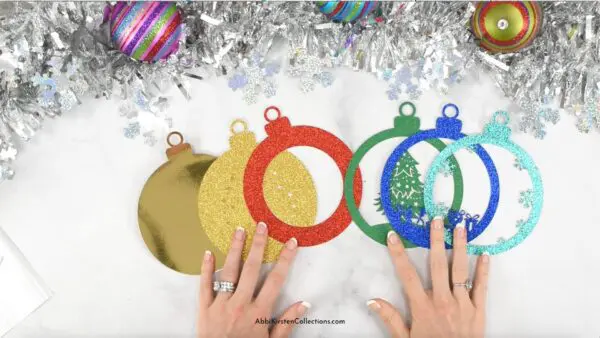
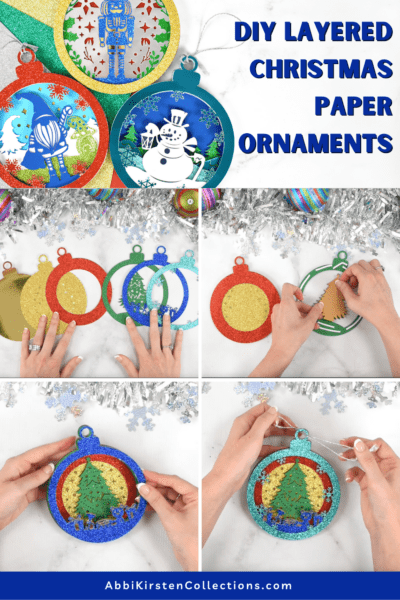
After you’ve finished cutting all of the layers, you should count a total of six. If you need help remembering the order of the layers, take a look at the file in Design Space. It will have everything stacked in order, so you can ensure you layer them in the right order.
Assembling The Paper Ornaments
It’s best to start from the bottom layer and work your way up. I’d recommend setting all six pieces aside and flipping them upside down. Now, you can easily lift and pull the next design off as you work!
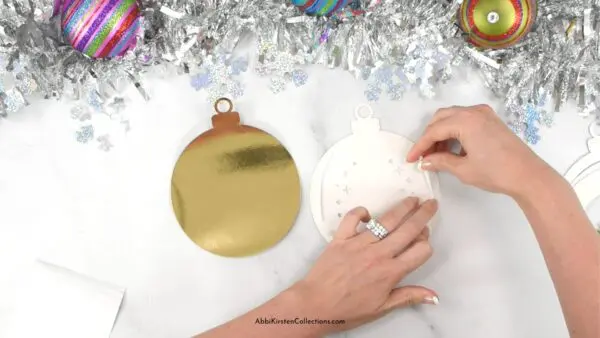
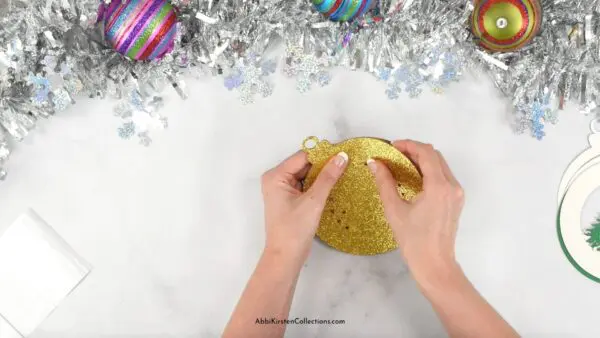
Grab the bottom two layers. Flip the sparkly gold layer over (this would be the second to last layer if you didn’t opt for the same colors), take the 3D foam strip tape, and place it around the back of this layer.
(Side note: I like the strips because I can mold and trim them more easily, but it’s a personal preference!)
After placing the foam tape down, use a weeding tool to easily pull the plastic covers off the tape to reveal the sticky back. Flip the layer back over and take a moment to align it. I like to align from the top of the ornament.
The next layer is the red cardstock (it’s alright if yours is different). Repeat the process of applying the 3D sticky tape. Align it from the top and press it together.
The next step is the Christmas tree. Apply the 3D foam strip tape, and align it from the top.

Before adding on the green Christmas tree layer, add the standalone Christmas tree cutout behind the tree layer to create that dimension. Before pressing this cohesive layer on top of the other layers, give it a good press.
Repeat the process for the toy layer. There’s another small cutout that should be placed behind the toy layer. Add some tape behind the cutout for some extra reinforcement! Place it on top of the other layers and give it a good press.
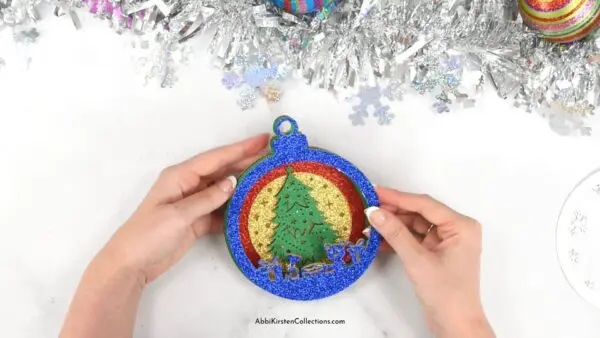
There are no additional sublayers for this last layer. Add the 3D tape, line it up, and give everything a final press.
Adding String To Your 3D Paper Ornament
Cut out approximately 12” – 14” of string. Having more is always better because you can cut it down later! Bring the two ends together and tie a little knot.
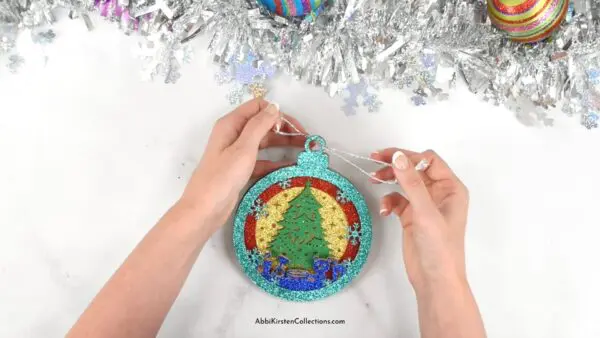
Take the looped side and feed it through the front. Then, thread the looped side through the ornament’s hole. Tightly pull to create a nice, clean loop for it to be hung on your Christmas tree!
I hope you enjoyed making these DIY Christmas paper ornaments with your Cricut machine. For more DIY Christmas ornaments, check out 15+ Holiday Ornaments To Make With Cricut.
About Abbi Kirsten
Welcome to my colorful corner of the internet, where we play with vibrant crafts and unlock your creative magic! Hang out with me and get lost in a fun array of projects, tutorials, and products, from stunning papercraft ideas to flower templates, Cricut help for beginners, and endless crafter’s hacks.
Join A-Star Crafters and participate in monthly Craft-Alongs in our community Facebook group!


nice thank you
These layered ornaments are beautiful and adorable!! Would you consider making a Nativity layered ornament?
Also, what would you suggest using if the 3D foam adhesive is not readily available? I live far away from big cities and don’t have time to order some before Christmas.
Thank you! I will put your idea about a nativity one down for future designs. 🙂
For the tape you can just opt for glue instead. Most craft stores and Amazon does have some form of the 3D tape usually, though it may be a different brand. 🙂