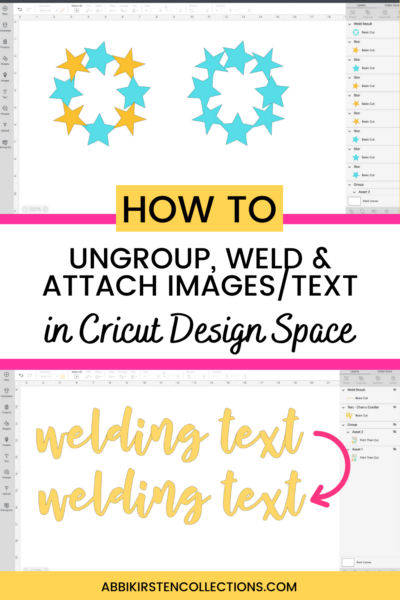
What’s the Difference Between Weld, Attach, and Group? Cricut Design Space Tutorial
This post may contain affiliate links that won’t change your price but will share some commission.
What is the difference between Cricut weld vs. attach?
What is the difference between Cricut weld and attach in Design Space? This is a question I have received countless times from new Cricut crafters. So it’s time I add an in-depth answer here on Abbi Kirsten Collections. By the end of this post, you will clearly understand the Cricut weld vs. attach tools in Design Space and why they are important tools you need to be using for your Cricut craft projects.
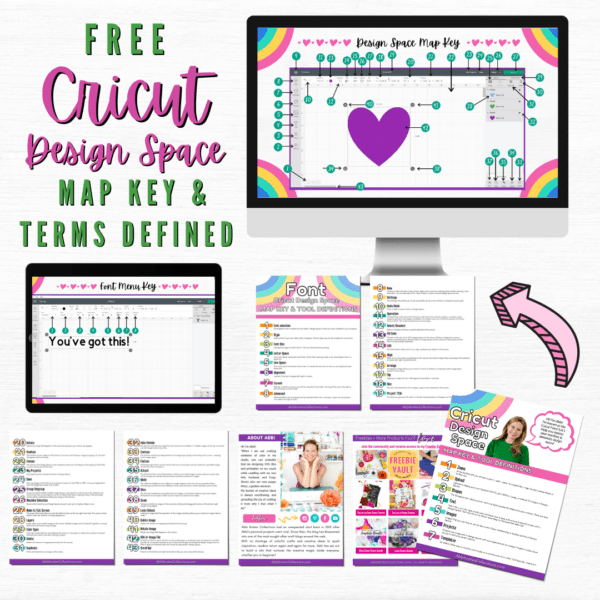
If you need more help learning the Cricut Design Space software, I want you to grab a copy of my ebook, Cricut Confidence, where I will walk you through all the Design Space tools, functions, examples, and pro tips you need to know!
Cricut Weld Vs. Attach and Ungroup Video Tutorial
Below I’ve created a full video to explain the difference between Cricut weld vs. attach plus understanding group/ungroup. You can also keep reading for a written tutorial.
Design Space: Cricut Weld vs. Attach tool
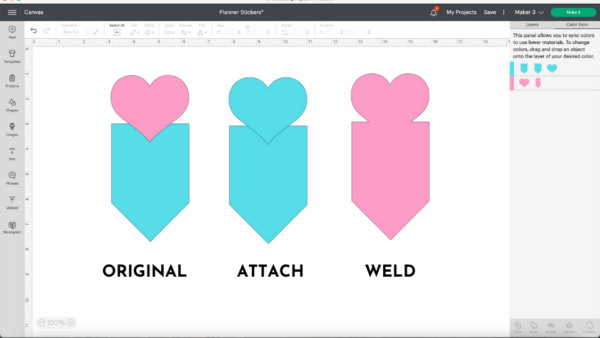
In short, the weld tool combines two overlapping images into one object eliminating unwanted cut lines. Weld cannot be undone once the project is closed out. Whereas the attach tool freezes the arrangement of your objects in design space, so placement remains the same when you click the Make It button. You can detach at any time.
Both the weld and attach tool can be found at the bottom right-hand corner in the Layer’s Panel in Cricut Design Space.
Because we are working in Cricut Design Space, you can use any Cricut machine that is compatible with Design Space. The Cricut Maker, Maker 3, Cricut Explore Air 2, Explore 3, and the Cricut Joy machine will all work.
All the tools we are talking about here, group, weld, and attach, are free to use. You do NOT have to have Cricut Access to use them!
Let’s dive into defining Cricut weld vs. attach!
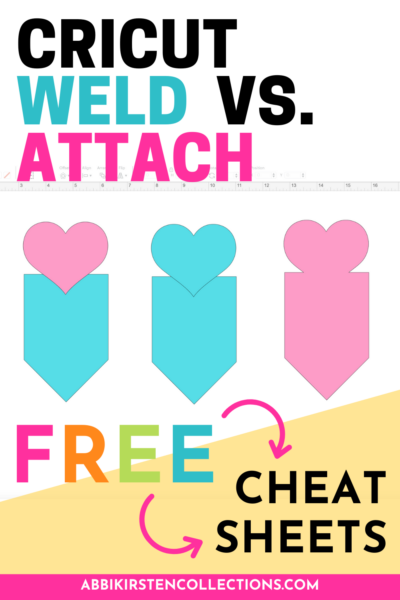
Also, be sure to download your free weld vs. attach cheat sheet in the Freebie Vault! Sign up or log in via the form below. Once inside, search the keyword “cheat sheet” or design #575
How to Group and Ungroup In Design Space
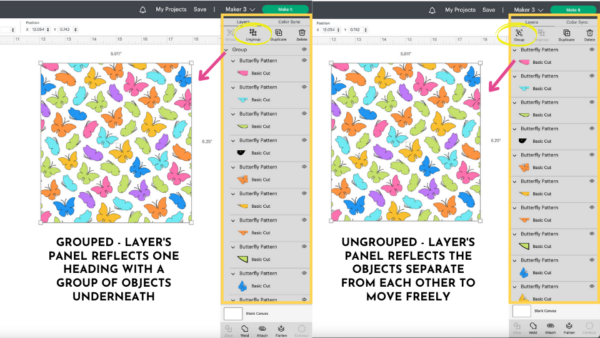
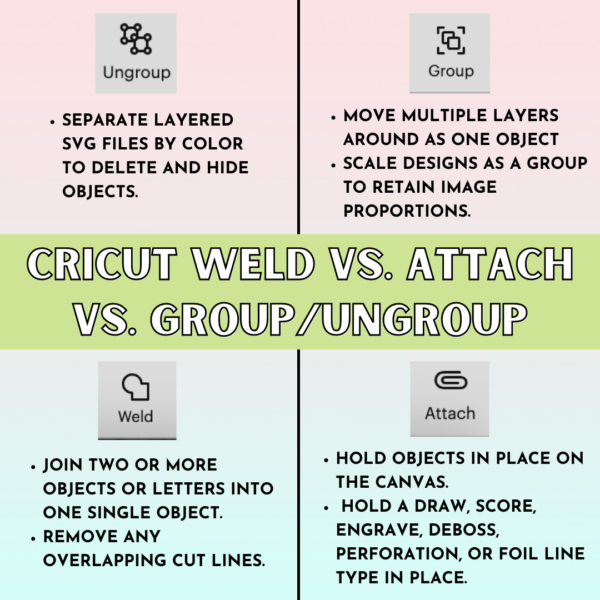
To understand Cricut weld vs. attach, you must first understand the group tool. Learning how to group and ungroup in Cricut Design Space is the first step with any design. Grouping and regrouping is a useful tool because it allows you to:
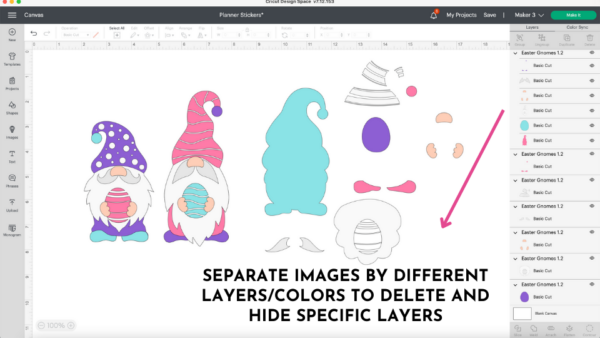
- Separate images by different layers or different colors to delete and hide objects.
- Move multiple layers and images around as one selected object.
- Scale objects all at once to retain image proportions.
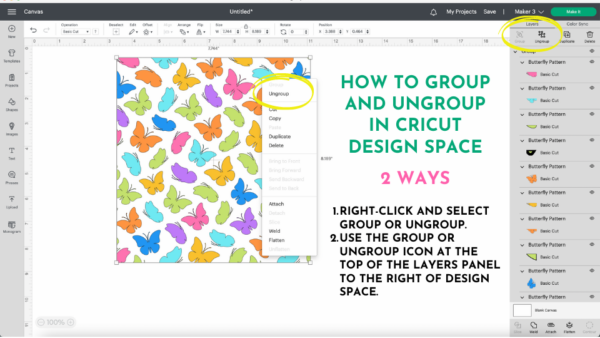
You can group and ungroup at any time in Design Space in two ways.
- By right-clicking and selecting group or ungroup.
- Or by using the group or ungroup icon at the top of the Layers Panel to the right of Design Space.
The ungroup icon will change to a group button once clicked so you can reverse the action.
How to Separate SVG Files In Cricut Design Space
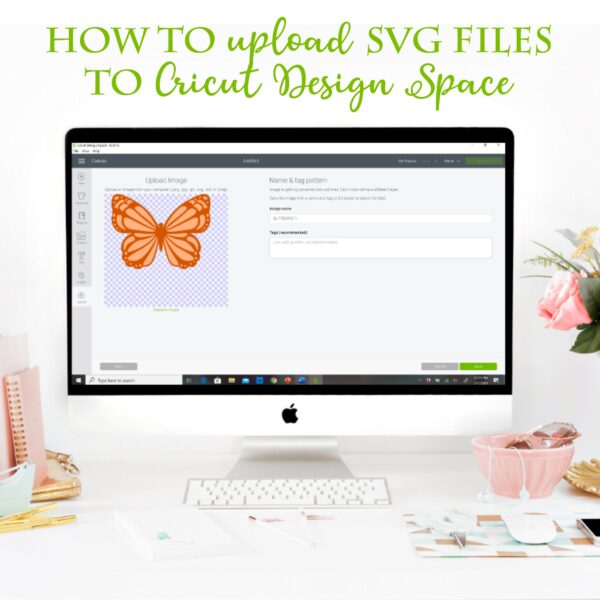
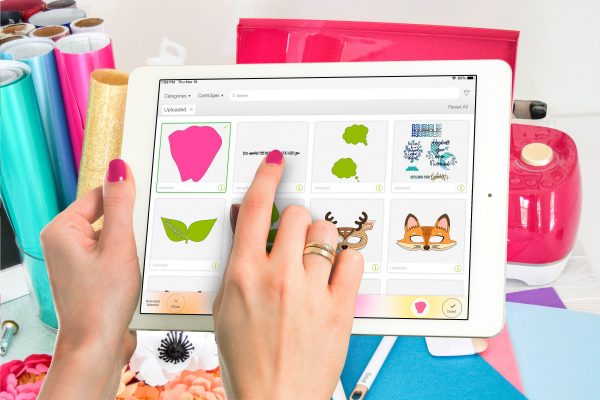
When you upload an SVG to Cricut Design Space, you will first need to ungroup if you wish to move layers around individually. Read how to upload an SVG cut file here.
Once the file has been brought on to the Design Space canvas, select the grouped image and click the ungroup button at the top right or right-click and select ungroup. That’s it! You can regroup or ungroup as often as you like. The current state will also reflect in the Layer’s Panel to the right.
How to ungroup a PNG image in Cricut Design Space
If you find yourself asking, why can’t I ungroup in Cricut Design Space you probably have loaded a PNG image or a Jpeg image. An image-based file like PNG or Jpeg format is not a vector (known as an SVG cut file). This means there is no internal layers but rather pixels, blending the image with one color fading into the next. You will know you have loaded an image instead of an SVG because the Layer’s Panel will reflect only a single image, not stacks of layers.
How to convert an image to a layered SVG file
If you want to learn how to convert a PNG image to a layered SVG cut file, I can help you do that here!
How and When to use the Cricut Weld Tool in design space
Welding combines shapes or script text in Design Space for consolidation and seamless cut lines.
What does weld mean?
Welding means you will join two or more separate shapes or letters into one single object or path by removing any overlapping cut lines. You can weld even if the objects do not overlap, which can be important when using the slice tool.
Welding Text
Welding is often used with text, specifically script font, and cursive letters. Because without welding, in most cases, Cricut will cut individual letters, which means it will not be one seamlessly cursive word unless you use the weld tool.

Step 1: To weld your text, type out a phrase in Design Space. Select a cursive font.
Step 2: Make sure you are happy with the letter spacing. If not, use the ungroup tool to move the letters until you are happy with them.
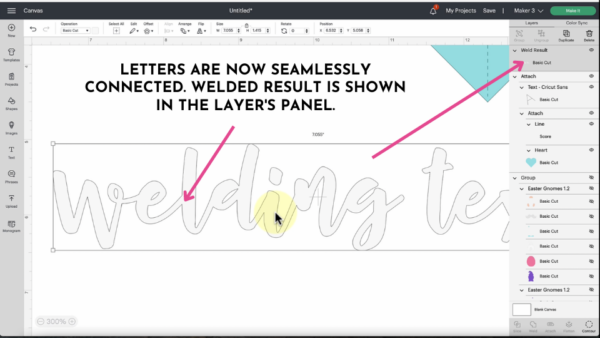
Now, take notice of the lines cutting the letters apart – this will literally happen when you cut the design out, something you do not want for a seamless script.
Step 3: With the word or text selected, click on the weld tool at the bottom of the Layer’s Panel to the right-hand corner. Take note that the cut lines between the letters have now disappeared!
Welding Images
Welding images behave much of the same way as text. Take two shapes that are overlapping and click the weld tool to see the cut line between them disappear. The reason the weld tool is helpful is that we can create brand new shapes and designs with the push of this button!
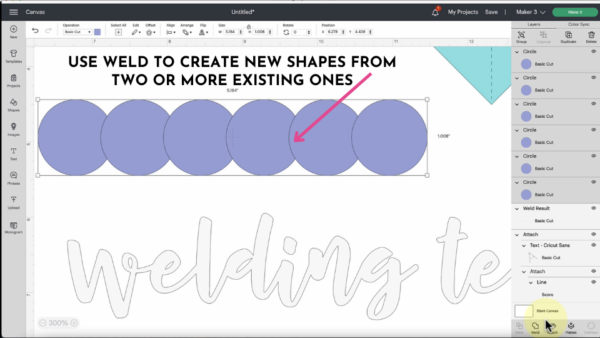
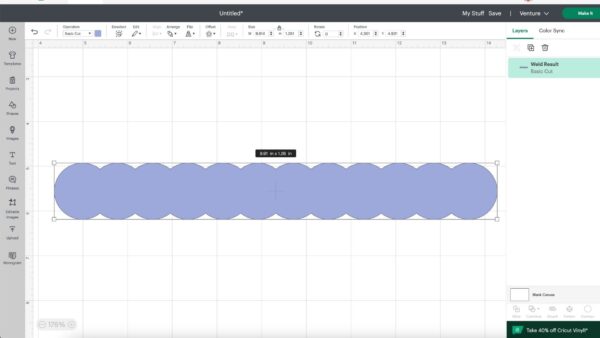
For example, in my image below, I used basic shapes from the shapes panel to overlap circles and create a border using the weld tool. Weld will work with simple shapes like our example or complex ones.
Why you should use the weld tool even if the objects do not overlap
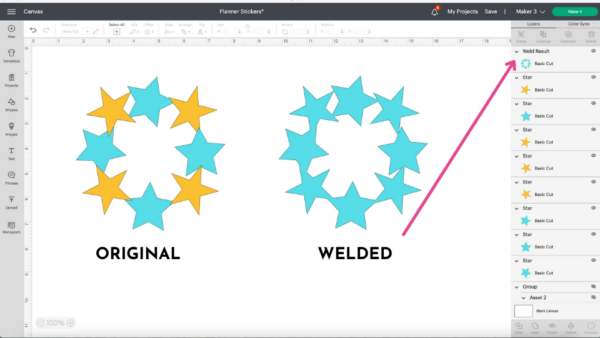
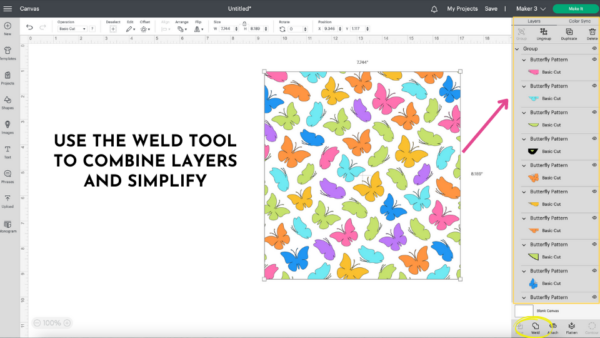
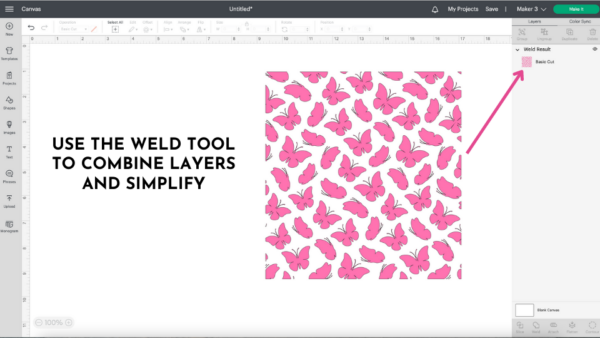
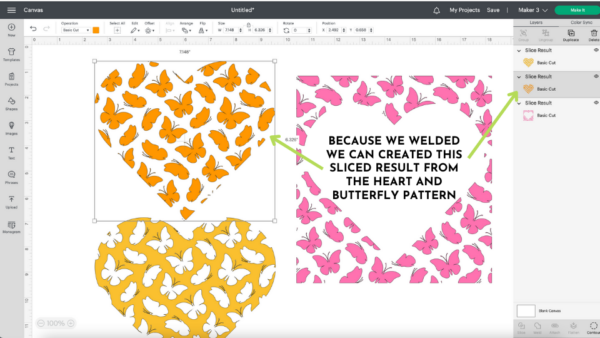
Simplifying a design: Welding is the best way to simplify multiple images in Cricut design space. Let’s say you made a butterfly pattern like mine below and wanted to combine all the shapes into one welded image in the Layer’s Panel instead of several dozen – the weld tool will do the job. Take a look at my multi-layer butterfly image below.
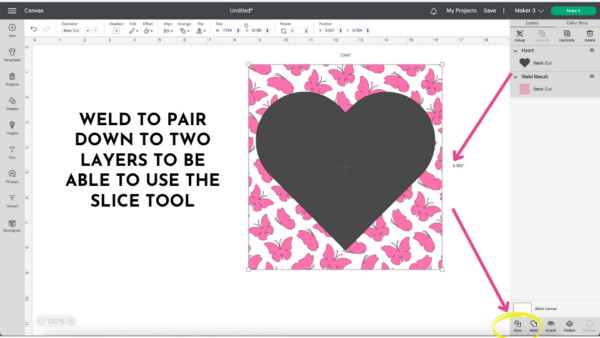
Using the slice tool: Welding is important even if the objects do not have overlapping lines because there may be times you wish to use the slice tool to create three new results from two existing ones. But the slice tool only works with two objects selected. Therefore, you can use the weld tool to pair down the selection by combining shapes. If you are dealing with a lot of layers, you should weld the objects to slice several out at once from another shape.
Cricut Design Space Weld Problems
How do I find what font I used after welding?
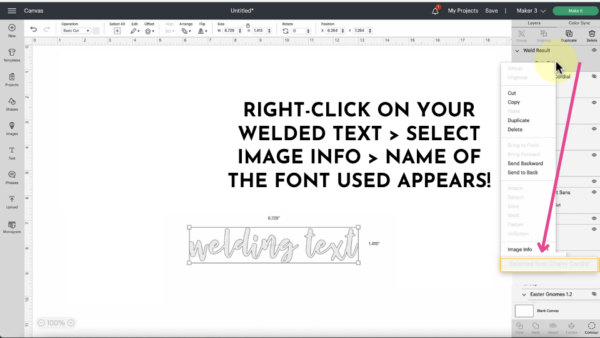
When you weld text, you lose the ability to edit the font. As a result, welded text cannot pull up the font selection menu to see what you used. The good news is you can still figure out what font you used in the Layer’s Panel by right-clicking on the welded text, going to Image Info, and taking note of what is listed on the dropdown, which reveals the font name!
Why is the weld button greyed out?
A greyed-out weld button indicates you do not have at least two objects selected on the canvas screen in Cricut Design Space.
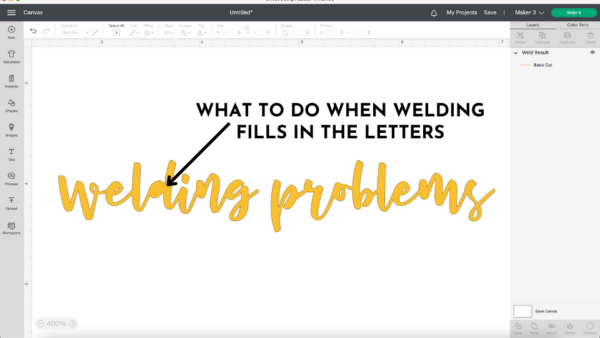
When I weld on Cricut, it fills in the letters
Sometimes after welding text, the center of an e, o, d, r, etc. fills in. This happens because the letters are either overlapping a little too much, or the text was typed rather small. Try selecting your text and regrouping, nudging the letter over a bit, and weld again. If this still does not work, then enlarge the text at least 3x the size it was originally.
Why can’t I unweld?
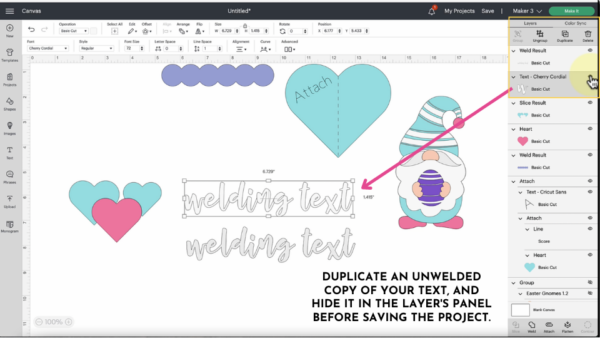
There is no such thing as an unweld function. Once you save and close a project, you cannot unweld. If you have just welded, you can click the Undo button at the top left or CTRL or CMD + Z on your keyboard. If you think you may want to edit the pre-welded result, make a duplicate and hide it in the Layer’s Panel so you can return to the original even after the project has been closed out.
How and when to use the Cricut attach tool in design space
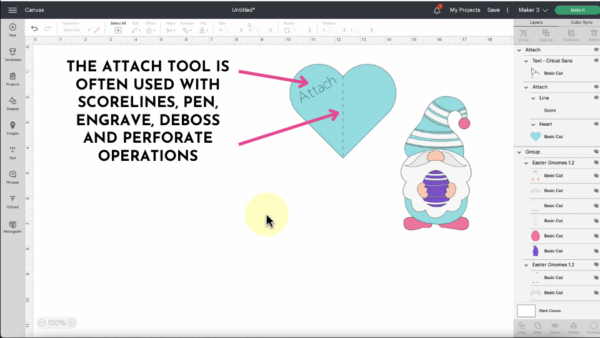
The Attach Tool is the most used tool in the Layer’s Panel since it is used in conjunction with pens, foiling, debossing, perforation, engraving, etc.
What does it mean to attach?
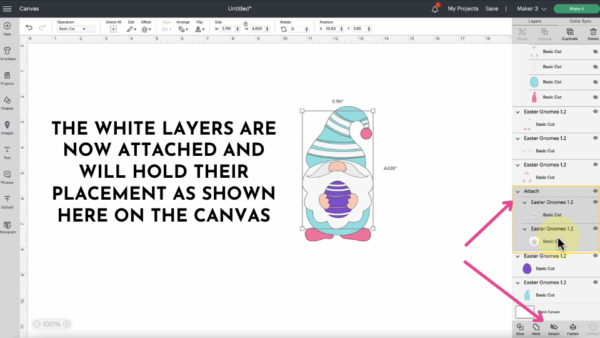
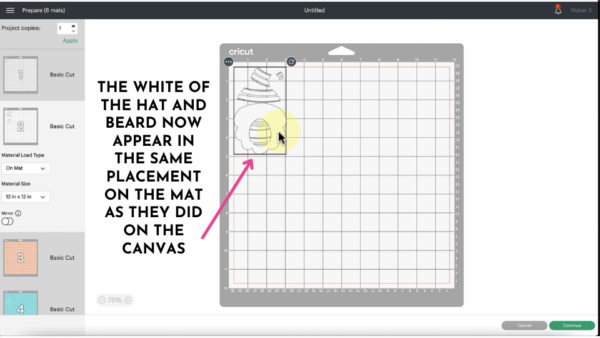
To attach means to tether one object in design space to another one in the exact location shown on the canvas at the time of clicking the Attach Tool. You can attach and detach at any given time.
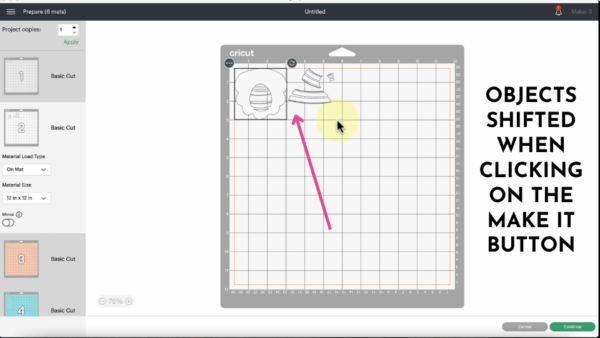
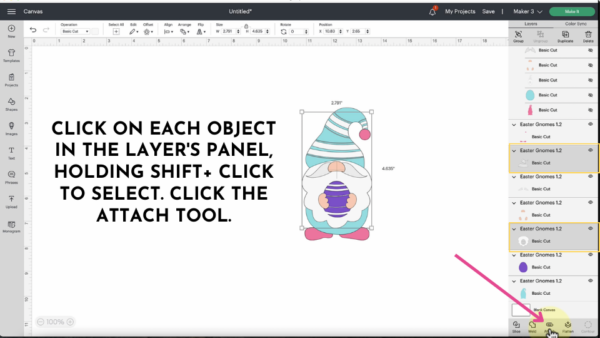
The Attach Tool for holding object placement
If you need images on the canvas to stay exactly where they are before you click on the cut screen, use the Attach tool. Cricut will automatically sort and shift images on the cutting mat preview when you click on the Make It button. To avoid objects shifting, use the Attach Tool at the bottom of the Layer’s Panel.
The Attach Tool for drawing operations
You will frequently use the Attach feature when working with the pen, foil, engrave, deboss, and perforate operations in Design Space, as well as any time you wish to add a scoreline to an image. Attach the scoreline to the image so it scores where you want it to.
How to Detach Objects
You can easily attach and detach at any time in Cricut Design Space. Select the attached object and click detach at the bottom of the layer’s panel to the right.
Cricut weld vs. attach is one of the most common questions Cricut beginners ask. I hope this post helped you understand the difference between weld, attach, and group and when to use each tool.
What other questions do you have? Ask me below in the comments! If you want more help mastering your Cricut machine, take my beginner’s workshop here!
About Abbi Kirsten
Welcome to my colorful corner of the internet, where we play with vibrant crafts and unlock your creative magic! Hang out with me and get lost in a fun array of projects, tutorials, and products, from stunning papercraft ideas to flower templates, Cricut help for beginners, and endless crafter’s hacks.
Join the Member Vault and participate in my monthly Craft-Alongs in my Facebook group to access all the magic!