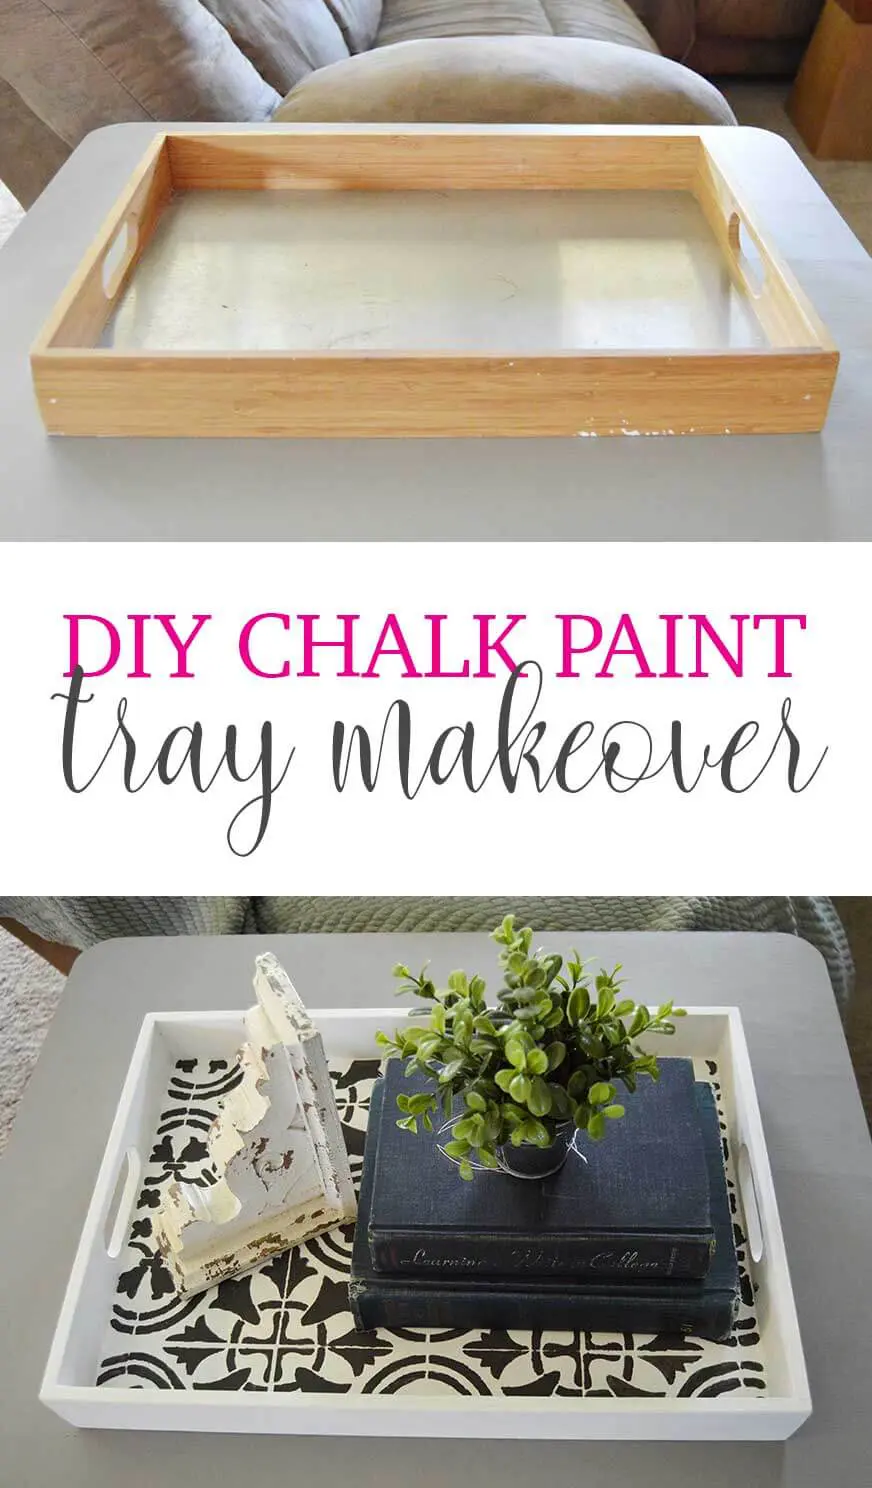
DIY Farmhouse Tray: Chalk Paint Tray Makeover
This post may contain affiliate links that won’t change your price but will share some commission.
Hello, friends! I’m Leslea from A Heart Filled Home. On my blog I love to write about budget friendly home decor, crafts, printables, and DIY projects. I’m so excited to share this DIY chalk paint tray makeover with you today!
DIY Farmhouse Wooden Tray
It never ceases to amaze me how you can totally transform the look of something with just paint! I love that you can give something a totally different look and new life with a coat (or two) of paint. And if you use chalk paint it makes it even easier!
I’ve had this metal and wood tray sitting in my garage for way too long. It was actually going to be donated to Goodwill but I held onto it because I knew it had potential. After completing a few projects recently with chalk paint I knew it would be the perfect solution for this tray makeover!
Materials Needed
-Tray (if you don’t already have one you can find them at Goodwill for next to nothing!)
–Chalk Paint (I used the colors Simplicity and Rocky Mountain from Country Chic Paint) an alternative option can be found here as well.
-Paint brush
-Foam brush
-Stencil (we love this one here!)
-Painter’s tape
–Clear Coat
DIY Chalk Paint Tray Makeover
Step 1
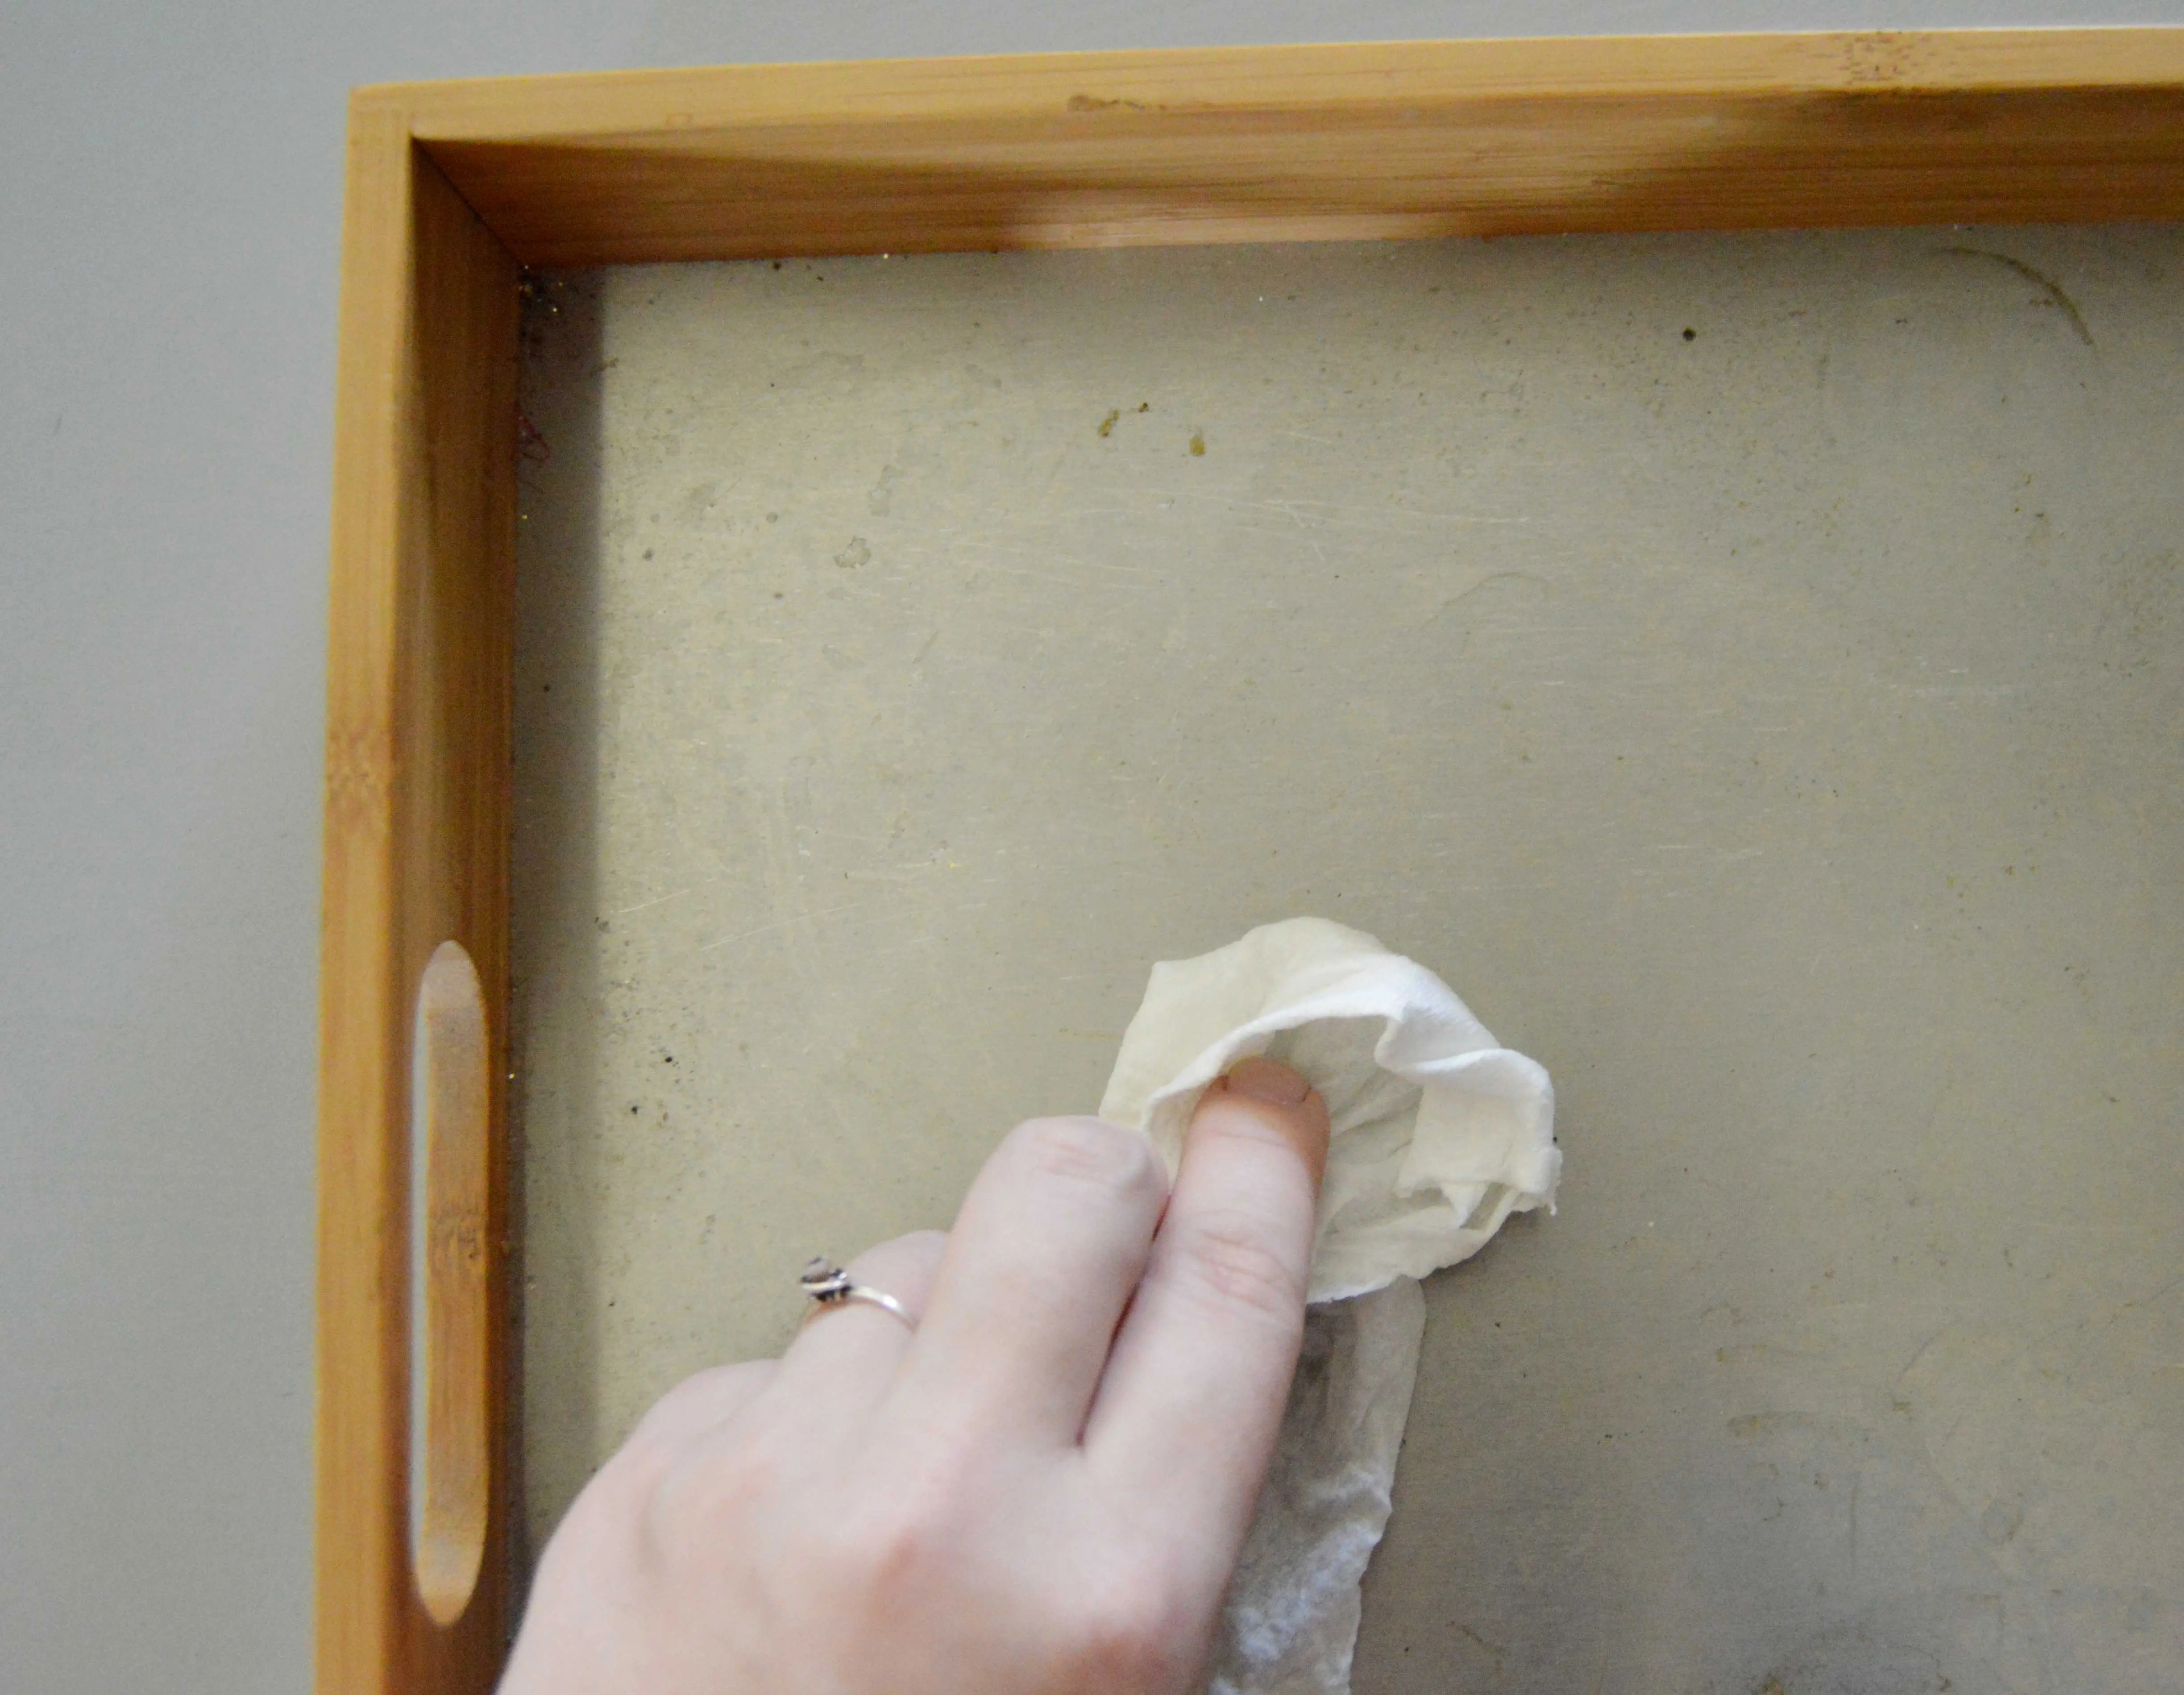
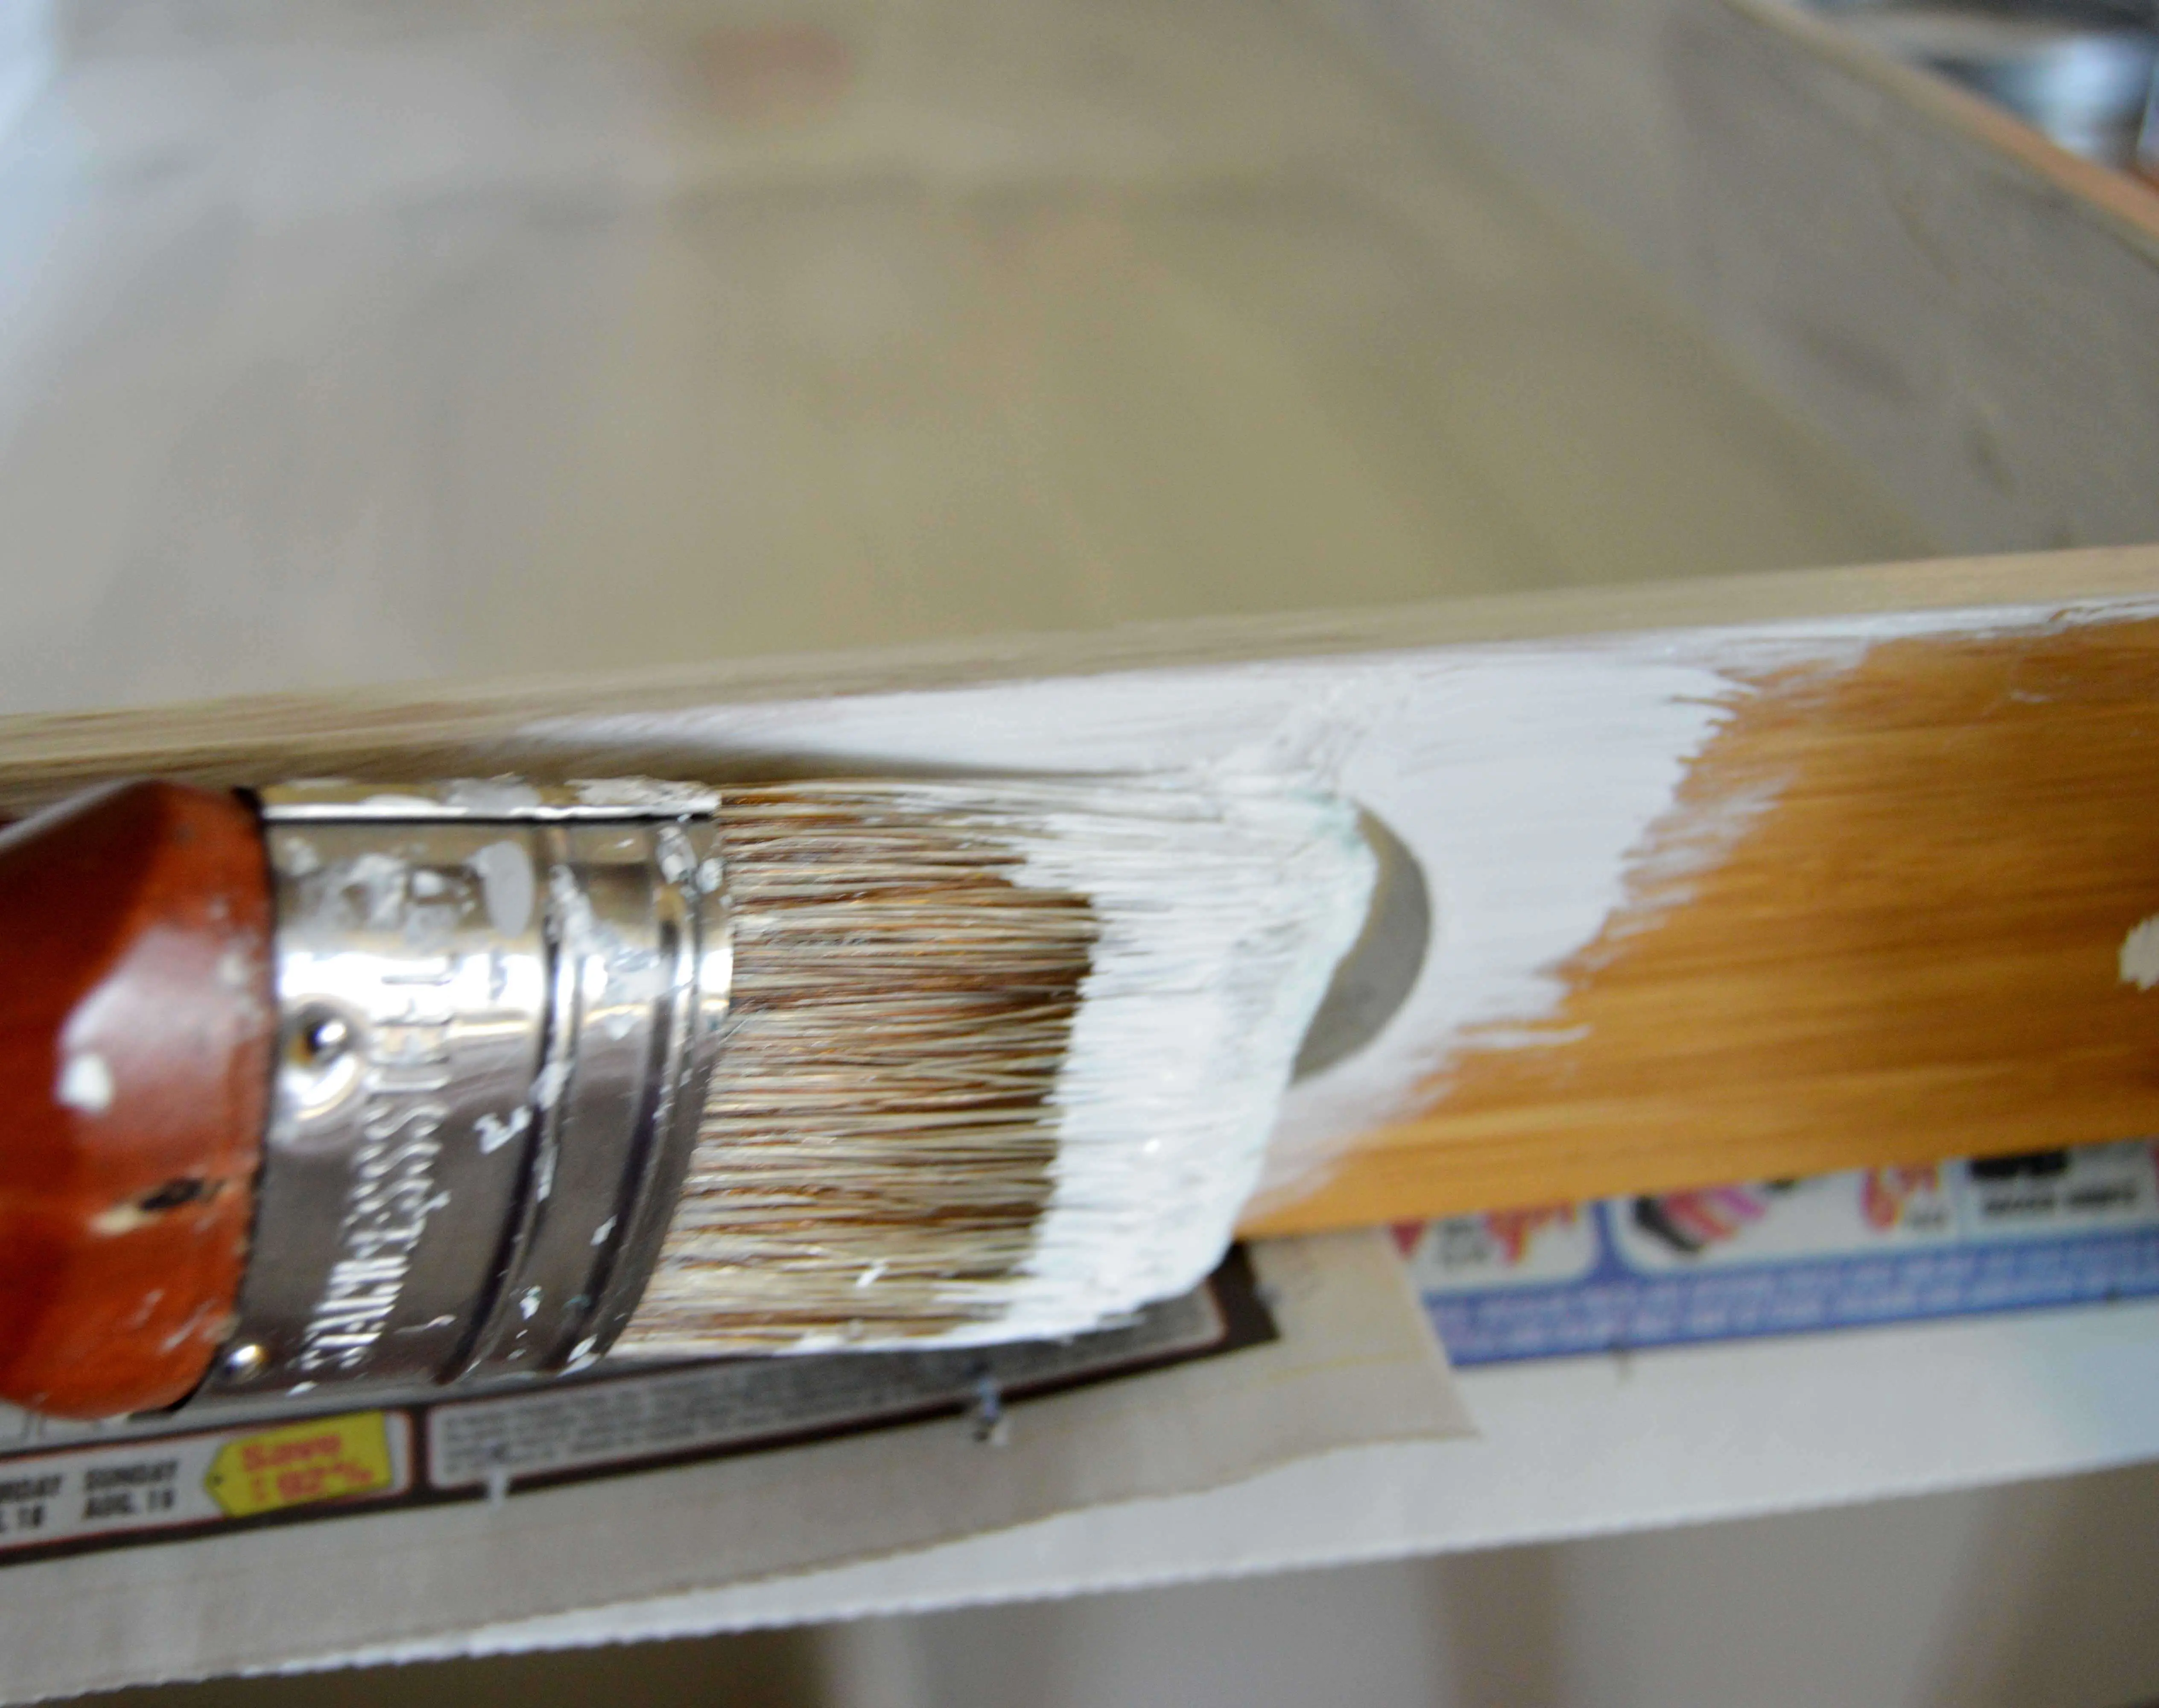
First I cleaned the tray with a towel and water. This was the only prep needed because the chalk paint will adhere to the surface with no additional prep needed!

Step 2
Next I painted the tray with 2 coats of white chalk paint, letting the paint dry between coats. Chalk paint dries very quickly so you won’t need to wait long!
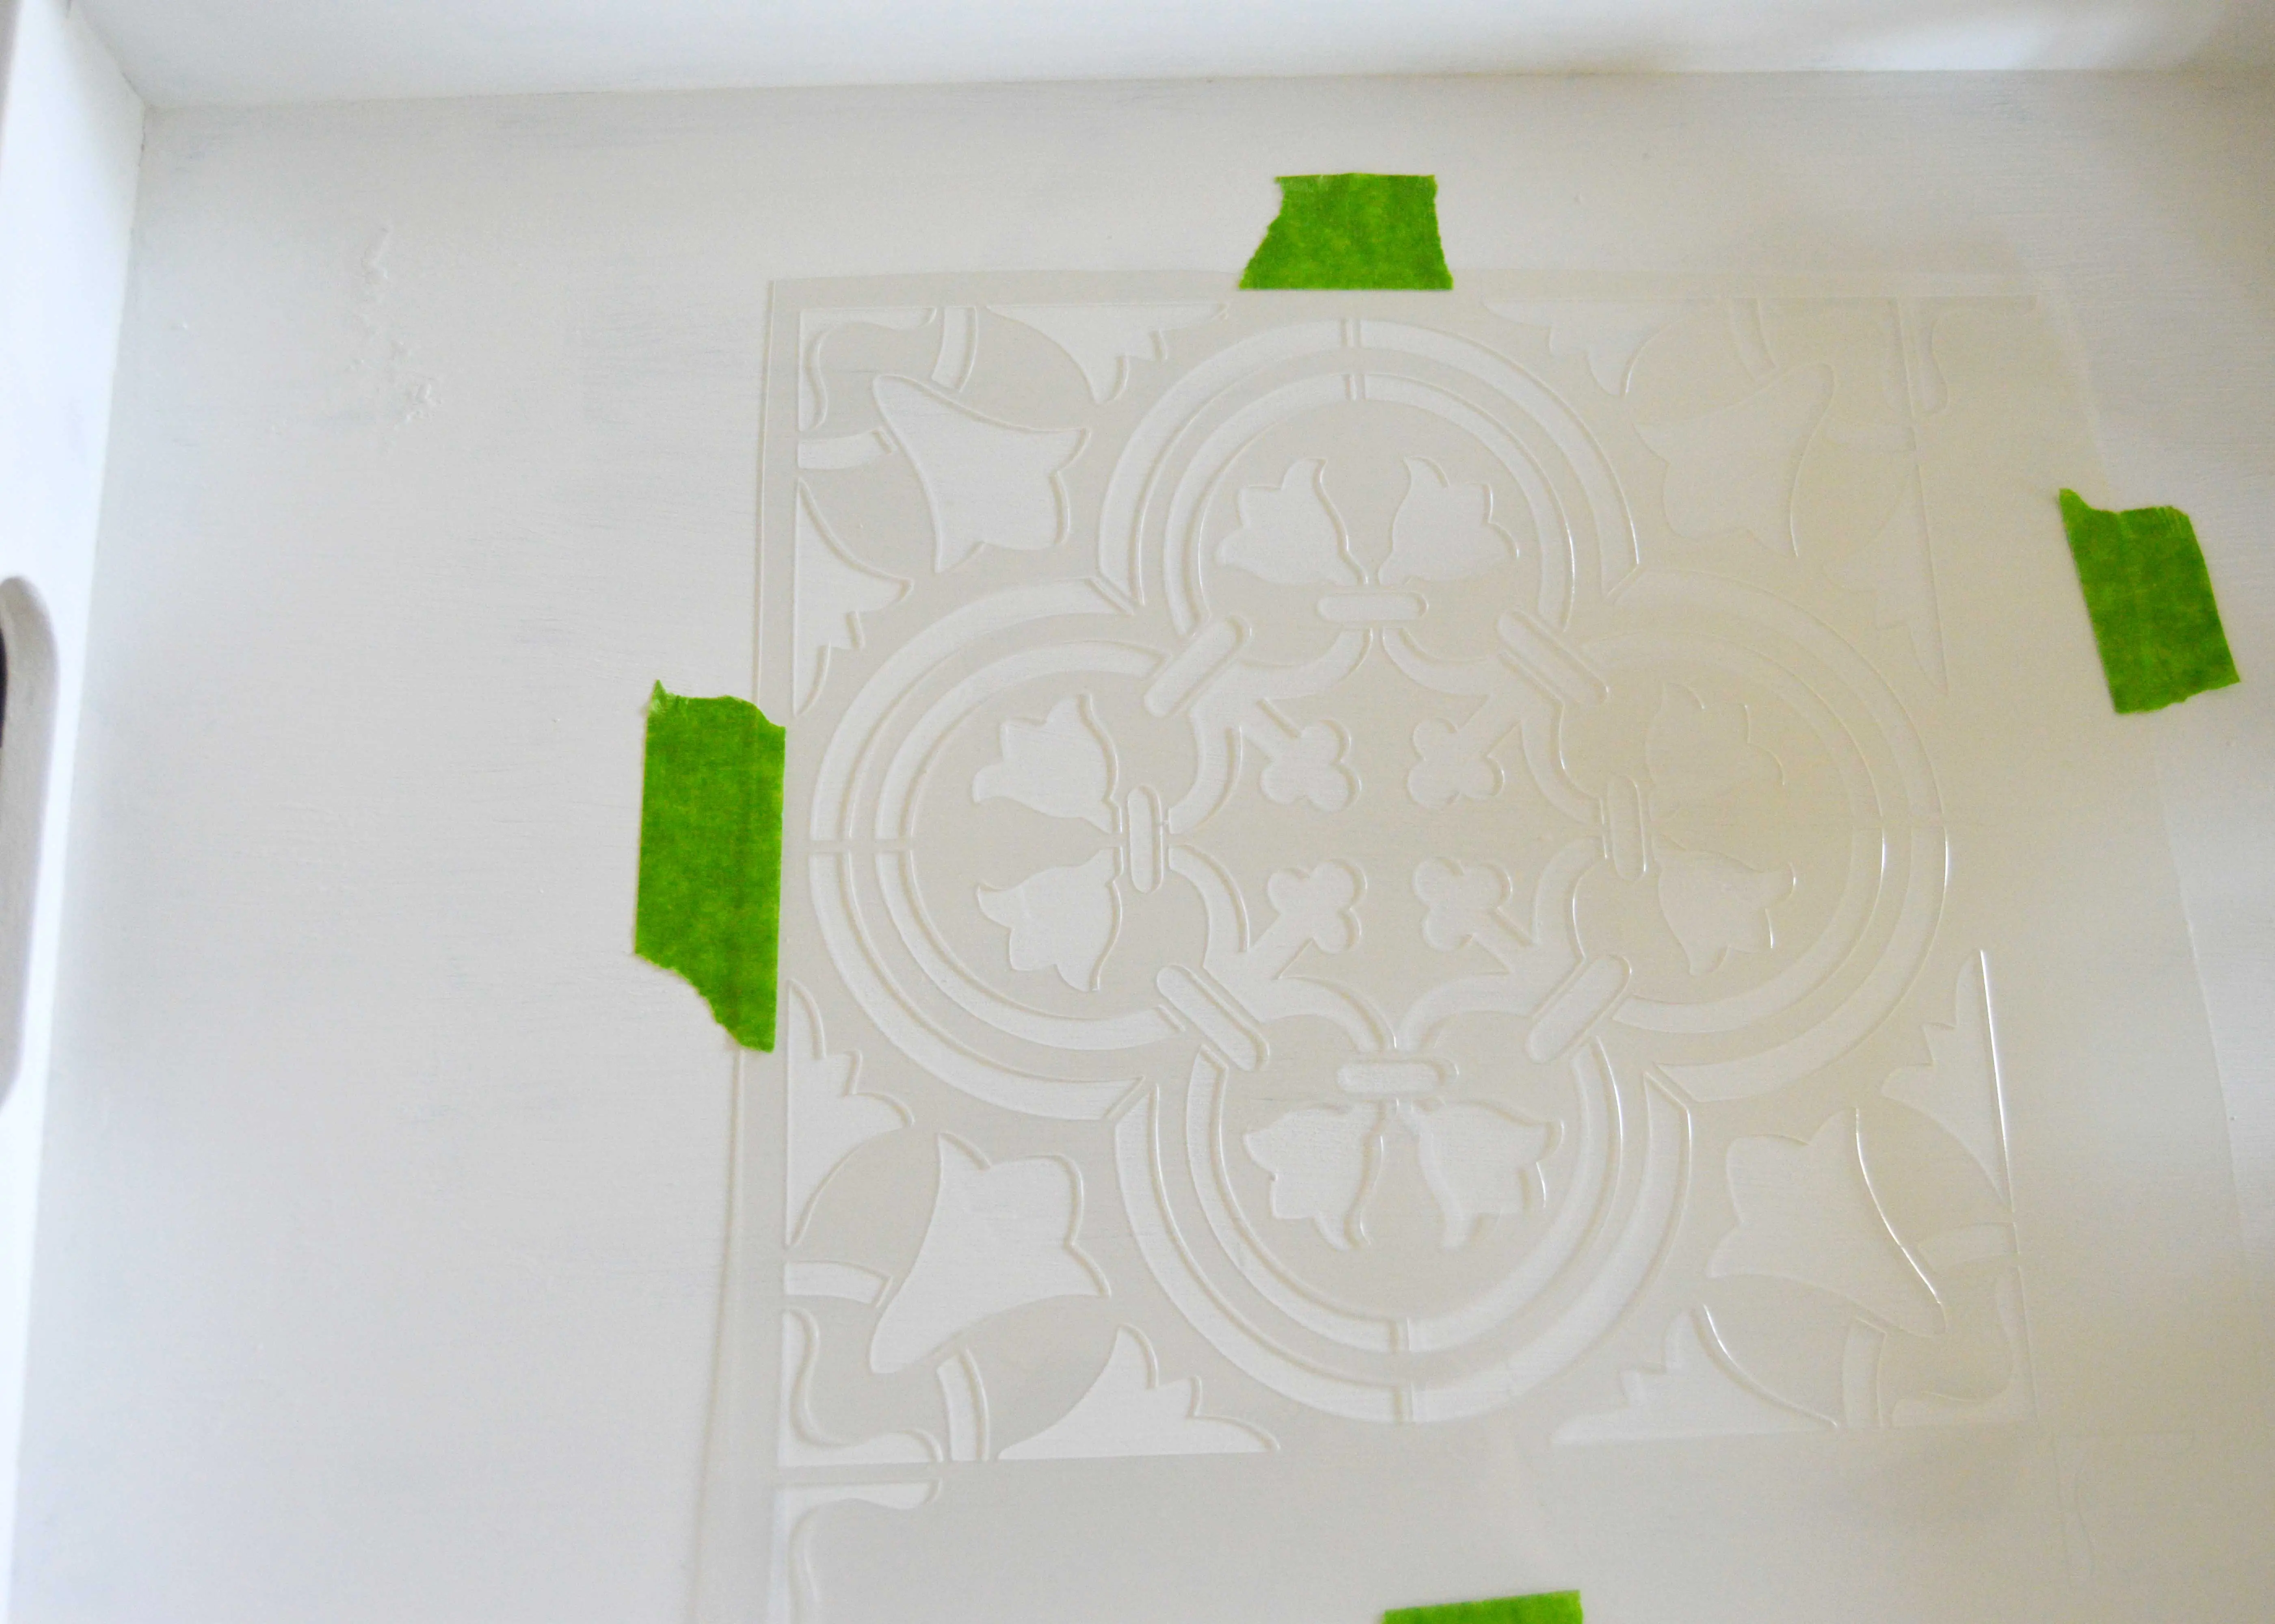
 Step 3
 Step 3
Then I placed my stencil in the center of the bottom of the tray using painter’s tape to prevent slipping. Next I lightly dipped my foam brush into my grey paint and then dabbed the excess paint onto the paint can lid so I didn’t have too much paint on my brush. Then I lightly dabbed my paint onto the stencil making sure to use light pressure to avoid paint bleeding underneath the stencil.
Step 4
After painting each design I lifted up the stencil while the paint was still wet. This will help prevent the stencil from drying or sticking to the bottom of the tray.
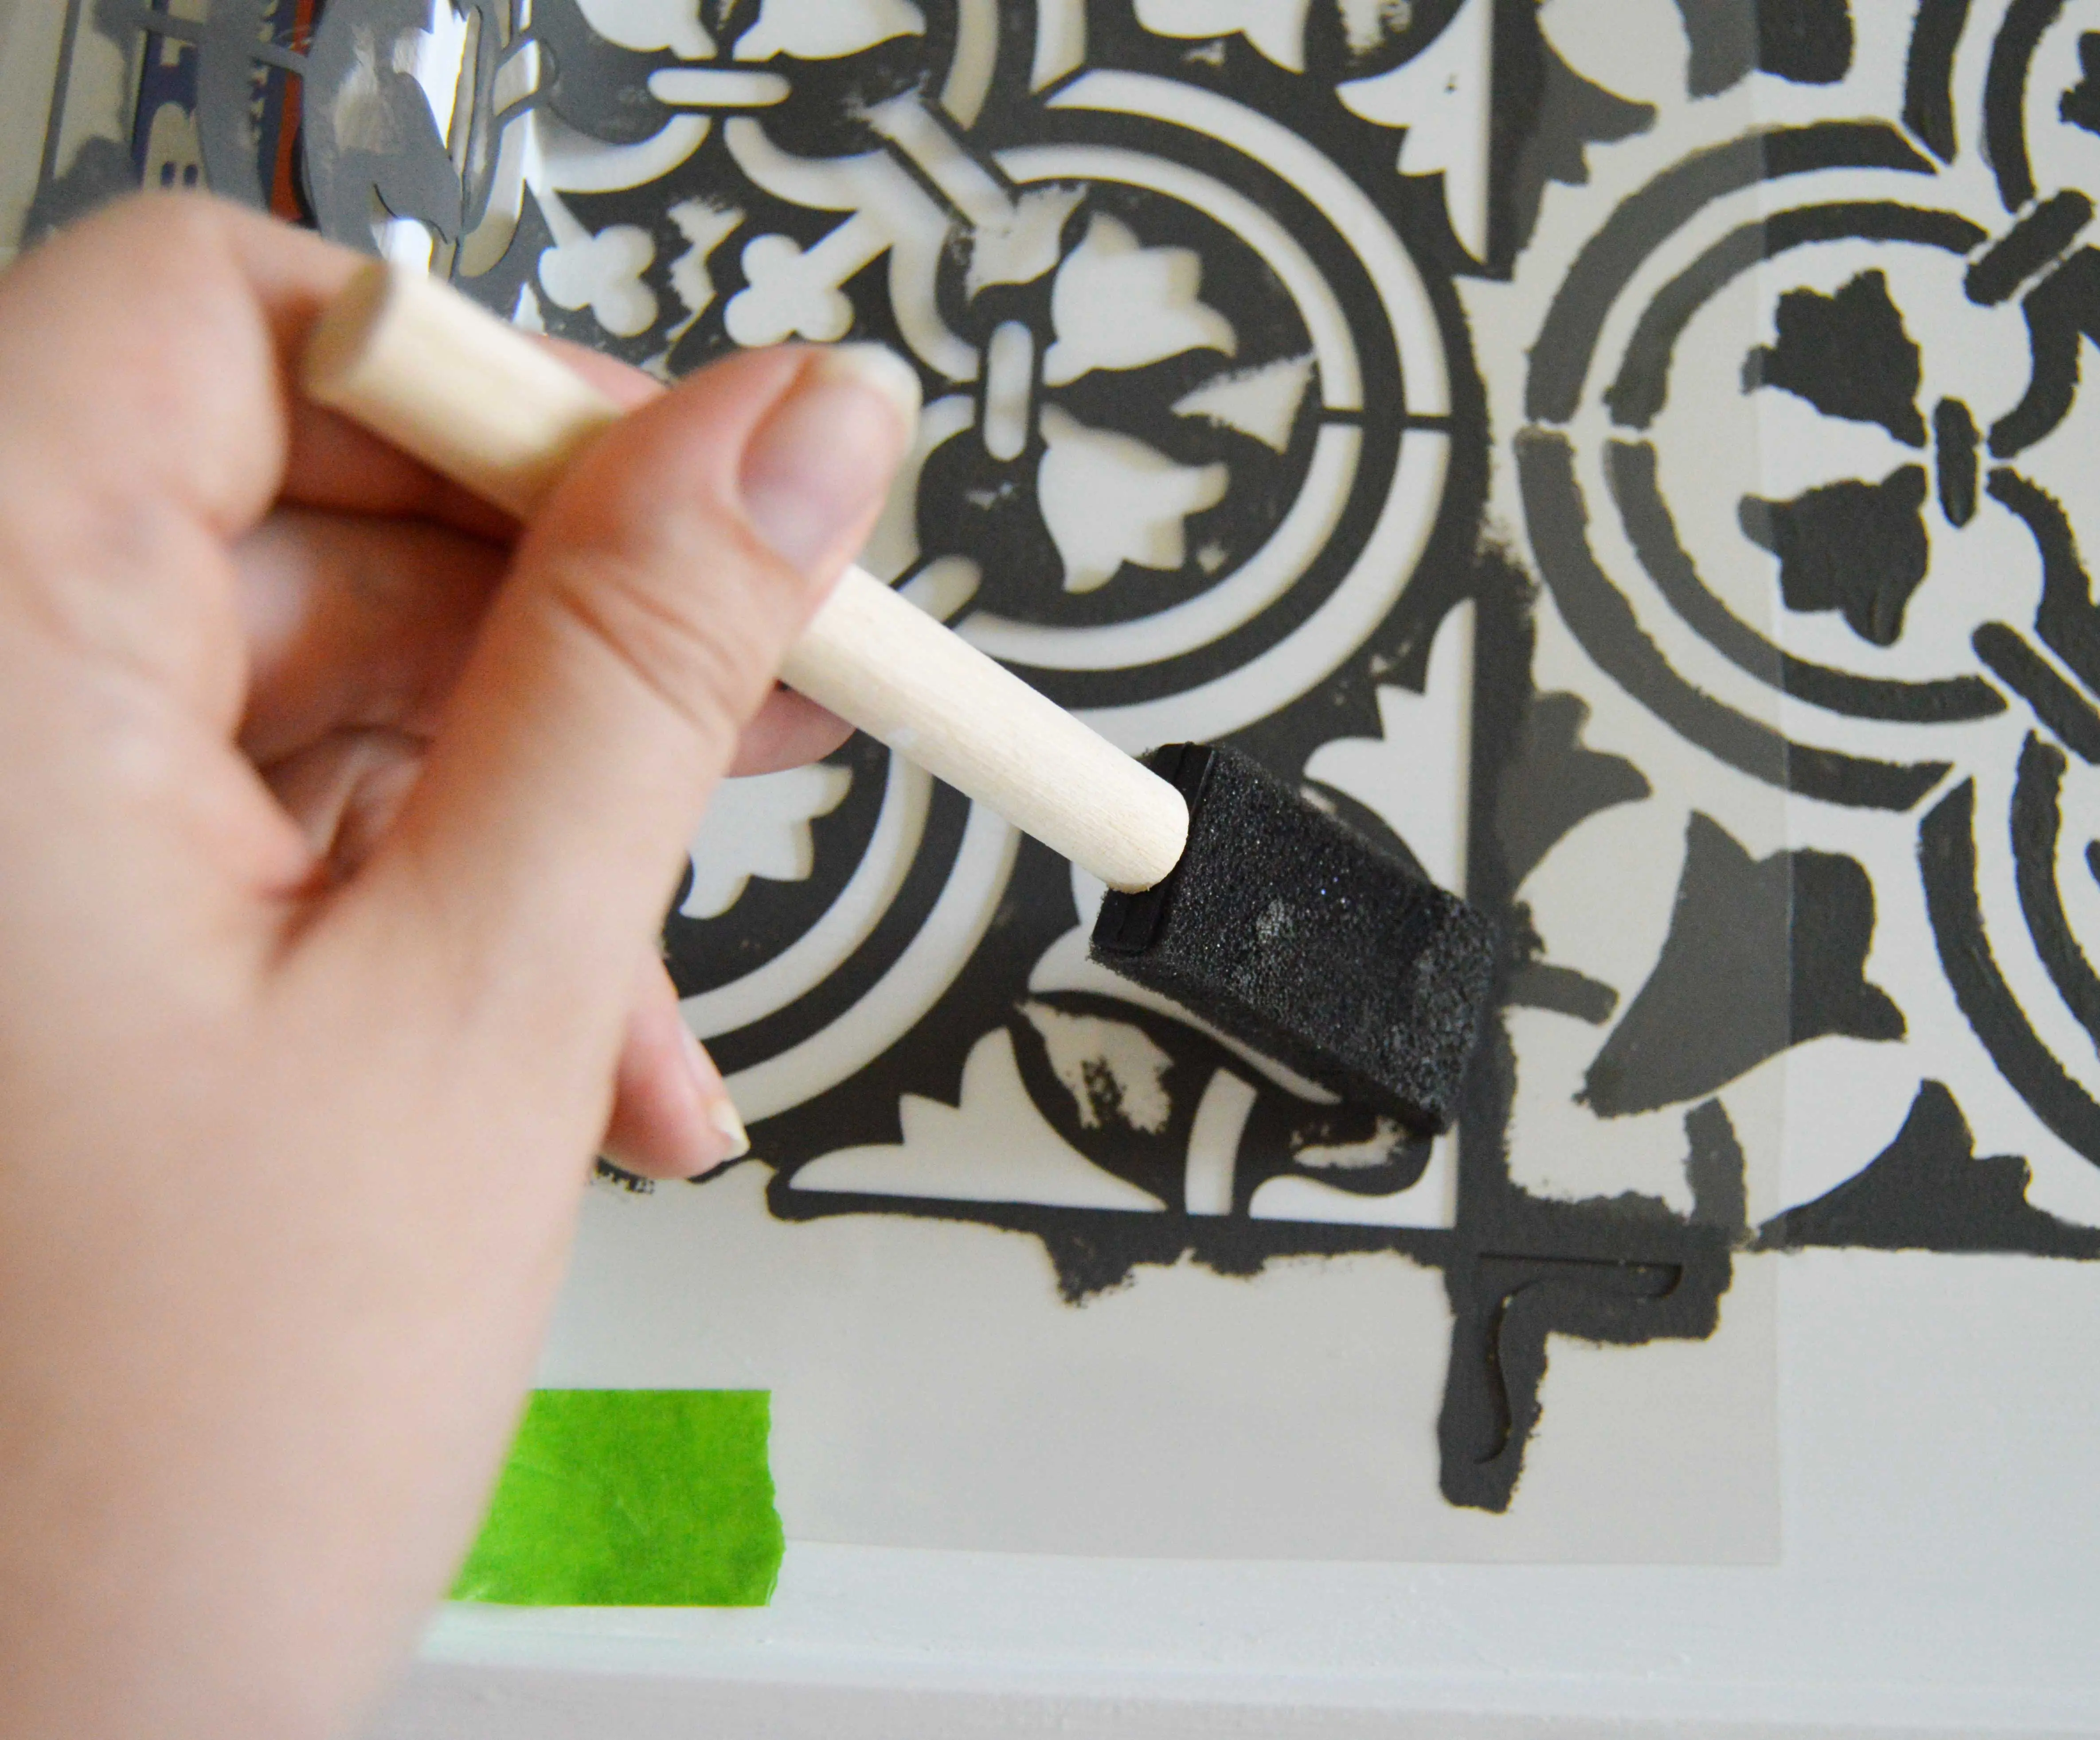
Step 5
When each stenciled design was dry I placed the stencil in the remaining spaces and finished painting my designs. When I got to the edges I bent the stencil, taped it and held it in place to prevent it from slipping. I had a few spots that needed touchups after I removed the stencil, so I took a small artist’s brush and touched up those spots as needed.
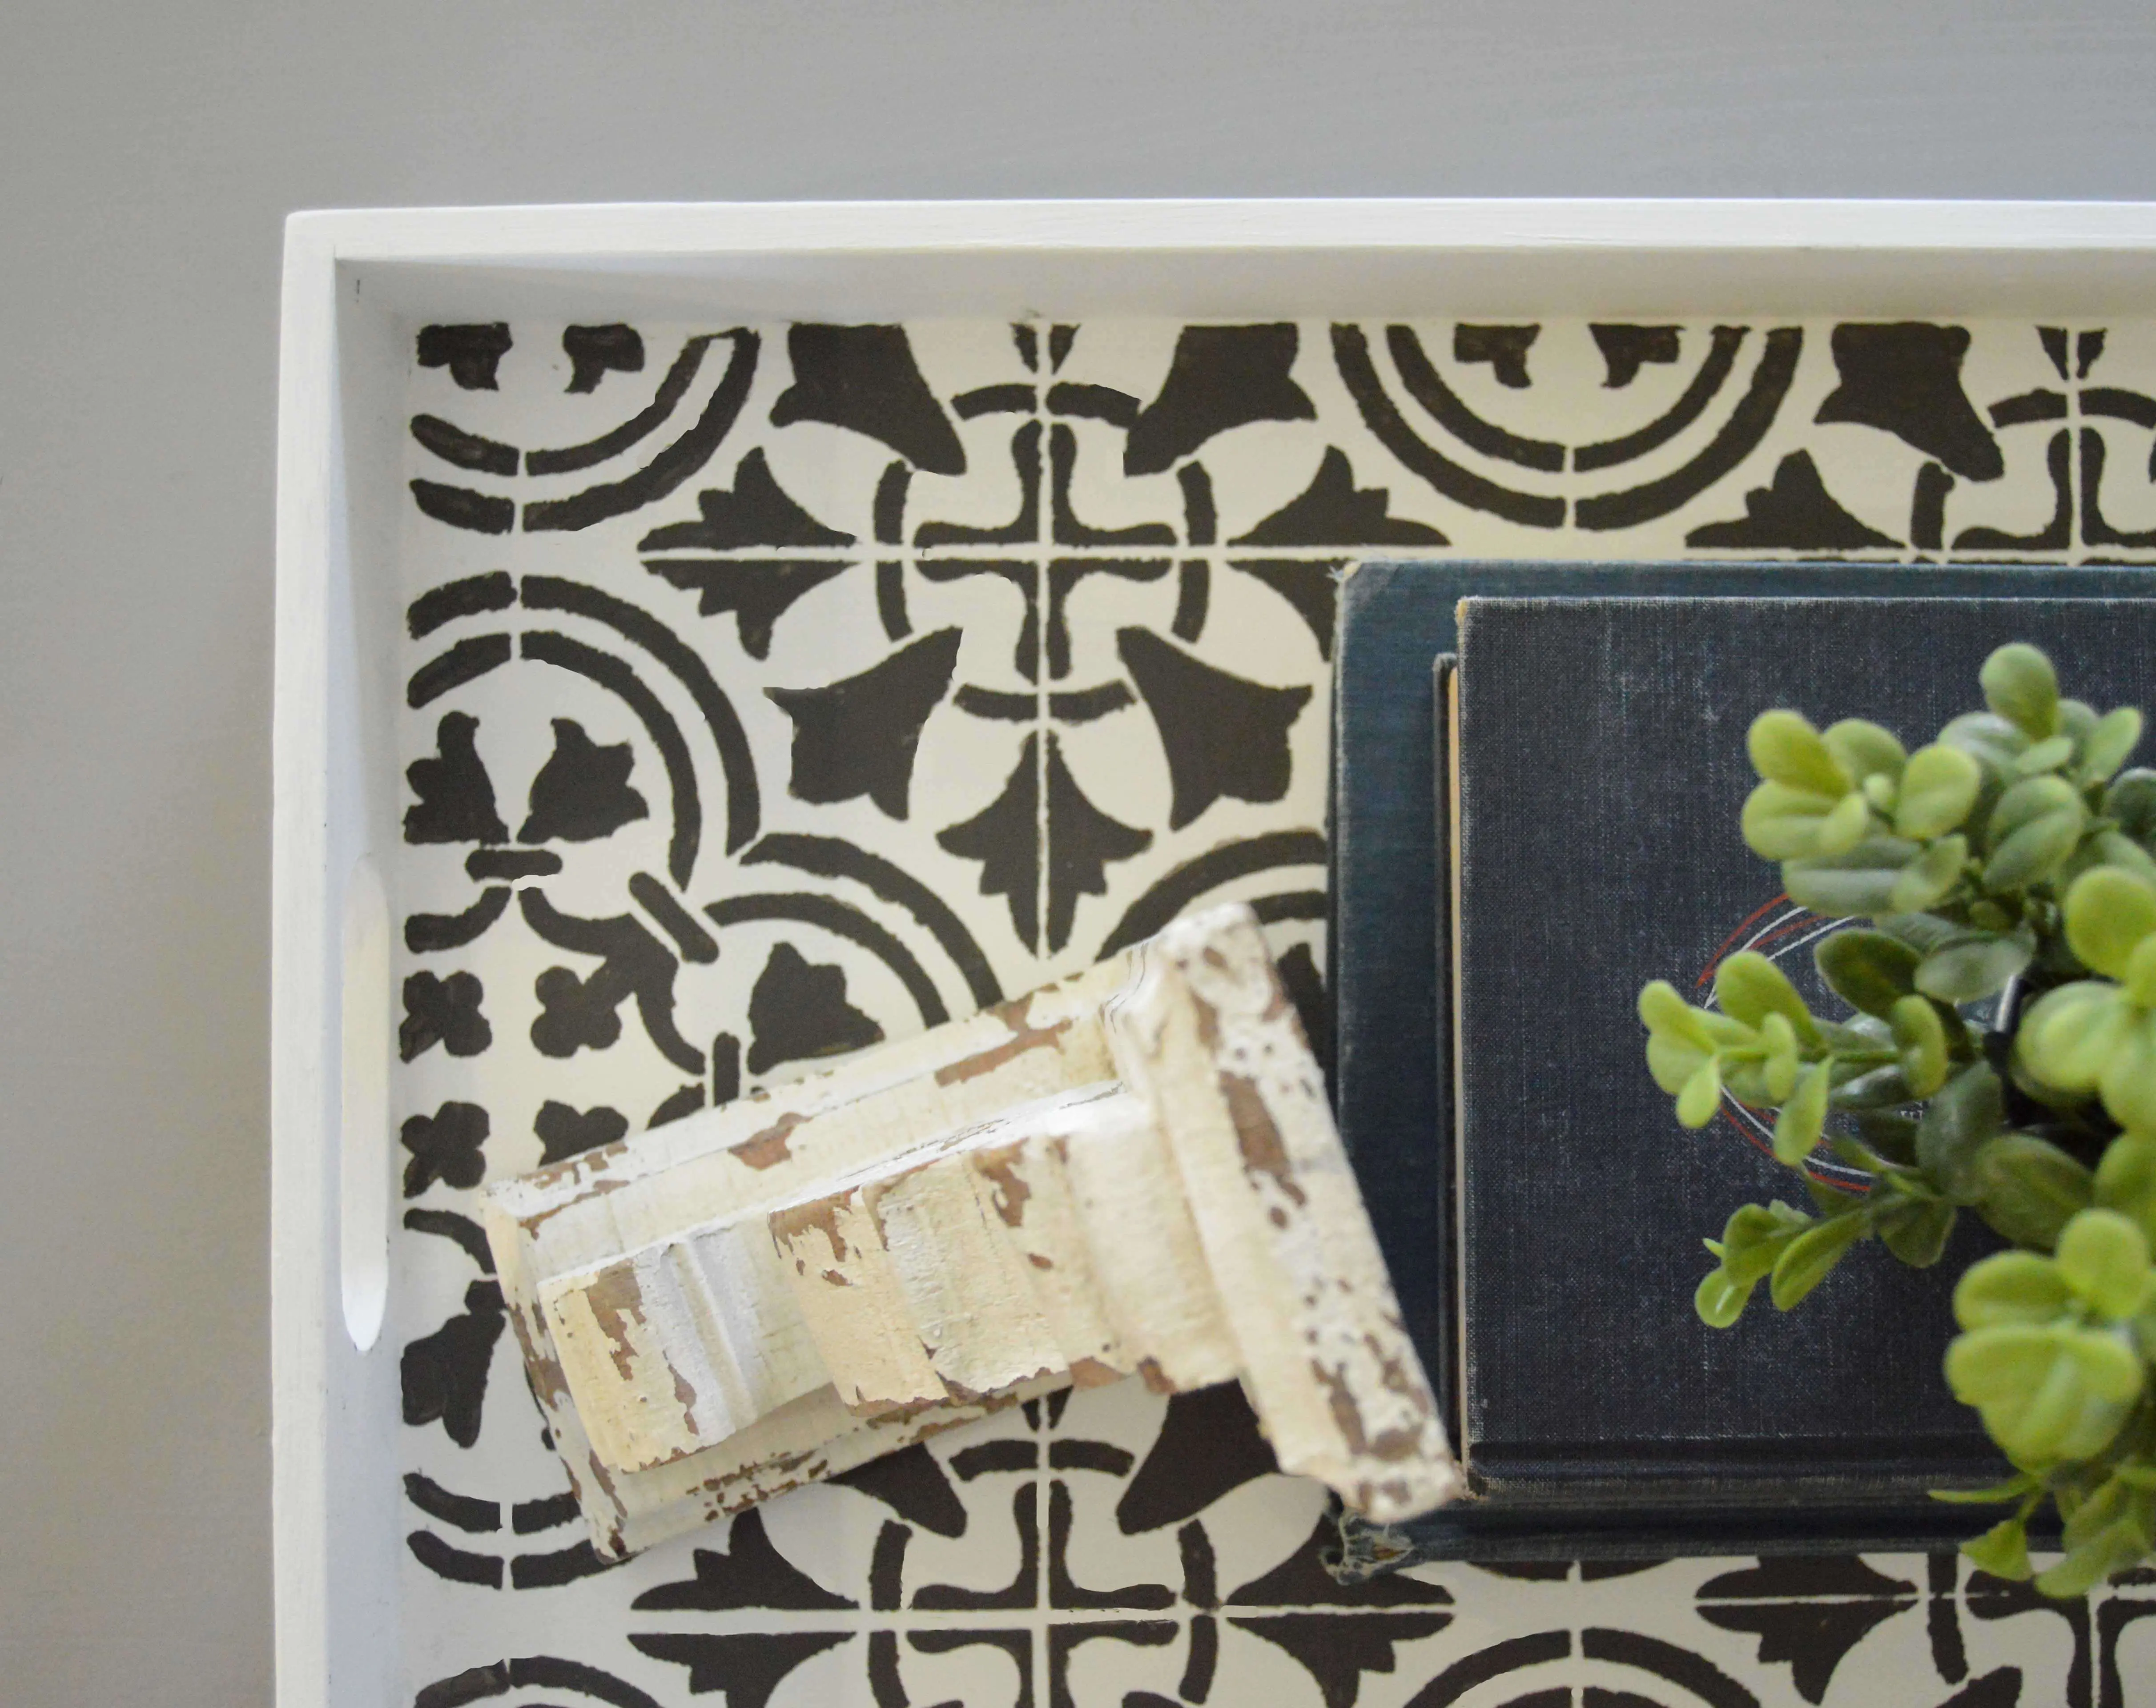
Step 6
After the paint was completely dry I gave it a couple coats of clear coat to seal the paint and protect it.
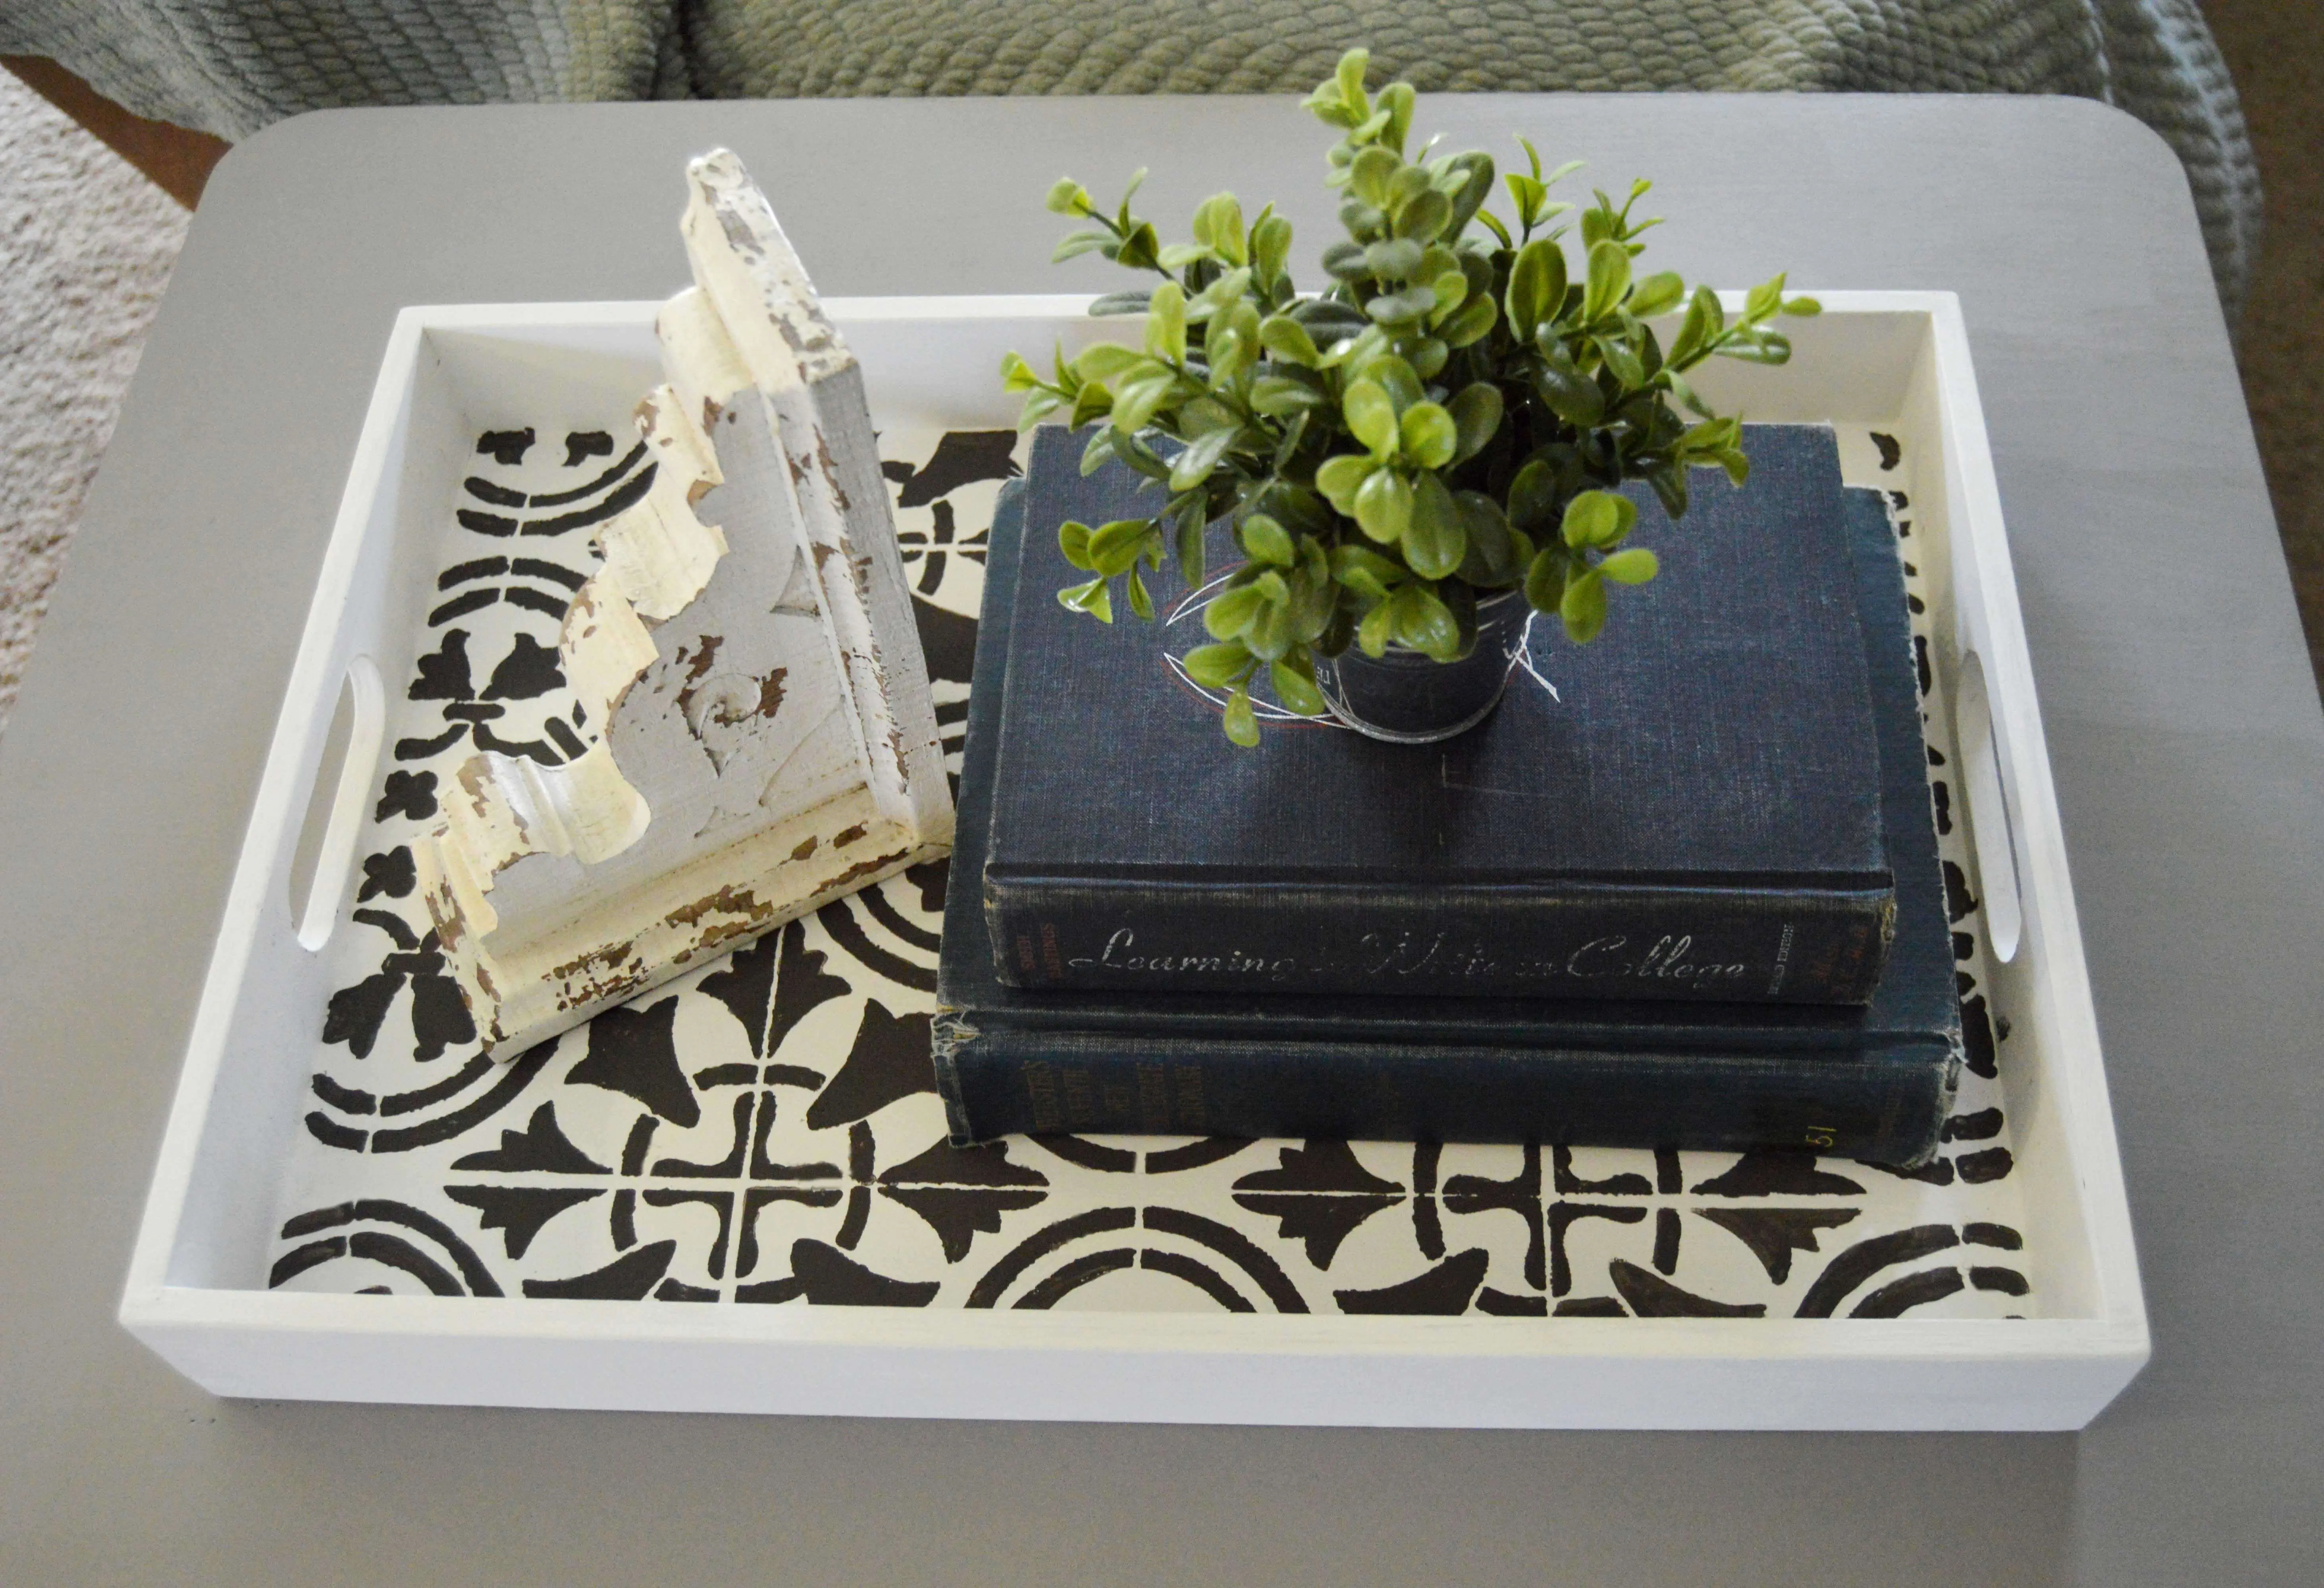
What do you think of my DIY tray makeover? I think it turned out beautiful and it fits into my home decor so much better now! I love how paint totally transformed it into a beautiful new piece!
My Farmhouse Picks

Blessing, Leslea
Follow Leslea and her blog, A Heart Filled Home here:
Discover More
Share what you’ve been up to by using #DIYwithAbbi. I would love to see your creativity in the works so flaunt your flower power magic! You are a huge source of my inspiration!