How to Layer Iron-On Vinyl on a Shirt with Cricut – Step by Step Tutorial
This post may contain affiliate links that won’t change your price but will share some commission.

Have you ever wondered how to layer iron-on vinyl? Learning to use your Cricut is so exciting, and one of the most favorite ways to craft is to use your machine to cut out heat transfer vinyl designs. There are some tricks to getting vinyl to work just right for you, and if you are a beginner then you may feel overwhelmed.
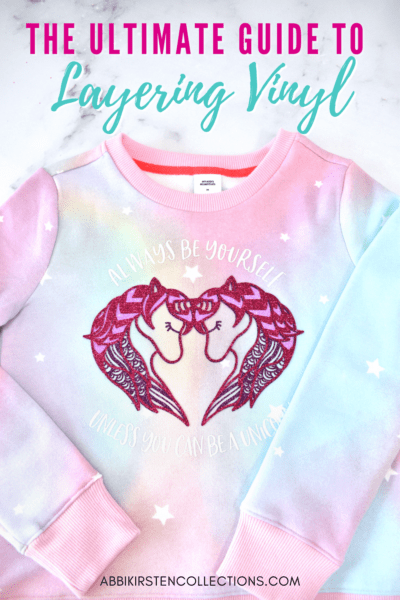
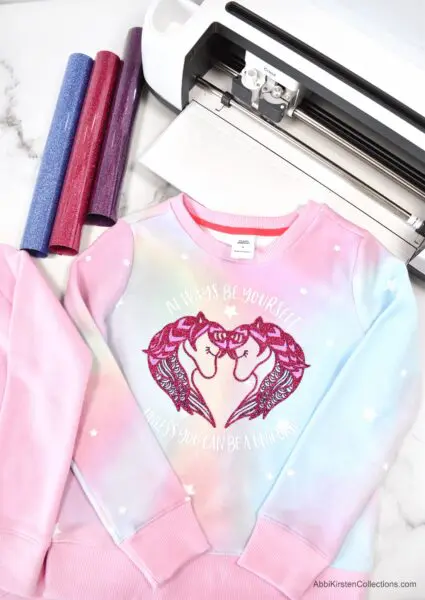
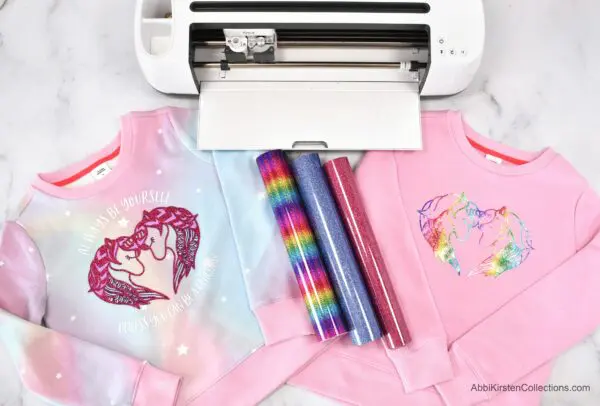
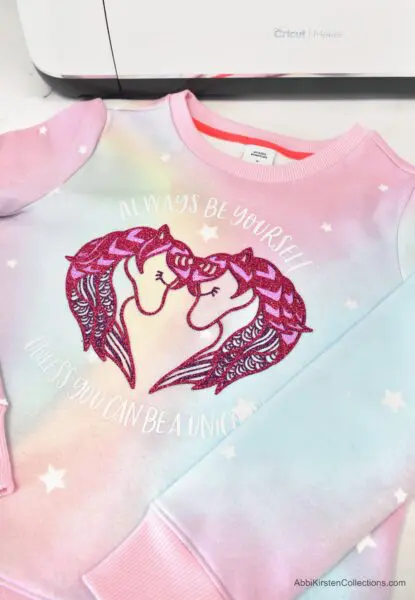
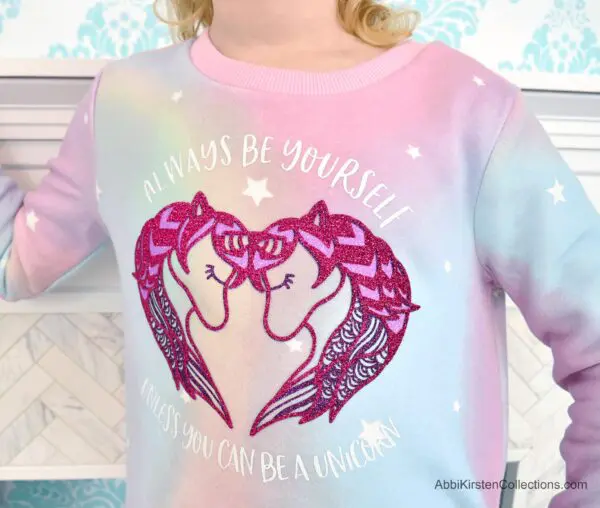
In today’s tutorial, I will show you how to layer iron-on vinyl, also known as heat transfer vinyl. This Cricut lesson will work with any type of vinyl, but in my example, I will be layering glitter iron-on vinyl – because, you know, sparkle! I’ll be using my unicorn design which you can download right here!
HOW TO LAYER IRON-ON VINYL WITH CRICUT – VIDEO TUTORIAL
Click play above to learn how to use heat transfer vinyl. Be sure to scroll down and download my free printable guide below, plus get access to ALL my other freebies inside the vault!
Iron-on Vinyl Project Supply List
- Iron-on vinyl, also known as heat transfer vinyl. I’m using glitter vinyl. You can also use everyday iron-on, holographic, etc.
- Cricut cutting machine
- Green standard mat
- Easypress or iron
- Easypress mat
- Weeding tools
- Layered SVG file – if you love my unicorn design, you can grab it here!
New to Cricut? Learn exactly what an SVG file is, how to upload an SVG to Cricut design space, and the difference between an SVG file and Print then Cut process!
Iron-on Vinyl Tutorial at a Glance
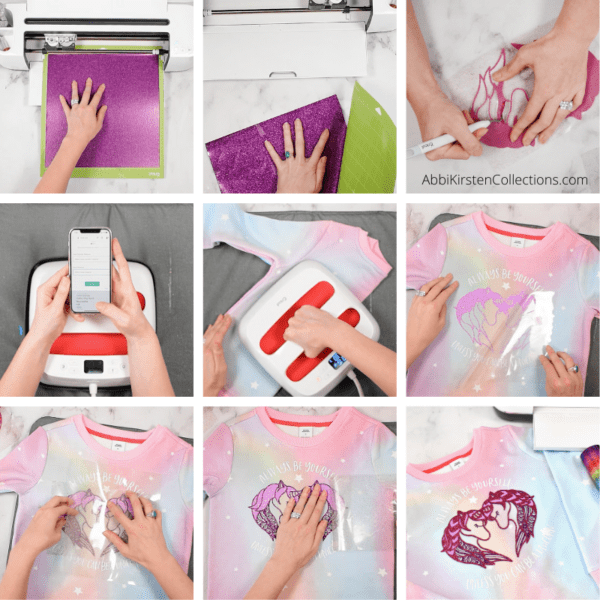
Cutting Your Design
- Open your iron-on and place it on your mat with the plastic carrier sheet face down (shiny side down).
- Use a Cricut scraper or brayer to flatten the vinyl if needed.
- Load your Cricut mat once you have selected the corresponding material in Design Space. Note: If your material isn’t cutting all the way through, try selecting More under Pressure on the cut screen.
- After your design is finished cutting, remove the vinyl from the mat by peeling the mat away from the iron-on.
- Trim your design down with scissors or a straight-cutter. Save your leftover vinyl.
Weeding Your Design
- Gently roll your design to see where you need to weed easier. Peel away the excess vinyl.
- Weed the intricate parts of your design with a weeding tool. Repeat steps 1-6 for every color you need to cut.
- Set your Easypress to the correct temperature and time using the guide at Cricut here.
- Press your shirt in half to warm the material and create a center crease as a point of reference. Learning how to layer iron-on vinyl is one thing but getting your design straight is another! Creating that center crease can help dramatically!
Layering Your Design
- Start with your largest design and press it first. Make sure to save the clear carrier sheet.
- Let the design completely cool before peeling the liner back. 2 minutes is a safe amount of time.
- Place the next layer of your design. Make sure to cover the whole design with the first largest carrier sheet to protect any exposed vinyl.
- Repeat the layering process. Remember to always protect your subsequent layers from direct heat with the carrier sheet.
- Finish by flipping over your shirt and sealing with heat by pressing from behind.
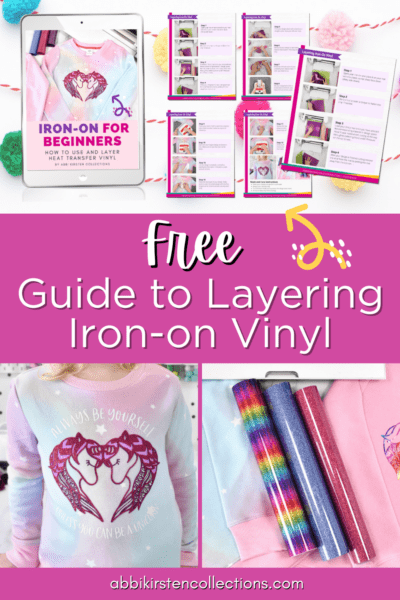
DOWNLOAD YOUR FREE GUIDE TO LAYERING IRON-ON HEAT TRANSFER VINYL!
Download these free templates by signing up below. If you are already a member, then login right here and find it in the printable section or search design #129.
My daughter absolutely LOVED her new sweatshirts with her unicorn svg design!
How did your Cricut vinyl iron-on project work out? Tell me below, and let me know if you have any questions!
About Abbi Kirsten
My mission is to inspire you to nurture the creative magic inside your soul – bringing you fun, easy-to-learn DIY projects, and quality template designs. I share a variety of projects, such as printables, SVG cut files, and craft tutorials, but specifically love paper crafting and paper flowers. Interested in paper flowers?! I’ve created dozens of signature designs for you to enjoy – starting with my bestseller, The Art of Giant Paper Flowers, the Giant Flower Library, and my shop of endless paper designs and flower templates.