DIY Giant Paper Dahlia Flowers- Free Paper Dahlia Flower Templates
This post may contain affiliate links that won’t change your price but will share some commission.
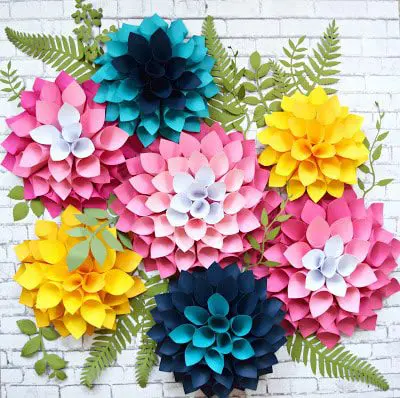
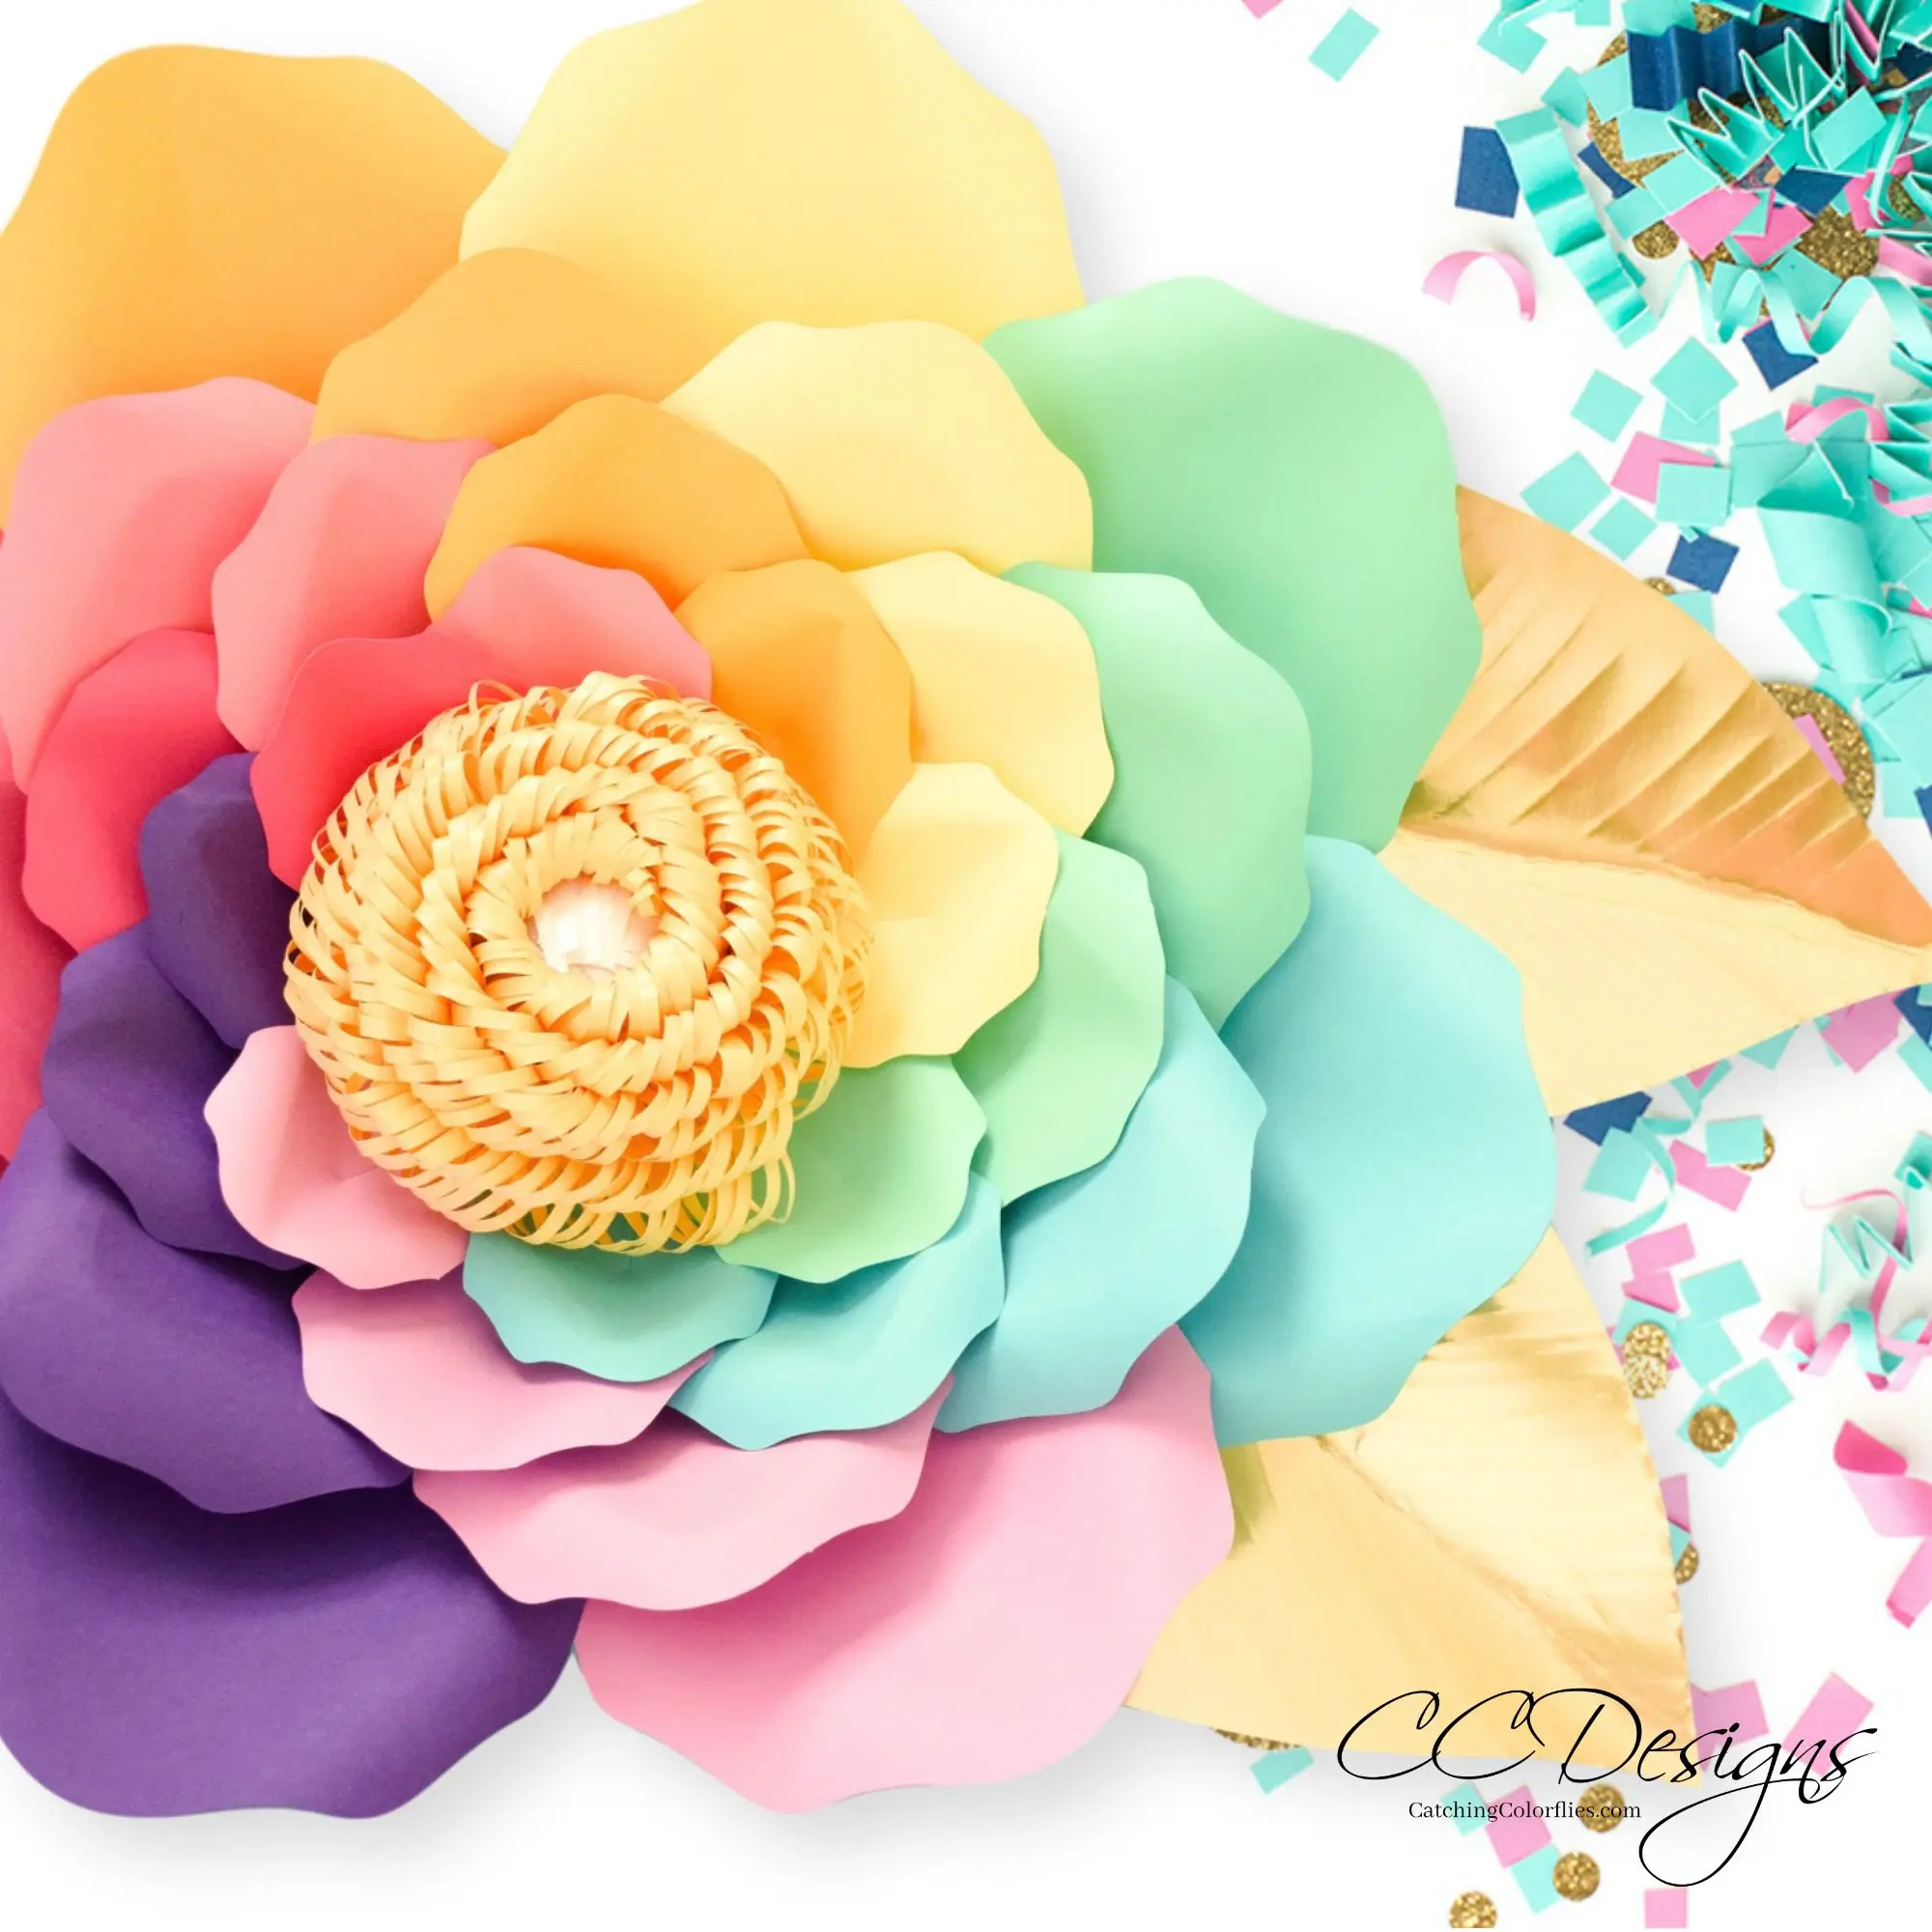
Large Dahlia Paper Flowers
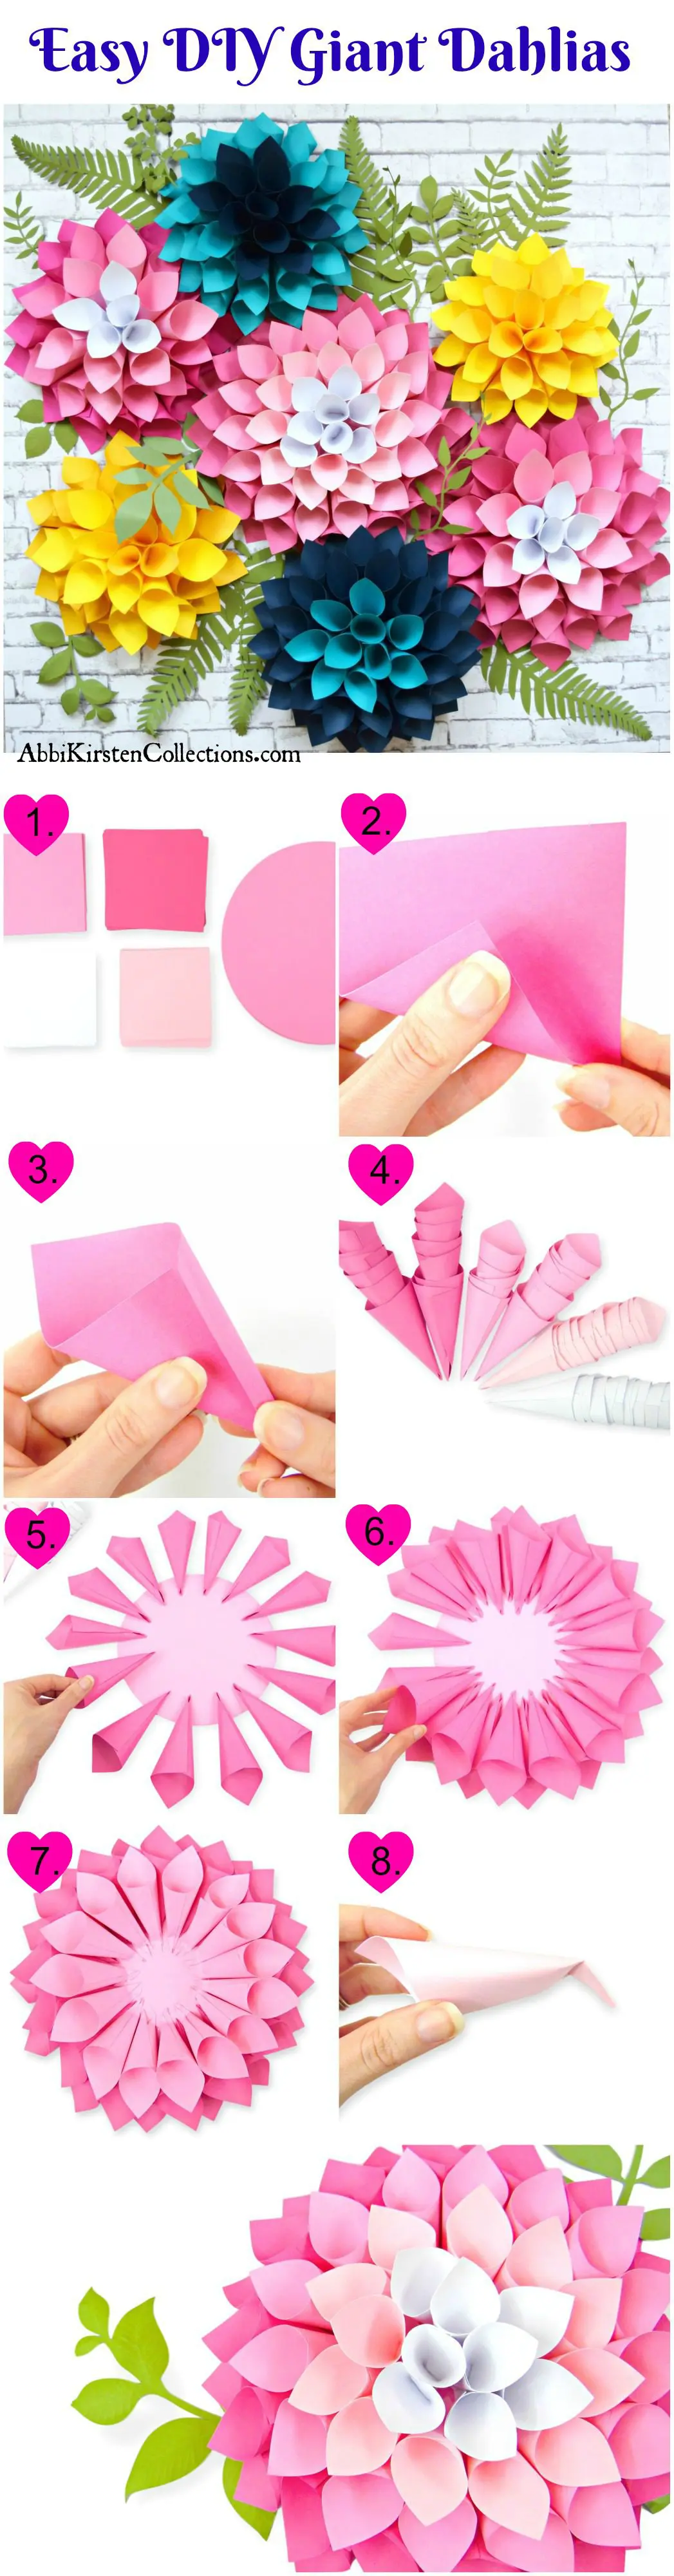
These giant Dahlia Paper Flowers are so incredibly beautiful once made. I had fun creating an ombre effect by using different shades of cardstock paper. What’s better is these dahlia paper wallflowers are beginner-proof and kid-friendly!
I share my dahlia paper flower tutorial and template in my book, The Art of Giant Paper Flowers. And because I love you all so much I am gifting the PDF printables and SVG cut files today for free!
It may surprise you that the large dahlia paper flowers templates are made using just some specially sized circles and squares. Because the templates are so simple these dahlia paper flowers are easy for those cutting by hand with scissors.
If you are looking for more large paper flower wallflowers for your home or party decor, check out all my flower tutorials here.
Supplies for Making Giant Dahlia Paper Flowers
- Glue Gun
- 65-pound cardstock
- Scissors and/or cutting machine ( a Cricut Maker or Cricut Explore Air 2 Machine will work)
- If you are interested in the vines I used in the photo above they can be found here.
Download Your Free Large Dahlia Flower Templates
Download these free paper flower templates by signing up via the form below. But if you are already a member, log in right here and find it by searching Dahlia or Design #24 in the search bar at the top. Need help entering the vault? Read this helpful post here.
Related Posts
Cut Out Your Paper Dahlia Petals
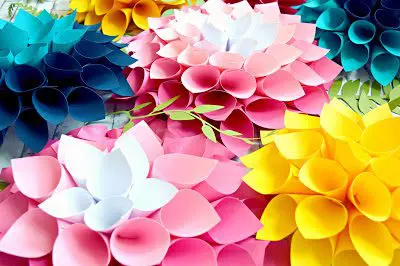
As I mentioned above the giant dahlia paper flowers are made from 2 basic geometric shapes—a large 8-inch circle for the base and several 4.5 inches and 4-inch squares rolled into a cone shape. Start with cutting out 40 of the 4.5-inch squares and 15 of the 4-inch squares. It’s important to note that the final count of squares used may vary for everyone.

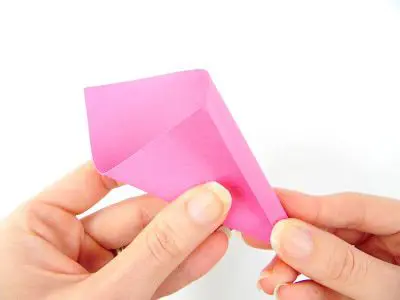
Shaping Your Dahlia Petals into Cones
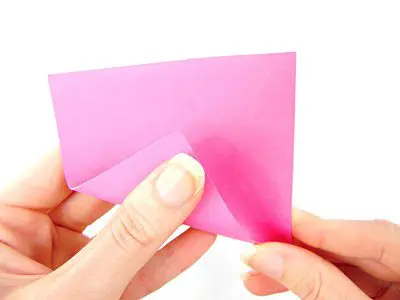
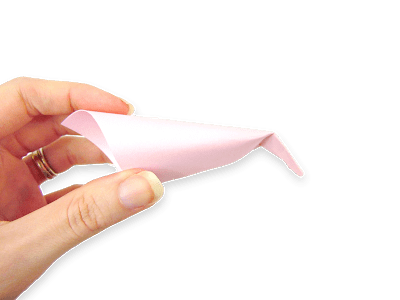
To form a cone, hold the square with one corner up and overlap the bottom, securing with your hot glue.
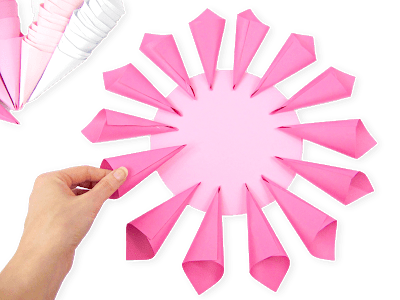
The 8-inch circle will be your base for gluing the cones to. If you want a variety of sizes of dahlia paper flowers you can do this by increasing or decreasing the circle base and adding or subtracting cones.
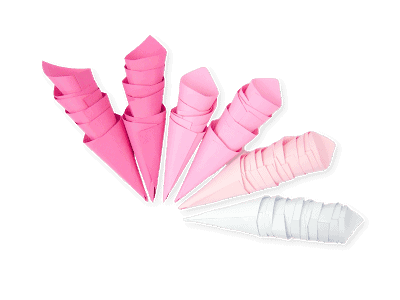
If you are aiming for the ombre effect or a rainbow dahlia, choose 4-6 shades of one color to use progressively as you work towards the center. I used 5 shades of pink and then white for the center of the dahlia flower.
How to Make Large Paper Dahlia Flowers
Beginning with your larger cones made from the 4.5-inch squares, glue the tips to the outer edge of the circle all the way around. Make sure to leave about a 1/2 inch or so of space between each cone as you go.

Next, continue adding more cones to your dahlia paper flowers. Place the cones in the spaces we left between the first layer of petals we glued down.
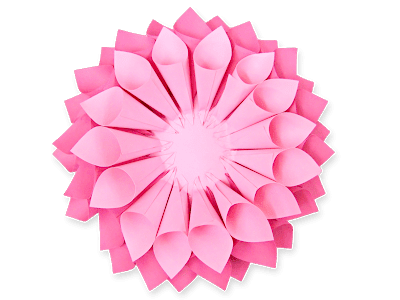
You would have moved on to your 4-inch cones now. Continue the pattern and keep filling in more of the dahlia petals.
Once you get down to the last dozen or so of the cones, they will naturally bend at the tip when you glue them down. This is what you want so that the final look is a tight dahlia center. You may need to grab a thin wood dowel or pencil to press the tip down. You want to ensure it makes good contact in the center with the glue.
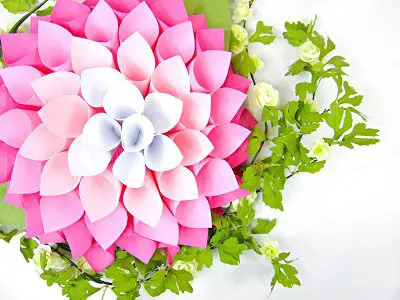
Once you have glued in your final petals your dahlia paper flowers should look something like the image above. Additionally, I have created a full video tutorial below as well for more visual details! How would you use these dahlia paper wallflowers? Share with me in the comments!
Giant Dahlia Paper Wall Flowers Video Tutorial
Watch the full video tutorial above to make these giant dahlia wallflowers. Don’t forget to download the paper dahlia templates above!

Hey, Crafty bestie! I’m Abbi!
I’m thrilled you are here! I have spent the last 10+ years making messes and magic in my home studio to make the world a more colorful place, one craft at a time! I’m on a mission to nurture the creative magic inside your soul and bring that bursting imagination inside you to life with easy-to-learn tutorials. If you haven’t yet, be sure to join the subscriber community to gain access to all my freebies or visit my signature design shop, Catching Colorflies!


How do you/ what do you use to hang them onto the wall?
You can use scotch mounting tape or a glue a wire loop to the back to hang from a hook or nail. 🙂
I take a hole punch/2 holes. I ran wire threw and hang
Can we use colored paper which we print on? 80gsm?
I use 65 pound weighted which is 76 grams, so 80 grams should be fine. 🙂
Loving this tutorial and cannot wait to make some giant dahlias for baby girl’s nursery! I am just wondering (and maybe I missed it somewhere, in which case I apologize) roughly what size is the finished flower? Thank you!
The biggest one measures about 14-15 inches across. 🙂 Enjoy making them for your littles nursery!
How big would i need to make the circle base to make it around 30″?
You will probably need to scale the circle base to around 20 inches for a 30-inch flower result. 🙂
How do you hang them afterwards?
Hi Denise,
Here is a post on all the ways to hang paper flowers! https://www.abbikirstencollections.com/2018/04/hang-paper-flowers.html
If I wanted to bring this down to roughly a 9″ finished flower, how would i change my sizes?
I would make the base about 7-8 inches and then you can use just the smaller squares for the petal cones. 🙂
Maybe I looked over it but what was the 5 inch circle for?
The 5-inch circle is optional for downsizing the dahlia flower. 🙂