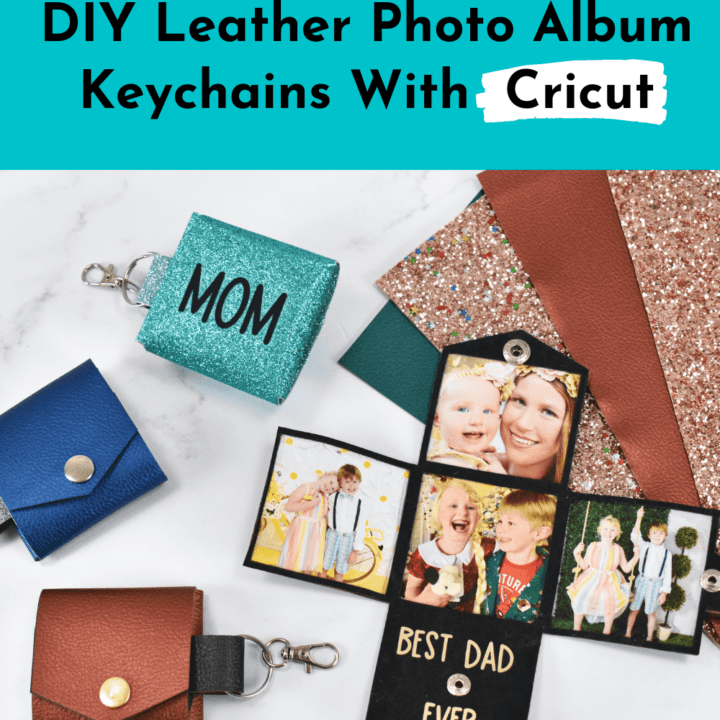
How To Make Personalized Photo Keychains With Cricut For Unique Custom Gifts
This post may contain affiliate links that won’t change your price but will share some commission.
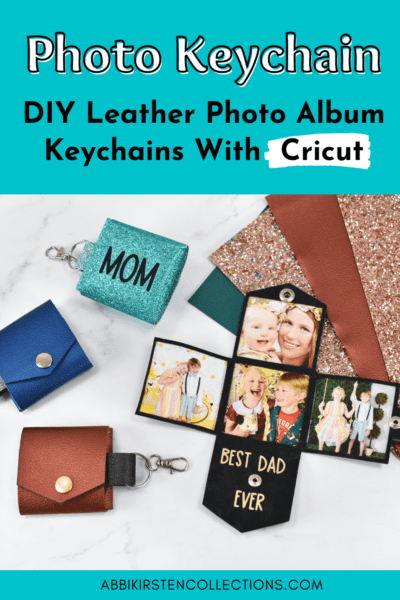
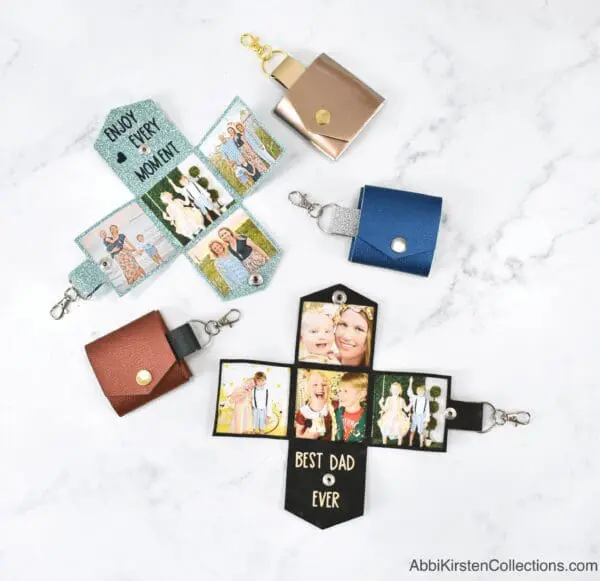
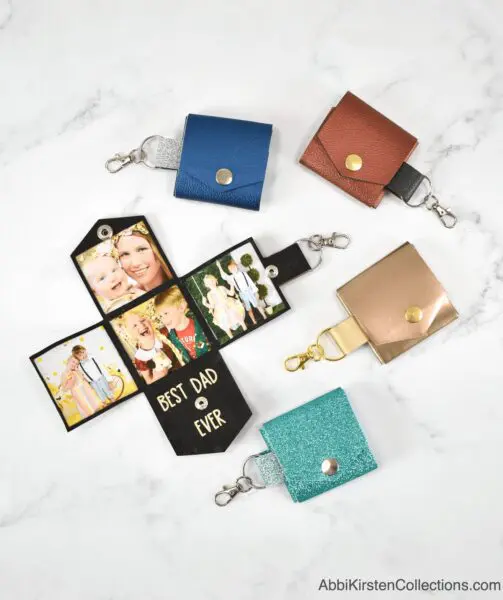
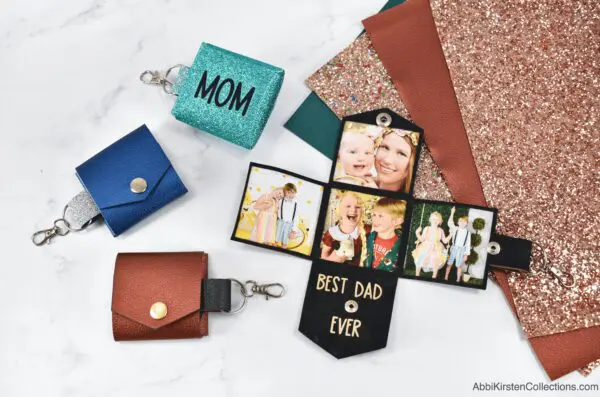
Create a Personalized Photo Keychain for a unique gift!
Have you ever wished to have a personalized photo keychain to carry with you? Maybe you have seen these unique keyrings online from sites that offer to create custom keychains as gifts, but as crafters, we love to make one-of-a-kind gifts by hand.
So when I had the idea to make photo keychains with Cricut, I knew they would make the perfect solution to carrying your favorite photos anywhere on your key ring.
While I do recommend having a cutting machine to make these personalized leather photo keychains, the templates can be cut with both the Cricut Maker machine or Explore machines.
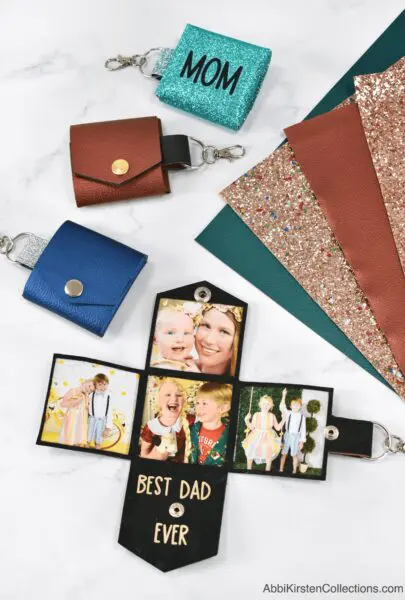
Whether you are looking for a special photo gift for Mother’s Day or Father’s Day, these custom photo keychains are fun and easy to make. The photo keychains can be personalized even more by typing out a short message to add to the inside of the keychain, which I will show you in the video tutorial below.
How To Create A Photo Album Keychain
In this tutorial, I use faux leather and glitter faux canvas as the primary material for my photo keychain. I will show you how to add iron-on vinyl to the back side of your faux leather or canvas for a finishing framed touch. Additionally, I will also teach you how to do back-to-back paper-thin faux leather or canvas if you wish to have it match on both sides.
Because we are making these photo keychains with our Cricut machine, our customizable options are much greater than if we had to order them from a manufactured website online. Instead, we can choose the exact color and texture of materials to add those unique personal touches that our recipient will love!
To get your pictures on, you will need a printer and some transfer paper for dark fabric.
I like the Nufun brand for image transfers.
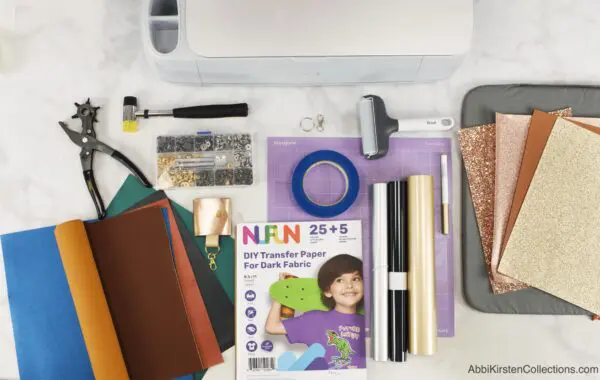
Supply list for mini Keychain album with Cricut
Let’s review the full material list for our DIY leather photo keychain albums below.
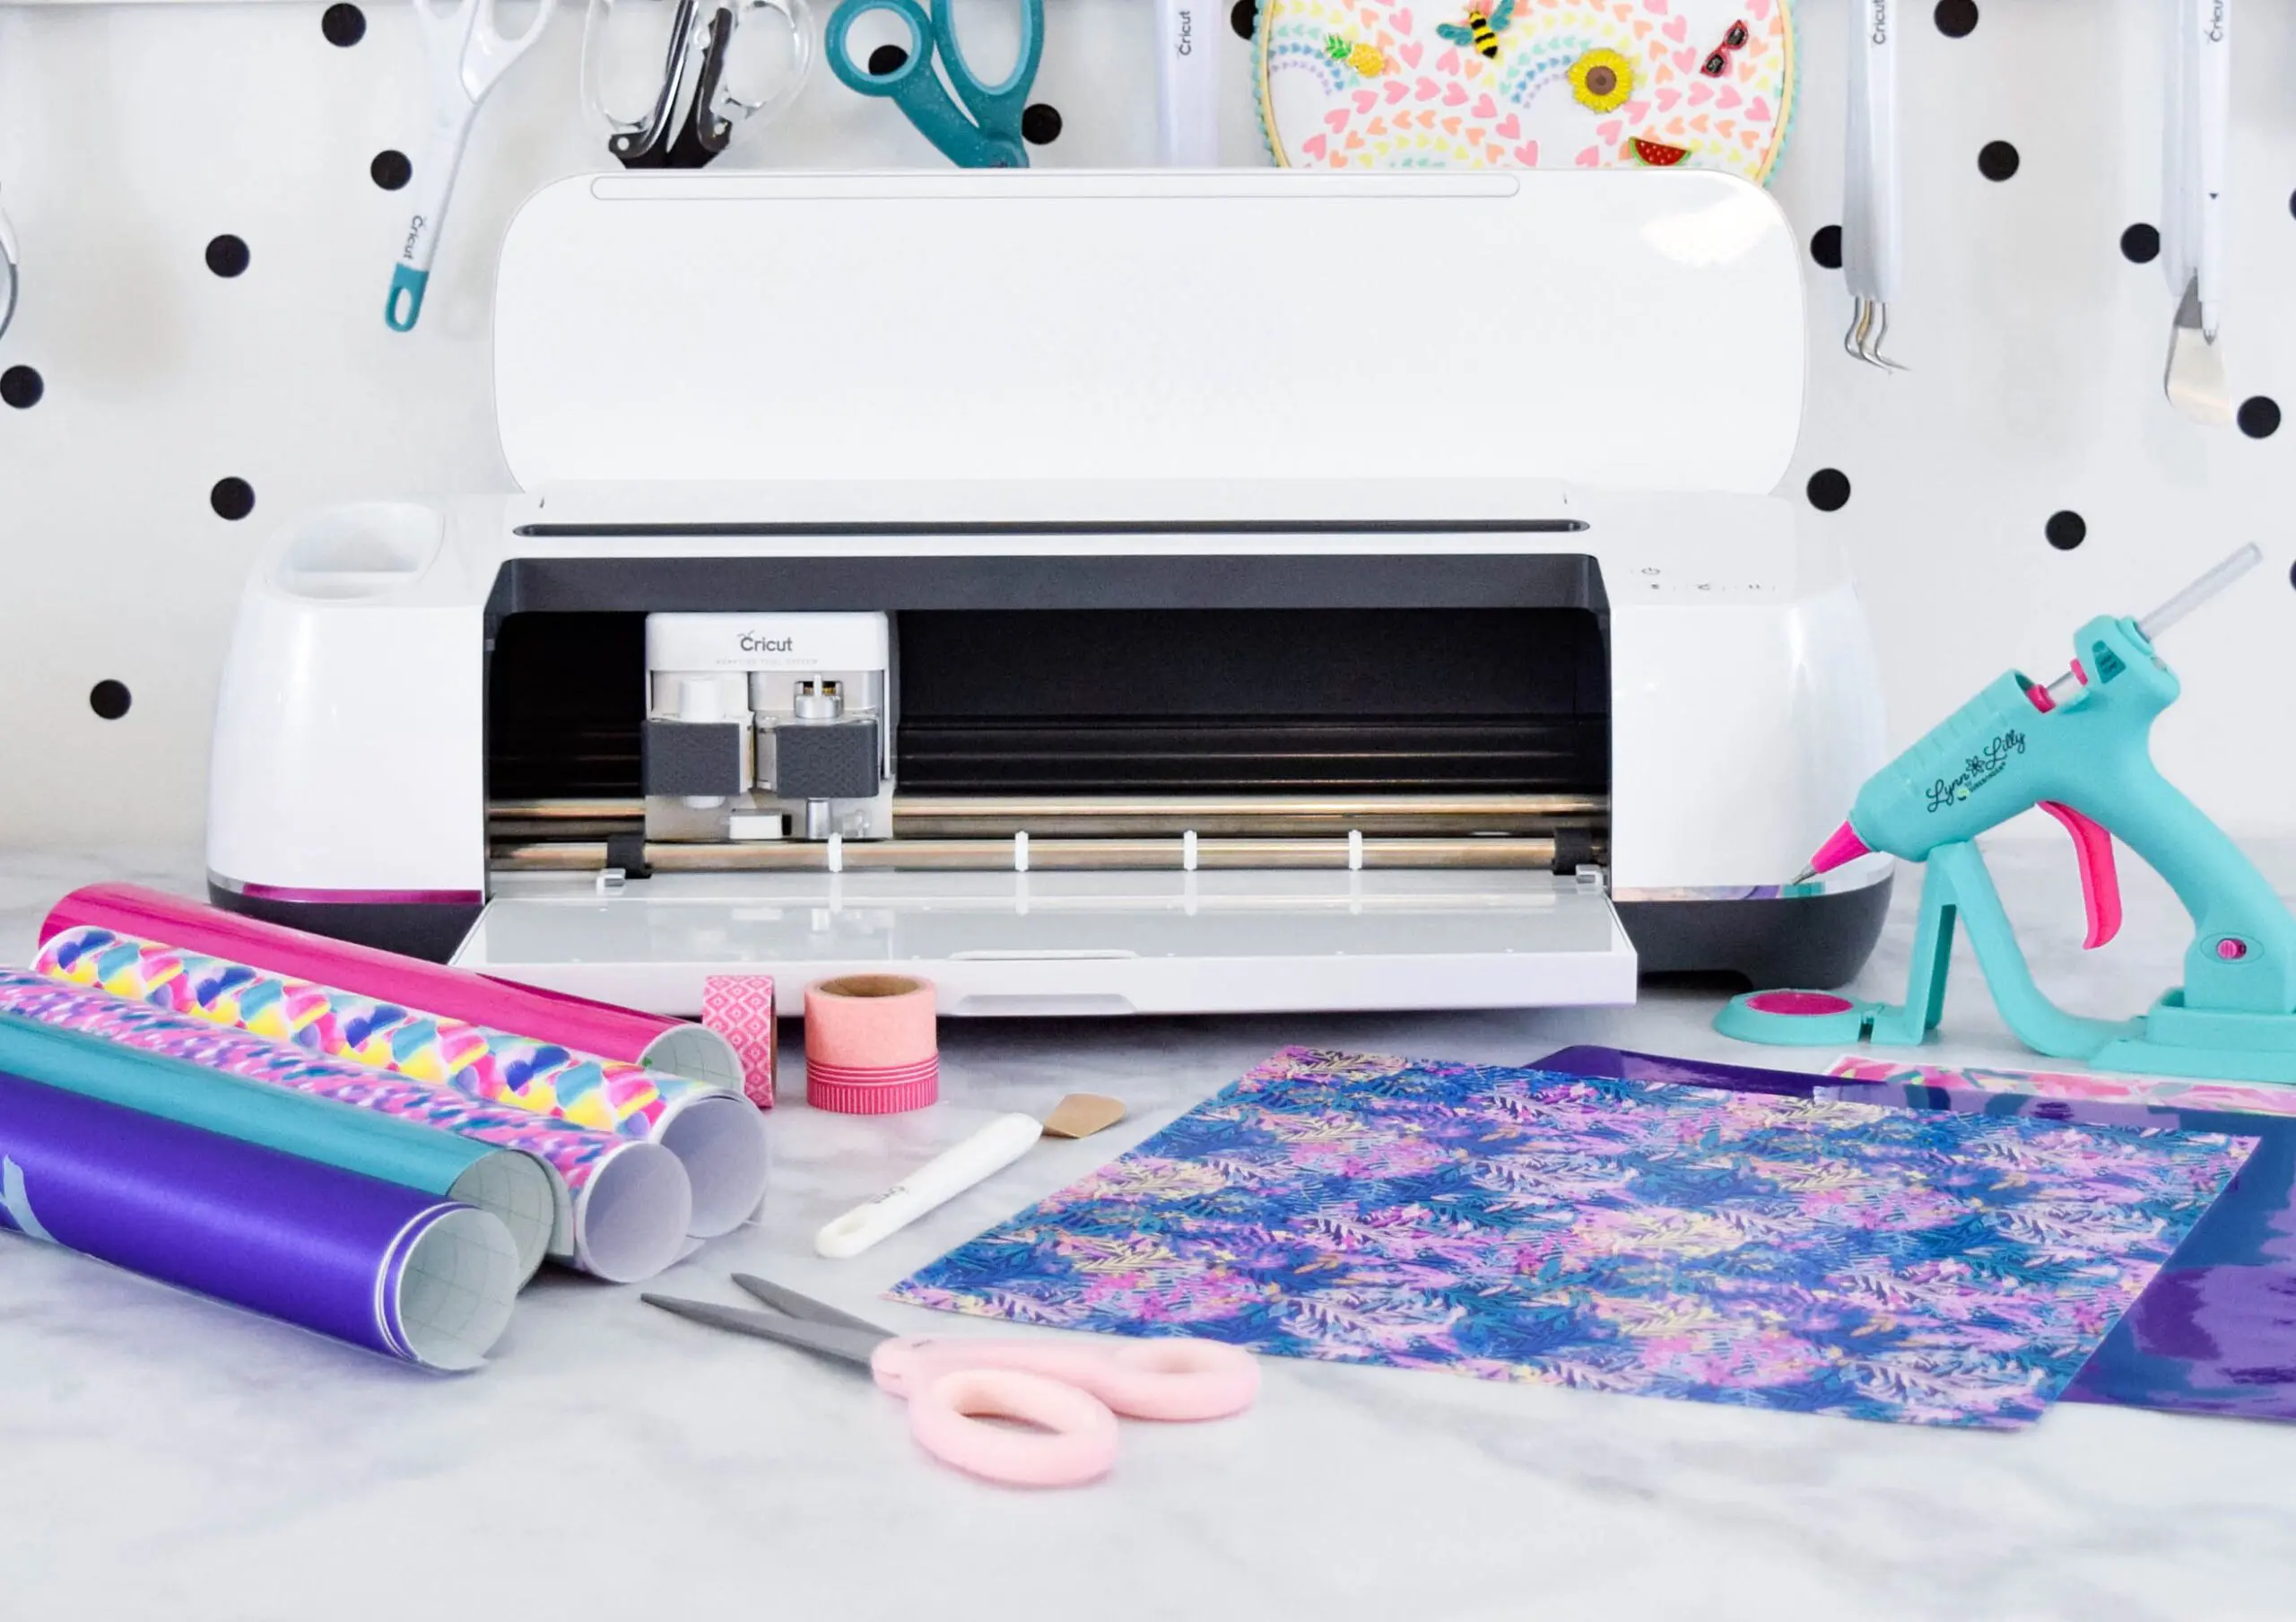
- Cricut machine (Any full-size Cricut can work or the Joy machine)
- Faux leather or glitter canvas
- Iron-on vinyl
- EasyPress Mini or full-size Easypress
- EasyPress Mat
- Nufun transfer paper for dark fabrics (this is what we are using for our photo paper. Do note that the paper finish of this transfer is matte, not glossy.
- Leather punch
- Snap kit
- Brayer
- Painter’s tape
- Key chain and ring with a clip
- Fabric glue if you opt to use faux leather as the top frame piece too
- Your favorite photos
- Metallic Sharpie to coat the edges of the faux leather or glitter canvas if the white edging bothers you (optional)
Download the photo keychain template
These adorable photo keychain templates can be downloaded in the AKC Member Vault! If you are not yet a Premium Member, you can join and start downloading all the premium and free designs in Abbi’s collection! Join the AKC Vault or sign in below. Once inside, search the keyword “keychain” or design #527 to find this design!
OR
DIY Faux Leather Photo Keychain Gift With Cricut Video Tutorial
In the video above, I will show you everything step by step, including how to set things up in Design Space using Pattern Fills and your favorite photo to make this unique gift.
Upload the Photo Keychain SVG To Design Space
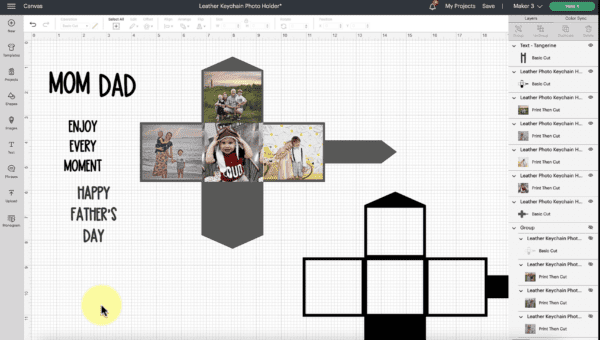
Step 1: Design Space Prep
- To get started on your custom photo keychain, download the keychain template from the AKC Member Vault (design #527).
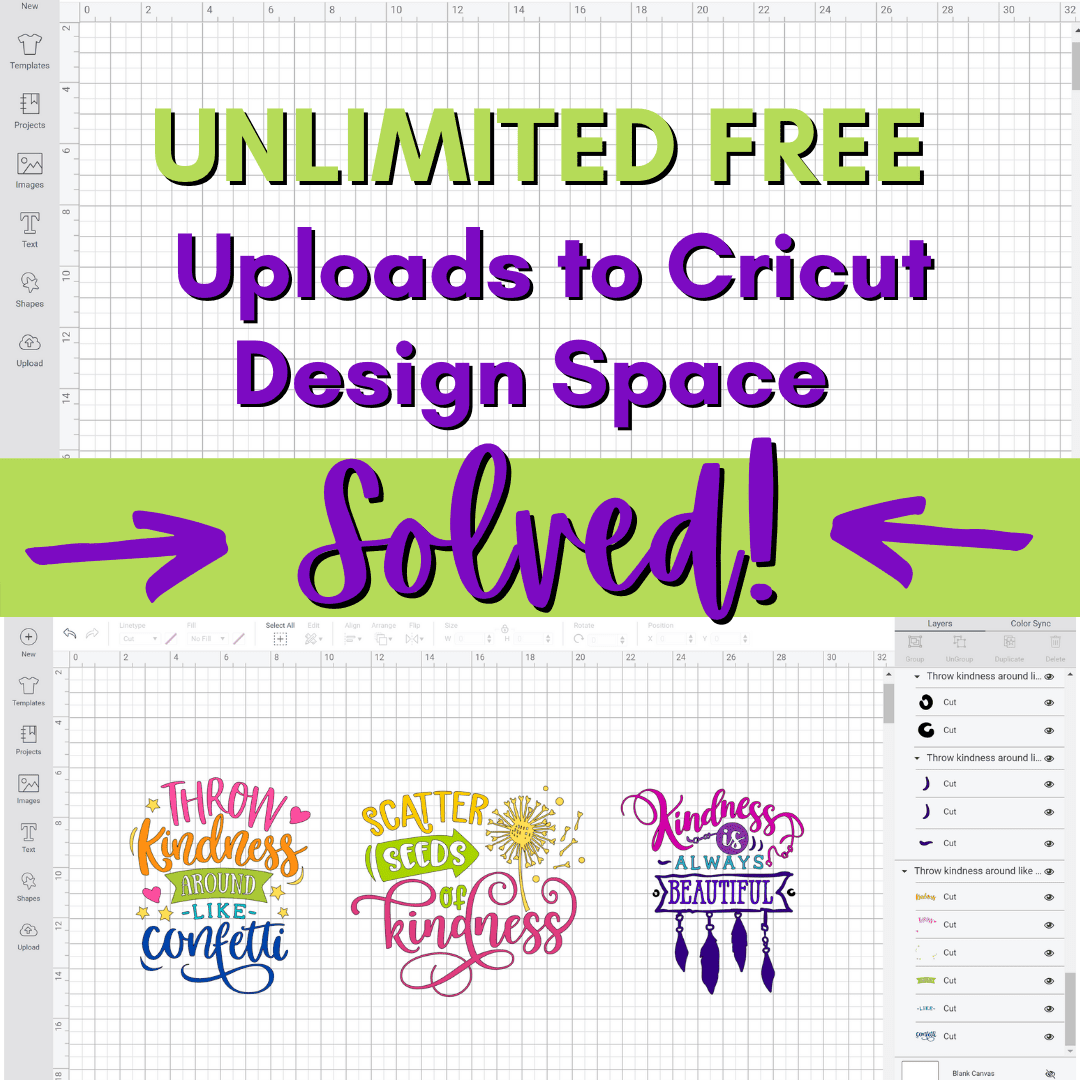
- Upload the SVG to Cricut Design Space. Learn how to upload SVG cut files.
- Insert your photos using the Pattern Fill option. You will first need to turn all four squares into the Print Then Cut operation before inserting your Pattern Fills. Watch the video to learn how to upload a Pattern Fill to Cricut Design Space.
- Using the text tool, type out a short special note or phrase. You can also use one of our phrases included with the keychain photo album template!
Step 2: Cut The Template
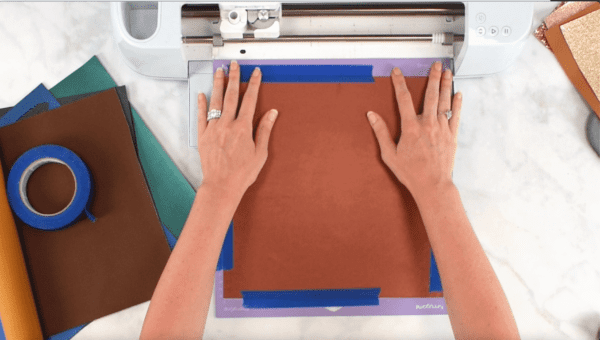
- Cut out your faux leather or glitter canvas. If your material is thick, I recommend using painter’s tape to hold down the edges. And the purple, strong grip mat is recommended.
- Next, cut out the iron-on vinyl.
- Even if you do not opt to use the iron-on vinyl for the picture frame layer, you will still need to cut the phrase and words from HTV vinyl – don’t forget to mirror!
- Lastly, have your Cricut Print Then Cut the photos. I use the Nufun photo transfer paper and print through design space, then have my Cricut cut the square images out.
If you’re new to Print Then Cut, learn how it works in this tutorial.
And if you are searching for a printer that delivers high-quality printing results, check out my suggestions.
Step 3: Assemble The Project
- Heat your EasyPress Mini (medium setting) or full-size EasyPress (270 for 25 seconds).
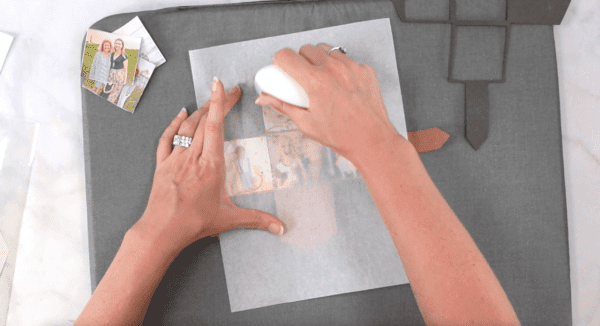
- Peel off the backing of the photo paper and place each photo in its proper spot. Be sure to use the same layout as you set up in Design Space. Most of us will choose to add family member photos, but you could totally do one with your fur babies too!
- Press the photo transfer paper on for 15 seconds.
- Next, add the finishing frame piece. If you opt to use faux leather as the frame for your keychain, you will need a little fabric glue to add around the edges. Otherwise, using the iron-on vinyl as your frame piece will get pressed for 25 seconds. Be sure to only cool peel! Watch how I do it.
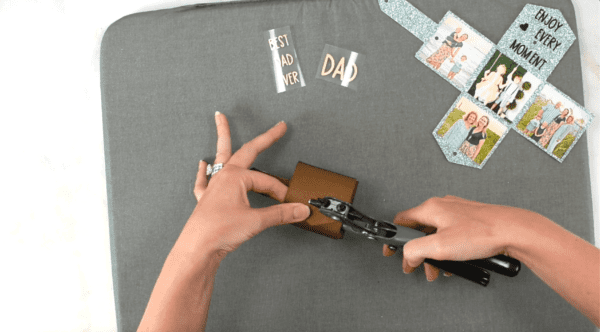
Step 4: Punch Holes For the Snaps
- Now it’s time to punch our holes. Using a leather punch, add two holes, one for the loop where the key ring will go and one to close the photo album. It is super important that you ensure the blank side where our message goes is the bottom snap while the photo area is the outermost top snap.
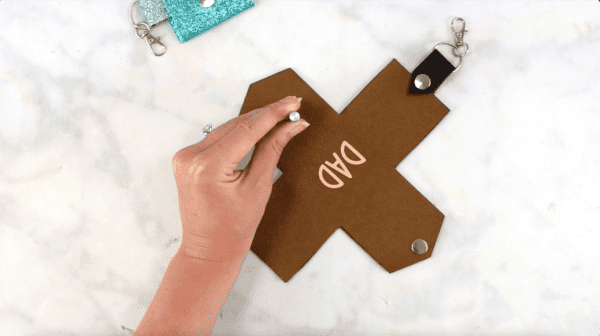
- Once you have punched your holes, add your phrases that were cut in HTV onto the blank area and the back if desired.
- Finally, secure the snaps by following the video instructions and adding on the key ring. Your custom keychain is finished!
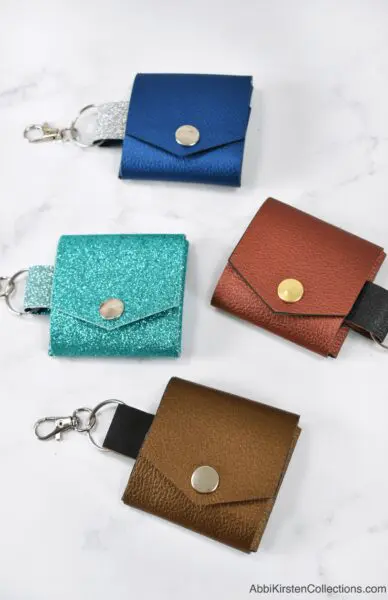
The final result of our keychain shape was a square that looked like a little envelope making it a cute and special gift. I am brainstorming some other ideas, too, for more faux leather keychain templates.
What do you think of these personalized photo keychains with Cricut? Our photo print keychains serve as a perfect gift for the holidays or special occasions like Father’s Day or Mother’s Day and are great birthday gifts too!
DIY Personalized Photo Keychain
Follow this step-by-step tutorial to create a unique and thoughtful personalized photo keychain. It's a great gift for Mother's Day or Father's Day!
Materials
- Cricut machines (any full-size machine or the Joy can work)
- Faux leather or glitter canvas
- Iron-on vinyl
- EasyPress Mini or full-size Easypress
- EasyPress Mat
- Nufun matte transfer paper for dark fabrics
- Leather punch
- Snap kit
- Brayer
- Painter's tape
- Key chain and ring with a clip
- Fabric glue (if you opt to use faux leather as the top frame piece too)
- Your favorite photos
- Metallic Sharpie to coat the edges of the faux leather or glitter canvas (optional)
Tools
- Cricut
- Brayer
- Mat
Instructions
- Download the keychain template from the AKC Member Vault (design #527).
- Upload the SVG to Cricut Design Space.
- Insert your photos using the Pattern Fill option. You will first need to turn all four squares into the Print Then Cut operation before inserting your Pattern Fills.
- Using the text tool, type out a short special note or phrase.
- Cut out your faux leather or glitter canvas. If your material is thick, I recommend using painter's tape to hold down the edges. And the purple, strong grip mat is recommended.
- Cut out the iron-on vinyl.
- Have your Cricut Print Then Cut the photos.
- Heat your EasyPress Mini (medium setting) or full-size EasyPress (270 for 25 seconds).
- Peel off the backing of the photo paper and place each photo in its proper spot.
- Press the photo transfer paper on for 15 seconds.
- Add the finishing frame piece. If you opt to use faux leather as the frame for your keychain, you will need a little fabric glue to add around the edges. Otherwise, using the iron-on vinyl as your frame piece will get pressed for 25 seconds.
- Using a leather punch, add two holes, one for the loop where the key ring will go and one to close the photo album.
- Add your phrases that were cut in HTV onto the blank area and the back if desired.
- Secure the snaps and add on the key ring. Your custom keychain is finished!
Cricut Earrings Made Easy
Do you enjoy working with faux leather on your Cricut? Or maybe you are struggling and need an expert to guide you! My friend, Amy Romeu, is the queen of making earrings with your Cricut! She has so many great hacks and tips when working with faux leather. Check out her Cricut Earrings Made Easy workshop. You will be blown away by the knowledge and insight Amy has packed into her workshop!

Save this post for later
Don’t have time to craft right now but love this idea? Save the post and come back to it anytime!
More Cricut Crafts To Make


About Abbi Kirsten
Welcome to my colorful corner of the internet, where we play with vibrant crafts and unlock your creative magic! Hang out with me and get lost in a fun array of projects, tutorials, and products, from stunning papercraft ideas to flower templates, Cricut help for beginners, and endless crafter’s hacks.
Join A-Star Crafters and participate in monthly Craft-Alongs in our community Facebook group!