Butterfly and Bug Shadow Boxes
This post may contain affiliate links that won’t change your price but will share some commission.
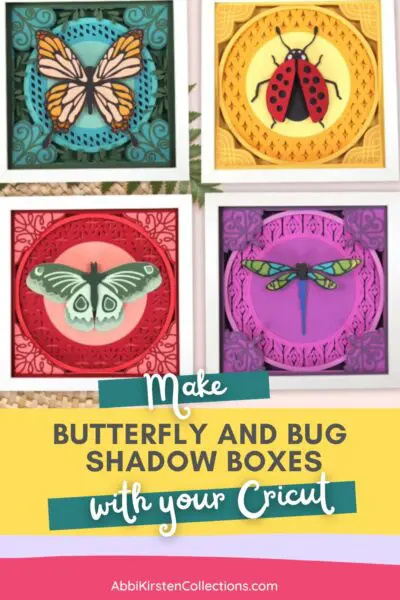
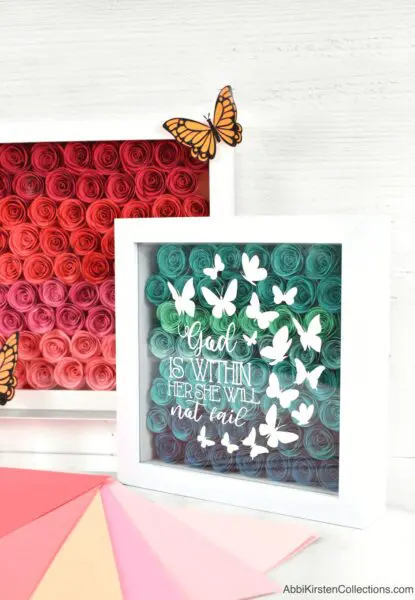
If you love layered paper crafts and nature-inspired decor, these beautiful Butterfly and Bug Shadow Boxes are such a fun project to make! Using cardstock, layered SVG files, and a shadow box frame, you can create dimensional wall art filled with delicate butterflies, insects, and intricate paper details. These Cricut shadow box designs are perfect for craft room decor, gifts, nurseries, or seasonal home decorations, and they really stand out when displayed in colorful frames.
This project is beginner-friendly for anyone familiar with layered paper crafts and is a wonderful way to use your cutting machine to create elegant, multi-dimensional paper art.
Making Butterfly and Bug Shadow Boxes
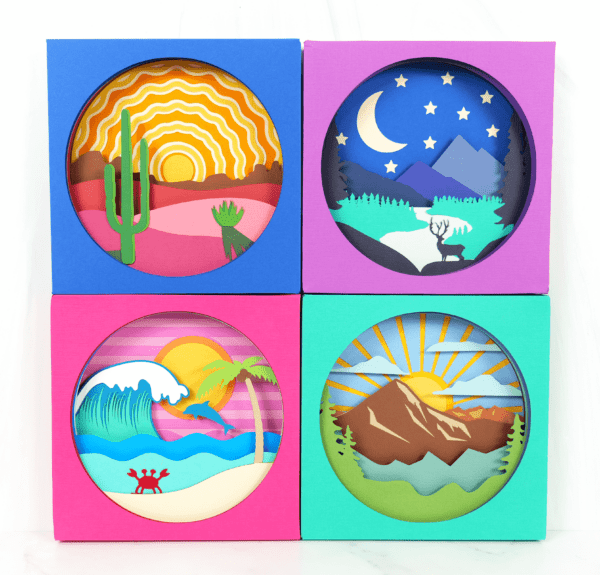
Creating 3D layered shadow boxes is its own art form – perfect for framing and displaying as wall art or other home decor – with lots of potential to customize with your favorite theme, quote, or idea. Besides the butterfly and bug shadow boxes, Abbi Kirsten Collections also has other shadow box designs, all with templates and instructions available within the A-Star Crafters Vault:
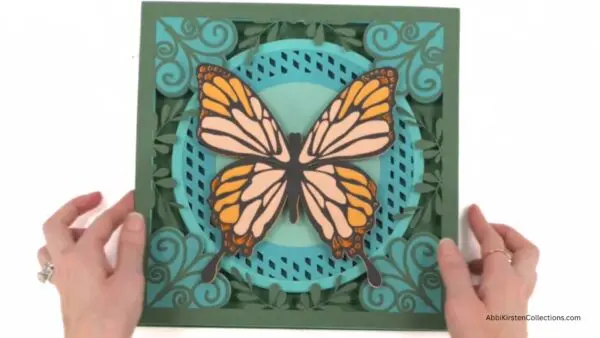
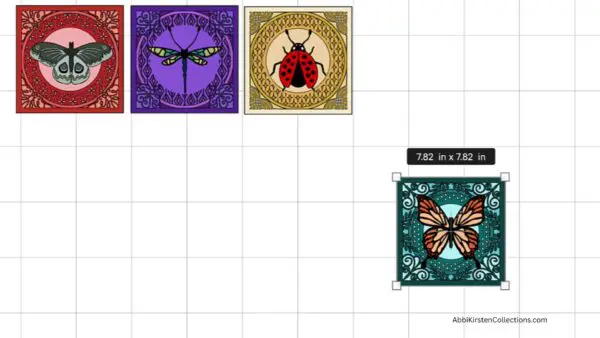
The Butterfly and Bugs Shadowbox Collection featured in this blog post is a part of A-Star Crafters and includes templates for a butterfly, moth, ladybug, and dragonfly, all easy to make with your Cricut. Watch the video tutorial below or walk through the steps following the video to begin crafting your beautiful shadow box creation. I’ll be showing you how to create the butterfly shadow box; however, the process is basically the same for any 3D layered design.
You can use any cutting machine, such as Silhouette Cameo or Cricut, or any other machine that works with SVG cut files.
Supplies And Materials You’ll Need
Here’s everything you’ll need to make your Butterfly and Bug Shadow Boxes:
- Medium-weight cardstock (65 lb cardstock is best)
- Cutting machine (Cricut Maker or other compatible machine)
- Cutting mat
- 3D foam tape
- Bearly Art craft glue (recommended)
- Shadow box frame
- Tweezers for intricate layers and light grip mat for delicate cuts (optional)
- Butterfly and Bug Shadow Box Templates
Access The Butterfly and Bug Shadow Box Templates
You can find all the templates you need linked below, available for instant download. These templates are designed to work seamlessly with your cutting machine.
- If you’re an existing A-Star Crafter, log in to access and download the Butterfly and Bug templates here.
- If you haven’t yet joined A-Star Crafters, click JOIN A-STAR CRAFTERS below, create your account, log in, and go directly to the Butterfly and Bug Shadow Box Collection here. Join to get access to the templates for this fun project and so much more!
Get This And Hundreds More Craft Templates By
Becoming an A-Star Crafter!
Butterfly and Bug Shadow Boxes Video Instructions
The video below shows how easy it is to create and assemble a butterfly shadow box. You can also read on for the step-by-step process in assembling the craft.
Steps for Making The Butterfly and Bug Shadow Boxes
1. Download The Templates.
Download the templates here. The collection includes multiple layered shadow box designs featuring butterflies and bugs that can be customized with your favorite cardstock colors and frame styles.
2. Import The Files Into Design Space and Resize, If Needed.
Import the files into Design Space. I used my Cricut machine for cutting the SVG templates. In the video, I show you how to cut and layer the butterfly template for your shadow box.
If you’re new to Cricut, read my tutorial on uploading an SVG file to Design Space. I also offer a free Cricut Freedom Workshop on how to master your Cricut with real actionable steps – but without the tech confusion and overwhelm!
- Before cutting, you may want to adjust the size of the SVG design to fit your shadow box frame. A good rule of thumb is to size the design about ¼ inch smaller than your shadow box opening so it fits comfortably inside the frame. For example, if you’re using a 10-inch shadow box, you would size the design to around 9.75 inches. This gives you enough room for easy placement without bending the paper layers.
- Review the Layers panel on the right side of your screen to take note of the stacking order. To do this, click the template design, then right-click and select Ungroup. The layers are already arranged in the correct order, making assembly much easier. You can simply follow the layer arrangement shown on your screen as you build the design.

3. Cut The Cardstock Layers.
Load your cardstock onto the cutting mat and cut each layer of the design. For best results:
- Use the Cardstock for Intricate Cuts setting for detailed layers.
- Remove delicate pieces carefully from the mat.
- Keep layers organized in stacking order as you cut.
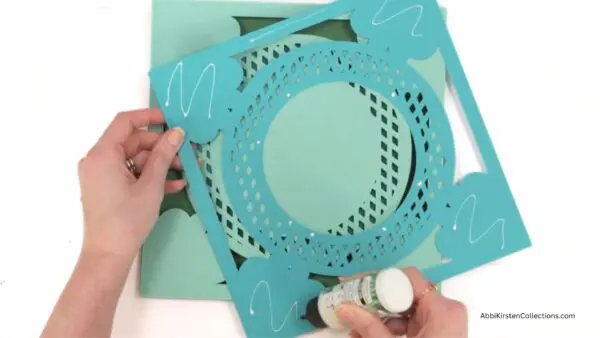
4. Assemble the Larger Base layers.
Start assembling the larger, less intricate layers first. For these larger layers, we’ll use the 3D foam tape. Apply the foam tape to the back, stacking the layers in order and pressing firmly to secure them together. I love how the foam tape creates beautiful dimension and depth inside the shadow box!

5. Glue The Intricate Overlay Layers.
Next, we’ll glue the more intricate layers like the lattice cutouts and detailed overlays. For these intricate pieces, use the craft glue instead of foam tape since we want these delicate layers to lay flush and smooth without warping.
- Apply glue lightly around the edges.
- Add tiny dots of glue in a few center areas.
- Carefully align each layer on top of the piece beneath it.
6. Assemble and Add the Butterfly Centerpiece.
Next, let’s assemble the layers that are part of the butterfly centerpiece and add the finished butterfly as the final top piece of the design.
- Glue the most intricate top layers together first.
- Attach the completed butterfly to the bottom layer using foam tape. This combination of glue and foam tape gives the butterfly a beautiful dimensional effect.
- Once assembled, place foam tape on the back of the butterfly and position it in the center of the shadow box design.
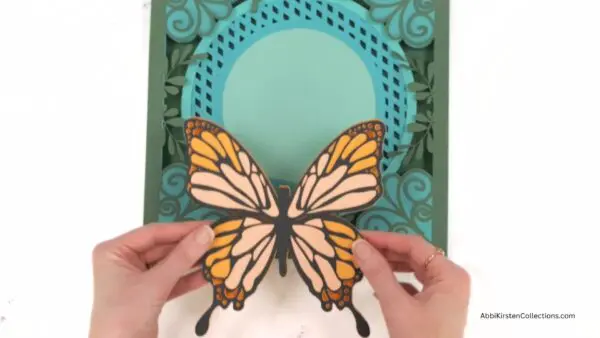
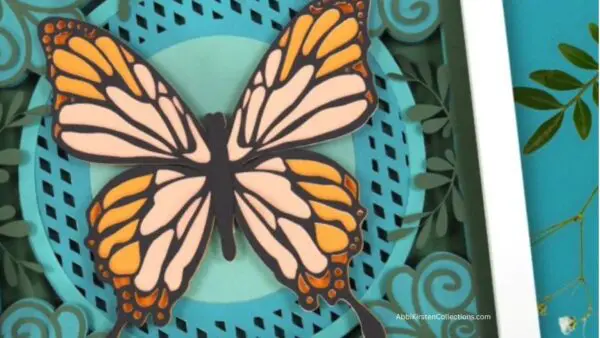
The raised butterfly creates a beautiful focal point and adds extra depth to the finished project.

7. Place the Finished Design Into The Frame (Optional).
After all layers are assembled, you may want to place your completed design into a shadow box frame. You can also add a glass front for a polished look or leave the glass off for extra dimension and texture. Both options are lovely, depending on the style you prefer.
Would You Like To Make More Shadow Box Crafts?
Shadow boxes add such a unique, eye-catching effect to any home decor. They also make meaningful gifts or keepsakes as a thoughtful way to commemorate the memory of a loved one or pet or to share that special photo of family or friends. Check out a few favorites below!

Looking For Freebies? Find Hundreds Of Free Templates In The Craft Vault!
Did you make this craft?
We would love to see what you have created! Tag @abbi_kirsten_collections on Instagram so we can see your creations!