Make Fruit Pop-Up Cards With Cricut
This post may contain affiliate links that won’t change your price but will share some commission.

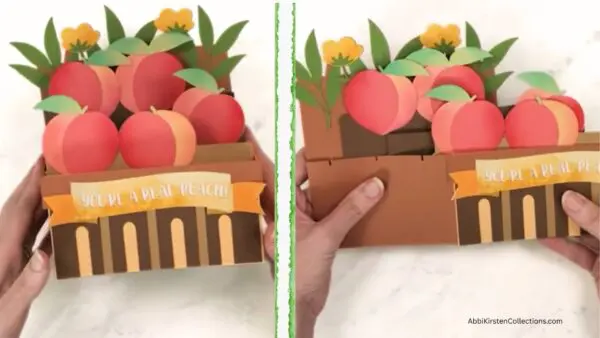
Handmade decorative fruit pop-up cards are the perfect way to send a cheerful, personal message to brighten anyone’s day. Featuring layered paper fruit designs that stand up for a beautiful 3D effect, these Cricut-friendly cards can be used as greeting cards, party decor, teacher gifts, or table centerpieces. Best of all, they fold flat to fit inside a large envelope for easy gifting and mailing!
Whether you choose the peach, strawberry, apple, or lemon design in this collection, these 3D fruit cards are colorful, cheerful, and surprisingly easy to assemble.
Create 3D Pop-Up Cards As An A-Star Crafter
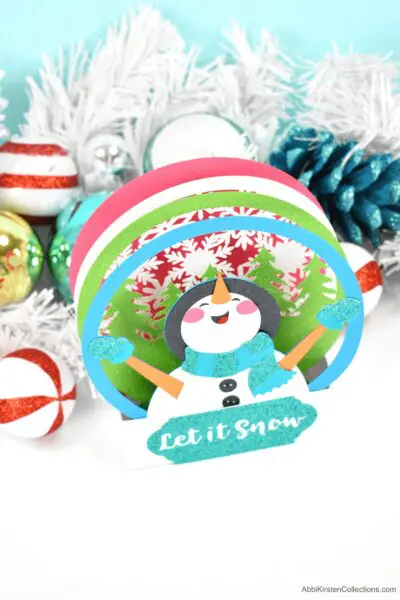
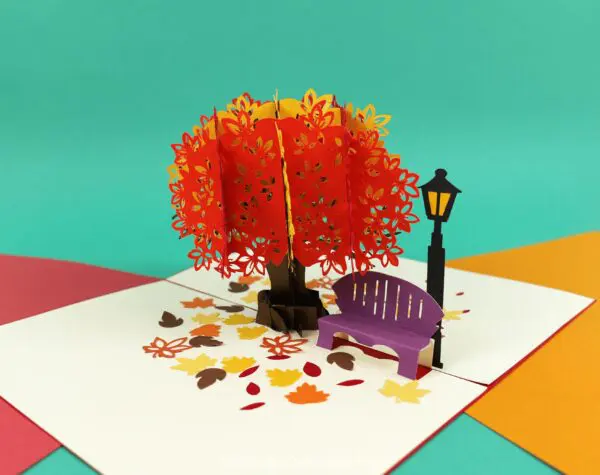
Abbi Kirsten Collections has many other cute and festive 3D pop-up card and box designs, all with templates and instructions available within the A-Star Crafters Vault. Check out a few of our seasonal favorites:
- Fall Vibes Pop-Up Collection with pumpkin, turkey, sunflower, and autumn tree designs
- Christmas and Winter Holiday Pop-Up Collection featuring snowman, nutcracker, Santa, tree, Nativity, and Hanukkah motifs
- Pop-up treat and gift boxes such as our Heart Gift Box and Spring House Explosion Treat Box
Supplies And Materials You’ll Need
Here’s everything you’ll need to make these delightful Fruit Pop-Up Cards:
- Medium-weight cardstock in your chosen colors (65 lb cardstock is best)
- Cutting machine (Cricut Maker or compatible machine)
- Cutting mat
- Scoring stylus or scoring wheel
- Bearly Art craft glue (recommended)
- Large envelope for mailing the finished card
- Inkjet printer (optional for Print Then Cut banners)
- Distress oxide inks or distress inks (optional)
- Ink blending brushes (optional)
- Fruit Pop-Up Card Templates
Access The Fruit Pop-Up Decorative Card Templates
You can find all the templates you need linked below, available for instant download. These templates are designed to work seamlessly with your cutting machine.
- If you’re an existing A-Star Crafter, log in to access and download the Fruit Pop-Up card templates here.
- If you haven’t yet joined A-Star Crafters, click JOIN A-STAR CRAFTERS below, create your account, log in, and go directly to the Fruit Pop-Up Collection here. Join to get access to the templates for this fun project and so much more!
Get This And Hundreds More Craft Templates By
Becoming an A-Star Crafter!
Fruit Pop-Up Cards Video Instructions
The video below shows how easy it is to create these fruit pop-up cards. You can also read on for the step-by-step process in assembling the craft.
Steps for Making The Fruit Pop-Up Cards
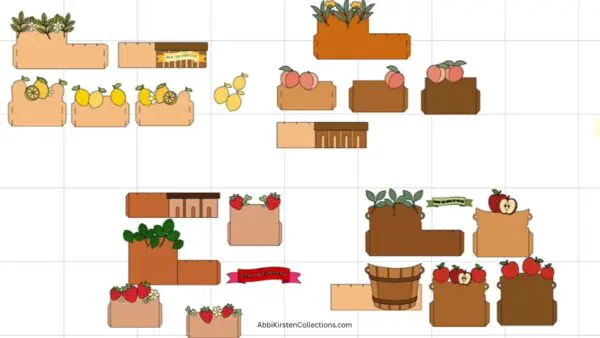
1. Download the Templates.
Download the Fruit Pop-Up Card SVG collection from the Craft Vault. The collection includes fruit-themed designs with layered fruit elements, card base pieces, and banner options for you to add a sweet sentiment.
2. Import the Files into Design Space and Prepare the Lines.
Upload the SVG files into Design Space. You’ll need to make a few adjustments before cutting the template pieces.
- Ungroup the file. Note the solid lines on the design. Select each of these lines, then change their operation from Cut to Score.
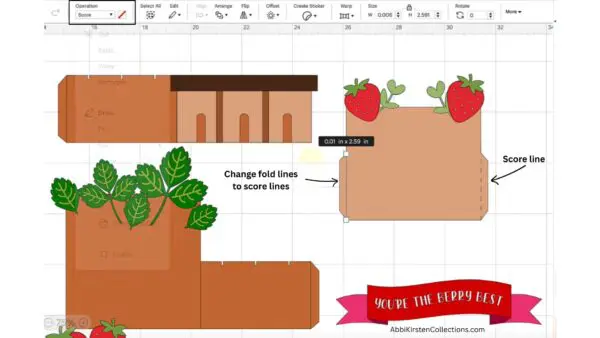
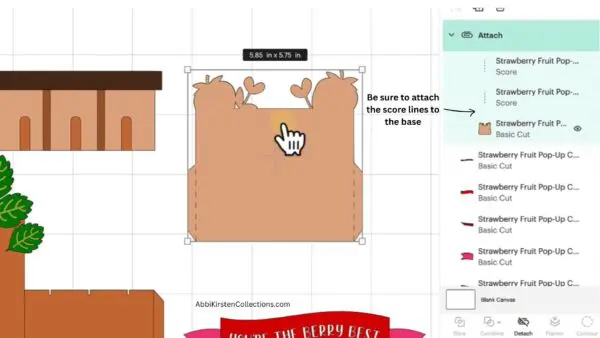
- Next, select the score lines along with the matching base layer, then click Attach so the score lines stay in the correct position (attached) during cutting.
- Repeat this process for all score lines included in the design.
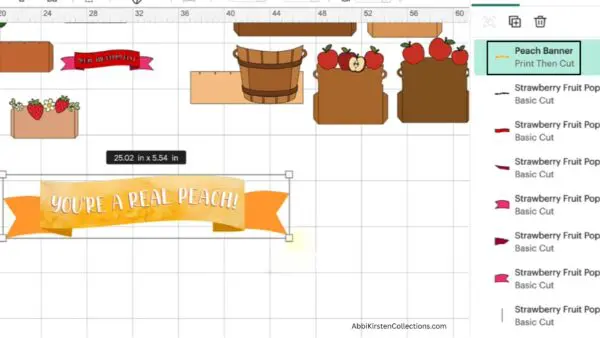
Banner options. For the banners, you can either cut the banner and write your own message by hand or use your Cricut to write the sentiment (or omit the banner entirely). You’ll see a Print Then Cut version is included with the templates; it’s often the easiest option since it avoids cutting tiny individual letters from cardstock.
Once your file is prepared, remember to save your project so you won’t need to repeat the setup in the future.
If you’re new to Cricut, read my tutorial on uploading an SVG file to Design Space. I also offer a free Cricut Freedom Workshop on how to master your Cricut with real actionable steps – but without the tech confusion and overwhelm!
3. Cut All Cardstock Pieces.
Now that you’ve added score lines and attached them to their bases as instructed in Step 2, you’re ready to load your cardstock onto the cutting mat and cut all pieces according to the color selections for your chosen fruit design.
If you’re using a Print Then Cut banner, you can print the banner using an inkjet printer or place the printed sheet onto the cutting mat and allow your cutting machine to cut around the banner shape.
Pro Tip: After cutting, organize all pieces by layer to make assembly easier.
4. Arrange and Review The Layers.
Before gluing or assembling anything, lay out all the cut pieces and take a few moments to ensure everything is facing the correct direction.
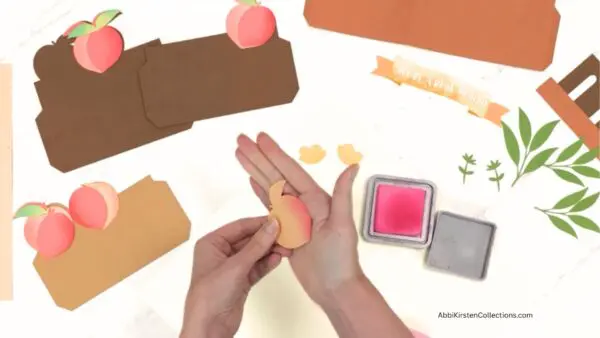
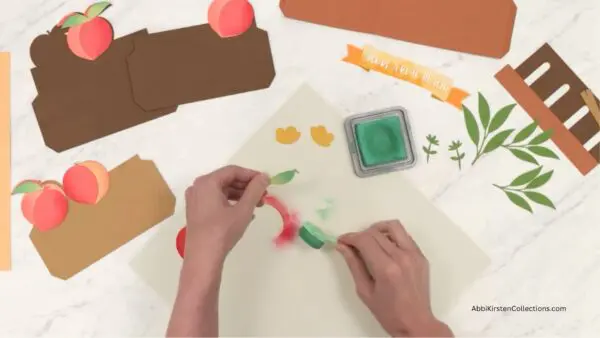
5. Add Ink Shading (Optional).
Distress oxides and inks add such a rich depth and dimension to papercrafts; they are a personal favorite! For this project, I used a blending brush to lightly ink the edges of my cardstock pieces around the outer edges, then gently blended inward. This simple step adds beautiful shading and helps the finished card look more realistic and detailed.
My color suggestions for the distressing are:
- Picked Raspberry Distress Oxide – for lighter fruit tones
- Candied Apple Distress Oxide – for darker reds
- Lucky Clover Distress Oxide – for leaves and greenery
Also, check out my post on recommended best papercraft and paper flower supplies.
6. Glue and Assemble the Fruit Pieces.
Once the shading is complete, begin assembling the layered fruit pieces, leaves, flowers, and other decorative accents. Apply a thin layer of glue to the back of each layer and carefully align the pieces.
Pro Tip: Take your time during alignment to achieve crisp, professional-looking results.
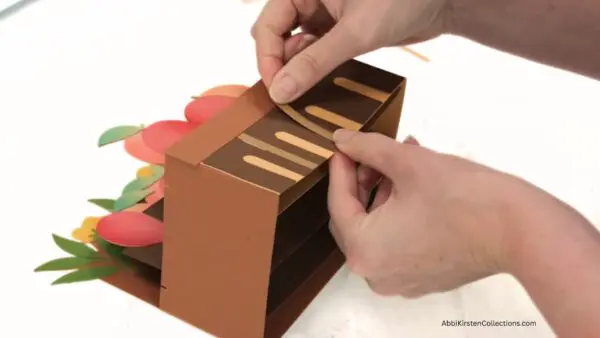
7. Fold the Card Structure.
Next, let’s work on folding and checking our alignment for the main pieces that create the pop-up effect. Fold all score lines carefully in the correct direction. You’ll have a front and back panel as well as several connecting support pieces.
The support pieces are designed in progressively larger sizes and create the dimensional layers inside the card. Reminder: Make sure all folds are crisp before moving on.
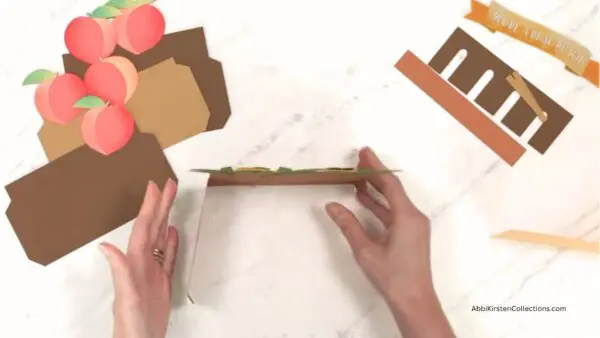
8. Build And Glue the Pop-Up Interior.
Now we’ll create the interior parts of the card by gluing each support tab into place, starting with the shortest support piece.
- Working from front to back, attach the shortest support piece, add the middle support piece, then attach the tallest support piece. Use those decorative notch marks as alignment guides.
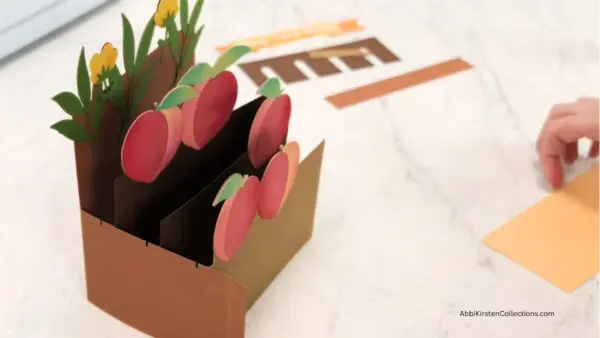
- Check frequently that the supports remain straight and the bottom edges stay aligned. You want the layers to stand evenly, plus proper alignment will ensure that the card opens and closes smoothly.
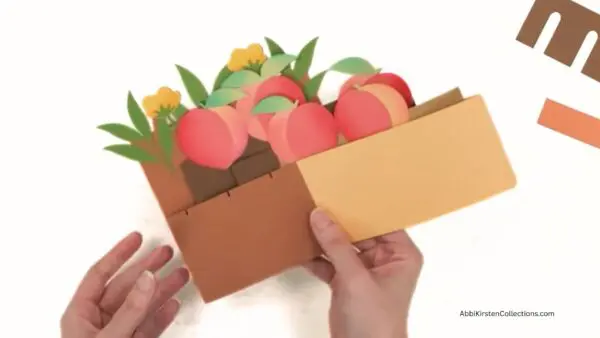
9. Attach the Front and Back Panels.
With the support pieces attached to one side, connect the front and back panels to complete the structure of the card.

Glue each tab one at a time and carefully align the edges. As the glue dries, you’ll notice the structure begins forming a dimensional display that can stand upright while still collapsing flat when needed.
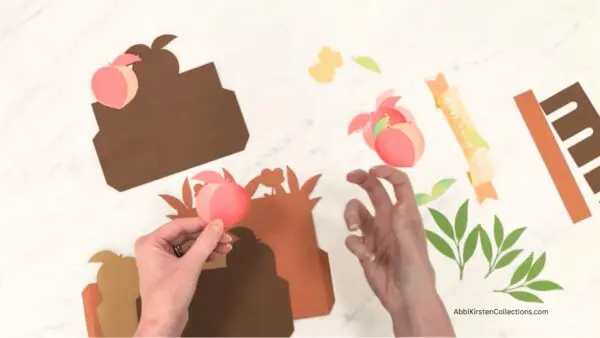
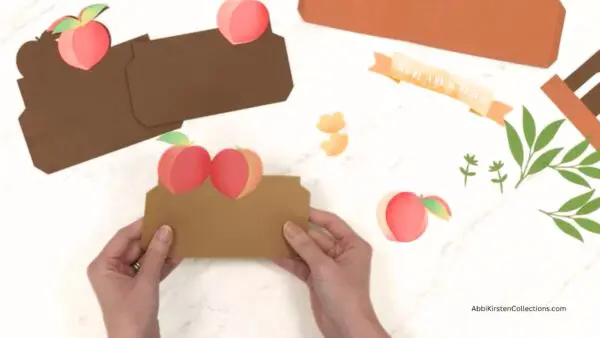
10. Add the Decorative Layers.
Now it’s time for the fun part – gluing the assembled fruit elements onto the various pop-up levels inside the card. Arrange the pieces according to the design layout to create a layered scene that adds depth and visual interest. The staggered placement of the little elements creates a beautiful 3D effect when the card is displayed.
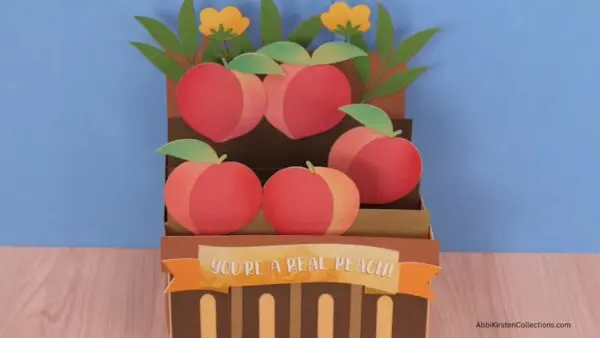
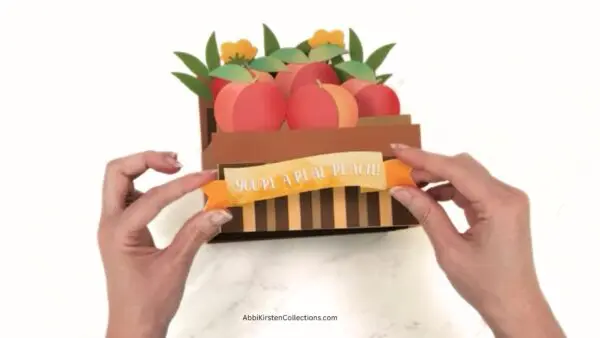
11. Attach the Banner.
As a final touch to your fruit pop-up card, add a text banner to complete the project. Position it near the top of the card where it’s easily visible when displayed. The banner can be printed or handwritten and customized with a cheerful message, such as:
- “You’re a Real Peach”
- “You’re the Berry Best”
- “Bushel Full of Thanks”
12. Fold and Display.
One of the best features of these fruit pop-up cards is that they collapse flat for mailing. Simply fold the card inward and slide it into a large envelope. When it’s opened, the card transforms into colorful 3D decor that can be enjoyed long after the occasion has passed. These standup designs make thoughtful handmade gifts and are unique additions to summertime events and party decor.
Final Thoughts
I hope you enjoyed making these Fruit Pop-Up Cards as a fun twist on traditional handmade cards! They make wonderful gifts for birthdays, thank-you notes, teachers, and special occasions. With their layered 3D design, vibrant fruit themes, and fold-flat construction, they’re both practical and impressive. Customize the colors, sentiments, and embellishments to make each card uniquely your own and enjoy creating a handmade keepsake that’s sure to bring a smile.
More Pop-Up Cards Please!
Pop-up cards add a unique, eye-catching effect to any home decor. They also make meaningful gifts and keepsakes. Check out additional favorites below, including my FREE template for making a Flower Bouquet Pop-Up Card.

Looking For Freebies? Find Hundreds Of Free Templates In The Craft Vault!
Did you make this craft?
We would love to see what you have created! Tag @abbi_kirsten_collections on Instagram so we can see your creations!