DIY Cali Poppy Paper Flowers
This post may contain affiliate links that won’t change your price but will share some commission.

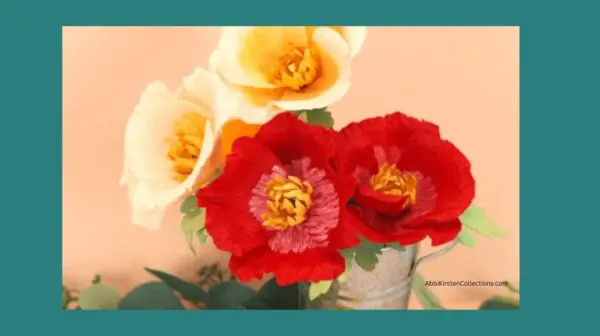
You can bring the beauty of the California countryside into your home with these vibrant poppy paper flowers! Called the “golden” poppy (and California’s state flower), they’re typically radiant orange and red in color. In this tutorial, you’ll learn how to combine both cardstock and crepe paper to create lifelike poppies with rich texture and dimension, perfect for weddings and showers, home decor, and more.
Create Lifelike Poppy Paper Flowers As An A-Star Crafter
These beautiful Poppy Paper Flowers are part of the Cali Botanical Collection designs within Abbi Kirsten Collections, which also includes a Prickly Pear Cactus, a Crepe Paper Succulent Flower, and an Agave Paper Plant. As an A-Star Crafter, you have access to each design’s templates for uploading, a follow-along video, and step-by-step instructions to give you all that you need to create these realistic paper flowers and plants!
Access The Poppy Paper Flowers Template
You can find the template for the poppy paper flowers linked below, available for instant download. This template is designed to work seamlessly with your cutting machine.
- If you’re an existing A-Star Crafter, log in to access and download the poppy template here.
- If you haven’t yet joined A-Star Crafters, click JOIN A-STAR CRAFTERS below, create your account, log in, and go directly to the Poppy Paper Flowers here. Join A-Stars to get access to the templates for this fun project and so much more!
Get This And Hundreds More Craft Templates By
Becoming an A-Star Crafter!
Supplies And Materials
Here’s everything you’ll need to make the Cali Poppy Paper Flowers:
- Medium-weight cardstock
- 90g crepe paper
- Cutting machine with a rotary blade or scissors to cut the templates
- Detail scissors
- Hot glue and liquid glue
- Bearly Art craft glue (recommended)
- Wood dowel rod or scraper edge tool
- 18-gauge floral wire
- 24-gauge floral wire
- Floral tape
- Acrylic paint pens and/or distress oxides
- Ink blending brush
- Sewing clips (helpful when cutting by hand)
- Cali Poppy Paper Flowers Template
Cali Poppy Paper Flowers Video Instructions
The video below shows how easy it is to create these colorful and realistic poppies. You can also read on for the step-by-step process in assembling the craft.
Steps for Making The Poppy Paper Flowers
1. Download the Template.
Download the Cali Poppy Paper Flowers template from the Craft Vault, then upload to Cricut Design Space. The poppies are part of a collection of botanical designs within Abbi Kirsten’s A-Star Crafters Craft Vault.
If you’re new to Cricut, read my tutorial on uploading an SVG file to Design Space. I also offer a free Cricut Freedom Workshop on how to master your Cricut with real actionable steps – but without the tech confusion and overwhelm!
2. Gather Your Materials And Choose A Cutting Method.
For this project, I used crepe paper for the petals and cardstock for the flower centers to create a flower that looks incredibly realistic while remaining sturdy and easy to assemble. You have several options for cutting the templates:
- Cut the crepe paper petals by hand using the printable templates or use the rotary blade on your Cricut Maker.
- Cut the cardstock flower centers by hand using a fringe cut or use your cutting machine for crisp, detailed results.
Pro Tip: If you’re making several flowers, consider cutting all of your petals and centers in batches before moving on to assembly. This makes the entire process much quicker.
3. Cut The Crepe Paper Petals.
The California poppy petals are cut from 90g Italian crepe paper (I recommend Cartefini since it’s not too thick or thin), which offers the perfect balance between flexibility and durability.
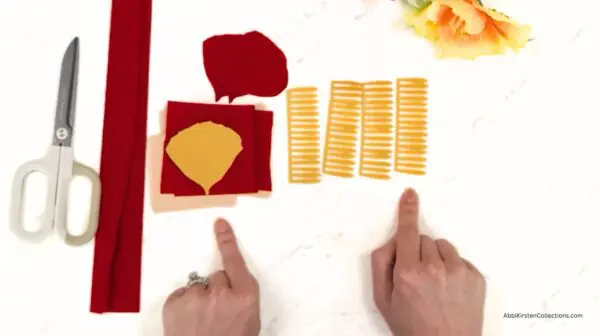
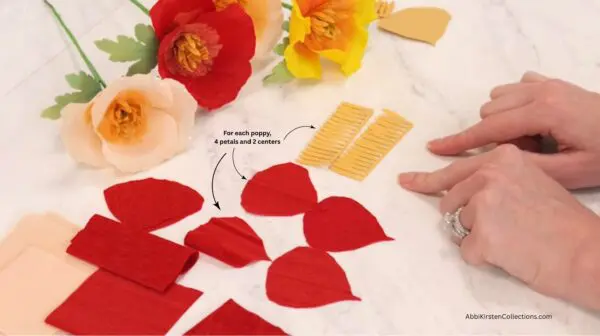
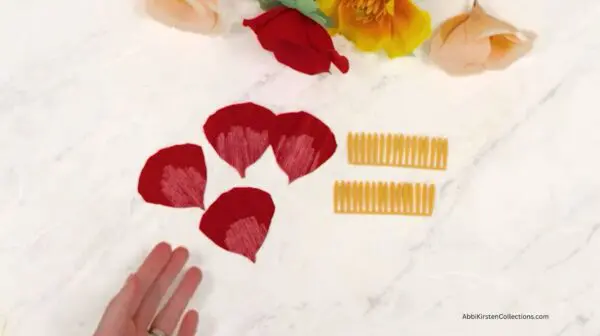
Petal count. For each California poppy, you’ll need 4 crepe paper petals and 2 flower centers. Preparing all the petals before assembling the flower helps streamline the entire project.
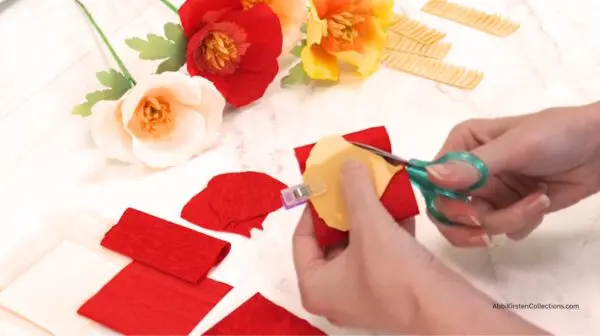
Cutting the petals. Fold the crepe paper in half twice, place the petal template over the folded paper, then cut around the template using the detail scissors. It’s helpful to use a little sewing clip to hold the paper to the template. Remove the template and you’ll see your two matching petals. Just to note, your petals actually have a top and bottom; you’ll notice the top of your petal has a bit more grain to it.
Pro Tip: Always make sure the grain of the crepe paper is running vertically when you cut out your petals. This is essential in helping you shape the petals later for a realistic look.
4. Create the Flower Centers.
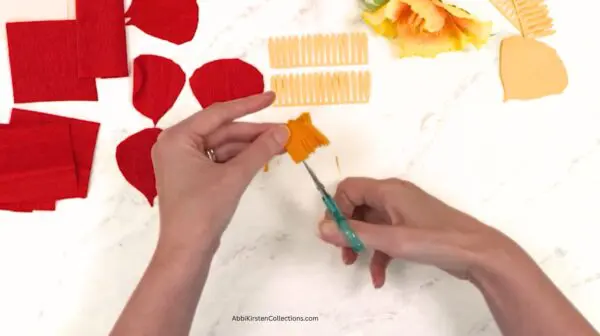
The fringe flower center included with the template cuts perfectly on a Cricut machine. However, if you’re cutting the centers by hand, you can easily create a similar effect using a strip of crepe paper or lightweight cardstock. To make a hand-cut fringe flower center:
- Cut a strip approximately 1 inch tall by 4 inches wide.
- Fold the strip several times.
- Use detail scissors to cut a narrow fringe along one long edge.
- Unfold the strip.
- Twist the fringe gently with your fingers to soften the edges and create a natural look.
This simple alternative produces a flower center with wonderful texture and pairs beautifully with the crepe paper petals.
5. Add Realistic Color to the Petals.
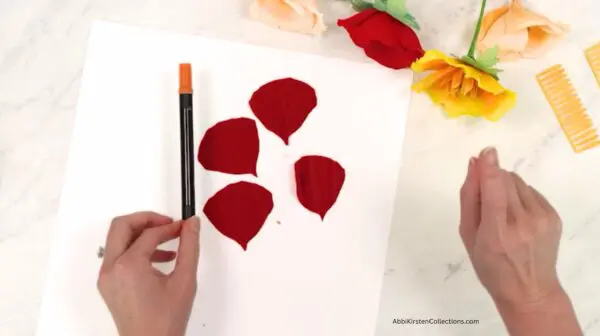
Adding color is optional, but it gives your California poppies their signature vibrant center and creates a much more lifelike appearance. You can color your petals using either:
- Acrylic paint markers (I used orange for the red poppy flower)
- Distress ink or distress oxide with an ink blending brush
Pro Tip: For darker crepe paper colors, acrylic paint markers often provide better coverage, while distress ink or oxide typically works well on lighter shades.
When adding color:
- Always protect your work surface.
- Apply color only near the base of each petal, leaving most of the petal untouched (around 2/3 of the petal) for a natural gradient.
- Always work with the grain of the crepe paper—not across it.
Whether you choose paint markers or ink blending, both methods create beautiful results. Feel free to experiment with different color combinations to match the natural variation found in these beautiful California poppies.
6. Shape the Poppy Petals.
Now it’s time to transform your flat petals into realistic California poppy blooms. A great feature of crepe paper is that it naturally stretches and curls, making it perfect for creating soft, lifelike flowers. You can shape the petals in several ways – with your fingers, a wood dowel or pencil, or a similar shaping tool.
- Begin by gently curling the top edge of each petal backward. The curl should be subtle since California poppies have lightly rolled edges rather than dramatic curls.
- Next, pinch the edges between your thumb and forefinger to create soft ripples. These tiny crimps give each petal the natural movement found in real flowers.
- Finally, lightly stretch only the center of the petal. Avoid stretching the edges too much.
- Repeat this process for all the petals.
Pro Tip: Less is more when shaping crepe paper – no need to overstretch the paper. Small adjustments create the most realistic results.
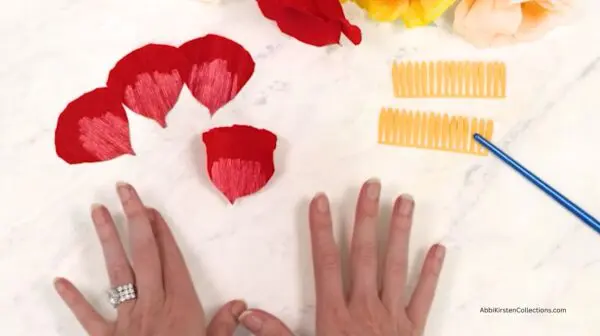
7. Prepare the Flower Center.
The flower center only needs a little shaping before assembly.
Using a scraper edge tool, dowel, or your fingers, gently curl the fringe downward. This softens the appearance and helps the center wrap naturally around the stem. If you’re using crepe paper for the fringe center, you can lightly twist the fringe with your fingers before shaping for extra texture.
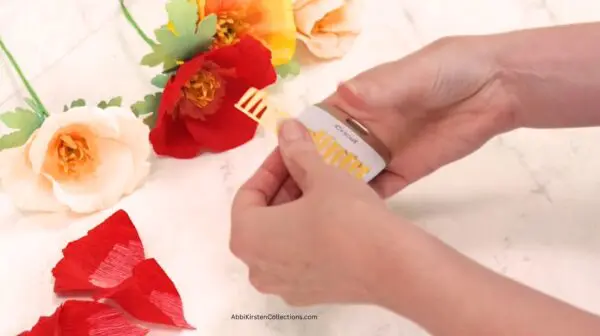
8. Assemble Your Poppy Paper Flowers.
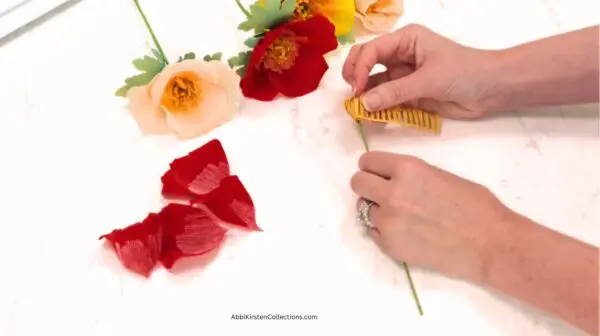
Now it’s time to bring the parts of your flower together. Trim the 18-gauge floral wire to your preferred stem length. Optionally, use needle-nose pliers to bend the very tip of the wire into a small hook. This gives the glue a little more surface area to grip.
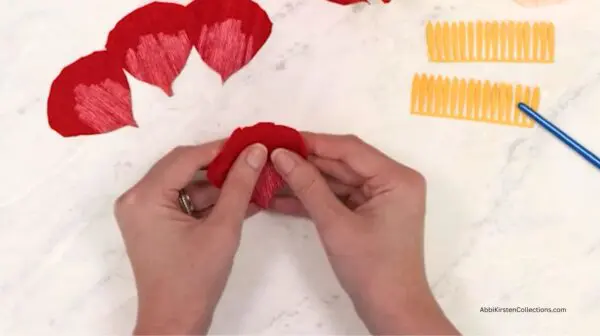
Build the flower.
- Apply a small amount of hot glue to the tip of the floral wire.
- Wrap the first flower center around the wire.
- Continue rolling the second center directly after the first until both pieces form one full center.
- Fluff the fringe slightly with your fingers.
Next, begin attaching the petals. For the most natural-looking bloom:
- Glue the first petal onto the base of the flower center.
- Attach the second petal directly across from the first.
- Place the remaining two petals between the first pair so they alternate evenly around the flower.
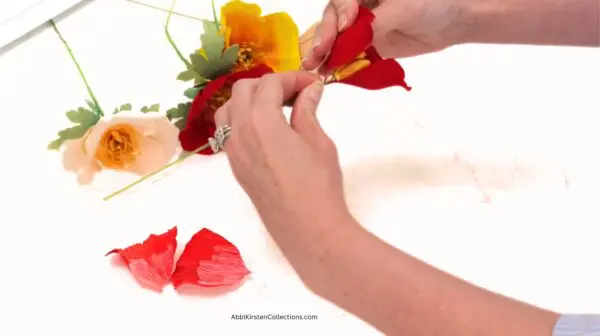
Once all four petals are attached, gently bend and arrange them until the flower has an open, airy appearance. If any petal feels too loose, simply add a tiny dot of hot glue near the base for extra support.
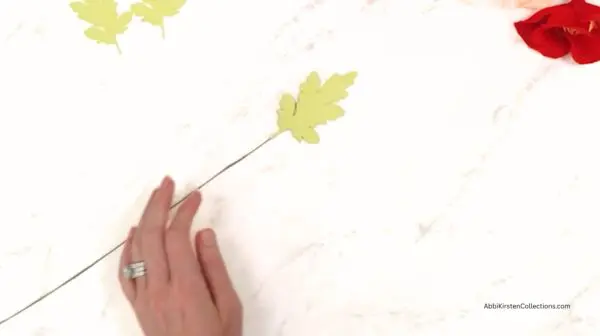
9. Create the Poppy Leaves.
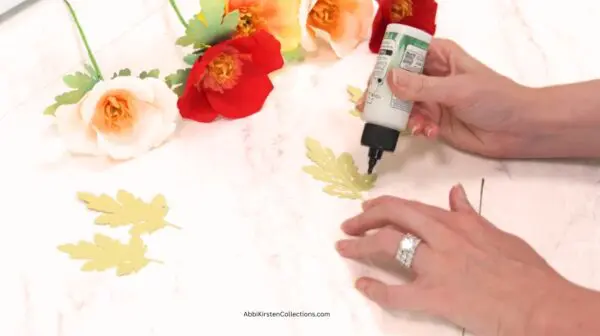
The leaves add beautiful balance and realism to your finished flower. Each leaf is made from two cardstock cut pieces with floral wire sandwiched between them. To assemble each leaf:
- Match two leaf cutouts together.
- Apply liquid craft glue across one leaf.
- Lay a piece of 24-gauge floral wire down the center.
- Place the second leaf on top.
- Press gently and allow the glue to dry.
Repeat this process for as many leaves as you’d like. One to three leaves per flower creates a beautiful finished look.
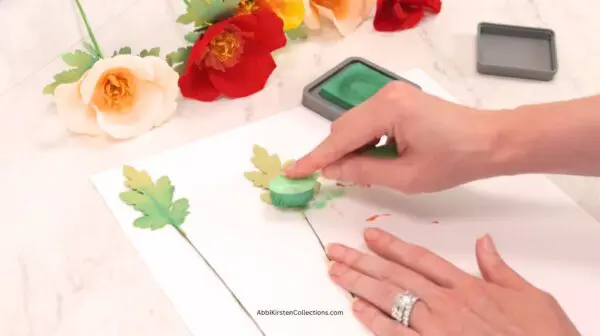
10. Add Color to the Leaves (Optional).
For extra realism, use distress ink or distress oxide with a blending brush. Lightly blend a darker green, such as Lucky Clover, from the base of the leaf upward, leaving the tips lighter to create a natural gradient. Apply color to both sides if desired.
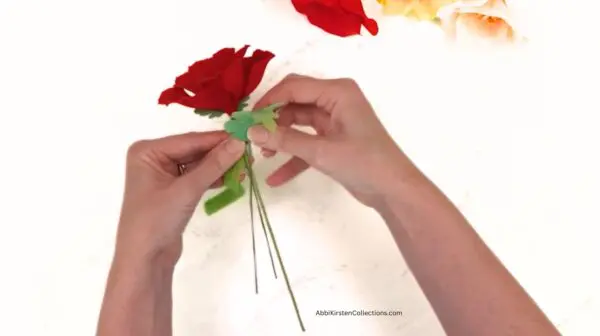
11. Attach the Leaves and Finish the Stem.
Once the leaves have dried, gently bend them along the wire to create soft curves. Next, secure the leaves to the flower stem using floral tape.
- Place the first leaf just below the flower.
- Wrap floral tape around the stem several times.
- Add the second (and third, if desired) leaf slightly lower on the stem.
- Continue wrapping the floral tape down the entire stem.
If your floral tape isn’t especially sticky, place a tiny dab of liquid craft glue beneath the tape at the beginning and end to help secure it. Finally, adjust the petals and leaves until you’re happy with the overall shape of your poppy paper flowers.
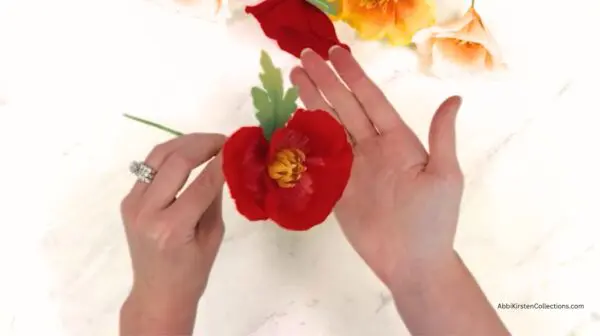
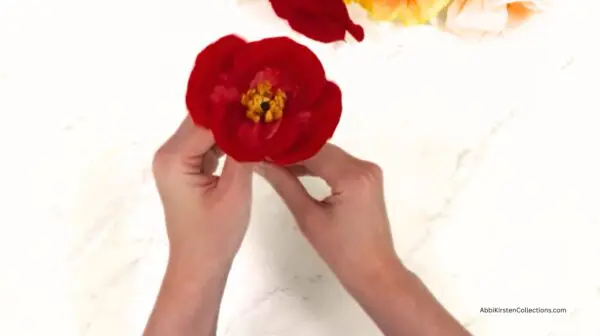
Finished Poppy Paper Flowers
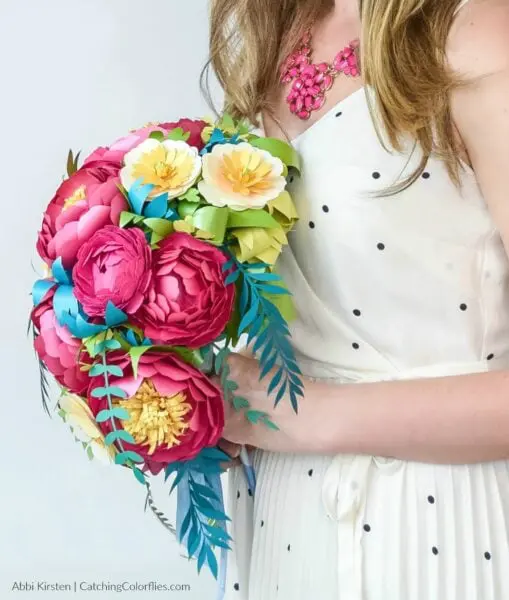
Your beautiful poppies are now complete! You’ve created a flower that’s full of realistic movement and dimension. Whether you’re making a single bloom or an entire bouquet, these poppies pair beautifully with the other designs in the Cali Botanical Collection, including paper succulents, prickly pear cactus, and agave plants.
We’d love to see your finished flowers, so be sure to share your creations with the Abbi Kirsten Collections community and tag us on social media!
Looking for More Creative Crafting?
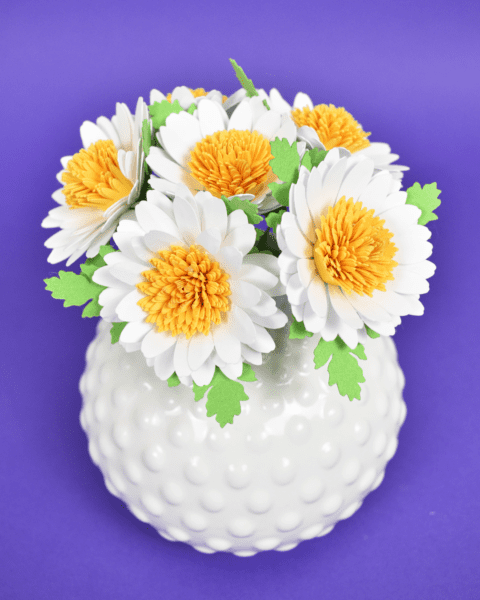
We have so many paper flower creations, gift ideas, holiday decorating fun, and more at Abbi Kirsten Collections, with free Cricut workshops and our free 3-part series on creating your own SVGs from Scratch. And if it’s more paper flower creations you’re looking for, here are a few crafters’ favorites!

Find Hundreds Of Free Templates In The Craft Vault!
Did you make this craft?
We would love to see what you have created! Tag @abbi_kirsten_collections on Instagram so we can see your creations!