How to Add Patterns and Shape Cut-Outs to Your Paper Flower Templates in Cricut Design Space
This post may contain affiliate links that won’t change your price but will share some commission.
Designing and crafting with paper flower templates are a big thing around here on Abbi Kirsten Collections. If you spend five minutes with me you will probably figure that out!
As a self-taught artist and designer, I love to create and share my templates with my readers. Often I will get asked, how do you design your files? The long answer to this is I use an open-source program called Inkscape. Inkscape helps me convert images and even draw new ideas from scratch. Believe me, I am no traditional artist but that’s the beauty of computer software!
Editing SVG images in Cricut Design Space
The short answer to how I design my files is, sometimes I play around with the tools available to me in Design Space. This petal pattern tutorial is a great example of how to use the tools available in Design Space.
While Cricut Design Space is limited, there are still quite a few tricks of the trade to customize existing SVG files in their software. In today’s tutorial, we will primarily be using the Slice and Weld tools.
Converting or designing your own SVG images
If you are like me, at some point, you may want to break free from creating only in Cricut Design Space. After about a year of Cricut crafting, I wanted to learn how to convert images to SVG files. I can absolutely help you with that in my Free The SVG program, where you can finally discover the freedom of creating your own SVG cut files!
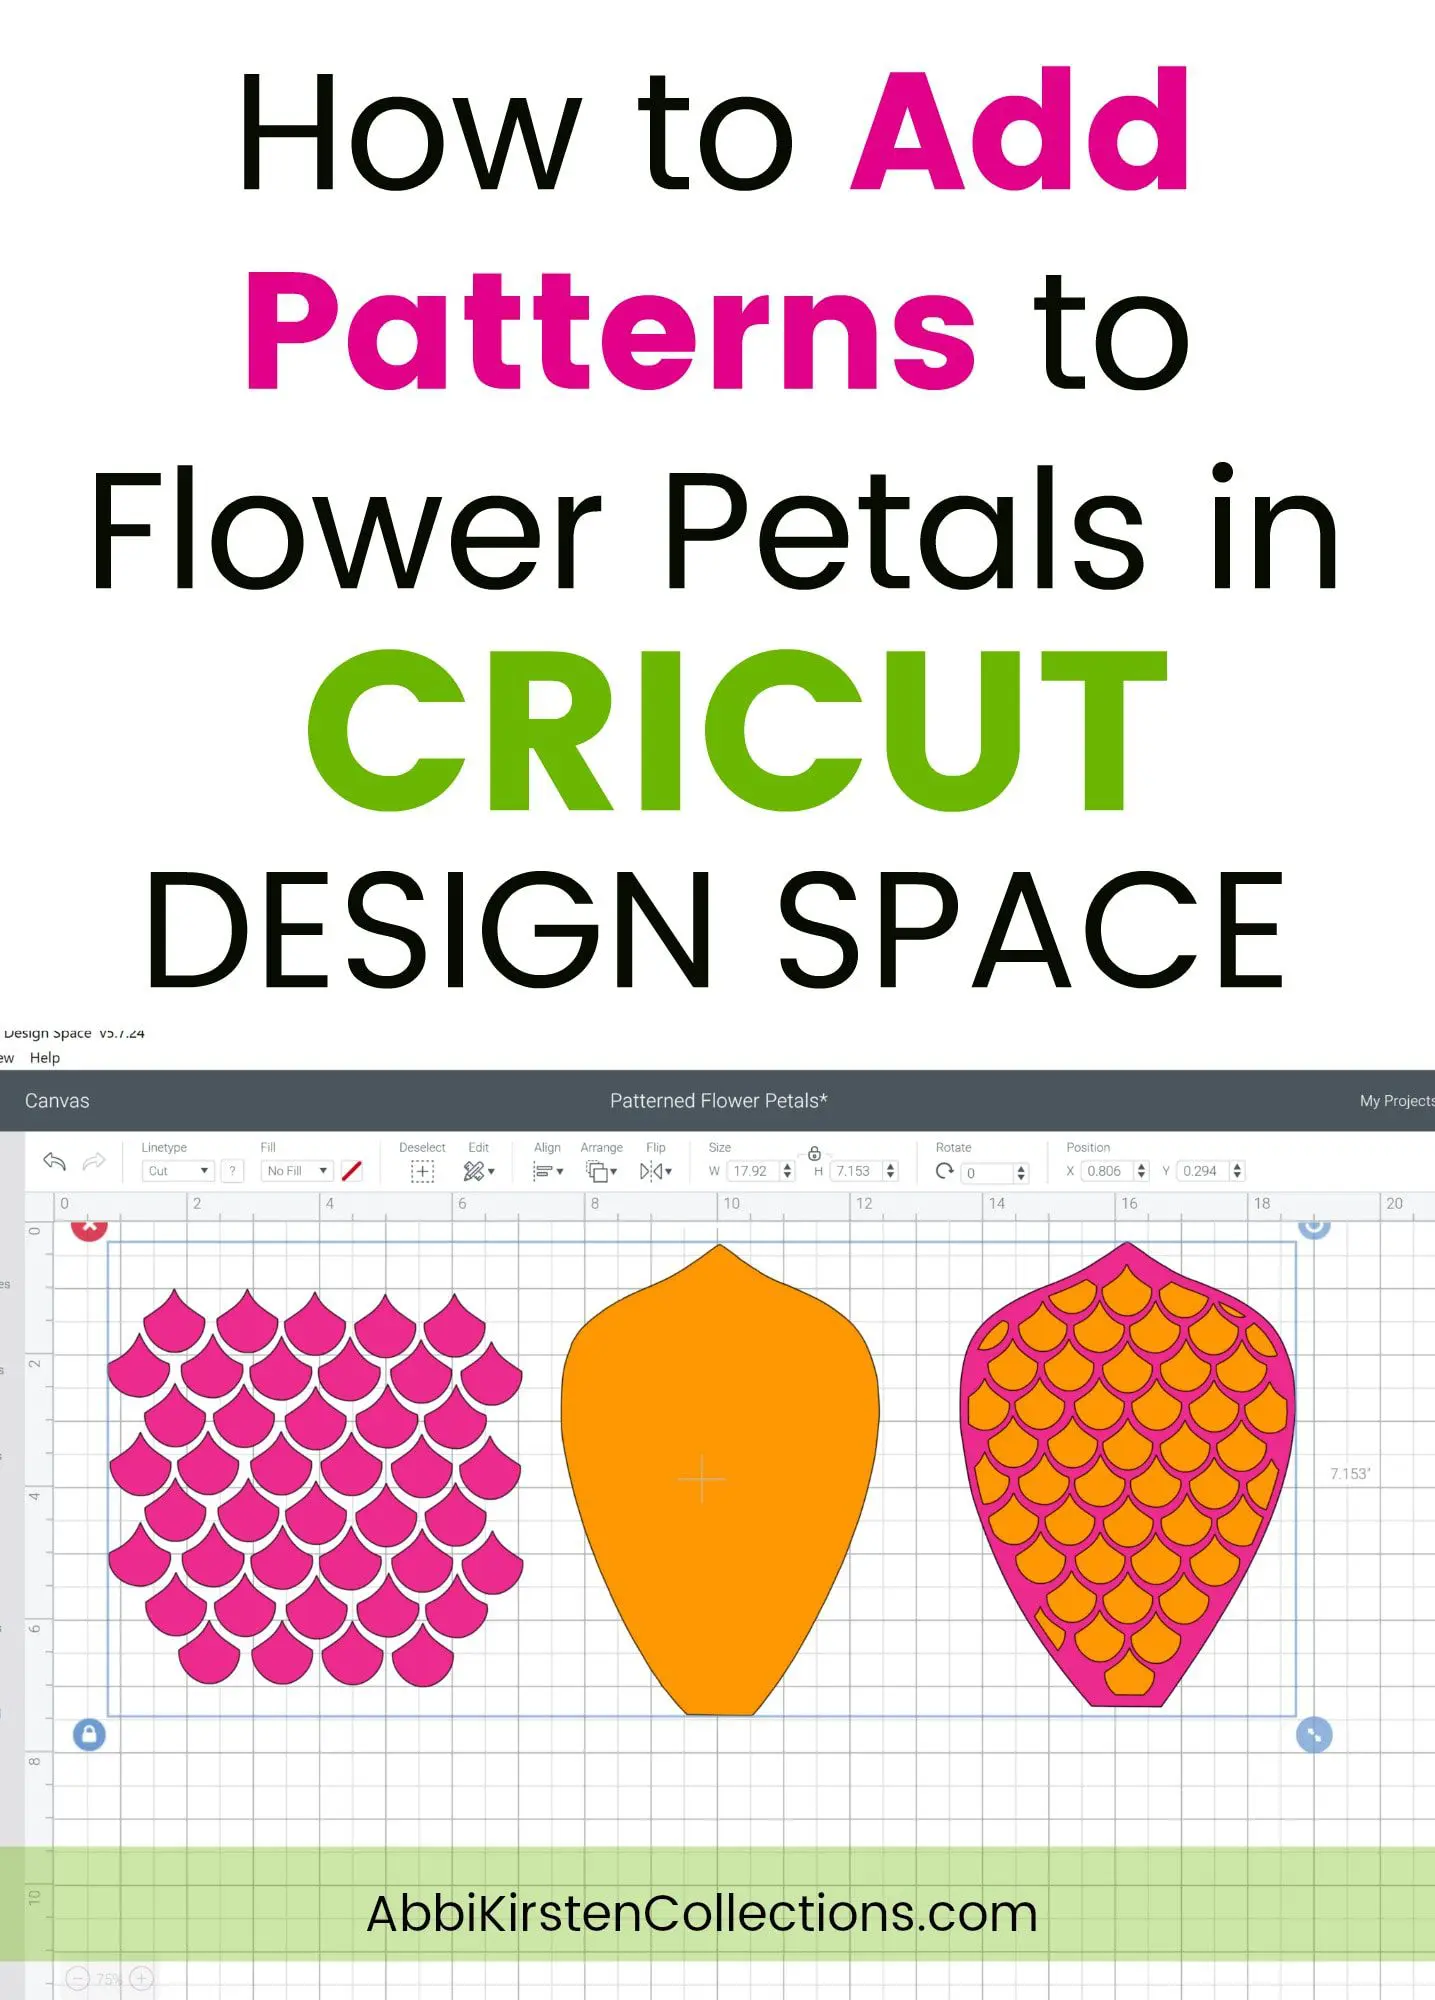
How to Add Patterns to Flower Templates in Cricut Design Space
Let’s take a look at how to get a totally plain petal to dress up into a two-layered pattern. Below you will find a synopsis of the steps and for a full video tutorial be sure to scroll down and click play.
Free Flower Templates
I am providing my Everly template for this tutorial and also some patterns to play within Design Space. Find my flower templates and patterns inside the Freebie Vault under Giant Paper Flowers by signing up below. If you are already a member, log in right here. Need help entering the vault? Read this helpful post here.
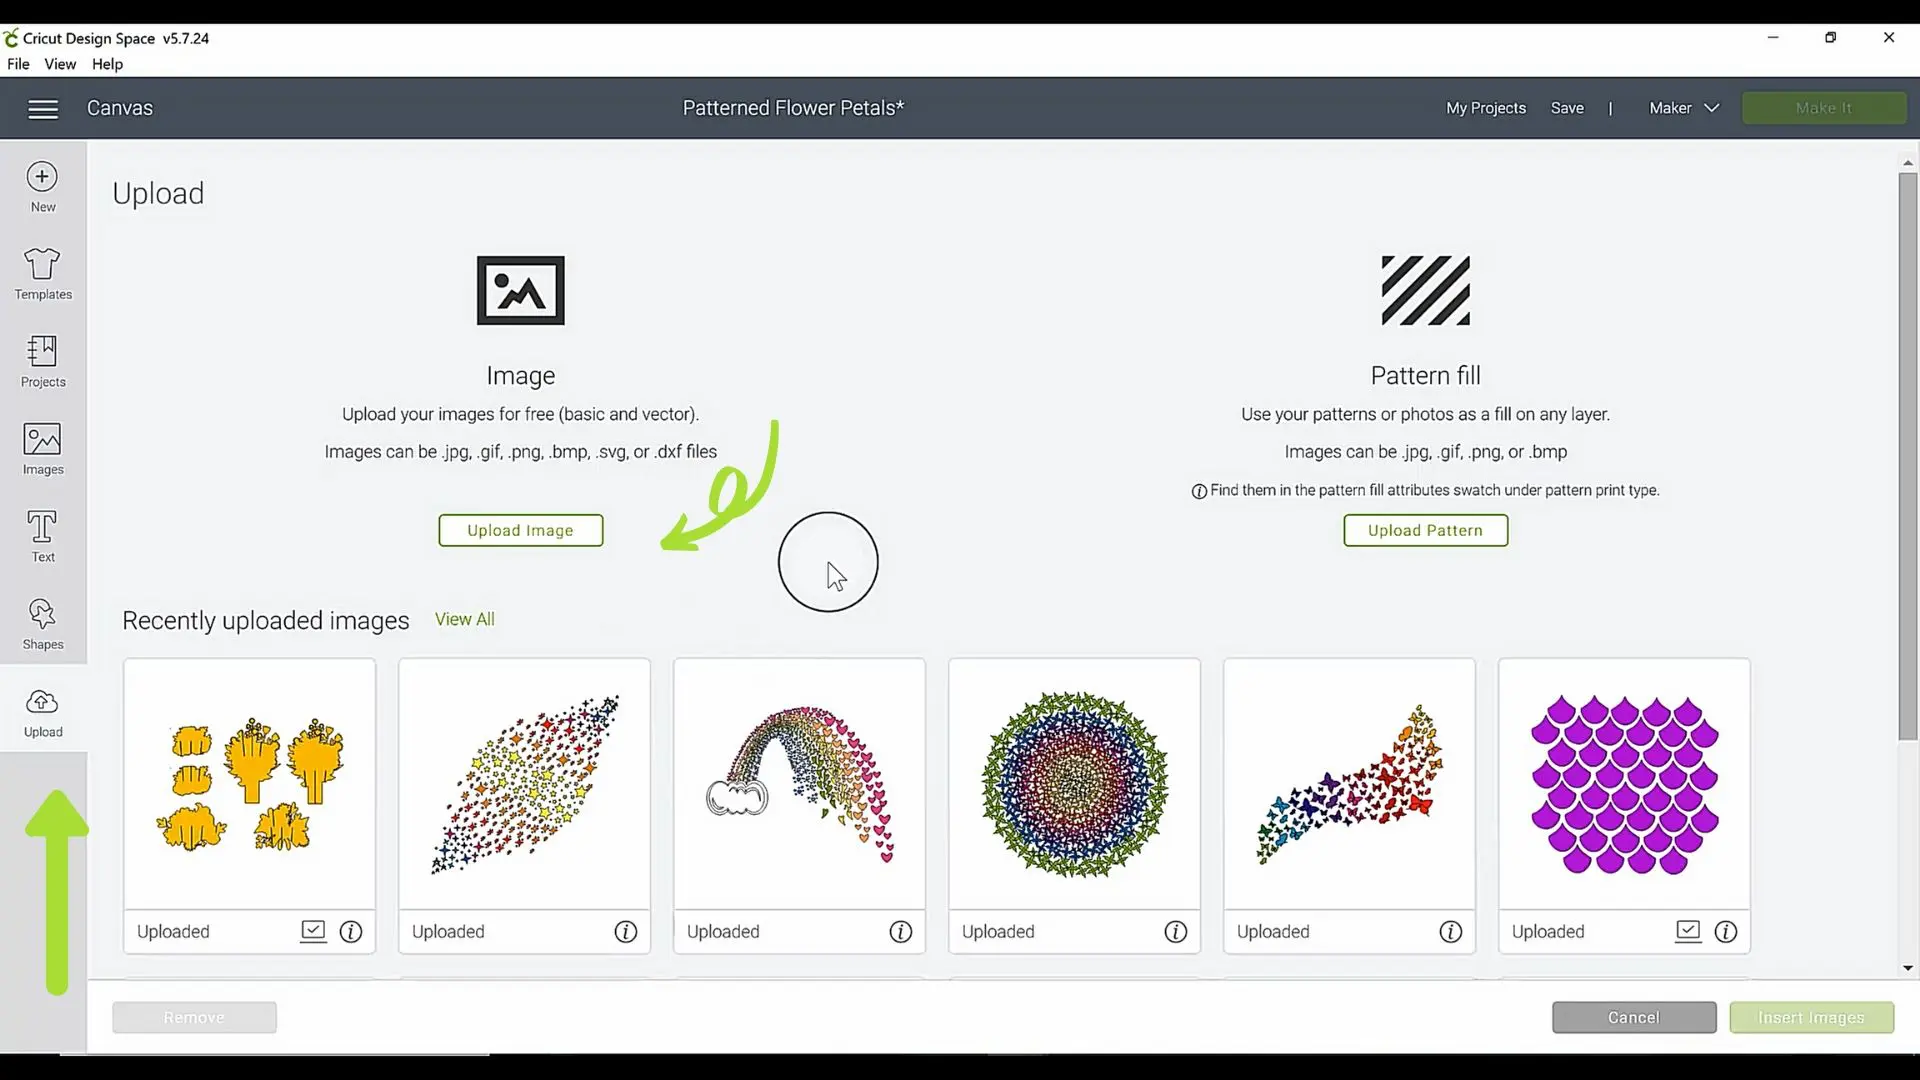
Step 1: Upload Your Images
The first step is to bring the images into Design Space. Navigate to the Upload button on the left side of the Canvas in your Design Panel, browse your computer and upload the flower petal/pattern or image you wish to create a pattern from.
Step 2: Decide on a Pattern
Next, decide on your pattern. You can either bring in an existing pattern, such as my mermaid or polka dot pattern freebies or you can create a pattern from the basic shapes panel. Cricut Access subscribers can also choose any image for this part.
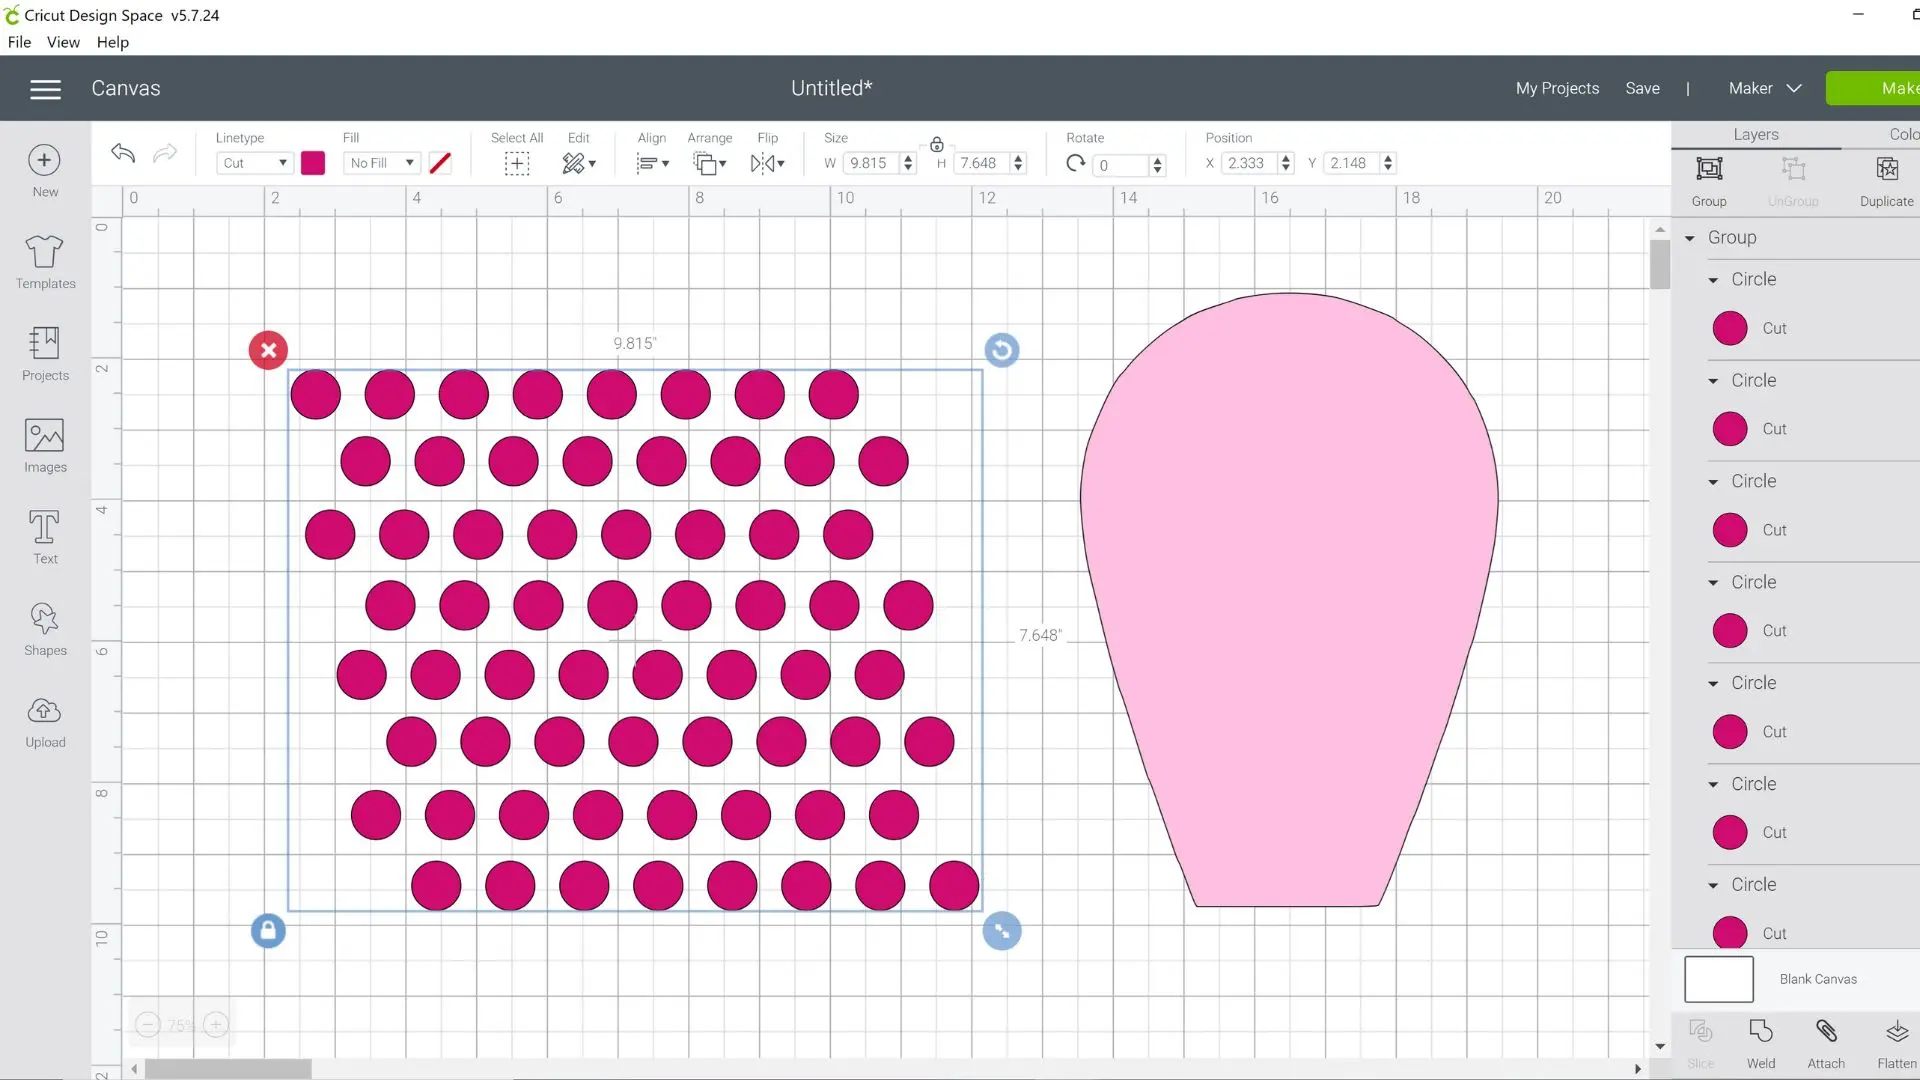
I’m using the circle to create a polka dot pattern here. I start by duplicating and creating a line of the circle image, using the Duplicate button at the top right of the Layer’s Panel.

Use the Align and Distribute tools to align the circles to the bottom and then distribute them horizontally.

Step 3: Group the Pattern
Next, group the pattern line by using the group button at the top right and start to duplicate that again as well as offsetting your lines a little bit as shown below.
Step 4: Layer the Pattern
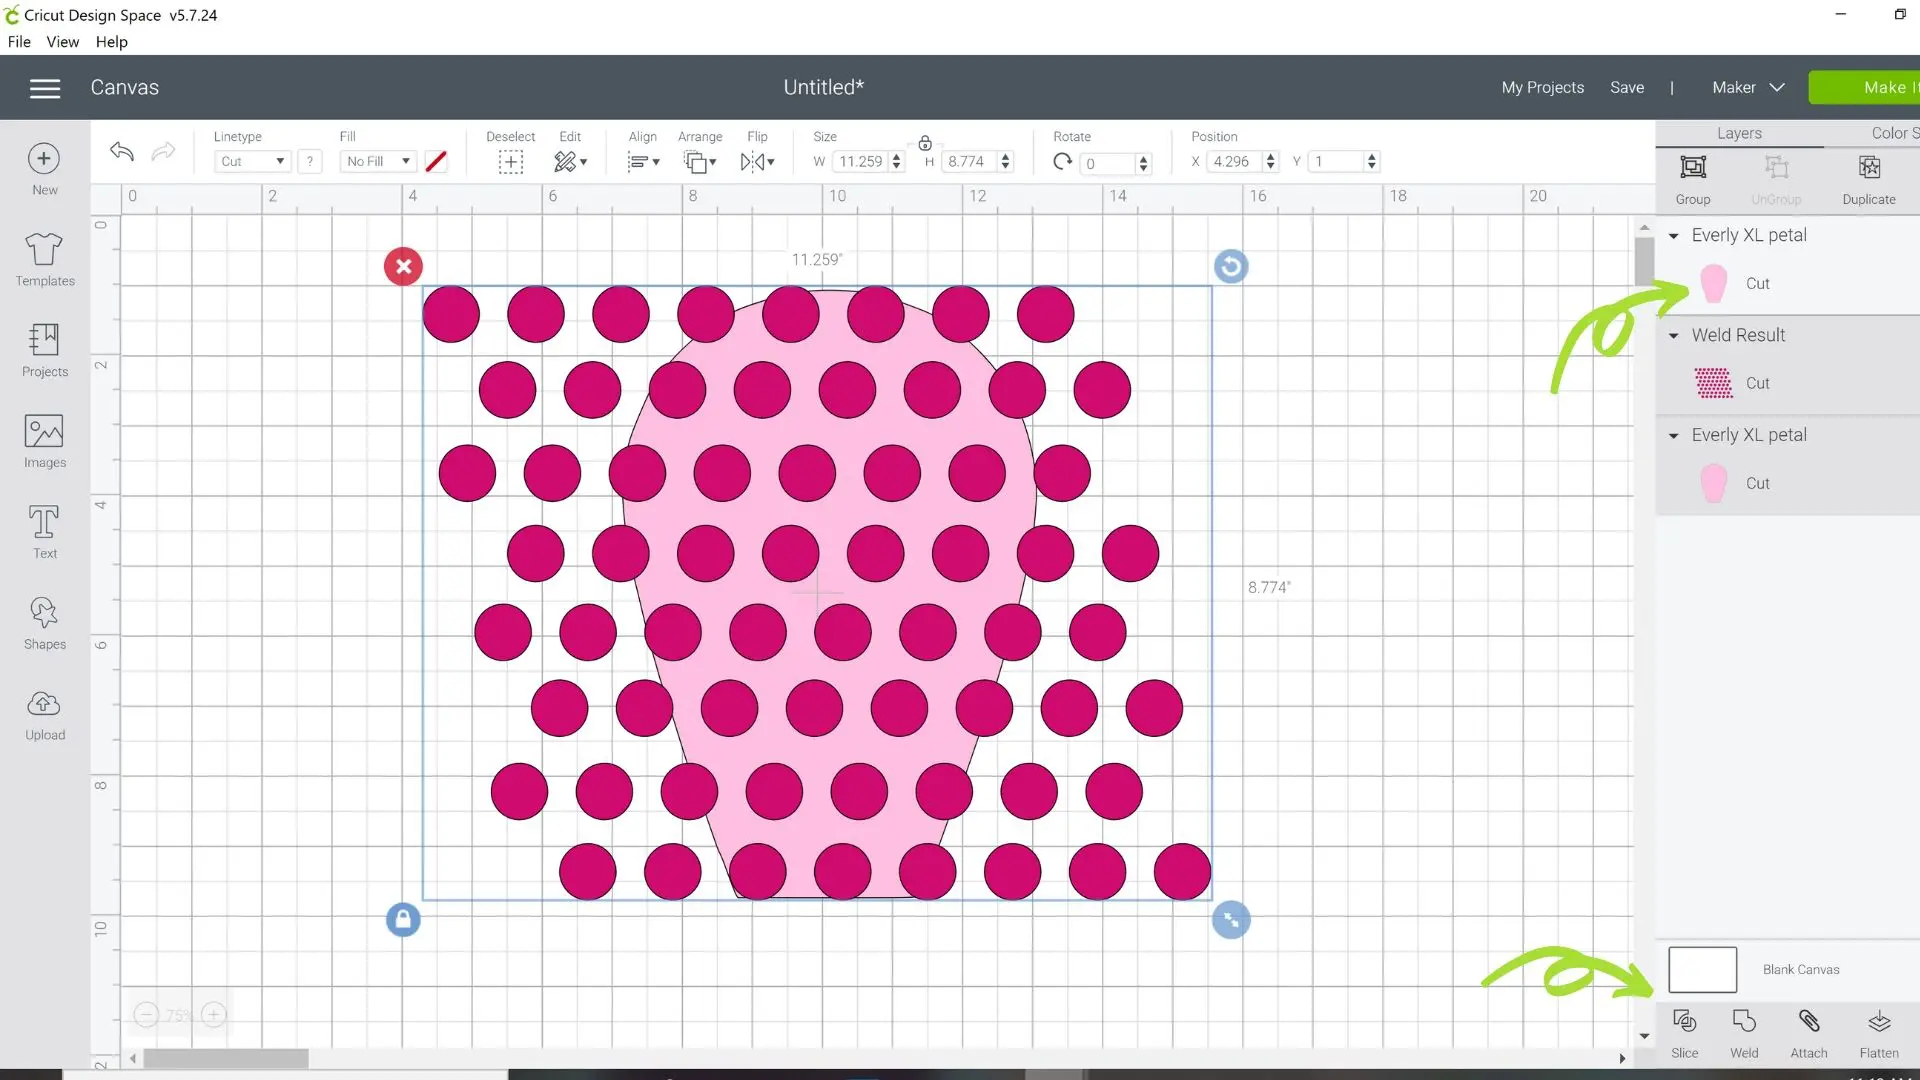
Once you have a healthy pattern created, it’s time to set it up to be cut out of our petals. In order to slice this pattern out from our petal, you need to Weld all these circles together. Select all the circles and click on Weld at the bottom of the Layer’s Panel to your right.
You will see the welded result to your right in the Layer’s Panel.

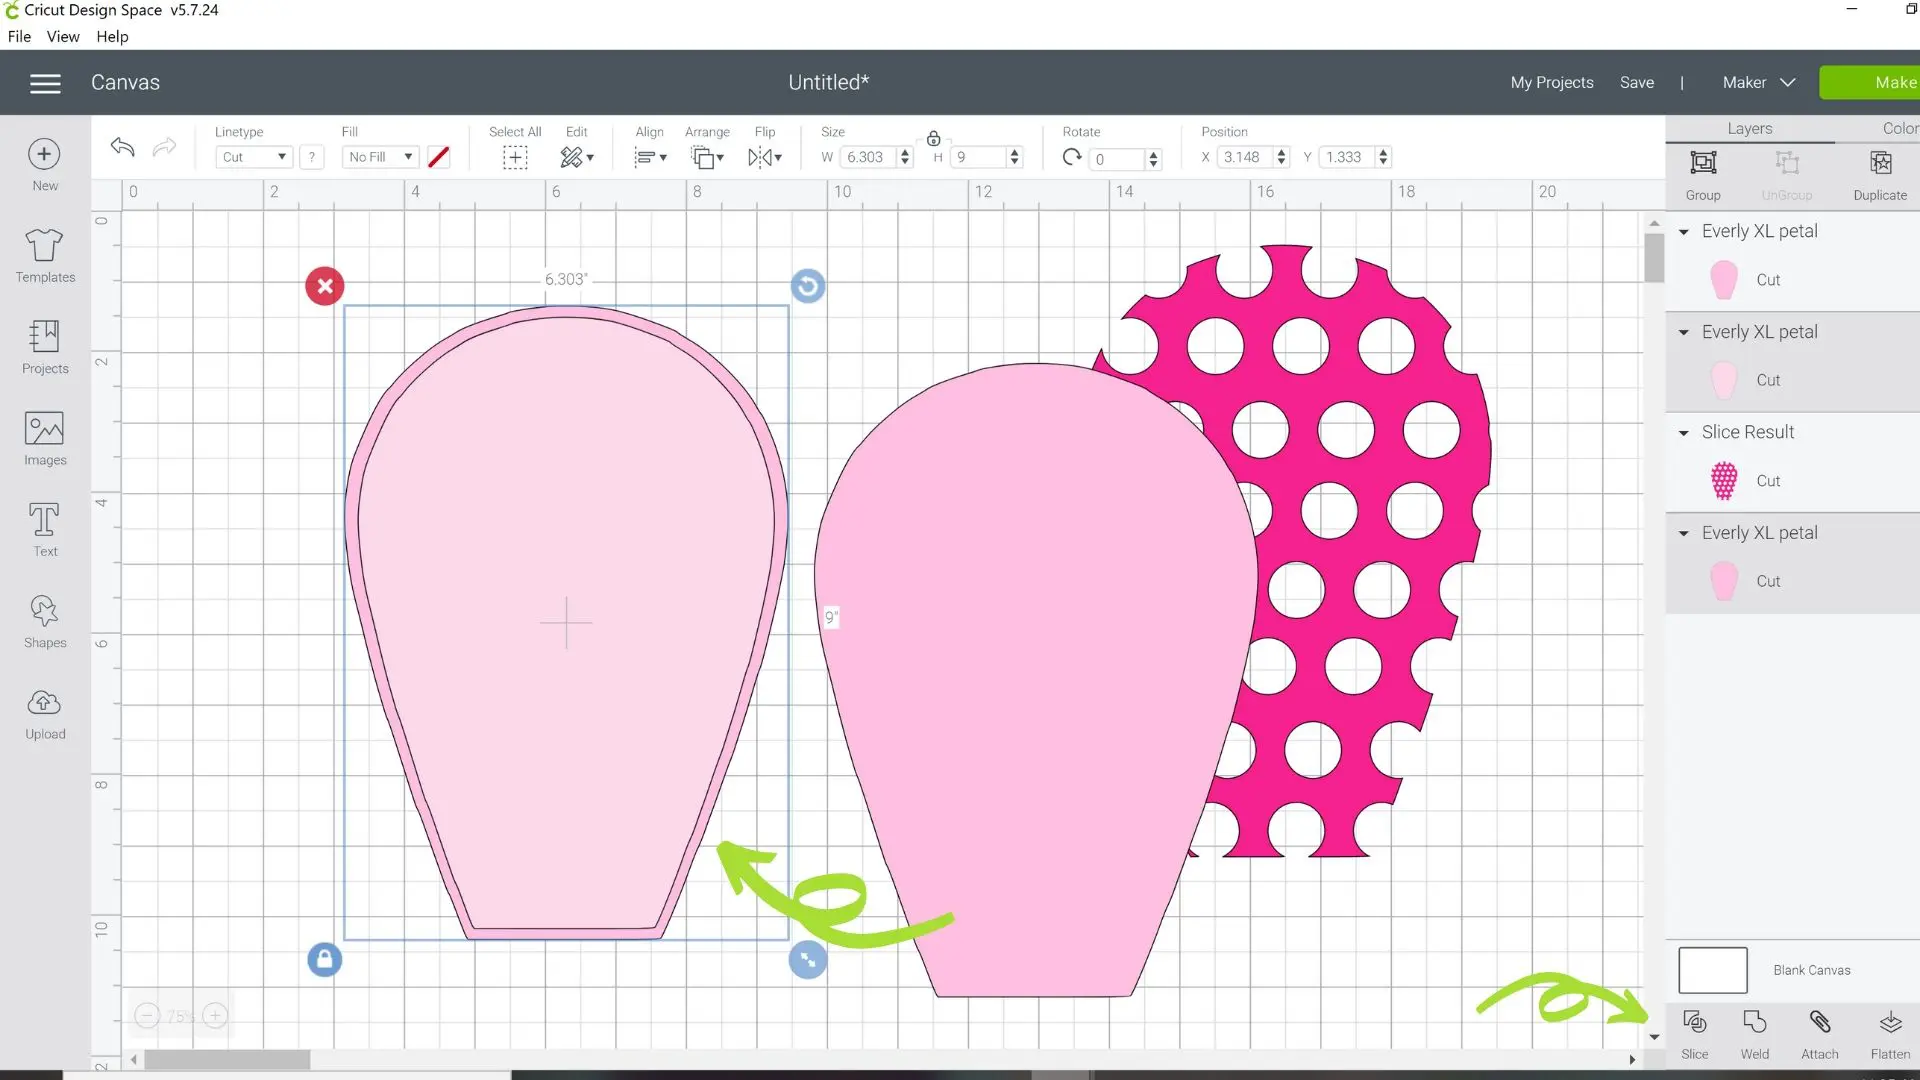
At this point, you need to duplicate the solid base light pink petal and just hide it in the layer’s panel – use the eye icon to hide or unhide images. Pull the welded pattern over the top of the original base petal. Make any adjustments so that it fully covers the petal shape.
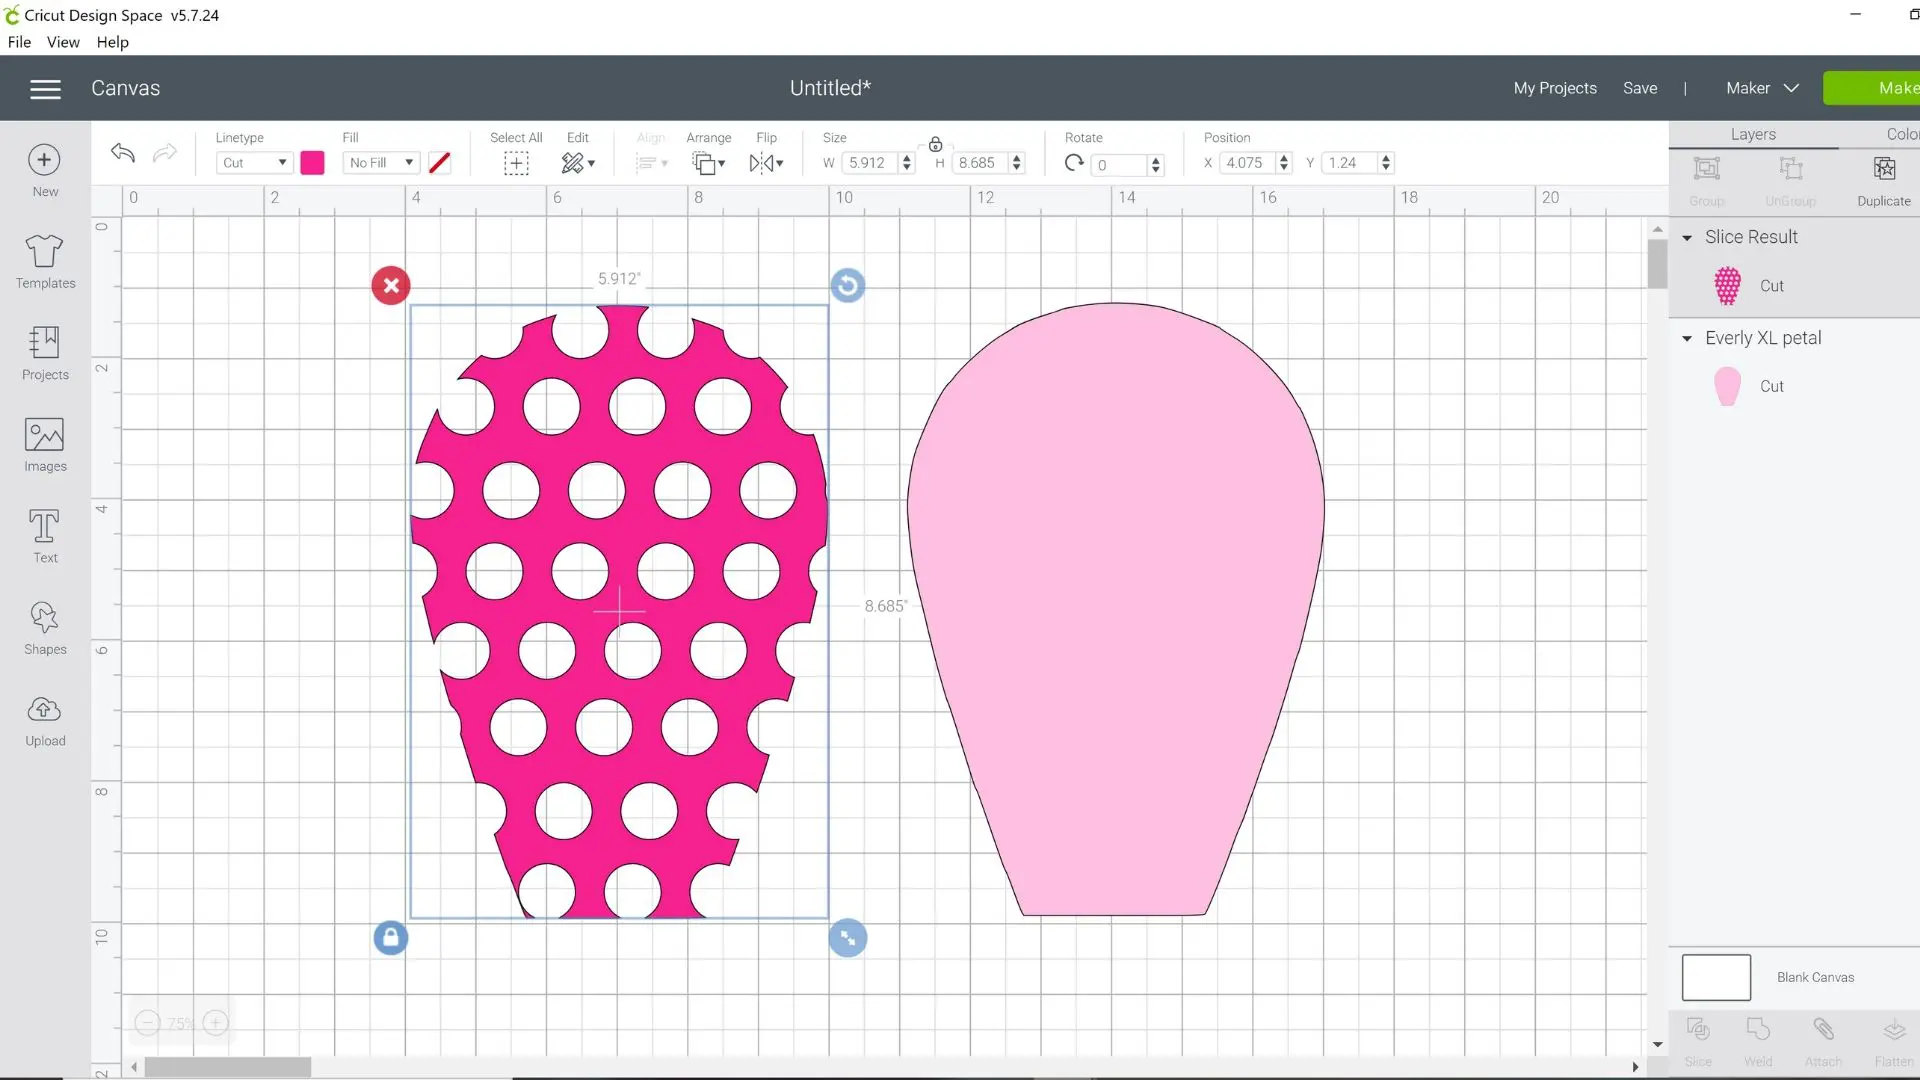
With both the polka dot pattern and the petal selected click the Slice tool to the bottom right.
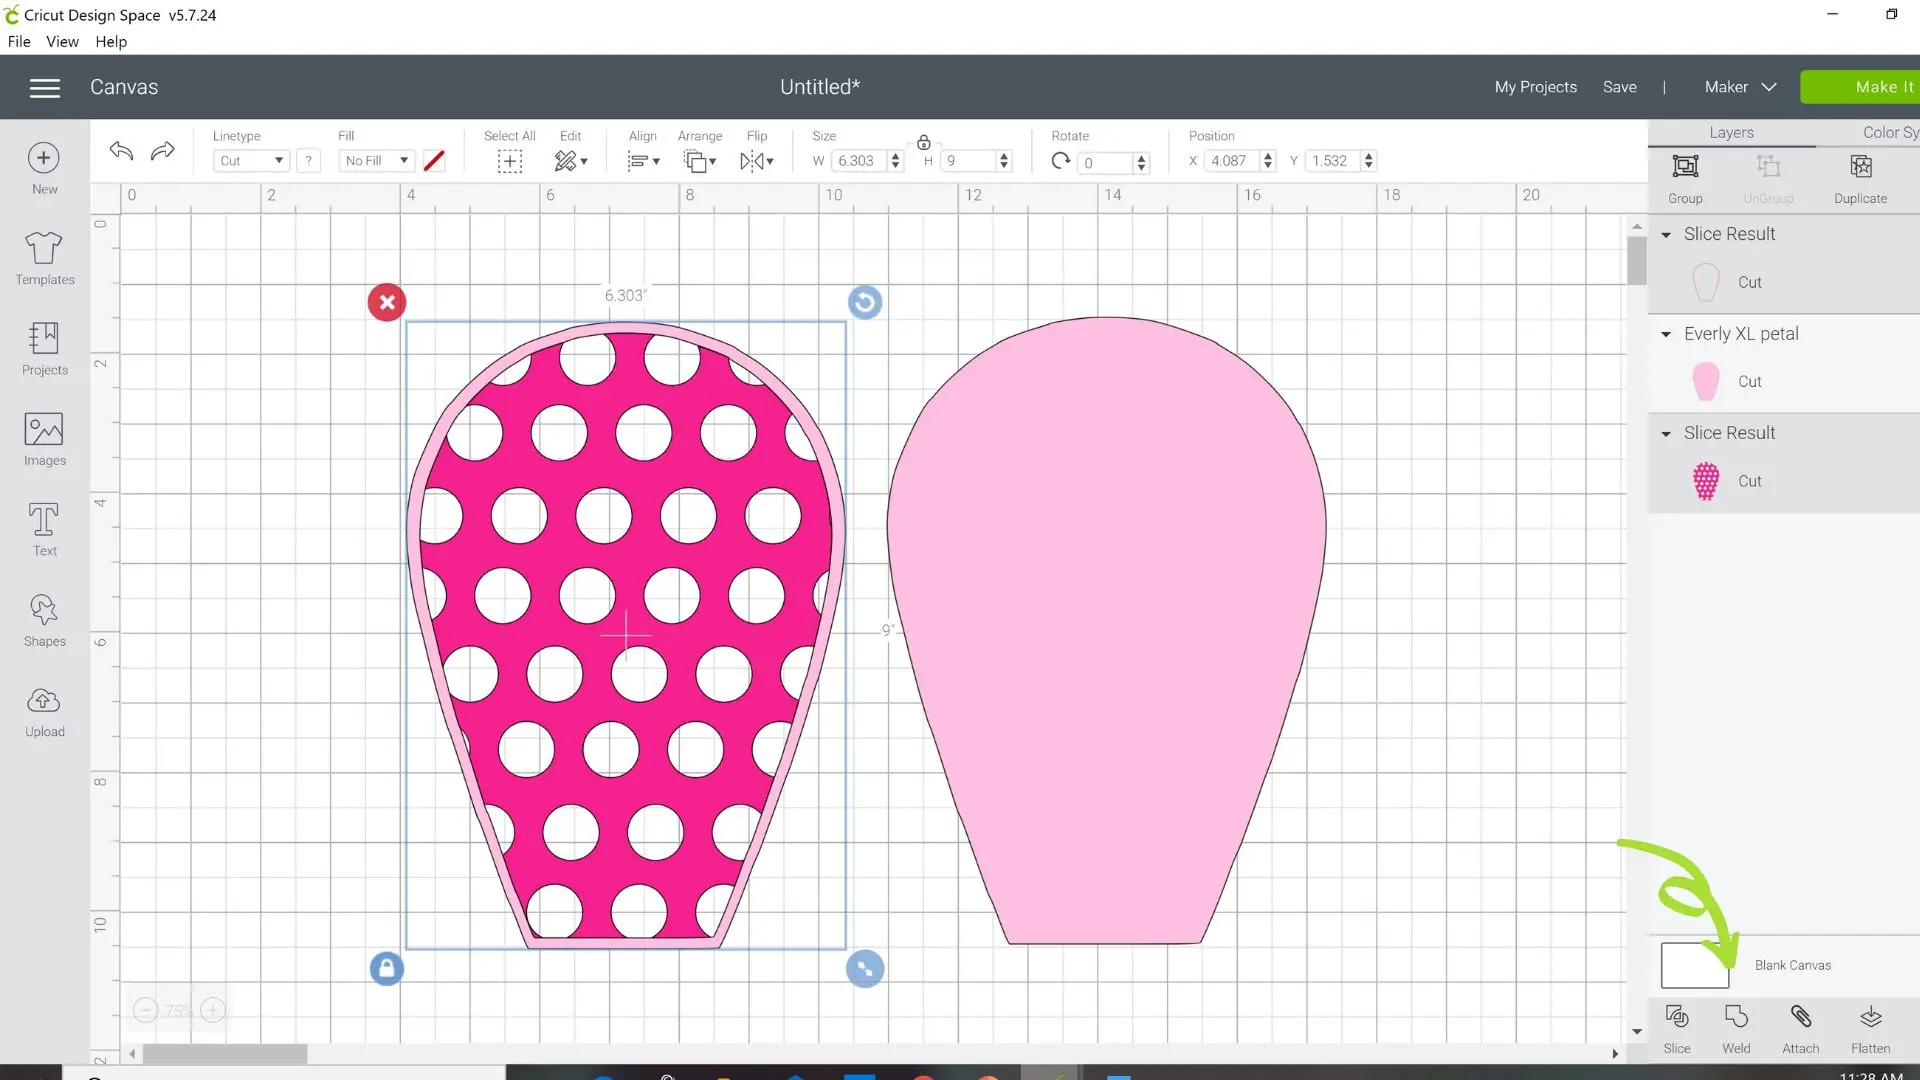
Begin to pull the sliced result apart to reveal the cut-out piece. You can delete all other pieces. You could stop here or add a framed edge, which I will show you next.
Step 6: Stack the Designs
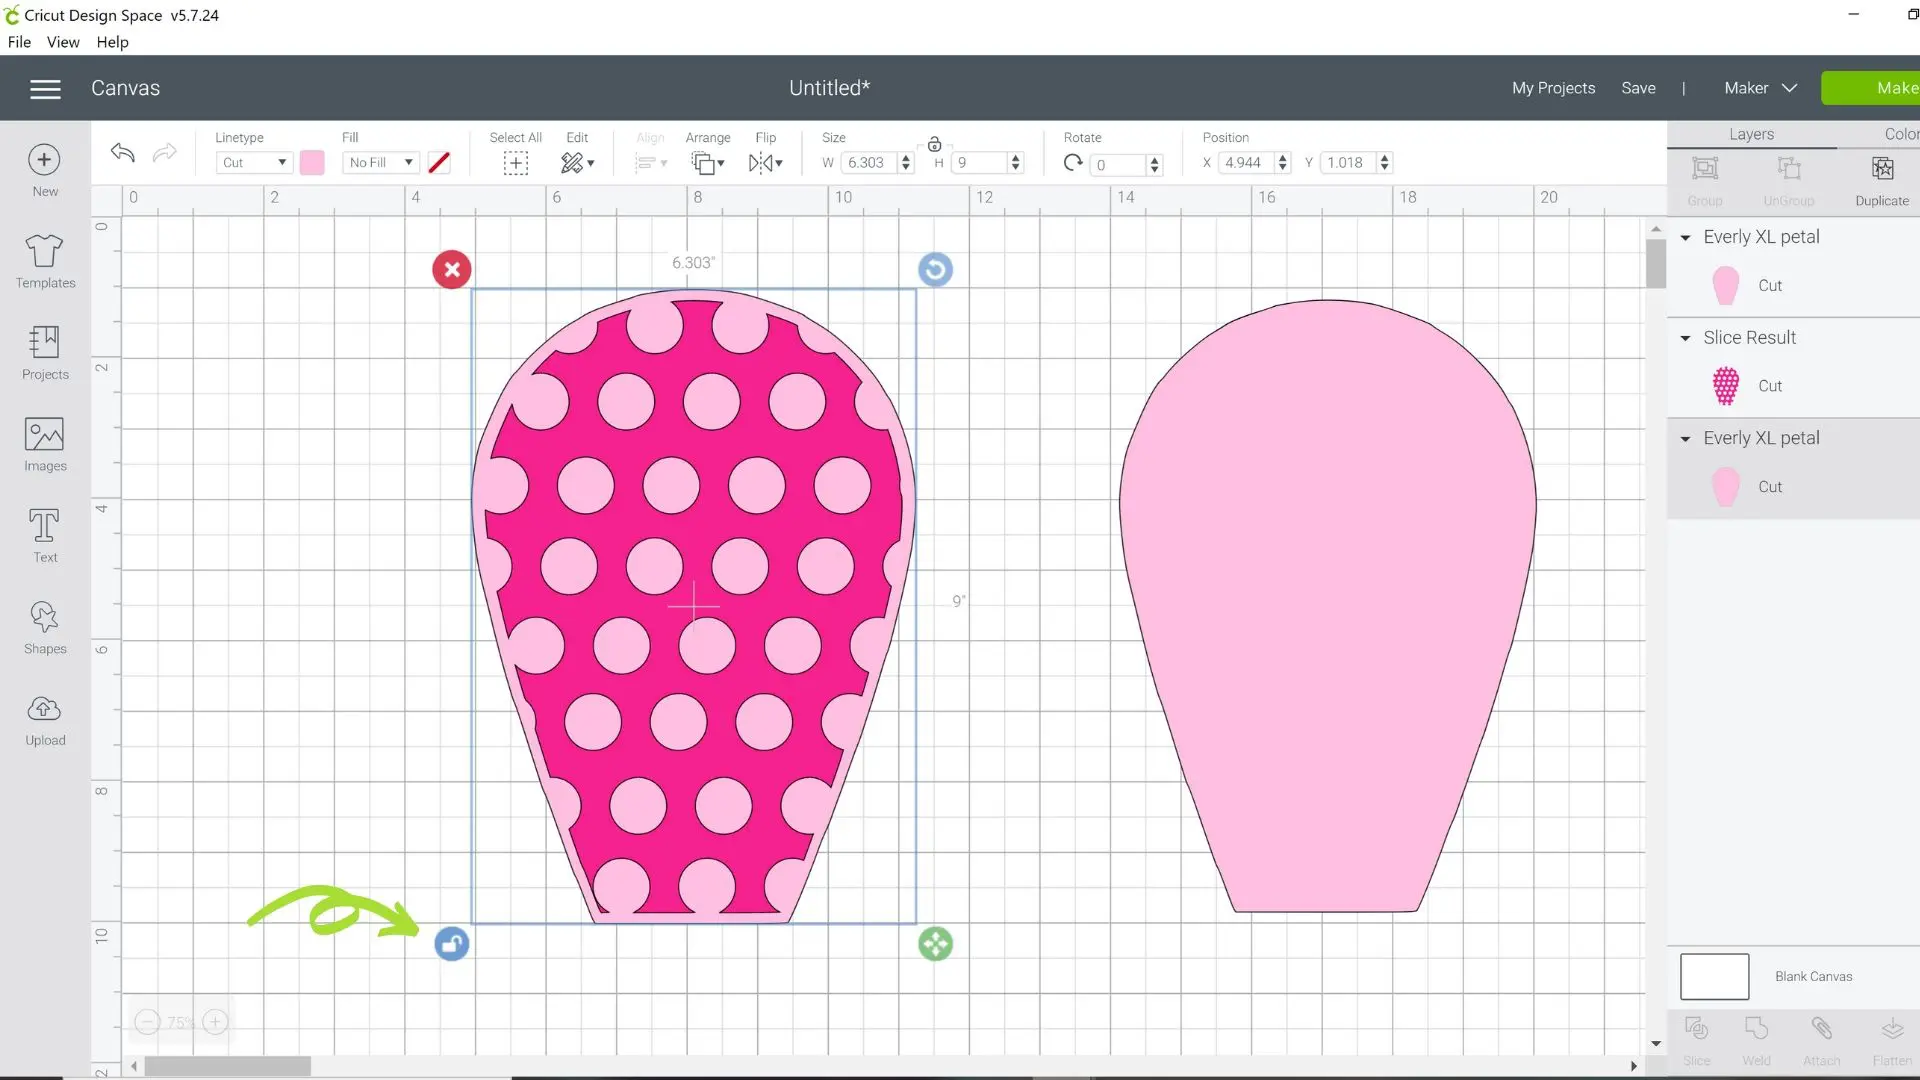
To create the framed edge, duplicate the solid base petal again and stack the pattern result on top of the base petal. Unlock the bottom base petal using the unlock icon to the left when an image is selected. Stretch the base petal a little larger to create an outlined edge. You may wish to use the Align tool here to center everything.
Duplicate the larger stretched out base petal and then stack it on the smaller one leftover from the original duplicate.
Align it again and then use the Slice tool to cut out the framed edge.
Step 8: Finalize the Design
Delete all extra sliced pieces except the framed edge. Pull the polka dot pattern back over to the outlined edge and align it center. Use your Weld tool once again to unite the pattern and the framed petal edge.
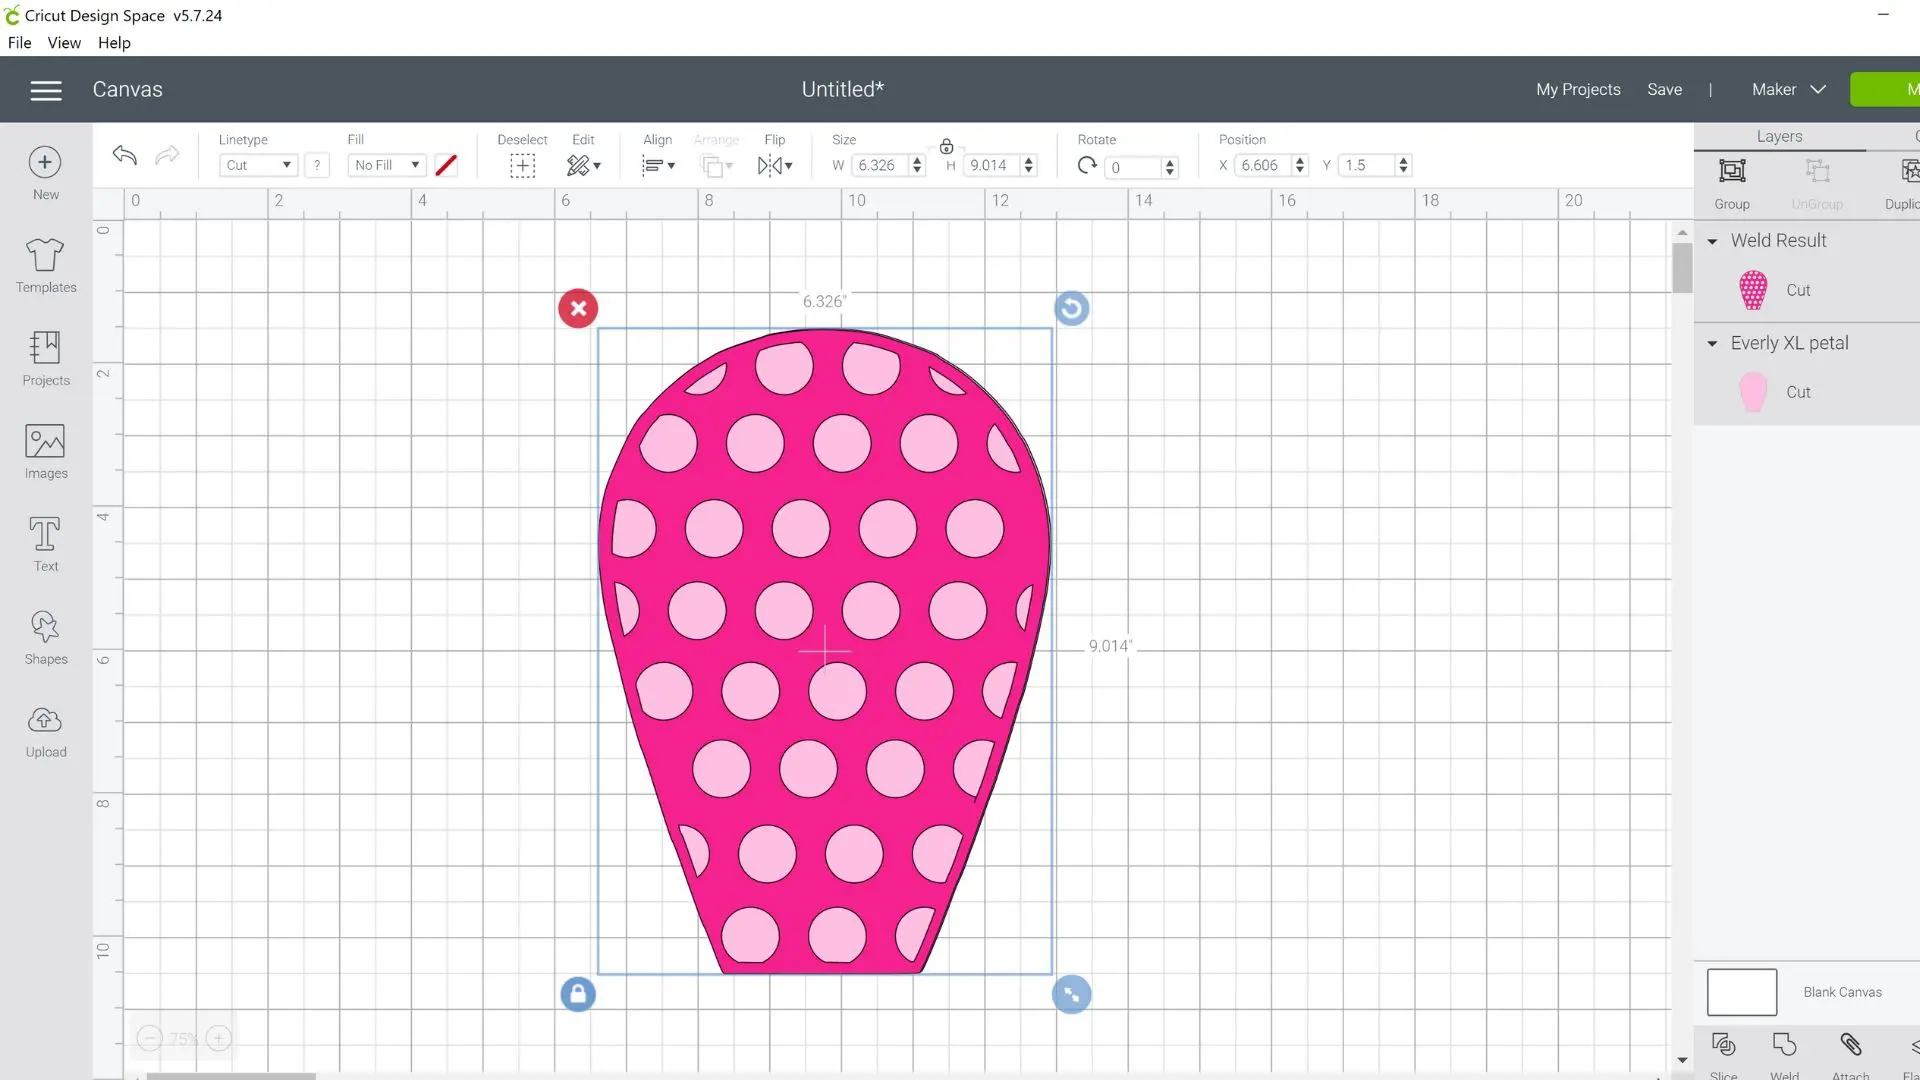
Once that is complete, you should have two results, the petal pattern with a finished edge and a solid petal base! I know this is a ton of steps when broken down like this so be sure to watch the video below for a complete and comprehensive understanding.
In my patterned flower templates video below, I show you how to use the mermaid tail pattern, which again, is a freebie here on the blog! Unlock the Free Vault and download your free petal template and patterns via the teal button below.
Here is a photo of how the flower turned out!

Adding Mermaid Scales Pattern Cut-out to Petals Video

About Abbi Kirsten Collections
I have spent the last 9+ years building my creative skills and sharing them with others. My flower designs are created with simplicity, color, and crafty fun in mind. If you haven’t yet, be sure to join the subscriber community to gain access to all my freebies or visit my signature design shop here!
Want to join my Facebook community to share your crafts and learn from the best? Click here to request access to my group, Crafters and Cricut Lovers.
For further color crafts and inspiration, join me on Instagram & Facebook.
More Tutorial to Love
- Easy Beginners Steps to Learning Cricut Design Space
- How To Use a Cricut Cutter: A Simple Guide to Getting Started with Cricut
- Cricut Design Space Combine Tools: Weld, Unite, Subtract, Intersect and Exclude
- Cricut Design Space Help for Beginners – How to Download and Use Design Space
- What Pens Work With Cricut? How to Use Any Pen with Your Cricut Machine