Typography Cardboard Vase Craft With Crepe Paper Flowers
This post may contain affiliate links that won’t change your price but will share some commission.
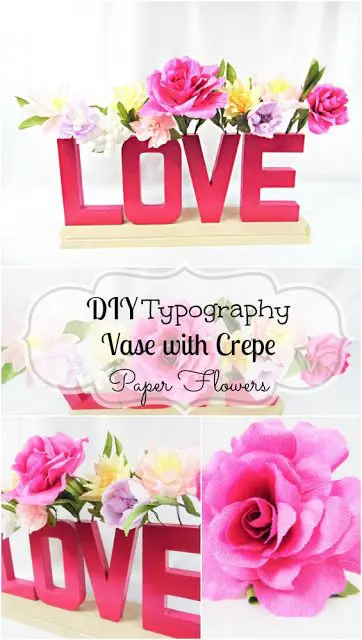
Cardboard Vase Craft With Bonus Crepe Paper Flowers
At one time, Target sold a home decor line called “Oh Joy!” It featured trendy pieces you could mix and match to spruce up your shelves, tables, and more. My favorite was a set of metallic flower vases in the letters “O” and “K.”
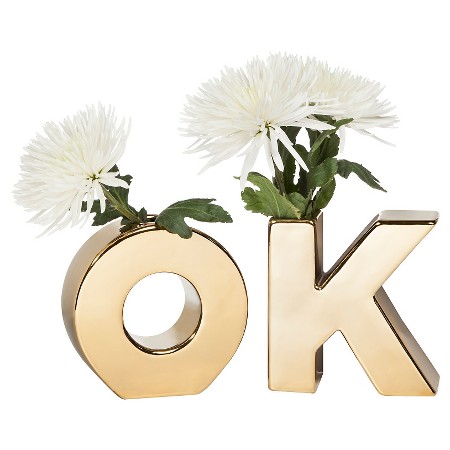
These items are no longer for sale, but don’t worry! I’ll show you how to make a customized typography vase for faux flowers at a fraction of the cost. I’ll also include tips, tricks, and links to make realistic crepe paper flowers!
A letter-shaped vase set offers a modern backdrop to otherwise stale table settings. As centerpieces or dessert-table decor, these paper vases are a sweet sentiment for special occasions and bring the event’s overall theme together. Each cardboard flower vase craft can highlight the reason for the party, such as a “MOM” vase set for Mother’s Day.
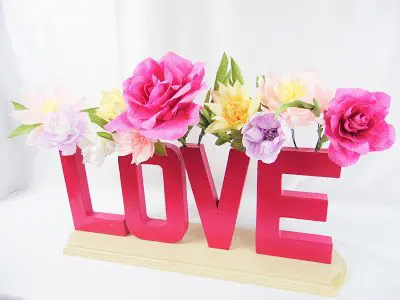
You don’t need a special occasion to use a typography vase. Make a permanent table or shelf display using your family’s last name and your favorite paper or fake flowers. I chose to use the word “LOVE” because I wanted a daily reminder to always show love towards others, inside and outside the home. Of course, it works great for Valentine’s Day, too!
You can choose a word that’s most inspirational to you. Other words for typography cardboard vases include
- Dream
- Smile
- Hope
- Faith
- Believe
- Wish
- Welcome
- A child’s name for their nursery
Don’t limit yourself to just centerpieces, either. You could skip the wood bottom and hang the letters directly on the wall for a cool wall art statement piece.
Colorful Cardboard Vase Inspiration
While searching for more DIY vase ideas, I came across a similar concept from Kara at A Kailo Chic Life. Using trendy succulent flowers, Kara put her unique spin on her cardboard letters. I adore the colors she picked, too! I chose watermelon pink for my love letter vase, while Kara used bright color variations. The color scheme of your arrangement can be whatever you want!
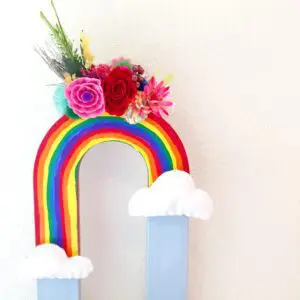
The same is true when it comes to the features of DIY cardboard vases. You can use solid colors or paint the letters with personal design elements–pictures (adhered with Mod Podge, I DIYer’s best friend!) or hand-drawn geometric shapes. You could even make fun shapes, like this cardboard rainbow vase from Jennifer Perkins, and make it a craft you can do with kids!
The variations are truly endless and a lot of fun to make!


Supplies For The “LOVE” Typography Cardboard Vase Craft
I’ve included links for the supplies to make the “LOVE” letter vase, all of which can be found at Amazon or your local craft store.
- Cardboard (Papier Mache) letters
- Wood base
- Glue gun and glue sticks
- Spray paint or acrylic craft paint in the colors of your choice
- X-acto knife or drill
- Cardboard or newspaper to cover your surfaces
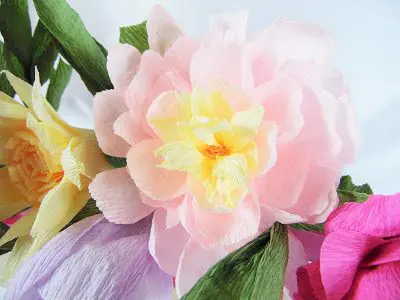
Making Crepe Paper Flowers
You will need at least 8-10 large flowers and greenery, depending on how many letters you use.
I have many crepe paper flower templates and tutorials you can choose from. I recommend starting with my comprehensive tutorial on how to make stunning crepe paper flowers, where you can find full supply lists, tips, tricks, and templates.
Some crepe paper flowers you can make for your letter vase include:
How To Make A “LOVE” Cardboard Vase
Step 1: Prep Your Space
Gather your supplies and make sure your workspace is big enough and clean. You will need to prepare a space outside if you are using spray paint.
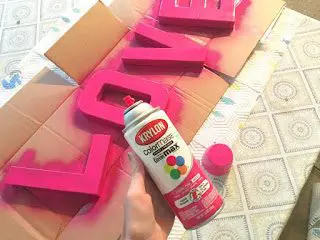
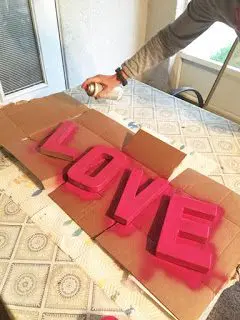
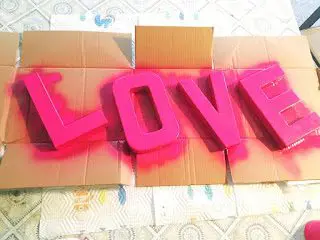
Step 2: Paint The Letters And Wood Base
Put newspaper or scrap cardboard under your letters before painting to protect the work surface. Only use spray paint outdoors! Let your letters dry thoroughly between each coat before moving on to the next step. I choose a watermelon pink for my letters and a tan for the board.
Pro-Tip: If you need a more neutral tone for a better fit in your home, paint your letters or base a tan, cream, or dusty blue.
Pro-Tip: If your paint isn’t adhering to the papier mache/cardboard vase letters, try priming the letters first and then using your acrylic or spray paint.
Step 3: Creating The Vase
To make these painted cardboard letters into a lovely vase, we have to cut holes in the tops of the letters so the paper flower stems have a place to go.
Some people use an X-acto knife to cut the top of the letters open. I did it a little bit differently and had my hubby drill a few holes where I wanted them in the letter tops. The flowers stand up better when using drilled holes.
Step 4: Adding The Wood Base
After you finish drilling or cutting open the tops, use your hot glue gun to adhere the bottom of the letters to your painted and dried wooden base.
Even though you are using simple words, double-check your spelling!
Pro-Tip: Before gluing the cardboard vase letters to the board, measure and mark where you want each letter to go so that your word is centered on the base.
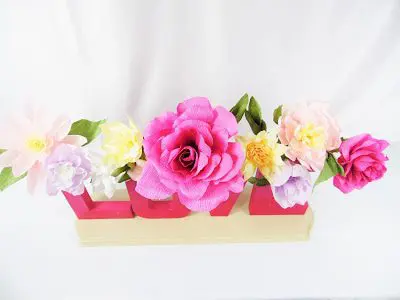
Step 5: Adding Crepe Paper Flowers
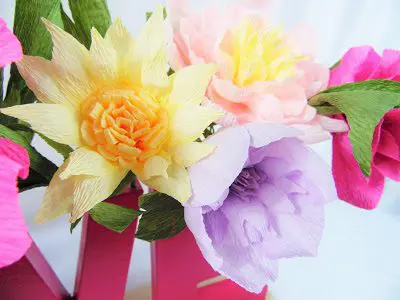
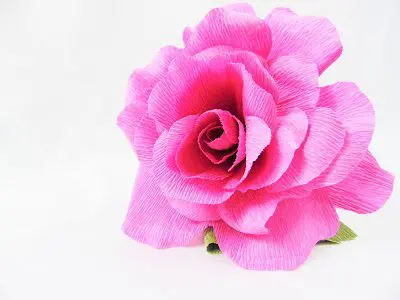
A papier mache or cardboard vase means you can’t use an actual bouquet of real flowers, but you can create paper flowers that look like the real thing!
You can use silk faux flowers, but I make crepe paper flowers because they add a unique pop! If you have already made your flowers, add them to your vases. If you are new to paper flowers and are having trouble deciding what to make, check out my beginner’s guide on how to make realistic paper blooms.
Congratulations! You’ve made a typography cardboard vase and realistic crepe paper flowers using simple craft supplies, a bit of glue, and your imagination!
Alphabet crafts like this make stunning decorations, statement pieces, and beautiful gifts that are long-lasting and perfect for any time of year. We hope you had fun, and we can’t wait to see what you create next!

Typography Cardboard Vase Craft
This typography cardboard vase is the perfect budget-friendly home decor craft! Fill the cardboard letters with your favorite paper flowers and create a keepsake for years to come.
Materials
- Cardboard (Papier Mache) letters
- Wood base
- Glue gun and glue sticks
- Spray paint or acrylic craft paint in the colors of your choice
- X-acto knife or drill
- Cardboard or newspaper to cover your surfaces
Instructions
- Make the paper flowers of your choice. You'll need about 8-10 medium-small paper flowers with stems to fill a letter vase with 4 letters.
- Paint the cardboard letters using spray paint.
- Let the letters dry completely in between coats of paint and before attaching to the base.
- Drill or cut holes into the top of the letters -- this is where the stems of the paper flowers will be held.
- Using the hot glue gun, adhere the letters to the wooden base. Let dry completely before filling with flowers.
- Add the paper flowers or silk flowers to the vase. Then you're done!


Beautiful!
Thank you!
This is adorable! Thanks for sharing at Merry Monday!