DIY Christmas Signs: Custom Recipe Sign with Vinyl: Free SVG Files for Cricut or Silhouette
This post may contain affiliate links that won’t change your price but will share some commission.
Create a dIY christmas recipe sign
Sharing Christmas craft projects is the highlight of my year. Today’s craft, DIY Christmas signs for recipes, is my favorite project so far this holiday season! Just last week you all went nuts for my Hallmark Christmas Movie blanket SVG and I can’t wait to see what you will do today!
I decided to apply the novel concept of vinyl wood signs as a Christmas craft/gift this year. New to Cricut? Check out my help section!
I absolutely love how these DIY Christmas signs, made from my favorite holiday recipes, turned out (this could also be a year-round gift for treasured family recipes too).
You can easily plug and play your own recipes in or use mine! For this project, I am giving you FOUR FREE SVG recipe cut files to use for your own DIY Christmas sign projects! Download below.
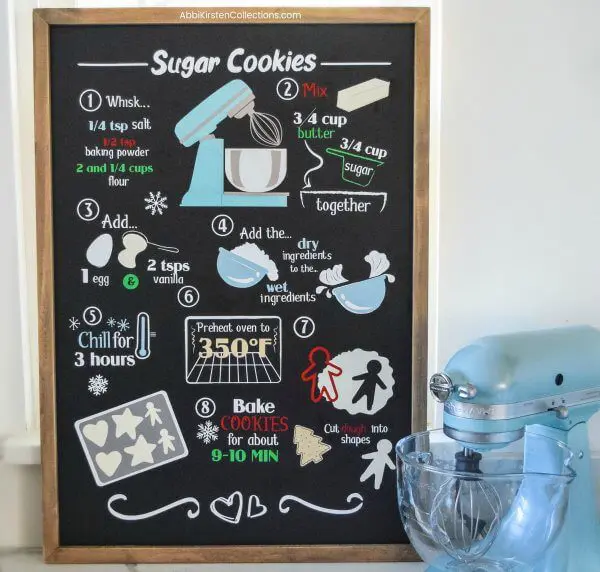
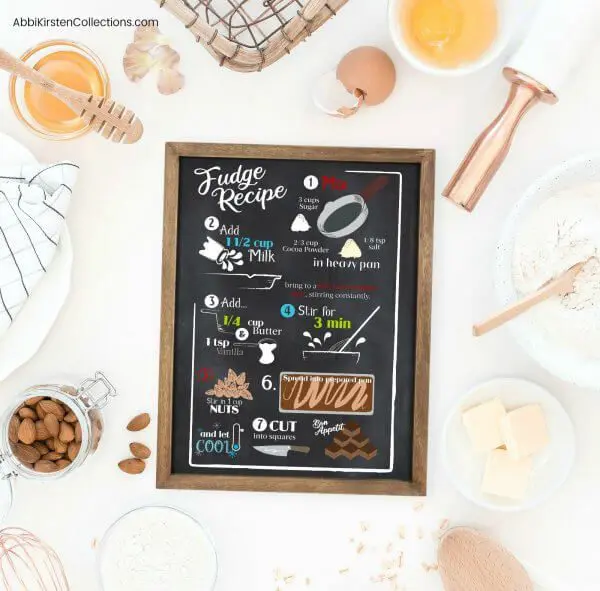
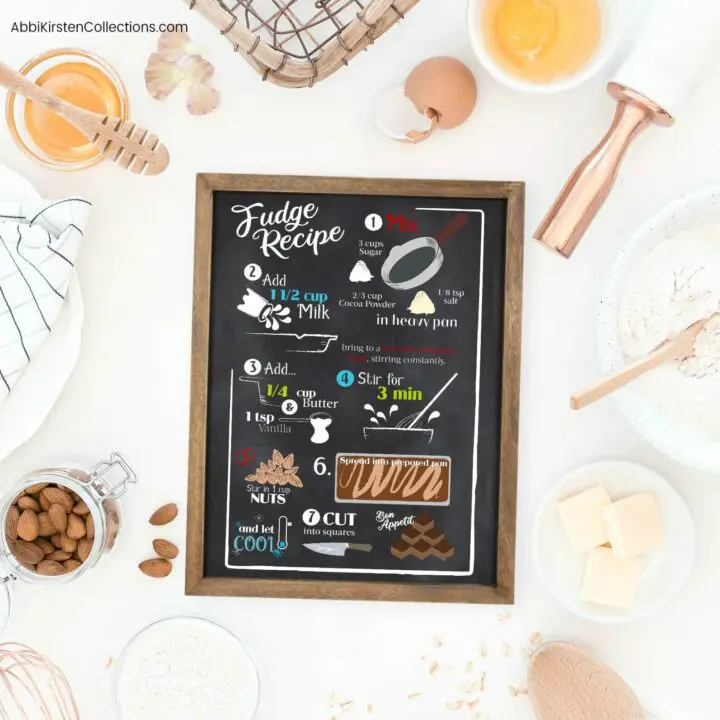
These sweet holiday cookie recipes pretty much get made every year in my house:
- Gingerbread men and women
- Snowball cookies
- Sugar cookies
- Fudge
Because we are making a sign that will hang in the kitchen during the holidays, it’s important to make it visually appealing, so I created some super adorable graphics.
Most of you will likely use your own recipes but the SVG graphics can add a lot of fun to any vinyl sign you create. Not sure the best place to buy vinyl? I can help with that!
Scroll down to the supply section for my free Christmas recipe sign templates.

Supplies
- Wood sign (depending on your chosen recipe and its length, make sure your sign is a decent size)
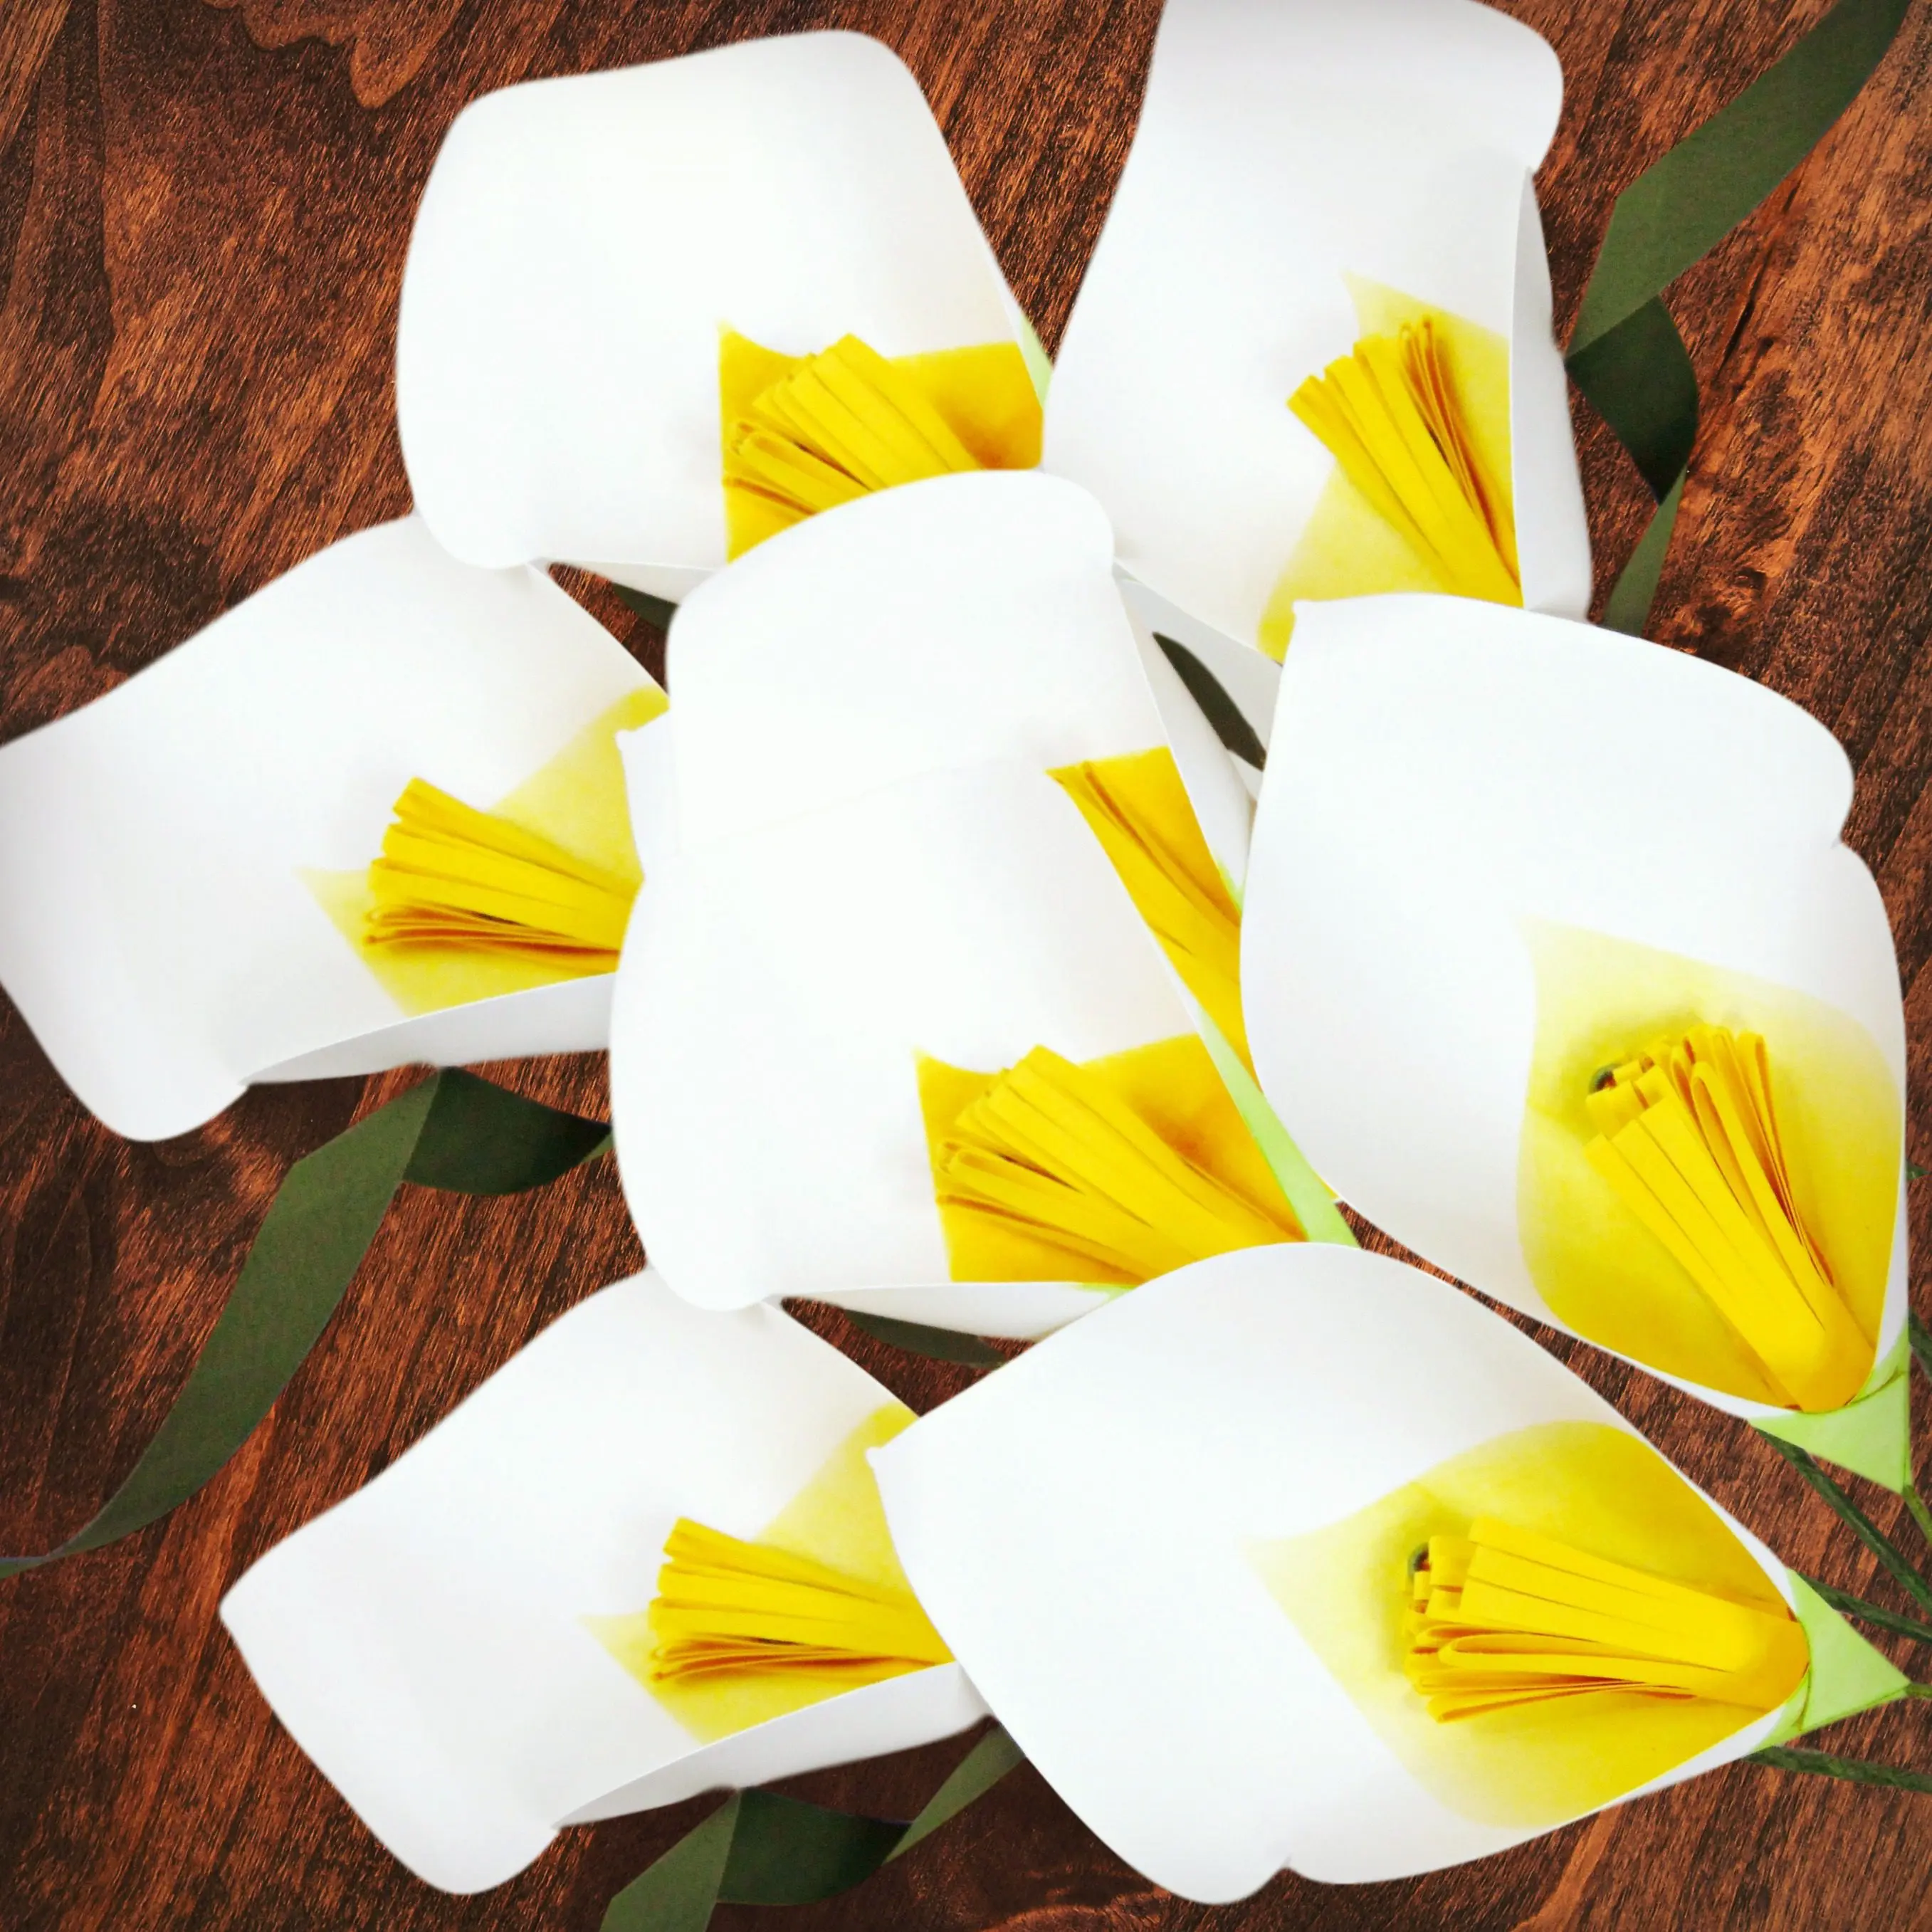
- Vinyl in choice colors. I recommend white for most of the wording and complementary colors as well. You will also want to use vinyl for the graphics like the mixer, desserts, utensils, etc..I love to use glitter vinyl for the details!
- Transfer tape
- Cricut scraper
- Cricut cutting machine (or any cutting machine that works with SVG files)
- SVG recipe templates – download all four of mine below via the form below
Get access to the Christmas receipt sign freebie templates below
Download these free templates by signing up via the form below. If you are already a member, log in and find it by searching ‘recipes’. Need help entering the vault? Read this helpful post.
DIY Christmas Sign Directions

- Download your templates (via the red button above) and load the SVG cut files into your cut software.
- Measure your sign and adjust the size of your overall graphic
- Attach together any text or images that can be grouped for easier cutting and weeding.
- Load your vinyl and cut all your pieces out.
- Weed your vinyl (Cricut Brightpad can help you weed with ease!)
- Use your transfer tape to burnish (rub) your vinyl and lift it off the plastic backing.
- Make sure you have the image of the whole recipe SVG on your computer screen while doing the next step.
- Start at the top and add your vinyl piece by piece. To keep things straight, work from the top down, not by color, or you may run out of room on the sign.
- When you finish adding all your pieces fill in any unwanted spaces with small snowflake designs (included in the snowball recipe SVG).

This project only took me about 3 hours from start to finish. What I love most is not only can this make a last-minute Christmas gift but also a very unique and one-of-a-kind present that your loved one is guaranteed not to receive from anyone else! Or you can just make some for yourself to deck your halls, which is what I did!
DIY Christmas Recipe Sign
Create a DIY Christmas recipe sign as a unique gift or a fun decoration to deck your halls! This tutorial will walk you through all you need to know.
Materials
Tools
Instructions
Step 1: Download your templates load the SVG cut files into your cut software.
Step 2: Measure your sign and adjust the size of your overall graphic.
Step 3: Attach together any text or images that can be grouped for easier cutting and weeding.
Step 4: Load your vinyl and cut all your pieces out.
Step 5: Weed your vinyl.
Step 6: Use your transfer tape to burnish (rub) your vinyl and lift it off the plastic backing.
Step 7: Start at the top and add your vinyl piece by piece.
Step 8: When you finish adding all your pieces fill in any unwanted spaces with small snowflake designs.
I’d LOVE to see how your DIY Christmas signs turns out. Join my Facebook group and show off your skills!

Want more Christmas crafts?! Be sure to join my FREE 12 Days of Christmas Crafts email series!

More Crafty Posts to Love!
- Butterfly and Bug Shadow Boxes
- Make A Spring House Explosion Treat Box
- Easy Beginners Steps to Learning Cricut Design Space
- How To Use a Cricut Cutter: A Simple Guide to Getting Started with Cricut
- Cricut Design Space Combine Tools: Weld, Unite, Subtract, Intersect and Exclude

About Abbi Kirsten Collections
I have spent the last 9+ years building my creative skills and sharing them with others. My flower designs are created with simplicity, color and crafty fun in mind. If you haven’t yet, be sure to join the subscriber community to gain access to all my freebies or visit my signature design shop here!
Want to join my Facebook community to share your crafts and learn from the best? Request access to my group, Crafters and Cricut Lovers.
For further color crafts and inspiration, join me on Instagram & Facebook.


Wow! I love these recipe signs. Thank you so much for the freebie!